Cara Membuat Dripping Effects Di Photoshop
Summary
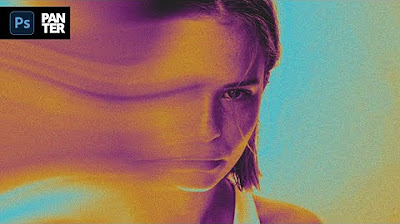
TLDRThis tutorial walks through the process of creating a 'Driving Effect' in Photoshop. The steps include setting up a new project, importing and resizing an image, removing the background, and adding a colorful backdrop. The main focus is on applying a liquid or paint-like 'dripping' effect, which is achieved by importing and manipulating a separate dripping effect image. Key tools like the Quick Selection Tool, Magic Wand Tool, and Layer Masks are used to integrate the effect seamlessly into the image. The final result is a dynamic image where liquid appears to flow from the subject, giving it an artistic, animated feel.
Takeaways
- 😀 Create a new project in Photoshop with a canvas size of 1920x1080 pixels and a resolution of 72.
- 😀 Import the desired photo (e.g., a woman's image) and adjust its size and positioning.
- 😀 Duplicate the photo layer (Ctrl+J) and turn off the visibility of the original layer to work on the copy.
- 😀 Use the Quick Selection Tool to remove the background from the image.
- 😀 Refine the selection by erasing any unwanted parts or lines using the Paint Tool.
- 😀 Add a background layer (such as a light blue gradient) below the image layer.
- 😀 Search for a 'Driving effect PNG' image and import it into Photoshop.
- 😀 Use the Magic Wand Tool to remove the background of the driving effect image.
- 😀 Flip the driving effect layer vertically using the Edit > Transform > Flip Vertical option.
- 😀 Adjust the size of the driving effect to fit the woman's body, positioning it properly over the image.
- 😀 Press Ctrl+Click on the selection of the effect and delete unwanted parts to complete the effect creation.
Q & A
What is the first step in creating the Driving Effect in Photoshop?
-The first step is to create a new project in Photoshop with a canvas size of 1920 pixels in width, 1080 pixels in height, and a resolution of 72.
What is the role of the 'Clipping Mask' in this tutorial?
-The 'Clipping Mask' is used to apply the driving effect only to the image of the woman, ensuring the effect is restricted to her figure.
Why is it important to duplicate the woman's photo layer?
-Duplicating the woman's photo layer is crucial as it allows the user to work on a non-destructive copy while keeping the original layer intact for reference.
What tool is used to remove the background from the woman's image?
-The 'Quick Selection Tool' is used to select and remove the background from the woman's image. Additionally, the 'Delete' key is pressed to remove the unwanted sections.
How can you improve the selection process when removing the background?
-You can improve the selection by using the 'Minus' option in the Quick Selection Tool to refine the edges, or manually paint over areas that are hard to select automatically.
What background color is chosen for the project, and why?
-A light blue background is chosen to complement the driving effect and create a clean, aesthetically pleasing contrast with the woman's image.
Where can you find the 'Driving Effect' image for this tutorial?
-The 'Driving Effect' image can be found by searching for 'Driving effect PNG' or 'Driving effect JPG' on Google. It is recommended to use a PNG file with a transparent background to avoid extra editing.
What tool is used to remove the white background of the 'Driving Effect' image?
-The 'Magic Wand Tool' is used to select the white background of the 'Driving Effect' image. After selecting it, pressing the 'Delete' key removes the unwanted background.
Why do you flip the 'Driving Effect' image vertically?
-The 'Driving Effect' image is flipped vertically to ensure that the liquid flow faces the proper direction, matching the intended visual design of the effect.
What happens when you press Ctrl + Click on the selected effect layer?
-Pressing Ctrl + Click on the selected 'Driving Effect' layer will load the selection, which is then used to remove the effect from the woman's image when the delete action is performed.
Outlines

此内容仅限付费用户访问。 请升级后访问。
立即升级Mindmap

此内容仅限付费用户访问。 请升级后访问。
立即升级Keywords

此内容仅限付费用户访问。 请升级后访问。
立即升级Highlights

此内容仅限付费用户访问。 请升级后访问。
立即升级Transcripts

此内容仅限付费用户访问。 请升级后访问。
立即升级浏览更多相关视频
Out of Bounds Technique - Adobe Photoshop Tutorial
How to Use Motion Blur in Photoshop

Cara Mudah Membuat Gradient Text Effect di Photoshop
How To Create Pixelated Text Effect in Photoshop [Free File] - Photoshop Tutorials
How to 3D Chrome Typeface Effect (+FREE PSD) | PHOTOSHOP TUTORIAL 2021

GAMPANG!! MEMBUAT FILTER INSTAGRAM BINGKAI FRAME ACARA DIES NATALIS | SPAK ART + CANVA
5.0 / 5 (0 votes)
