LOAD BALANCE - Menggabungkan 2 Koneksi Internet dengan MIKROTIK
Summary
TLDRIn this video, Nanang MRK walks viewers through the process of load balancing two internet connections using MikroTik. The tutorial covers setting up two different ISPs (Wi-Fi from a neighbor and Orbit Star 2), configuring MikroTik RB941 for dual WAN, and optimizing internet speed and reliability. Key steps include IP setup, DHCP configuration, bridge creation, and rule implementation for efficient load balancing. The video also demonstrates how to test and troubleshoot internet speed using both ISPs, providing a practical solution for enhancing internet performance and backup. Aimed at improving gaming or browsing experiences, this tutorial offers a comprehensive guide for users looking to manage multiple internet connections effectively.
Takeaways
- 😀 The video is about learning how to set up load balancing using MikroTik routers, which involves combining two internet connections for faster speeds and backup.
- 😀 MikroTik's load balancing feature helps to increase internet speed by combining two sources of internet (e.g., 20mbps + 20mbps = 40mbps) for smoother internet experience.
- 😀 It also offers a backup solution: if one internet source fails, the other can take over automatically, ensuring a continuous connection.
- 😀 The tutorial includes a setup using two ISPs: one through Wi-Fi from a neighbor and the other using Orbit Star 2 internet.
- 😀 The key focus of the video is on the practical application of MikroTik’s load balancing feature for specific use cases like gaming (e.g., Mobile Legends) and heavy internet usage.
- 😀 The video provides a detailed breakdown of the network topology, including how to wire and configure the MikroTik router for two different internet connections.
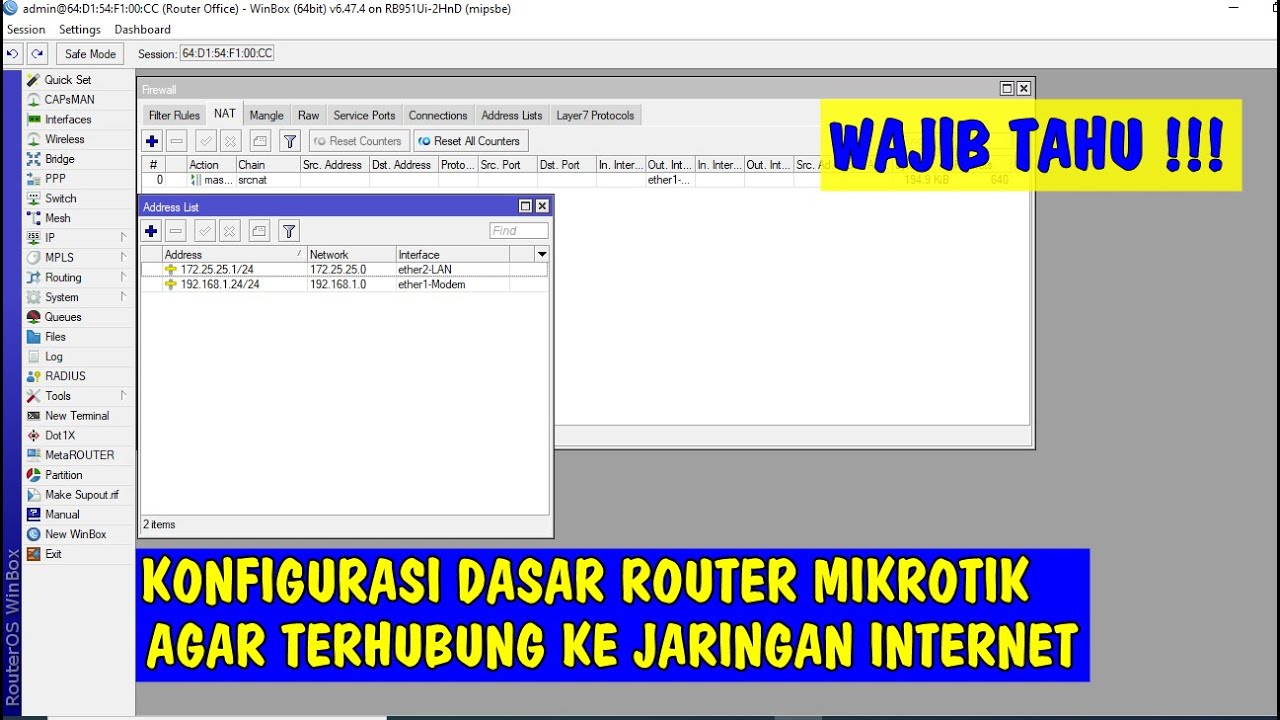
- 😀 Step-by-step instructions are given for configuring the MikroTik device using Winbox, including renaming interfaces, assigning IP addresses, and setting up DHCP.
- 😀 The video also explains how to set up the router to distribute IP addresses to the connected devices via the DHCP server.
- 😀 The tutorial covers the need to configure firewall NAT (Network Address Translation) settings and ensures the router can properly route traffic between the two ISPs.
- 😀 The load balancing configuration is finalized by adding specific rules to control traffic and routing, ensuring the two internet connections are balanced for optimal performance.
Q & A
What is the purpose of load balancing with MikroTik in the video?
-The main purpose of load balancing with MikroTik in the video is to combine two different internet connections (ISPs) to increase internet speed and provide a backup connection in case one of the ISPs fails.
How does combining two ISPs improve internet speed?
-By combining two ISPs with load balancing, the total bandwidth is increased. For example, two 20mbps connections are combined to provide approximately 40mbps speed, allowing for faster internet performance.
What is the first step in configuring MikroTik for load balancing?
-The first step is to configure the Ethernet ports of the MikroTik router. Each port is assigned to a specific ISP (Ether1 for ISP1, Ether2 for ISP2), and the output ports (Ether3 and Ether4) are grouped together into a bridge for the internet output.
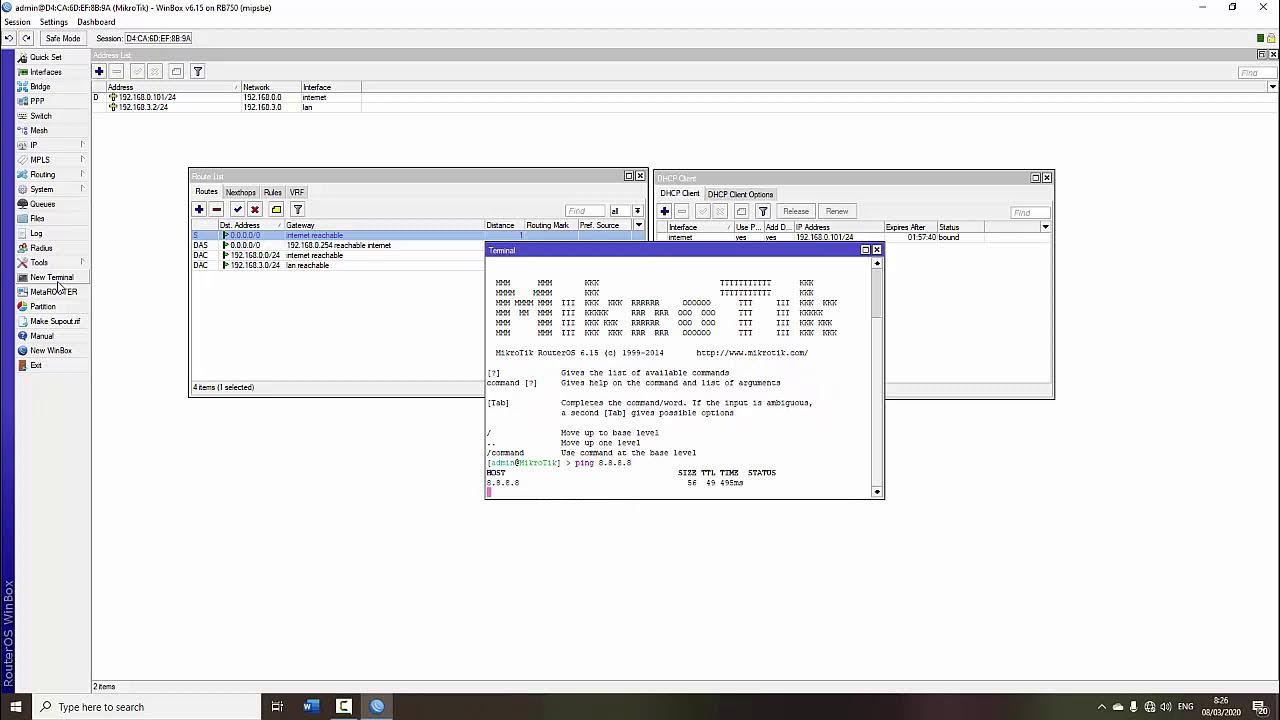
Why is the DHCP client used in the MikroTik configuration?
-The DHCP client is used to obtain an IP address from the ISPs for the MikroTik router. This ensures that the router has a valid IP address from each ISP, allowing it to connect to the internet.
How is the DNS configured in the MikroTik setup?
-The DNS is configured by setting the router to use Google's DNS servers (8.8.8.8 and 8.8.4.4). This ensures reliable DNS resolution for internet traffic.
What is the purpose of bridging Ethernet ports 3 and 4?
-Ethernet ports 3 and 4 are bridged together to combine the output interfaces. This allows the internet connection to be shared through these ports, distributing the internet across connected devices.
How does MikroTik distribute IP addresses to connected devices?
-MikroTik distributes IP addresses to connected devices using DHCP. The bridge created between Ethernet ports 3 and 4 is configured as a DHCP server to assign IP addresses to devices connected to these ports.
What are the key steps in setting up the load balancing rules?
-Key steps in setting up load balancing include marking connections, marking routing paths for each ISP, and setting up rules to manage traffic flow between the ISPs. This ensures that traffic is routed appropriately and efficiently between the two connections.
What happens when one of the ISPs fails in the load balancing setup?
-When one ISP fails, the backup ISP automatically takes over, ensuring continuous internet access. The load balancing setup allows the second ISP to handle traffic without interrupting the internet connection.
What is the significance of setting up gateway routes in MikroTik?
-Setting up gateway routes is essential to ensure that traffic from the MikroTik router is routed correctly through the appropriate ISP. This is done by defining the gateway addresses and assigning each ISP to its respective route.
Outlines

此内容仅限付费用户访问。 请升级后访问。
立即升级Mindmap

此内容仅限付费用户访问。 请升级后访问。
立即升级Keywords

此内容仅限付费用户访问。 请升级后访问。
立即升级Highlights

此内容仅限付费用户访问。 请升级后访问。
立即升级Transcripts

此内容仅限付费用户访问。 请升级后访问。
立即升级浏览更多相关视频

Membuat Wifi Voucheran Tanpa Mikrotik Dengan Tp-Link EAP 110 Omada

SUBNETTING IP Address Untuk Nembak Wifi dan Topologi Jaringan [ PASTI BISA ]

LOAD BALANCE METHOD PCC - MIKROTIK TUTORIAL [ENG SUB]

LOAD BALANCE ECMP - MIKROTIK TUTORIAL [ENG SUB]
Konfigurasi Dasar Router Mikrotik agar terhubung ke Jaringan Internet
TUTORIAL DASAR MIKROTIK (KONEKSI INTERNET)
5.0 / 5 (0 votes)
