Pan Tilt Control using Servos for ESP32 Cam | WiFi Security Camera
Summary
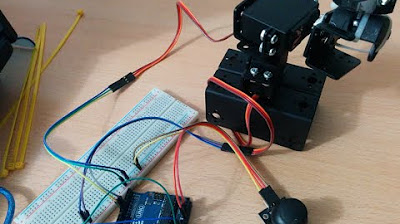
TLDRIn this tutorial, learn how to build a pan-and-tilt surveillance camera using the ESP32 camera module and servo motors. You'll assemble the hardware, connect the servos and ESP32, and upload the necessary code via Arduino IDE. Control the camera’s horizontal and vertical movement through a custom mobile app, streaming images over Wi-Fi. The video includes a detailed walkthrough of setup, wiring, coding, and troubleshooting tips to ensure smooth operation. Perfect for those looking to create their own Wi-Fi-enabled camera system for home security or fun projects!
Takeaways
- 😀 The project involves creating a pan-and-tilt control for an ESP32 camera module using servo motors, allowing horizontal and vertical rotation from 0 to 180 degrees.
- 😀 This setup can be used as a home surveillance camera, sending captured images to a mobile device over a Wi-Fi connection using WebSocket.
- 😀 The components required for the project include the ESP32 cam module, SG90 servos, an AC-DC power adapter, an Arduino Uno for uploading the code, and a breadboard.
- 😀 To assemble the pan-and-tilt control, connect the servo motors to the ESP32 cam module at IO14 and IO15 pins and ensure that the servos are properly mounted on the bracket.
- 😀 You need to install the ESP32 board in the Arduino IDE, along with the necessary libraries such as Async TCP, Async Web Server, and ESP32 Servo library for controlling the servos.
- 😀 The HTML page for the mobile app interface includes sliders to control the pan and tilt motors, and WebSocket handles communication between the mobile app and ESP32.
- 😀 The camera module uses WebSocket for sending live video to the mobile app, and also allows the user to control the pan and tilt angles via the app's sliders.
- 😀 The WebSocket event handler is designed to rotate the servos based on the received slider values and to control a flashlight attached to the camera.
- 😀 In the code, there are important steps to configure the camera, handle WebSocket connections, and set up Wi-Fi on the ESP32 module in soft AP mode.
- 😀 Some troubleshooting tips include reconnecting the Wi-Fi if the video does not display, ensuring proper 5V DC power supply, and avoiding connections on the IO16 pin as it is used internally by the ESP32.
Q & A
What is the purpose of this tutorial?
-The tutorial demonstrates how to create a pan-and-tilt-controlled ESP32 camera system using servo motors, enabling horizontal and vertical rotation of the camera for surveillance purposes. The system captures images and sends them to a mobile device over Wi-Fi using WebSocket.
What hardware components are required for this project?
-The required hardware components are: ESP32-CAM module, pan-tilt servo assembly (SG90 servos), 5V AC-DC power adapter, Arduino Uno for uploading code, breadboard, and jumper wires.
How is the pan-and-tilt movement of the camera controlled?
-The pan and tilt movement of the camera is controlled through servo motors, which are connected to the ESP32-CAM module. The movement is controlled using a mobile app via sliders for pan and tilt adjustments over a WebSocket connection.
Why is it important to set the 'ws max skewed messages' parameter to 1?
-Setting the 'ws max skewed messages' parameter to 1 ensures smooth video streaming by preventing delays and poor performance that can occur when too many WebSocket messages are skewed or out of sync.
How do you connect the pan and tilt servos to the ESP32-CAM module?
-The pan servo is connected to the IO14 pin of the ESP32-CAM, and the tilt servo is connected to the IO15 pin. Additionally, both servos and the ESP32-CAM require a 5V power supply.
What should be done if the video feed is not displayed in the mobile app?
-If the video feed does not display, reconnect the Wi-Fi on the mobile device and ensure the device is properly connected to the ESP32-CAM's Wi-Fi network.
What libraries need to be installed for this project?
-The necessary libraries to install are: ESP32 board library (via Arduino Board Manager), Async TCP, Async Web Server, and ESP32 Servo libraries.
How do you upload the code to the ESP32-CAM module?
-To upload the code, an Arduino Uno is used as a programmer to transfer the code to the ESP32-CAM module. Instructions for using Arduino Uno for uploading code are provided in the tutorial.
What should you avoid when wiring the ESP32-CAM module?
-Avoid connecting the IO16 pin of the ESP32-CAM, as it is used internally by the PS RAM, which could cause issues with the functionality of the device.
How do you access the camera control app on the mobile device?
-To access the camera control app, connect the mobile device to the ESP32-CAM's Wi-Fi network, then open a web browser and navigate to the IP address `192.168.4.1`. This will open the control interface where you can adjust the pan and tilt sliders and view the camera feed.
Outlines

此内容仅限付费用户访问。 请升级后访问。
立即升级Mindmap

此内容仅限付费用户访问。 请升级后访问。
立即升级Keywords

此内容仅限付费用户访问。 请升级后访问。
立即升级Highlights

此内容仅限付费用户访问。 请升级后访问。
立即升级Transcripts

此内容仅限付费用户访问。 请升级后访问。
立即升级浏览更多相关视频

Camera Car With Pan Tilt Control | ESP32Cam

ESP32 Servo Motor Web Server with Arduino IDE

Robot Arm using ESP32 and Smartphone | Complete Robot Arm assembly 🔥

Smart Home Dashboard with ThingsBoard & ESP32: Real-Time Monitoring, Device Control, IP Cam & Alerts

طريقة تحويل الكاميرا الثابتة الى كاميرا متحركة بواسطة Arduino

How To Balance DJI Ronin RS3 - COMPLETE Beginner's Guide!
5.0 / 5 (0 votes)
