Beginner's Guide to Microsoft Word

Technology for Teachers and Students
25 Sept 201718:27

Summary

TLDRThis beginner's guide to Microsoft Word covers essential functions such as opening the application, using templates, navigating tabs, and utilizing ribbons. It provides detailed instructions on creating documents from scratch, inserting images, utilizing text boxes, and formatting text. The tutorial also highlights useful tools like spell check, word count, thesaurus, and options for saving and printing documents. Emphasis is placed on basic functions to get started, with hints at more advanced features to be explored in future videos. The guide is ideal for teachers, students, and anyone new to Word.

Takeaways

  • πŸ” If Microsoft Word isn't on your taskbar, you can search for it using Windows Search.
  • πŸ“„ Microsoft Word offers various templates, such as trifold brochures, event menus, and blog posts.
  • πŸ–±οΈ To start from scratch, select 'Blank document' to open a new blank Word document.
  • πŸ–₯️ The interface includes tabs (Home, Insert, Design, etc.) that change the ribbon with different tools and options.
  • πŸ“ Use the 'Tell me what you want to do' search bar to quickly find features like showing the ruler.
  • πŸ“ Adjust the zoom level in the lower right corner to comfortably view your document.
  • ✍️ Use the Home tab for essential formatting tools like text alignment, styles, and font adjustments.
  • πŸ“Έ Insert images via the Insert tab and use 'Wrap Text' to freely position images within your document.
  • πŸ“ The Review tab includes tools for spelling and grammar checks, word count, and a thesaurus.
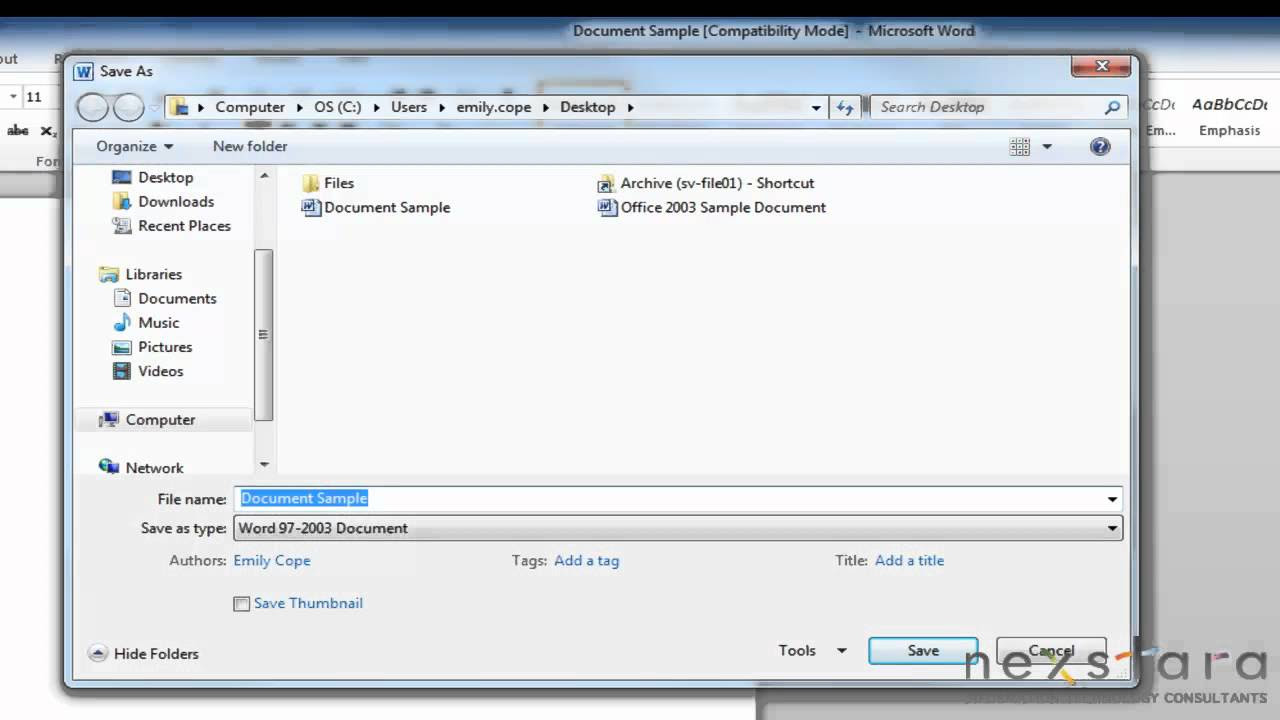
  • πŸ“‚ Save your document to your computer or OneDrive, and export it as a PDF if needed.

Q & A

  • What should you do if Microsoft Word is not installed on your computer?

    -You can search for Microsoft Word using the Search Windows function. If it does not appear in the search results, it means that Microsoft Word is not installed on your computer.

  • What is the purpose of using templates in Microsoft Word?

    -Templates in Microsoft Word can save time by providing pre-designed documents that you can customize for various purposes, such as brochures, menus, blog posts, and educational materials.

  • How can you start a new document from scratch in Microsoft Word?

    -To start a new document from scratch, you need to click on 'Blank document' when Microsoft Word opens.

  • What is the 'ribbon' in Microsoft Word?

    -The 'ribbon' in Microsoft Word is the area across the top of the interface that contains tabs such as Home, Insert, Design, etc. Each tab provides a different set of tools grouped into categories.

  • What should you do if you cannot find a specific option or tool in Microsoft Word?

    -If you cannot find a specific option or tool, you can use the 'Tell me what you want to do' search bar at the top to quickly locate it.

  • How can you adjust the zoom level of your document in Microsoft Word?

    -You can adjust the zoom level by going to the lower right corner of the window and changing the zoom percentage to fit your preference.

  • What is the purpose of the 'launch button' in the groups on the ribbon?

    -The 'launch button' in the groups on the ribbon provides access to more tools and options that do not fit in the initial space of the group.

  • How can you insert a picture into a Microsoft Word document?

    -To insert a picture, you go to the 'Insert' tab, select 'Pictures,' and then choose an image from your computer. You can also insert online pictures by selecting the 'Online Pictures' option.

  • What are some options available in the Format tab when working with pictures?

    -The Format tab provides options such as resizing, removing the background, altering color schemes, applying artistic effects, adding frames, and cropping the picture.

  • How can you change the text wrapping options for a picture in Microsoft Word?

    -To change the text wrapping options, click on the picture, then click the text wrapping button that appears or right-click and select 'Wrap Text.' You can choose options like 'In Front of Text' or 'Behind Text' to position the picture freely.

  • What is a text box and how can it be used in Microsoft Word?

    -A text box is a floating container for text that can be placed anywhere in the document. You can insert a text box from the 'Insert' tab, type your text in it, and then move it around as needed.

  • What tools are available in the Review tab to help with writing and editing?

    -The Review tab offers tools like Spelling & Grammar check, Word Count, and Thesaurus to help improve the quality and correctness of your document.

  • How can you double-space your text in Microsoft Word?

    -To double-space your text, highlight the text you want to affect, go to the 'Home' tab, find the Paragraph group, click on the line and paragraph spacing options, and select '2.0' for double spacing.

  • How can you save a document to OneDrive in Microsoft Word?

    -To save a document to OneDrive, click 'File,' then 'Save As,' and choose OneDrive as the save location. You may need to sign in to your Microsoft account to access OneDrive.

  • What are the benefits of exporting a Microsoft Word document as a PDF?

    -Exporting a document as a PDF ensures that the formatting remains consistent across different devices and platforms, making it ideal for sharing and printing.

  • How can you pin a document to the top of the Recent Documents list?

    -To pin a document, find it in the Recent Documents list, hover over it, and click the pin icon that appears. This keeps the document at the top of the list for easy access.

Outlines

00:00

πŸ“„ Getting Started with Microsoft Word

This section introduces the basics of Microsoft Word, explaining how to open the application and the various templates available. It covers how to search for Word on your computer, the types of documents you can create, and the benefits of using templates. The focus is on starting from scratch and understanding the layout, including closing the navigation panel and recognizing the tabs and ribbons.

05:02

πŸ› οΈ Exploring Word's Interface and Tools

This paragraph details the Microsoft Word interface, emphasizing the functionality of the tabs and ribbons. It explains how each tab provides different groups of tools and how to access additional tools through the launch buttons. It also covers basic document setup, such as adjusting the zoom level, showing rulers, and navigating the layout tab for different document options.

10:05

πŸ”  Formatting and Styling Text

Here, the focus is on text formatting and styles. The paragraph explains how to type, highlight, and modify text using the Home tab options like centering, underlining, and changing text size. It introduces the use of styles for quick formatting, such as headings and titles, and demonstrates how to use the undo feature to revert changes.

15:07

πŸ–ΌοΈ Inserting and Managing Images

This section covers how to insert and format images in Word. It explains the process of adding pictures from your computer, resizing them, and adjusting their layout options for better placement within the text. It also highlights the additional Format tab that appears when an image is selected, offering tools for background removal, color adjustments, artistic effects, and cropping.

πŸ“ Adding Text Boxes and Shapes

The paragraph explains how to add and format text boxes and shapes. It describes the purpose of text boxes for floating text over the document and how to adjust their position relative to other text. It also covers inserting shapes like arrows and call-outs, and emphasizes their utility for creating detailed and interactive documents.

πŸ” Reviewing and Finalizing Documents

This section outlines essential review tools in Word, such as the spelling and grammar check, word count, and thesaurus. It provides instructions on double-spacing text, changing font colors, and adjusting margins. The paragraph concludes with steps for saving and exporting documents, including creating PDFs and using OneDrive for cloud storage.

πŸ“‚ Managing and Accessing Recent Documents

The final paragraph explains how to manage recently created documents in Word. It describes how to pin important documents to the top of the recent list for easy access. It also highlights the importance of saving and printing documents, and offers tips on maintaining organization as the number of documents increases.

Mindmap

Keywords

πŸ’‘Microsoft Word

Microsoft Word is a widely used word processing software developed by Microsoft. It allows users to create, edit, and format documents such as reports, essays, and flyers. In the video, the presenter provides a beginner's guide to using Microsoft Word, highlighting its basic features and functions.

πŸ’‘Templates

Templates are pre-designed document layouts that help users quickly create various types of documents. Microsoft Word offers a variety of templates for brochures, menus, blog posts, and more. The video explains how to choose and use templates to save time and effort in document creation.

πŸ’‘Ribbon

The ribbon is the toolbar at the top of the Microsoft Word interface that organizes commands into tabs and groups. Each tab provides access to different sets of tools and features. The video details how the ribbon changes based on the selected tab, offering specific options for tasks like formatting, inserting, and layout adjustments.

πŸ’‘Layout

Layout in Microsoft Word refers to the arrangement and formatting of elements on a document page. This includes margins, spacing, and alignment. The video discusses how to access and adjust layout options through the 'Layout' tab and other related tools to customize the document's appearance.

πŸ’‘Insert Tab

The Insert Tab in Microsoft Word allows users to add various elements to their documents, such as pictures, shapes, tables, and text boxes. The video demonstrates how to use the Insert Tab to enhance documents with images and other visual elements, improving their overall presentation.

πŸ’‘Text Box

A text box is a movable, resizable container for text that can be placed anywhere in a document. It allows for flexible text placement independent of the main document flow. The video shows how to insert and format text boxes to add floating text elements to a document.

πŸ’‘Spelling and Grammar Check

Spelling and Grammar Check is a feature in Microsoft Word that reviews the document for spelling and grammatical errors. The video highlights the importance of using this tool to ensure documents are error-free and professional. It also demonstrates how to run a check and correct any identified mistakes.

πŸ’‘Save and Export

Save and Export refer to the processes of storing a document on a computer or converting it to different formats. The video explains how to save documents to a local drive or cloud storage (OneDrive) and how to export documents as PDFs, ensuring they can be easily shared and accessed.

πŸ’‘Styles

Styles in Microsoft Word are predefined sets of formatting options, such as font type, size, and color, that can be applied to text. They help maintain a consistent look throughout the document. The video illustrates how to use styles to quickly format headings and other text elements, enhancing document readability.

πŸ’‘Zoom Level

The zoom level in Microsoft Word controls the magnification of the document on the screen. Adjusting the zoom helps users view the document at a comfortable size for editing and reviewing. The video shows how to change the zoom level to fit the document on the screen and improve the user experience.

Highlights

Guide to creating documents like reports, essays, handouts, and flyers using Microsoft Word.

Instructions on how to locate and open Microsoft Word on your computer.

Overview of various templates available in Microsoft Word, including brochures, event menus, and blog posts.

Explanation of how to filter templates by category, such as Business, Event, and Education.

Focus on starting from scratch by creating a blank document.

Tour of the Microsoft Word layout, including tabs like Home, Insert, and Design.

Explanation of the Ribbon interface and how it changes based on the selected tab.

Details on the functionality of groups within each Ribbon, such as Page Setup, Paragraph, and Arrange.

Importance of launch buttons in groups for accessing additional tools and options.

Adjusting zoom levels to better view your document on the screen.

Using the 'Tell me what you want to do' feature for finding specific options, like showing rulers.

Basics of text formatting, including centering text, changing font size, and using styles like Heading and Title.

Inserting and formatting pictures, including resizing and changing layout options to position images freely.

Utilizing online pictures and other insertable elements like shapes, text boxes, and call-outs.

Reviewing spelling and grammar, using the thesaurus, and checking word count for documents.

Saving documents to different locations, including OneDrive, and exporting documents as PDFs.

Using the recent documents list and pinning frequently used documents for easy access.

Emphasis on Microsoft Word's versatility and power for creating a wide range of documents.

Mention of upcoming advanced tutorials and encouragement to follow on social media and YouTube for more content.

Transcripts

play00:00

This is the beginner's guide to using Microsoft Word and specifically using it

play00:05

to create documents like reports, essays, handouts, flyers, things like that. And so

play00:11

I'm just gonna go down here and click on Microsoft Word. If you don't have Word

play00:15

down here on the taskbar, you can just click here on Search Windows and do a

play00:19

search for Microsoft Word to see if it's on your computer. If that doesn't turn up

play00:23

anything, then it's not installed on your computer, but like I said, I'm gonna go

play00:27

ahead and click on that to start it up and Microsoft Word opens right up and it

play00:31

gives me right away a bunch of templates that I can choose from to help me get

play00:35

started creating documents using Microsoft Word. And you can see that

play00:39

there's all sorts of great documents. They have trifold brochures they have

play00:43

event menus. They have blog posts, all sorts of different templates that you

play00:47

can use. Also across the top, notice that you can filter them by category, so I

play00:51

could just show Business templates. I could show Event templates, labels and so

play00:55

on. And notice that there is an Education category. You can also search for online

play00:59

templates here. So templates can be a great time-saver. You can just select one

play01:04

of these templates to open it up and then edit it and use it for your own

play01:08

purposes. But, in this tutorial, we're going to focus just on creating starting

play01:12

from scratch. And so I'm gonna click here where it says Blank document and it

play01:15

opens up the Microsoft Word layout and a blank document. Now there is so much to

play01:22

Word. Most people don't really use Word to its full capabilities but in this

play01:26

tutorial I'm really going to focus on the basics, on those essentials that you need

play01:30

to know to start using Microsoft Word effectively. And one of the first things

play01:35

I'm going to do is just close this panel here at the left that says Navigation.

play01:38

It's a nice panel, but I'm going to get rid of that and close that out. Next, I want

play01:43

to give you a quick tour of what you're seeing here in the layout. You'll notice

play01:47

that, across the top, we have tabs. We have the Home tab, insert tab, design tab. and

play01:52

This is very similar to Excel Microsoft Excel and also Microsoft PowerPoint.

play01:57

If you've watched my other tutorials, you already know about this Microsoft office

play02:01

layout, but for those who maybe haven't watched those other tutorials just a

play02:05

quick intro each of these tabs. When you click on it will give you a different

play02:10

ribbon and that's what they call this this is the ribbon.

play02:13

And the ribbon changes based on the tab that you click. Ok, so if I want to change

play02:18

something about the layout, I click on layout and then I look at the layout

play02:21

ribbon and see what I can do. Now each ribbon is divided up into groups, so this

play02:26

is the Page Setup group. This is the Paragraph group and the Arrange group.

play02:29

Now, what if I want to insert something, maybe a picture or a photo, I would go to

play02:34

the Insert tab and click and I get the insert ribbon with lots and lots of

play02:38

different groups. Now, one thing about groups that you need to be aware of is

play02:42

some groups will have a little launch button in the corner. So here's an

play02:47

example of a launch button. The paragraph group has a launch button but the

play02:52

arrange group doesn'tm at least for me it doesn't. The page setup group has a

play02:55

launch button. So what are these lunch buttons and why do you need to know

play02:59

about them? Well basically, whenever you see a launch

play03:01

button, what that means is that there are more tools but that they couldn't fit

play03:05

them in the space provided in the group. So if I don't see one of the font

play03:09

options that I would like to have, I look through these to see if it's there and

play03:13

if it's not I can just click here on the launch button and then I'll get even

play03:17

more options. Another example over here in the Styles

play03:20

group, There's a few styles but if I click here then I get many many more

play03:24

styles to choose from and some options that I don't see just by looking at the

play03:28

group itself. So watch out for that launch button. Ok, now down here I have

play03:33

the page of my document. This is my Word document and it's completely blank. At

play03:38

this time a couple of things that I want you to know about before you get started

play03:42

making a document: First of all, I don't know about you, but I like to be able to

play03:46

see the document - at least its width - and so I'm gonna go down here in the lower

play03:51

right corner and change the zoom level. So it was at 200% and that was a little

play03:57

bit too big for me. Maybe 150 maybe to 125. You know something like that that

play04:03

will be a little bit easier to fit on the screen. So I think I'll just go with

play04:07

this 100%. Now, in this tutorial I'm using Microsoft Word 2016 for Windows, but if

play04:14

you're using an older version of Microsoft Word, or even a future version

play04:17

of Microsoft Word or Word for Mac, most of what I'm showing you will still be

play04:21

applicable, but one of the things that I kind of miss from an older version

play04:26

Microsoft Word is I miss the rulers. I'm used to having a ruler across the top

play04:31

and also down the left side to help me know the size of the pages that I'm

play04:35

working with. So I'm gonna go here and look and see where might there be an

play04:40

option to show the ruler and I would think it would be maybe here in the

play04:45

layout options. But the reason I'm bringing this up is because if you're

play04:49

having trouble finding an option, like I am right now, you don't need to really

play04:53

hunt and search for it very much if it's not quickly showing up. All you need to

play04:57

do is go here to the top where it says "Tell me what you want to do" and do a

play05:01

search. So I'll do a search for "Rulers" and, look, right there at the top there's

play05:05

an option that says "Show Ruler" and I can click on it and immediately the rulers

play05:09

pop up. Okay, so I'm happy now with the look of Microsoft Word. Okay, now I'm

play05:15

ready to start creating a wonderful document and let's say this document is

play05:20

going to be a handout or a worksheet for my students. I can just go in and start

play05:24

creating. So I'll just provide a space there for the name of the student, the

play05:28

class period, and I'm just typing and hitting Return or Enter on the keyboard.

play05:33

And I would like this to be the title of my document. Now this is pretty typical,

play05:39

but what I would do here is highlight the text and immediately I get a pop-up

play05:44

here with some options that I have. But I can also go here to the Home tab home

play05:48

ribbon. That's where you'll find the most commonly needed options in Microsoft

play05:53

Word. And so, look, there is Center and that's what I was hoping for.

play05:56

I can also underline if I want to. I can make it bold and there's all sorts of

play06:00

options that you have there. I could make the text bigger but more often than not,

play06:04

instead of making all of these fine tuned adjustments, what I often do is I

play06:09

use these styles. And so to show that, I'm going to click the Undo button several

play06:13

times to go back to just the text. So with just the text selected, I'm going to go

play06:18

here where it says Styles and I'll go to Heading number 1 and you can see what

play06:22

it does. It changes the color, it makes it bigger, changes the font a little bit.

play06:26

There's also Heading number 2, and several other options. Title would be a

play06:30

good one as well. And I'm gonna go with Title. Now, regardless of which one you

play06:34

pick, if you want you can still adjust it, like I would still like that to be

play06:38

centered. I still like it to be underlined, and I

play06:41

think that looks really nice. So, now I hit Enter or Return and I can proceed to

play06:45

create this worksheet. I can type in instructions for my students and

play06:49

Microsoft Word handles most of the work. I'm just typing hitting Enter,

play06:54

moving down. Now I can also click to move around using the mouse, but watch what

play06:59

happens. I can only click so far. It's not letting

play07:02

me go past the current line that I've typed. I can go to the right side of it,

play07:07

but that's as far as it'll let me go. I can go back up though, by clicking and

play07:11

make changes, make adjustments. Okay and I'm really ruining this document aren't

play07:15

I? So I'll just undo a few times, but the point is that if you want to put in some

play07:20

blank space and then type something below, you're gonna have to tap Enter a

play07:25

few times to move the cursor down, and then you'll be able to type down below,

play07:29

Now, when you get to the bottom of the page, you hit enter and, look, it just

play07:33

takes you automatically to page number two. Now, a few other essential things to

play07:37

know about Microsoft Word include how to insert pictures, because that's really

play07:42

one of the powerful things about Microsoft Word. And you heard me say the

play07:45

key word there, didn't you? It's "Insert". So I click on "Insert" and look at the

play07:49

options that I have: four things to insert into this document, all sorts of

play07:53

things, including Wikipedia articles, online videos, all sorts of neat things.

play07:58

But in this case, I'm going to go to pictures, and that automatically accessed

play08:02

my computer and now I can browse my computer to find pictures that I can

play08:07

then pull in and use in my document. So I'll pull in this skeleton. Now, whenever

play08:12

you put a photo or an image into Microsoft Word, it brings up some

play08:17

difficulties. For example, that is not at all where I wanted that photo to be. I

play08:21

wanted it to be here, in between the text up here and the text down below, and so

play08:26

this is a problem. The other problem is the photo came in way too big. So let's

play08:30

fix some of these issues. The first thing I'm going to do is click on the picture.

play08:33

Now ,something subtle just happened when I clicked on that photo. Look what

play08:38

happened. I got an additional tab and ribbon that appeared at the top of

play08:43

Microsoft Word and this is going to be very important. Anytime you click on

play08:47

something, especially something special like a photo or a video, it's going to

play08:50

give you some extra options. In this case the format options. First

play08:54

thing I want to do though is just resize this image. So with it selected, I can

play08:58

just go to the corner - any corner - click and drag to shrink that photo down to

play09:03

size a little bit. And that's a lot better. Now, I still I'm struggling. I'm

play09:07

trying to drag it up to the place I want it to be but it's just not quite

play09:12

cooperating with me. The reason why is because this photo has some specific

play09:17

layout options that come pre-selected by default and so I need to change those

play09:22

layout options. Now in this latest version of Microsoft Word, when you click

play09:26

on a photo, you'll get this little button that pops up. You can then click on it to

play09:31

change the layout options, but just like in older versions of Microsoft Word, you

play09:36

also have the option to right-click and go to Wrap Text and that will give you

play09:40

the same options. So here in Wrap Text, I'm going to go with In Front of Text or

play09:45

Behind Text. Either one will work great. I guess I'll choose Behind Text, and now

play09:50

you can see what happened. Now, it's moving much more freely. I was not able

play09:55

to do this before. I was not able to click and drag and put the picture

play09:59

wherever I wanted it to be, but just by changing the options to Behind Text or

play10:05

in Front of Text, now it's unlocked that photo and I can put it literally

play10:09

anywhere in this document that I want it to be. You could even be up here in the

play10:13

header or in the footer. It really doesn't matter. So that's a nice little

play10:17

trick that you'll want to know and be able to use in your own documents. I also

play10:22

want you to know that you can insert online pictures, and this is a great

play10:26

option. You can connect to the internet and do searches and find images, find

play10:31

clipart, and things that are on the web and then just click and drag to drop

play10:34

them into your project. So that's a really nice option to have. Now, before we

play10:39

move away from the photo and move on to other topics, I want you to notice this

play10:44

Format tab that I mentioned earlier. When you click on a photo and then the format

play10:48

tab, it gives you some options to do some things that are really nice. You can

play10:52

remove the background. In this case, it wasn't very successful in how I removed

play10:56

the background. You can alter the color scheme in lots of ways. You can do some

play11:01

corrections, and there's some artistic effects. And so there's some

play11:05

pretty exciting things you could come up with, some creepy images here with this

play11:08

skeleton. I'm going to undo that but these photo effects are really pretty nice. You

play11:13

can compress the picture as well and do some other exciting things. There's also

play11:17

some picture styles. For example, you can put a frame around Mr. Skeleton here and

play11:22

there's all sorts of different frames. You can have a kind of a fuzzy border

play11:25

around the skeleton. If you'd like, you can make it almost 3D with some of these

play11:30

3D effects. So some really nice options. You can also crop, and you'll be

play11:35

surprised how often this is helpful and necessary. So when I clicked on Crop, it

play11:40

gave me some additional lines and edges and things like that.

play11:44

So I can use that to crop out part of the photo - whoops - and I have to make sure

play11:49

I get the exact line there, and then I can just click outside the box and it

play11:54

makes that crop effective. So watch out for this format tab. It'll appear and

play11:59

give you some wonderful options that you need to be aware of.

play12:02

There are also all sorts of other great options, especially shapes are especially

play12:06

good. You can put in arrows. You can put in call-outs. You can put in squares,

play12:12

rectangles, circles, plus signs - all sorts of great shapes that are useful

play12:17

especially for teachers and students. And I want you to know that you can also add

play12:22

a text box. Now how is the text box special? How is it different from the

play12:26

regular text that you're typing in? Basically a text box is additional text

play12:30

that can float on top of your document. So I'm gonna go with the simple text box

play12:35

and I'll type in a wonderful message here and then click away. This text box

play12:41

now can be dragged wherever I want it to go. Now it is interacting with that text

play12:45

and if I don't want that to happen, I can use this button here to make it be

play12:50

behind the text, the other text, or in front of the text. I'm going to go with

play12:54

behind, and so now I can drag it freely so similarly to how I fixed this photo

play12:58

and made it so that I could drag it anywhere I wanted it to be. It's similar

play13:01

with text that's in a text box. Okay, now here in the review tab, a few other

play13:07

basics that you need to know about whenever you're writing a paper or a

play13:11

report or even a worksheet like this. It's important to get the spelling right

play13:15

and you can see here on the Review tab, you can click Spelling and Grammar and

play13:19

it will check for spelling mistakes. It looks like it found one. I don't know how

play13:24

I possibly misspelled this word but I did and, if it can, Microsoft Word will

play13:29

suggest alternate spellings that are correct. In this case, I've got it stumped

play13:33

a little bit so I'll close that out, but I just wanted to point that out the

play13:37

spelling and grammar in Word is great and is really one of the basic

play13:40

essentials that you need to know if you're gonna be using Microsoft Word.

play13:43

There's also some great options, like Word Count if you're a student and the

play13:47

teacher has said I want you to create a two-thousand word essay or report,

play13:51

you can just click to get a word count and it'll tell you how many characters,

play13:55

how many words, how many pages , etc. There's also a wonderful thesaurus to

play13:59

help you use a variety of words instead of using the same word over and over.

play14:03

That's very helpful. Okay, so let's say you're done with your document and it's

play14:07

time to get ready to turn it in. If you're a student and you're finishing an

play14:10

assignment, let's say or maybe you're a teacher and you've put together what you

play14:14

want to print and give to the students, how do you go from there? Well, one of the

play14:18

first things that you need to do is to consider if you have the right line

play14:22

spacing and things like that. Especially for students, maybe the teacher has said

play14:26

I want you to double space your paper. How do you do that? Well, here on the Home

play14:29

tab - home ribbon - you can go to Paragraph group and, look right here this is the

play14:34

line and paragraph spacing options. You can go in and say I want double-spaced. Now, for that to really be effective, you need to click and drag to highlight the

play14:43

text that you want to effect. So now when I do line spacing, set it at 2, now my

play14:48

paragraph has double-spaced text. I also want you to notice that you have font

play14:53

color options and all sorts of typical font options that you're probably very

play14:58

accustomed to on all sorts of tools. And on the internet there's different fonts

play15:02

to choose from here as well. Okay, so I'm happy with this. I'm good.

play15:06

Of course, I could change the margins at the left and right using this ruler tool,

play15:11

but if I don't want to mess with that, I'll just leave it as is. Now, to finish

play15:16

this off, I just go to File and I have a bunch of different options. First, I

play15:20

really should save this. And I can click Save. I can save it just to this PC and I

play15:25

could save it directly, let's say, to the desktop or to my

play15:29

documents, but also notice that there's an option to save it to OneDrive, and if

play15:32

you're not familiar with OneDrive, please watch my YouTube video on OneDrive. It's wonderful tool similar to Dropbox but extra good for Microsoft Office and

play15:41

Microsoft Word, in this case. Now, to access that it would be helpful to sign

play15:45

in to your Microsoft account and that way, like it says here, you can get to

play15:49

your documents from anywhere because you'll be signed in to your Microsoft

play15:53

Office account and basically OneDrive in this case, though I'll just save it to my

play15:58

desktop. It opens up, and I just give it a name. So there's the name I want to use.

play16:03

I click Save, and we're good to go. And, of course, I can also click there on File

play16:08

and I could print it, now that I've saved. I could have printed it without saving,

play16:12

but it's a good idea to save first, just so you don't forget. But I can now print

play16:16

and there's all these print options. Now, in addition to Print and Save, notice

play16:21

what else that there is. There's Export, and this is very powerful. I could create

play16:25

a PDF out of this document. So I can click that, save it also to the desktop

play16:30

in this case, and so now when I go to my desktop,

play16:34

look there is a PDF document that I've created from inside Microsoft Word and

play16:39

here's the original in Word format. So that's a nice powerful option, just built

play16:44

right into Word. So I'm done, so I'm going to close out of

play16:48

this document completely, go to my desktop. Let's say next week I need this

play16:53

same document, I can just go back to Word, open it up and, look, because it was

play16:57

recently created, it shows up here. So this is a list of recently created

play17:00

documents on this computer and there it is at the top. Now, as I use this more and

play17:05

more on this computer, I'm going to end up with 20, 3, 50, 100 documents. It might be

play17:11

nice, if this is a document that I'm going to keep working on a lot over the

play17:14

next few weeks, it might be a good idea to try to get it to stay at the top of

play17:18

the list. Well, there is a way to do that. If you put your mouse on it, look there's

play17:23

a little pin. And if you click that pin, it will pin this particular document to

play17:28

the top of the list. Now, I know right now, I just have the one document, but imagine

play17:32

500 documents. This document would remain at the top of the list because I pinned

play17:37

it. So that's a little trick that I think is helpful to know.

play17:39

So in this tutorial, we have gone over all of the basics that you need to

play17:44

know, all of the essentials that you need to know to start using Microsoft Word,

play17:48

whether you're a teacher, whether you're a student, a business-person, or you're

play17:52

just using this on your own at home. Microsoft Word is very powerful. You can

play17:56

use it to make all sorts of things, and what I've given you here today is just

play18:00

the basics to help you get started, with a few little bonus tips and tricks in

play18:04

there that are a little bit more than basic. So in the future, I'd like to make

play18:08

an advanced Microsoft Word tutorial, so watch for that.

play18:11

But thanks for watching and please consider connecting with me on my social

play18:15

media websites, like Facebook, Twitter and, Pinterest, and definitely do subscribe to

play18:20

my YouTube channel for more videos about technology for teachers and students. and

play18:24

Watch for a new video at least every Monday.

Rate This
β˜…
β˜…
β˜…
β˜…
β˜…

5.0 / 5 (0 votes)

Related Tags
Microsoft WordBeginner GuideDocument CreationReportsEssaysFlyersTemplatesFormattingInsert ImagesTech Tips