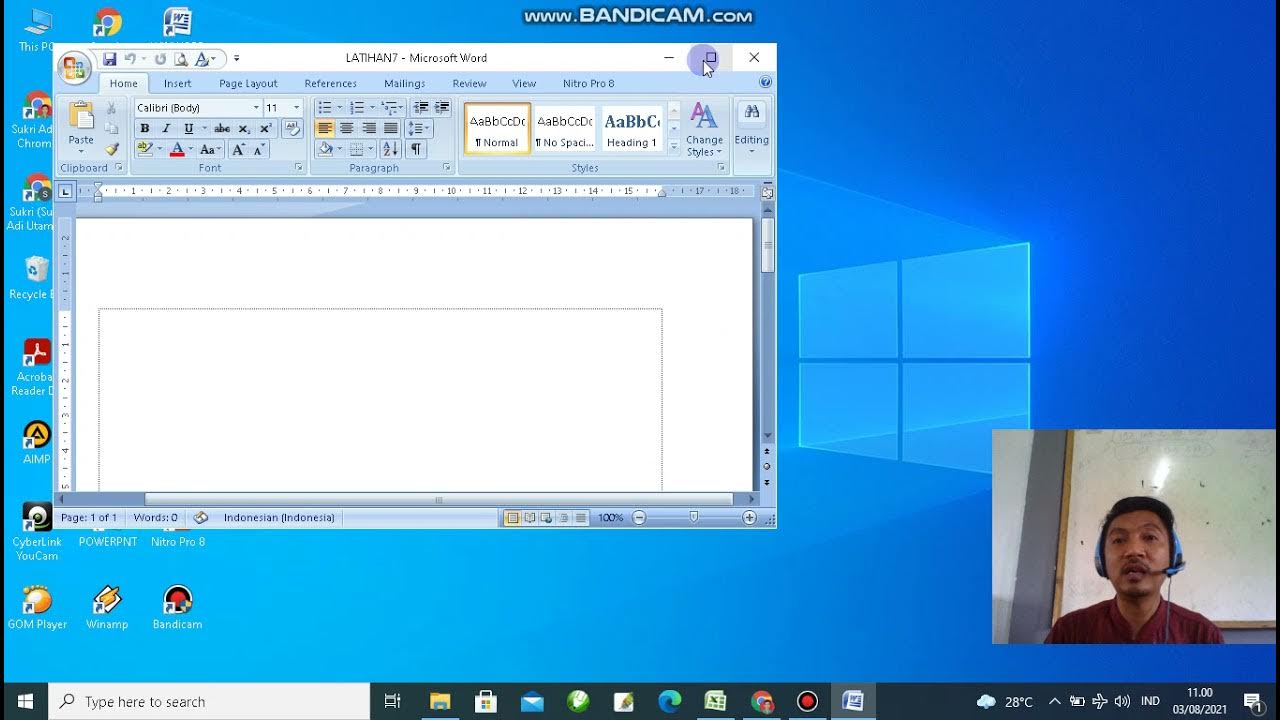
Microsoft Word 2010 - Basic User Guide - Lesson One - An Introduction

Nexstara
27 Jun 201110:30

Summary

TLDRIn this tutorial, Emily introduces Microsoft Word 2010, guiding viewers through its interface. She explains the ribbon's tabs and buttons, the quick access toolbar for shortcuts, and the backstage view for document management. Emily demonstrates creating, saving, and opening documents, and discusses templates for various projects. She also covers opening documents in different modes and saving files as read-only to prevent edits, providing a comprehensive overview of Word 2010's basic functions.

Takeaways

  • πŸ”‘ Microsoft Word 2010 is the latest version of Microsoft's word processing program.
  • πŸ“– The Ribbon is the control center of Word 2010, featuring various tabs and buttons for different functions.
  • πŸ” Users can navigate through different tabs such as Insert, Page Layout, and References to access specific features.
  • πŸ› οΈ The Quick Access Toolbar at the top provides shortcuts to frequently used commands like Save, Undo, and Redo.
  • πŸ“„ The Backstage view is accessed by clicking the File tab and offers document management options like Save, Open, and Print.
  • πŸ“ Creating a new document can be done through the Backstage view, with options for a blank document or using pre-made templates.
  • πŸ’Ύ Saving a document involves specifying a location, naming the file, and choosing the file type, such as Word Document or PDF.
  • πŸ” Opening a document can be done through the Recent documents list or by navigating to the file location in the Open tab.
  • πŸ”’ The Read-only option allows users to share documents without allowing others to make changes.
  • πŸ“Š The tutorial provides a comprehensive introduction to Word 2010, covering navigation, creation, saving, and opening documents.

Q & A

  • What is the main focus of the video tutorial series featuring Microsoft Word 2010?

    -The main focus of the video tutorial series is to provide an introductory overview of Microsoft Word 2010, including navigation of different tabs, toolbars, and ribbons, as well as creating, saving, and opening documents.

  • What is the ribbon in Microsoft Word 2010 and what is its purpose?

    -The ribbon in Microsoft Word 2010 is a thick toolbar located at the top of the application window. It serves as the control center, housing different tabs such as Insert, Page Layout, and References. Each tab contains specific buttons and controls related to its function, allowing users to access various features and commands.

  • How can users customize the Quick Access Toolbar in Microsoft Word 2010?

    -Users can customize the Quick Access Toolbar by clicking the down arrow at the end of the toolbar. This reveals a list of commands that can be added to the toolbar for quick access. To add a command, users can select it and click 'OK'. If they wish to remove a command, they can uncheck it from the list.

  • What is the Backstage view in Microsoft Word 2010 and how is it accessed?

    -The Backstage view in Microsoft Word 2010 is accessed by clicking the blue 'File' tab. It provides document management options such as saving, opening, printing, and accessing recent documents, as well as creating new documents.

  • How do you create a new document in Microsoft Word 2010?

    -To create a new document in Microsoft Word 2010, users go to the Backstage view by clicking the 'File' tab and then select 'New'. They can choose from a blank document or various templates available locally or from Office.com.

  • What are the different ways to save a document in Microsoft Word 2010?

    -In Microsoft Word 2010, users can save a document by going to the Backstage view and clicking 'Save'. They can choose the location, name, and file type for their document, such as a Word document, PDF, or web page.

  • How can you open a recent document in Microsoft Word 2010?

    -To open a recent document in Microsoft Word 2010, users can go to the Backstage view and click 'Recent'. This will display a list of recently worked-on documents, which can be opened by clicking on them.

  • What is the purpose of the 'Pin' feature in the recent documents list?

    -The 'Pin' feature in the recent documents list allows users to ensure that a specific document always appears in the recent documents list, even if it hasn't been recently accessed. This is useful for frequently used documents that users want to have easy access to.

  • How do you open a document in different modes in Microsoft Word 2010?

    -Users can open a document in different modes by clicking the arrow next to the 'Open' button in the Open dialog box. Options include opening as read-only, opening a copy, opening in protected view, and opening and repairing if the file is corrupted.

  • What is the purpose of saving a document as a read-only file in Microsoft Word 2010?

    -Saving a document as a read-only file in Microsoft Word 2010 ensures that others can view the document but cannot make any changes to it. This is useful when sharing documents with others who should only have access to read the content.

Outlines

00:00

πŸ–₯️ Introduction to Microsoft Word 2010

Emily introduces a tutorial series on Microsoft Word 2010. She explains that this lesson will serve as an overview of the software, focusing on navigation through tabs, toolbars, and ribbons. The ribbon, which is a toolbar at the top, contains various tabs like Insert and Page Layout, each with its own set of buttons and controls. Emily mentions that future lessons will delve into the functions of these tabs and controls. She also introduces the Quick Access Toolbar, which provides shortcuts to frequently used commands like Save, Undo, and Redo. Users can customize this toolbar by adding more commands. The Backstage view, accessed by clicking the file tab, contains document options such as Save As, Open, and New. Emily demonstrates creating a new blank document and exploring available templates, including those available online via Office.com.

05:01

πŸ’Ύ Saving and Opening Documents in Word 2010

Emily continues the tutorial by explaining how to save documents in Word 2010. She directs users to the Backstage view and the Save option, where they can choose a location, name the file, and select a file type such as Word Document, PDF, or Web Page. She also covers the Save As feature, which allows changing the file's location, name, and type. For opening documents, Emily discusses the Recent and Open options in the Backstage view. Recent shows documents that have been recently worked on, and users can pin documents to keep them easily accessible. The Open option allows users to search for documents by location. Emily also introduces different views for easier navigation, such as List, Small Icons, and Tiles. Additionally, she mentions special modes for opening documents, like Read-only, where edits cannot be made, and Protected View, which is useful for opening untrusted documents.

10:03

πŸ”– Saving Documents as Read-Only Files

In the final part of the tutorial, Emily quickly covers how to save a document as a Read-Only file to prevent others from making changes. She instructs users to go to the Backstage view, select Save As, find the document, right-click, and choose properties. In the properties, users can select the Read-Only option to save the document in a way that it can be viewed but not edited. Emily concludes the introductory tutorial, expressing hope that viewers found it helpful, and encourages them to return for more Word 2010 topics.

Mindmap

Keywords

πŸ’‘Ribbon

The ribbon is the thick toolbar at the top of Microsoft Word 2010 that contains tabs, buttons, and commands. It acts as a control center, allowing users to navigate between different tools like the Insert tab and Page Layout tab. In the video, the presenter explains how each tab on the ribbon contains its own set of functions, making it essential for accessing features quickly.

πŸ’‘Tabs

Tabs are located at the top of the ribbon in Word 2010, and each represents a different set of commands. For example, the Insert tab contains options for adding images or tables, while the Page Layout tab adjusts document formatting. The presenter emphasizes how clicking on different tabs changes the buttons and tools displayed, enhancing document customization.

πŸ’‘Quick Access Toolbar

The Quick Access Toolbar is a customizable shortcut area located above the ribbon in Word 2010. It allows users to add frequently used commands like Save, Undo, and Redo for easy access. In the tutorial, the presenter demonstrates how users can personalize this toolbar by adding or removing commands like Spelling and Grammar.

πŸ’‘Backstage View

Backstage View is a menu in Word 2010 that appears when the blue File tab is clicked. It provides document management options such as saving, opening, and printing files. The presenter shows how users can create new documents, access recent files, and adjust file properties through Backstage View, making it a central hub for file-related tasks.

πŸ’‘Save As

Save As is a feature in Word 2010 that allows users to save a document under a new name, in a different location, or in a different format, such as PDF. In the video, the presenter walks through how to use Save As from Backstage View, highlighting how users can change document names and file types before saving.

πŸ’‘Templates

Templates are pre-designed documents available in Word 2010, used for specific projects like calendars, business cards, or flyers. The presenter explains how users can either select templates stored locally on their computer or download more options from office.com, making it easier to start projects with predefined formatting.

πŸ’‘Document Views

Document views refer to different ways of displaying a Word document, such as List, Icons, or Tiles, which can aid in searching for files. The presenter mentions this feature when discussing how to open documents, showing how changing the view can help users find specific files more easily.

πŸ’‘Recent Documents

Recent Documents is a feature in Word 2010 that lists files a user has recently worked on. The presenter explains how to access this list from Backstage View and highlights a useful pinning feature that allows users to keep certain files always visible in the recent documents list, ensuring quicker access.

πŸ’‘Protected View

Protected View is a security feature in Word 2010 that allows users to open documents in a restricted mode, preventing edits until the file is trusted. The video mentions this feature when discussing how to safely open files received via email or from unknown sources, helping to protect against potential malware.

πŸ’‘Read-Only Mode

Read-Only Mode is a document setting that prevents others from editing the file. The presenter shows how to save a Word document in read-only mode through the properties menu, ensuring that while the document can be opened and viewed, no changes can be made to its content.

Highlights

Introduction to Microsoft Word 2010 as the latest version of Microsoft's word processing program.

Overview of navigating different tabs, toolbars, and ribbons in Word 2010.

Explanation of the Ribbon as the control center with various tabs for different functions.

Demonstration of how to switch between different tabs to access various buttons and controls.

Introduction to the Quick Access Toolbar for shortcuts to frequently used commands.

Tutorial on customizing the Quick Access Toolbar by adding or removing commands.

Introduction to the Backstage view for document options like save, open, and print.

Guide on creating a new document and choosing from various templates.

Explanation of the two types of templates: locally saved and Office.com templates.

Tutorial on saving a document with options to choose file location, name, and type.

How to open a document using the recent documents list or the open tab.

Details on pinning documents to always appear in the recent documents list.

Different viewing options in the open dialog box to facilitate document search.

Special mode open options like read-only, as a copy, and protected view.

Tip on quickly returning to the document from the Backstage view by clicking the Home tab.

Guide on saving a document as a read-only file to prevent changes by others.

Conclusion of the Word 2010 introductory tutorial with a prompt to check back for more topics.

Transcripts

play00:00

hello everyone my name is Emily and

play00:01

today we will be starting a new video

play00:03

tutorial series featuring Microsoft Word

play00:05

2010 Word 2010 is the latest version of

play00:08

Microsoft's popular word processing

play00:10

program this lesson is an introductory

play00:13

overview of Word 2010 I'll be showing

play00:15

you how to find your way around the

play00:16

different tabs toolbars and ribbons

play00:18

we'll be working with various views and

play00:20

I will show you how to create save and

play00:22

open documents okay let's get started so

play00:25

the first thing I want to show you is

play00:27

this thick toolbar that's full of

play00:30

buttons and um different tabs up here at

play00:32

the top and this thick toolbar is called

play00:35

our

play00:36

ribbon and what the ribbon is it's it's

play00:40

um basically our control center so the

play00:42

first thing you'll notice about the

play00:44

ribbon is that it has all these

play00:46

different tabs you have your insert tab

play00:48

your page layout tab

play00:50

references um Etc and you'll notice that

play00:53

when you click the different tabs um it

play00:56

changes all your different buttons and

play00:58

controls on your Ribbon

play01:01

and we're going to get into the function

play01:03

of all the different tabs and the

play01:06

various buttons and controls in later

play01:08

lessons so for right now you just need

play01:10

to understand a little bit about the

play01:11

navigation and the fact that these

play01:13

different tabs do have all of their own

play01:16

buttons and functions under them and

play01:19

that's and by clicking around that's how

play01:20

you get to see all these different

play01:22

functions um so like I said we'll get

play01:24

into all the details later but right now

play01:27

you just need to understand kind of how

play01:29

you surf around a a little bit the next

play01:32

thing that we really want to show you is

play01:34

what we call our quick access toolbar

play01:37

and it's at the very top and it's

play01:39

basically like your little shortcut area

play01:42

so um when anything that you want to

play01:45

have access to very quickly you can put

play01:47

onto your quick access toolbar um when

play01:51

you start you already have um save undo

play01:55

and redo loaded onto your quick access

play01:58

toolbar but if if you have something

play02:01

that you use a lot that you want to add

play02:02

on to it um you can do that by clicking

play02:05

this little down arrow and you'll notice

play02:08

that you have um different commands in

play02:10

here so uh spelling and grammar um

play02:14

actually you have pretty much any

play02:17

setting that you use a lot you can put

play02:18

on your quick access toolbar um you know

play02:21

if you use text box a lot you could put

play02:23

them on um and just add it there click

play02:27

okay um and then you see it just pops

play02:29

right up

play02:30

so should you um want to add spelling

play02:33

and grammar you can just click it there

play02:35

it pops right up on your quick access

play02:37

toolbar now should you decide that you

play02:39

don't like spelling and grammar on your

play02:41

quick access toolbar all you need to do

play02:43

is go down here and unselect it and then

play02:46

it disappears from your toolbar so it's

play02:48

pretty

play02:49

self-explanatory but like I said it's a

play02:51

very nice shortcut for you to use so

play02:54

that way you don't have to go through

play02:55

your Ribbon to search something out if

play02:57

you use it all the time

play03:00

next let's talk about what's called The

play03:01

Backstage view so if you click on this

play03:04

blue file

play03:06

tab that will pull up the backstage view

play03:08

for you and what the backstage view

play03:11

really is is it's um your document

play03:13

options so as you'll see um it's your

play03:15

save your save as your open your recent

play03:18

documents new um print Etc so the first

play03:23

area that we're going to delve into is

play03:25

new and this is where you go to create a

play03:27

new document um the document that you'll

play03:31

the document setting that you'll use

play03:32

most often is probably blank document

play03:35

and this will just be uh what you click

play03:37

to create a blank document and if you

play03:39

come over here and click create it'll

play03:41

pull it up right for you um another

play03:44

thing that's really great about this

play03:45

area is all the templates that you can

play03:47

choose from so if you have a special

play03:50

project that you're doing um but you're

play03:52

not quite sure how to set it up

play03:53

Microsoft Word might have a template

play03:55

already created that you could use to do

play03:57

it easily for you um they have calendars

play04:00

they have business cards Flyers really

play04:03

anything that you can think of they

play04:05

probably have a template already created

play04:07

for you so there's two kinds of

play04:09

templates that Microsoft has for you um

play04:12

they have your templates that are saved

play04:14

locally which are right up here and all

play04:16

you would do is Click whatever you want

play04:18

uh what area you want and um come down

play04:21

and search for what you need and you can

play04:23

click it and you'll just click the

play04:24

create button and it'll pop right up

play04:26

just like a blank document did um or

play04:30

your other option is if you have access

play04:32

to the internet you can come down here

play04:35

and these are your office.com templates

play04:37

and there's just a little bit more wide

play04:39

variety down here and so it's the same

play04:41

thing you would just click search for

play04:43

what you need and click the download

play04:45

button and it'll pop right up um for our

play04:48

purposes right now we're just going to

play04:50

create a regular old blank document so

play04:53

all you need to do is Click create and

play04:55

it'll pull right up for

play04:57

you all right so now we've created our

play05:00

document the next thing that we want to

play05:02

do is save it so again we'll go back

play05:04

into the backstage view so you'll just

play05:06

click the blue file button and then this

play05:10

time we're going to go to save so just

play05:11

click save and up will pop this window

play05:14

and this will be where you figure out

play05:16

where you want to save your file at so

play05:18

as you can see on the side um these are

play05:20

the different locations where you could

play05:22

save it so you could save it to your

play05:23

desktop you could save it to your

play05:25

documents Library uh your downloads

play05:28

really wherever you need to save this

play05:31

file up so for me right now I'm going to

play05:33

save it to my desktop and the next step

play05:35

that you want to do is you want to name

play05:36

your file so I'm going to name mine

play05:39

document

play05:41

sample and then um you also can choose

play05:45

what kind of file you want to save it as

play05:47

so there's this drop down menu and you

play05:50

can choose between a Word document which

play05:52

is kind of your um default setting in

play05:54

word or maybe you need to make it a PDF

play05:57

or a web page really whatever

play06:00

um would fit your needs so for us we're

play06:02

going to save it as a Word

play06:05

document and save as is the feature

play06:08

where you can change the location that

play06:10

your file is being saved you can change

play06:12

the name of your file and you can change

play06:15

the document type that your file is

play06:17

being saved

play06:18

in all right now let's talk about

play06:20

opening a document to open a document

play06:23

you're going to want to go to your

play06:24

backstage

play06:25

View and you have two choices you can

play06:28

either go to recent or can go to open

play06:31

and so if you go to recent that's going

play06:32

to pull up a list of documents that

play06:34

you've recently been working on um and

play06:37

you can just click it and that'll open

play06:38

it up um another handy feature in recent

play06:41

documents is if you have a document that

play06:43

you know you want to always appear in

play06:45

recent documents even if you haven't

play06:48

worked on it in a while um you can

play06:51

actually make sure you save it as a

play06:53

recent document forever and to do that

play06:56

you just click this little push pin and

play06:58

that'll make sure that always appears in

play07:00

your recent document list and if you

play07:02

decide you no longer want it to always

play07:04

show in your recent document list you

play07:06

can just unclick the push

play07:07

pin so the other way that you can open a

play07:10

document is by going to the open Tab and

play07:14

that'll pull up a box and again it'll

play07:16

have your searchability options um you

play07:19

can look um for your document in where

play07:23

you saved it to so if you saved it to

play07:24

your desktop you want to pull up your

play07:26

desktop um your documents you click

play07:28

there and and a really handy feature um

play07:31

about the open box is uh the views and

play07:35

in order to search more easily you may

play07:37

want to change um the way that this box

play07:40

is viewed so if you click list it's

play07:43

going to list it in list form um or you

play07:46

can have it in small

play07:48

icons um tiles which will be bigger um

play07:51

little icons that you can look at and so

play07:55

depending on what um you're opening or

play07:57

what you're searching for changing the

play07:59

different views can help you search for

play08:01

it more easily so for these purposes I

play08:03

think I'm going to switch it back to

play08:04

list just because that's easier for me

play08:06

to find and the document that I want to

play08:09

open up is document sample and then I

play08:12

would just click open now with open um

play08:16

you can actually open your document just

play08:18

regularly by clicking open or if you

play08:21

click this little arrow it'll drop down

play08:23

some special mode open options and um

play08:26

different ways that you can open your

play08:28

document is you could open your document

play08:30

is a readon document and that's when the

play08:32

document um can be opened but the person

play08:35

opening it can't make any edits to it

play08:37

you can open your document open your

play08:39

document as a copy and that means that

play08:42

um your original will be saved but

play08:44

you'll be opening a copy of that

play08:45

original so you can make whatever

play08:47

changes you want or you could open your

play08:49

document in protected view that's really

play08:52

great for if you are not sure like if

play08:55

you've gotten an email and you're

play08:57

opening an attachment that you don't

play08:58

necessarily Trust and you want to open

play09:00

it in a protected view that's where you

play09:02

would open it open and repair is if your

play09:06

um files have been corrupted you can

play09:08

open it in open and repair mode um so

play09:11

for us we're just going to open the

play09:12

document regularly um and then that'll

play09:16

open up our document and just one little

play09:19

tip too um in case I haven't mentioned

play09:21

this before whenever you are in um your

play09:24

backstage View mode and you want to get

play09:26

back to the document that you are

play09:28

working on um all you have to do is

play09:30

Click your Home tab and that'll easily

play09:32

get you back the last thing that I

play09:34

wanted to cover very quickly is how to

play09:37

save your document as a readon file so

play09:40

if you want to share your document with

play09:42

other people and make sure that they

play09:43

aren't able to make any changes to the

play09:45

document you want to save your document

play09:47

as a readon file and to do this you will

play09:50

go to the backstage view area and you

play09:53

will go to save as uh and you will find

play09:56

the document that you want uh in this

play09:58

case we want doent

play10:00

sample and uh what you'll want to do is

play10:03

Select it and you will rightclick it and

play10:06

then just click properties and that'll

play10:08

bring up this box and you'll see at the

play10:10

very bottom there is a readon option and

play10:13

you'll just click that when you click

play10:15

okay that'll make your document a readon

play10:18

file okay well that wraps up our Word

play10:20

2010 introductory tutorial hopefully you

play10:23

found it helpful and please check back

play10:25

soon for other word20 topics thank you

play10:28

so much for listening

Rate This
β˜…
β˜…
β˜…
β˜…
β˜…

5.0 / 5 (0 votes)

Related Tags
Word 2010TutorialMicrosoft OfficeDocument EditingRibbon InterfaceTemplatesFile ManagementQuick Access ToolbarBackstage ViewRead-only Files