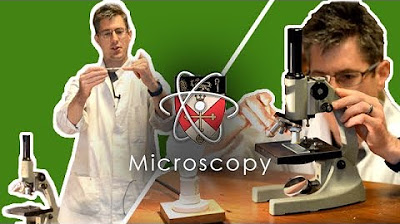
GCSE Biology Revision "Required Practical 1: Microscopes"

Freesciencelessons
22 Mar 201804:54

Summary

TLDRThis educational video offers a detailed guide on using an optical microscope to examine cells on a prepared slide, a crucial practical skill for students. It covers the microscope's parts, including the stage, objective lenses, and focusing dials. The tutorial demonstrates how to place the slide, adjust the lenses for clarity, and calculate total magnification. It also explains how to observe and sketch animal and plant cells, highlighting visible structures like the nucleus, cytoplasm, and cell membrane, and includes tips for adding a magnification scale to drawings.

Takeaways

  • 🔬 The video is a tutorial on using an optical microscope to examine cells on a prepared slide, which is a required practical for exams.
  • 📚 It's important to learn the details of the microscope's parts and their functions, as this could be a six-mark essay question in exams.
  • 🔍 The microscope has a stage to place the slide, with clips to hold it, and a light source or mirror to illuminate the slide.
  • 👀 The objective lenses, usually with magnifications of 4x, 10x, or 40x, are crucial for initial observation of the slide.
  • 🔎 The eyepiece contains a lens with a 10x magnification, used in conjunction with the objective lens for viewing.
  • 🔄 To view a slide, start by placing it on the stage, selecting the lowest power objective lens, and adjusting the coarse focusing dial.
  • 🚫 When adjusting the objective lens, do not look through the eyepiece to avoid damaging the slide.
  • 🔬 After initial focus, use the fine focusing dial to bring the cells into sharp view.
  • 📈 Total magnification is calculated by multiplying the magnification of the eyepiece lens by that of the objective lens.
  • 📝 For animal cells, you should be able to see the nucleus, cytoplasm, and possibly mitochondria, but not ribosomes.
  • 🌿 For plant cells, expect to see the cell wall, cytoplasm, nucleus, and possibly the vacuole and chloroplasts.
  • 📊 Include a magnification scale in your drawings, measured by placing a clear plastic ruler over the stage and showing the field of view diameter in millimeters.

Q & A

  • What is the main purpose of the video?

    -The main purpose of the video is to teach viewers how to use an optical microscope to observe cells on a prepared microscope slide, which is a required practical that could appear as a six mark essay question in an exam.

  • What are some variations in the design of optical microscopes mentioned in the video?

    -The video mentions that some optical microscopes may have a lamp instead of a mirror beneath the stage to illuminate the slide, and that the number and magnification of objective lenses can vary.

  • What is the function of the stage on a microscope?

    -The stage is the central part of the microscope where the microscope slide is placed, and it often has clips to hold the slide in place.

  • What is the purpose of the objective lenses on a microscope?

    -The objective lenses are used to magnify the specimen on the slide. Most microscopes have three different objective lenses with varying magnifications, typically four times, ten times, or forty times.

  • What is the magnification of the eyepiece lens in the video?

    -The eyepiece lens in the video has a magnification of ten times.

  • How do you calculate the total magnification when using a microscope?

    -The total magnification is calculated by multiplying the magnification of the eyepiece lens by the magnification of the objective lens in use.

  • What is the first step in using an optical microscope to view a prepared slide?

    -The first step is to place the slide onto the stage and use the clips to secure it in place.

  • Why is it important to adjust the microscope from the side when the objective lens is close to the slide?

    -Adjusting the microscope from the side helps prevent damage to the slide from accidentally touching the objective lens while looking through the eyepiece.

  • What is the role of the coarse and fine focusing dials in viewing a slide?

    -The coarse focusing dial is used to increase the distance between the objective lens and the slide until the cells come into focus. The fine focusing dial is then used to bring the cells into a clearer focus.

  • What details can typically be observed in animal and plant cells under an optical microscope?

    -In animal cells, one can typically observe the nucleus, cytoplasm, and cell membrane, with possible indications of mitochondria. In plant cells, the cell wall, cytoplasm, nucleus, and possibly the vacuole and chloroplasts can be seen.

  • How can you include a magnification scale in your drawing of the cells observed under the microscope?

    -A magnification scale can be included by placing a clear plastic ruler over the stage, measuring the diameter of the field of view in millimeters, and then representing this measurement on the drawing with a scale bar,标注着相应的放大倍数, such as 100 times.

Outlines

00:00

🔬 Introduction to Using an Optical Microscope

This paragraph introduces the video's focus on teaching viewers how to use an optical microscope to examine cells on a prepared slide, a skill crucial for a required practical that could be assessed in an exam. The presenter briefly mentions the microscope's components, including the stage, objective lenses, eyepiece, and focusing dials, and notes that variations exist among microscope models, such as the presence of a lamp or mirror for light reflection.

Mindmap

Keywords

💡Optical Microscope

An optical microscope is a device that uses visible light and lenses to magnify small objects, allowing the observer to see tiny details that are not visible to the naked eye. In the video's context, it is the primary tool used to examine cells on a prepared slide. The script describes its various parts, such as the stage, objective lenses, and eyepiece, which are essential for its operation.

💡Prepared Microscope Slide

A prepared microscope slide refers to a glass slide that has been treated with a sample, such as cells, which is then mounted for examination under a microscope. The script emphasizes the importance of learning how to use an optical microscope to view these slides, as it is a required practical skill in the study of biology.

💡Stage

The stage of a microscope is the flat surface where the prepared slide is placed for observation. The script mentions that it has clips to hold the slide in place, ensuring it remains steady while being viewed under the microscope.

💡Lamp

A lamp is a light source built into some optical microscopes, positioned below the stage, to illuminate the slide from beneath. The script notes that light passes through the slide, which is crucial for viewing the cells on the slide.

💡Mirror

A mirror is an alternative to a lamp in some microscopes, used to reflect external light up through the microscope slide. The script explains that the mirror helps to adjust the light intensity when a built-in lamp is not available.

💡Objective Lenses

Objective lenses are a set of lenses located near the stage of the microscope, which are used to magnify the specimen on the slide. The script specifies that most microscopes have three different objective lenses with varying magnifications, such as 4x, 10x, or 40x.

💡Eyepiece

The eyepiece is the part of the microscope where the observer looks through to view the magnified image. It contains an eyepiece lens with a magnification of 10x, as mentioned in the script, which, when combined with the objective lens, determines the total magnification.

💡Coarse Focusing Dial

The coarse focusing dial is used to adjust the distance between the objective lens and the microscope slide, allowing the observer to bring the cells into a general focus. The script describes its use in the process of viewing a prepared slide under the microscope.

💡Fine Focusing Dial

The fine focusing dial provides more precise adjustments to the focus, refining the image to bring the cells into a sharp, clear focus. The script mentions using this dial after adjusting the coarse focus.

💡Magnification

Magnification refers to the process of making an object appear larger than it is. In the context of the video, it is the product of multiplying the magnification of the eyepiece lens by that of the objective lens. The script explains how to calculate total magnification and the importance of understanding different levels of magnification for observing cells.

💡Nucleus

The nucleus is a membrane-bound organelle found in eukaryotic cells that contains the cell's genetic material. The script mentions that when using an optical microscope, one can observe the nucleus, cytoplasm, and cell membrane in animal cells.

💡Cell Wall

A cell wall is a structural layer surrounding some types of cells, such as plant cells, providing additional support and protection. The script notes that under a light microscope, one should be able to see the cell wall, which is a distinguishing feature of plant cells compared to animal cells.

💡Scale Bar

A scale bar is a line marked with units of measurement that is used in drawings or images to indicate the scale of the depicted objects. In the script, it is mentioned as a tool for including a magnification scale on a drawing of cells observed under the microscope, helping to represent the actual size of the cells.

Highlights

Introduction to using an optical microscope for examining cells on a prepared slide, a required practical for exams.

Explanation of the optical microscope's parts, including the stage, clips, and light source.

Differences in optical microscopes, such as the presence of a lamp or mirror for light reflection.

Description of the objective lenses with varying magnifications and their role in cell observation.

The function of the eyepiece lens and its magnification power in conjunction with the objective lens.

Demonstration of how to place a microscope slide on the stage and secure it with clips.

Guidance on selecting and positioning the lowest power objective lens for initial focusing.

Importance of adjusting the coarse focusing dial while observing from the side to prevent slide damage.

Process of using the coarse and fine focusing dials to bring cells into clear focus under the microscope.

Calculation of total magnification by multiplying the magnifications of the eyepiece and objective lenses.

Observation of animal cells under the microscope and the expected visibility of cellular structures.

Limitations of optical microscopes in observing fine details such as ribosomes.

Differences in viewing plant cells, including the visibility of the cell wall, cytoplasm, and nucleus.

Technique for creating a scale bar on drawings to represent the magnification and field of view.

Instructions on making a clear label drawing of observed cells with the inclusion of magnification.

Availability of practice questions on this required practical in the accompanying workbook.

Encouragement to click on the provided link to access additional resources for learning.

Transcripts

play00:01

[Music]

play00:08

I'm welcome back to three sighs lessons

play00:11

cold okay by the end of this video you

play00:14

should be able to describe how to use an

play00:16

optical microscope to look at cells on a

play00:18

prepared microscope slide um this is a

play00:21

required practical so it's important

play00:22

that you learn the details this could

play00:24

come up in the exam as a six mark essay

play00:26

question

play00:27

okay I'm showing you here an optical

play00:29

microscope and you should have used one

play00:31

of these at school now I should point

play00:33

out that some optical microscopes are

play00:35

slightly different to this and I'll

play00:37

discuss that in a minute I'm going to

play00:39

take you through the important part of

play00:41

the optical microscope and then we'll

play00:42

discuss how to use it to view a

play00:44

microscope slide and again you need to

play00:46

learn the names of the different parts

play00:48

the center of the microscope has a stage

play00:51

this is where we place a microscope

play00:53

slide the stage has clipped to hold the

play00:56

slide in place below the stage there's a

play00:59

lump light from the lump passes up

play01:02

through the microscope slide now as I

play01:04

said before some optical microscopes are

play01:06

slightly different to this rather than

play01:09

having a lamp these microscopes have a

play01:11

mirror beneath the stage the mirrors

play01:13

used to reflect light up through the

play01:15

microscope slide okay above the stage

play01:19

we've got a set of lenses these are

play01:21

called the objective lenses most

play01:23

microscopes have got three different

play01:25

objective lenses these usually have a

play01:27

magnification of four times ten times or

play01:30

forty times at the top of the microscope

play01:33

we've got the eyepiece and this is where

play01:35

we look through the eyepiece contains

play01:38

the eyepiece lens and that's got a

play01:39

magnification of ten times the final

play01:43

parts of the microscope or the course

play01:44

focusing dial the fine focusing dial and

play01:48

we'll be discussing how to use these

play01:49

later

play01:51

okay so we're gonna look now how to use

play01:53

an optical microscope to view a prepared

play01:55

slide first we place the slide onto the

play01:58

stage and use the clips to hold the

play02:01

slide in place we then select the lowest

play02:04

power objective lens this is usually

play02:06

four times we need to position the

play02:09

objective lens so it almost touches the

play02:12

microscope slide to do that we slowly

play02:15

turn the cause focusing dial now it's

play02:18

really important that we look at the

play02:20

microscope from this side while we

play02:22

adjust the position of the objective

play02:23

lens when the objective lens almost

play02:26

touches the slide we stop turning the

play02:28

dial if we look through the eyepiece

play02:31

while position in the objective lens

play02:33

there's a risk that we damage the slide

play02:36

okay at this stage we look down through

play02:38

the eyepiece now we need to slowly turn

play02:41

the course focusing dial this increases

play02:45

the distance between the objective lens

play02:46

on the slide we do this until the cells

play02:49

come into focus at this stage we use the

play02:52

fine focusing dial to bring the cells

play02:54

into a clear focus okay now to calculate

play02:58

the total magnification we multiply the

play03:00

magnification of the eyepiece lens by

play03:02

the magnification of the objective lens

play03:04

the eyepiece lens has a magnification of

play03:07

ten times and the low-power objective

play03:09

lens has a magnification of four times

play03:12

multiplying ten by four gives a total

play03:15

magnification of 40 times at this point

play03:18

we can select a higher power objective

play03:20

lens for example 10 times again we'll

play03:24

need to adjust the fine focusing dial to

play03:26

bring the cells back into focus

play03:29

so if we're looking at animal cells we

play03:32

should see something like this I should

play03:34

point out that this will depend on the

play03:35

type of animal cell on the slide at this

play03:39

stage we can use a pencil to make a

play03:40

clear label drawing of some of the cells

play03:43

now using an optical microscope we can

play03:46

only see limited detail we can see the

play03:49

nucleons the cytoplasm and the cell

play03:51

membrane and these tiny flecks may be

play03:53

mitochondria

play03:54

however we definitely cannot see wiper

play03:57

Solms if we look at plant cells we might

play04:00

see something like these but again this

play04:02

depends on the type of plant cells on

play04:04

the slide under the light microscope we

play04:07

should be able to see the cell wall the

play04:08

cytoplasm and the nucleus we may also be

play04:11

able to see the vacuole under

play04:13

chloroplasts now on your drawing you

play04:16

should also include a magnification

play04:18

scale to do this we place a clear

play04:20

plastic ruler over the stage and we

play04:23

measure the diameter of the field of

play04:24

view in millimeters then we show this on

play04:27

a drawing using a scale bar you should

play04:30

also write the magnification for example

play04:32

100 times remember you'll find plenty of

play04:35

questions on this required practical in

play04:37

my vision workbook and you can gather

play04:39

that by click on the link above

play04:42

you

play04:46

[Music]

Rate This

5.0 / 5 (0 votes)

Related Tags
Microscope UseCell ExaminationEducational VideoPractical GuideBiology LessonMicroscopy TechniquesSlide PreparationMagnification CalculationScientific MethodStudent Resource