Konfigurasi Inter Vlan Routing pada Cisco packet tracer (Routing on a Stick)
Summary
TLDRIn this tutorial, the presenter demonstrates how to configure inter-VLAN routing using a router and managed switches. The video covers setting up multiple VLANs, including configuring switch ports to assign them to specific VLANs, and enabling trunking for communication between VLANs. The router's sub-interfaces are configured with the `dot1q` encapsulation to route traffic between VLANs. The tutorial also includes testing the connectivity between different VLANs to ensure proper routing. Viewers are encouraged to try the configuration themselves, with the steps clearly laid out for both beginners and those looking to refresh their skills.
Takeaways
- 😀 Assalamualaikum warahmatullahi wabarakatuh, greeting viewers and hoping they are in good health.
- 😀 The video is focused on teaching how to configure inter-VLAN routing using Packet Tracer.
- 😀 Inter-VLAN routing allows different VLANs to communicate with each other, even if they are on different switches.
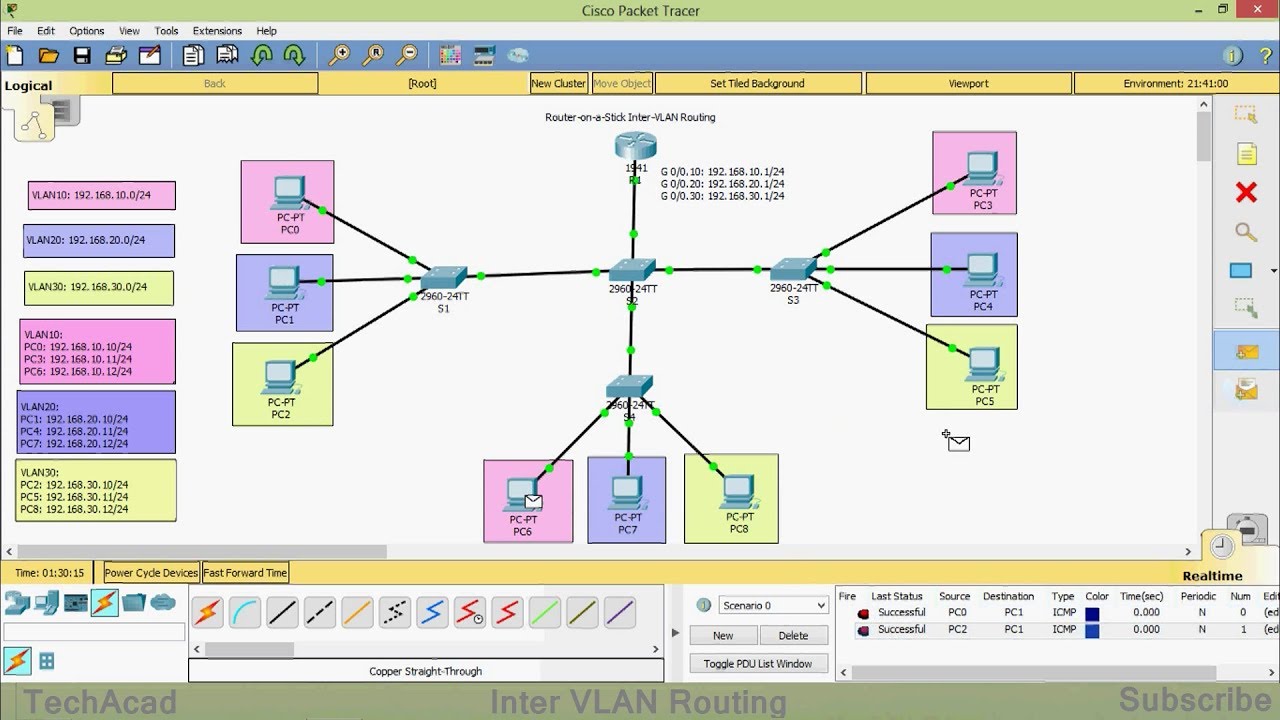
- 😀 The tutorial uses a network topology consisting of 1 router, 3 switches, and 4 client computers, with 4 different VLANs configured.
- 😀 VLAN 10 is named 'Kadin' with an IP network of 192.168.10.0/24, VLAN 20 is named 'Kasih' with 192.168.20.0/24, VLAN 30 is 'Kabid' with 192.168.30.0/24.
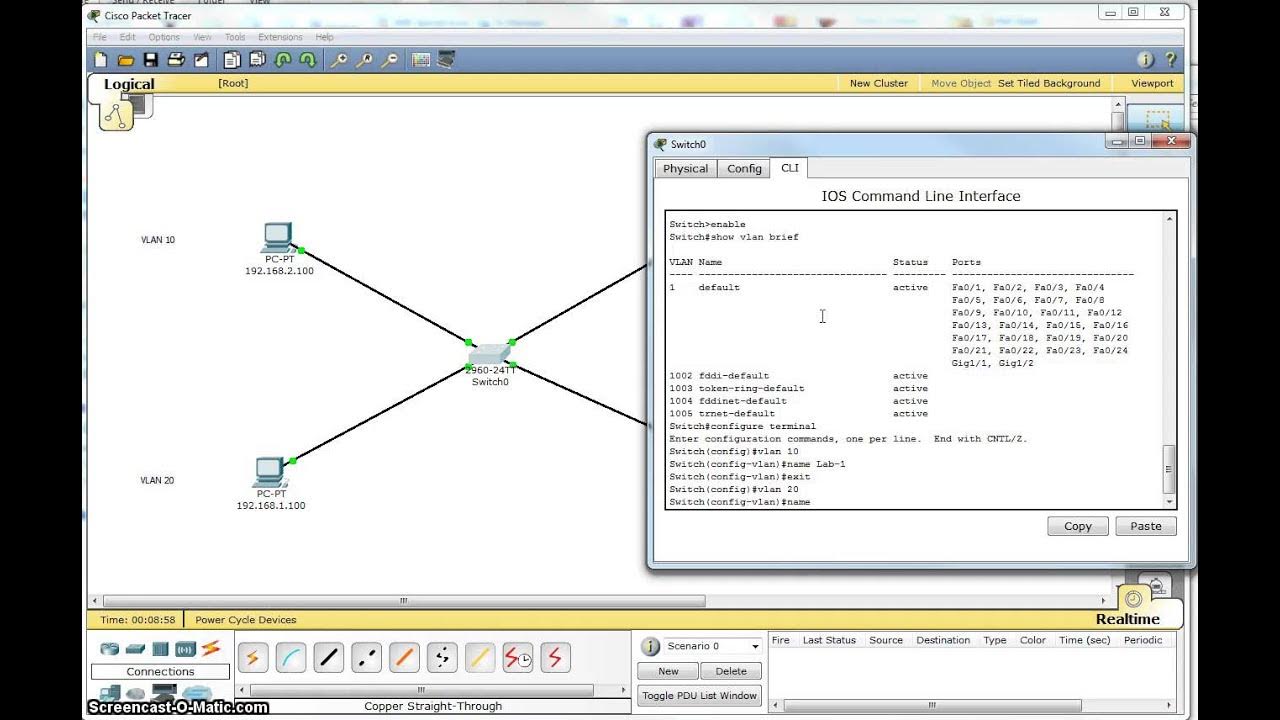
- 😀 The video explains how to configure the switch interfaces using the command line interface (CLI) to assign VLANs to ports.
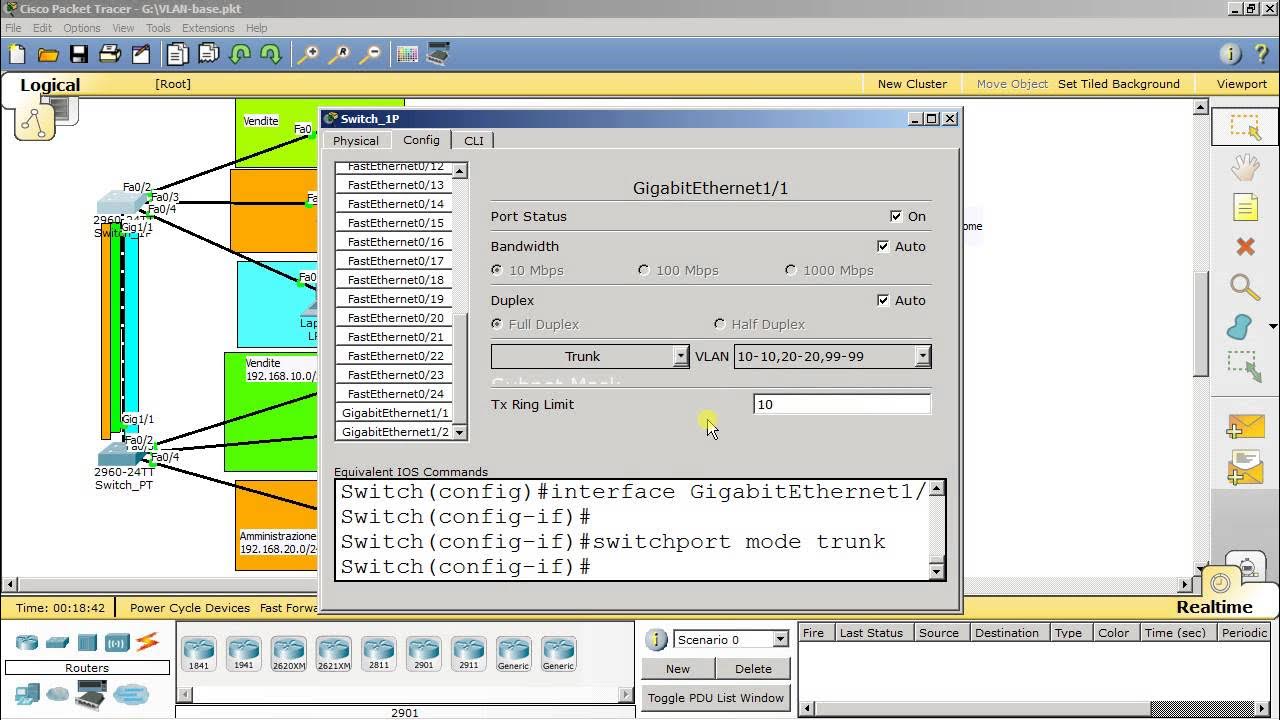
- 😀 Trunking is enabled on the interfaces connected to the router, allowing VLAN traffic to pass between switches and the router.
- 😀 The configuration process involves creating VLANs, assigning switch ports to specific VLANs, and verifying the settings using 'show' commands.
- 😀 The router’s configuration includes assigning IP addresses to subinterfaces corresponding to each VLAN for inter-VLAN communication.
- 😀 After configuring the switches and router, the network setup is tested to ensure devices in different VLANs can communicate with each other.
- 😀 The video concludes with a reminder to like and comment if there are questions, and a thank you message before ending the tutorial.
Q & A
What is inter-VLAN routing?
-Inter-VLAN routing is a process that allows communication between different VLANs, even if they are on different switches or networks. It enables devices from different VLANs to communicate by routing traffic through a Layer 3 device, such as a router or multilayer switch.
Which device is used to perform inter-VLAN routing in this tutorial?
-In this tutorial, a router is used to perform inter-VLAN routing. The router interfaces are configured to handle traffic from multiple VLANs and route the traffic accordingly.
What are the VLANs configured in the network setup?
-The network setup in this tutorial uses three VLANs: VLAN 10 (Kadin), VLAN 20 (Kasih), and VLAN 30 (Kabid). Each VLAN is assigned a specific IP network address.
How do you configure VLANs on switches in this tutorial?
-VLANs are configured on switches using the CLI. The process includes creating VLANs with specific names (e.g., Kadin, Kasih, Kabid) and assigning switch ports to the appropriate VLANs using commands like 'switchport mode access' and 'switchport access vlan'.
What is the purpose of trunking in this setup?
-Trunking is used to carry traffic from multiple VLANs over a single link between switches or between a switch and a router. It ensures that the VLAN information is preserved as traffic flows between devices, allowing inter-VLAN communication.
Why do we need to configure router interfaces for each VLAN?
-Each router interface must be configured with an IP address and encapsulation for each VLAN. This allows the router to route traffic between VLANs by assigning different interfaces to different VLANs, enabling communication across the network.
What command is used to assign IP addresses to router interfaces for different VLANs?
-The command used to assign IP addresses to router interfaces is 'ip address', followed by the appropriate IP address and subnet mask. The interfaces are also configured with 'encapsulation dot1Q' to handle VLAN tagging.
What is the purpose of using the 'encapsulation dot1Q' command in router configuration?
-'encapsulation dot1Q' is used to specify the VLAN tagging method (IEEE 802.1Q) on router interfaces. It enables the router to recognize traffic from multiple VLANs by tagging the packets with VLAN IDs for routing purposes.
How can we verify that the inter-VLAN routing is working properly?
-You can verify that inter-VLAN routing is working by performing a ping test between devices in different VLANs. For example, you can ping from a device in VLAN 10 to a device in VLAN 20 or VLAN 30 to confirm that the routing is functioning correctly.
What troubleshooting steps can be taken if inter-VLAN routing is not working?
-If inter-VLAN routing is not working, check the following: ensure that VLANs are correctly configured on switches, verify that trunking is enabled on the relevant ports, ensure that router interfaces are configured with the correct IP addresses and encapsulation, and test connectivity with ping commands to confirm communication between devices.
Outlines

This section is available to paid users only. Please upgrade to access this part.
Upgrade NowMindmap

This section is available to paid users only. Please upgrade to access this part.
Upgrade NowKeywords

This section is available to paid users only. Please upgrade to access this part.
Upgrade NowHighlights

This section is available to paid users only. Please upgrade to access this part.
Upgrade NowTranscripts

This section is available to paid users only. Please upgrade to access this part.
Upgrade NowBrowse More Related Video

Types of Inter VLAN Routing & Basic Inter VLAN Routing Configuration | (VLAN PART 4)
Router on a Stick Inter-VLAN Routing | CISCO Certification

Aula 04 - Curso de Redes de Computadores Básico Mão na Massa - Gateway e Interface Vlan
Single Switch VLAN in Packet Tracer
VLAN trunking
Tutorial - Cara Konfigurasi VLAN pada Cisco Packet Tracer (Untuk Pemula)
5.0 / 5 (0 votes)