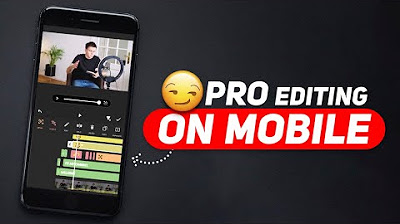
8 Editing Techniques to Make VIRAL YouTube Videos

DecodingYT
11 Mar 202430:37

Summary

TLDRThis video script outlines a tutorial on advanced mobile video editing techniques to enhance YouTube content. The instructor shares methods for creating custom animations, character movements, and text highlights. They demonstrate how to add progress bars, change text color in articles or screenshots, and implement number counting animations. The tutorial also covers the use of frames for smooth transitions and the application of various presets to manipulate animation speed. Aimed at improving video quality and engaging viewers, the script promises to teach these techniques using a mobile video editor like InShot.

Takeaways

  • 🎥 The video is about advanced mobile video editing techniques to enhance YouTube content.
  • 📱 The speaker has received comments and messages about editing videos on a mobile phone, emphasizing its feasibility and popularity despite some disbelief.
  • 📈 The video aims to demonstrate how the speaker achieved 19 million views and over 350,000 subscribers by editing videos on their smartphone.
  • 🔥 The tutorial covers advanced editing features such as creating custom animations, changing word colors in articles or screenshots, and adding progress bars and cool animations.
  • 📚 The importance of learning to use 'keyframes' is highlighted as it is essential for creating animations and transitions within the video.
  • 🎨 Keyframes allow for the definition of start and end points for any element in a video, enabling creative animations between these points.
  • 📹 Examples are given on how to use keyframes for various effects, such as making an element enter or exit the screen, resizing text, and fading in or out.
  • 🌟 The video mentions the use of 'keyframe presets' to manipulate the movement of animations and add smoothness, which can be applied to text stacks or main footage.
  • 🛠️ Viewers are taught how to add cool progress bars to their videos, with customization options for color and head design.
  • 🔍 A technique for highlighting words in articles or screenshots is shared, offering a professional alternative to the conventional text highlighting method.
  • 📊 The script introduces a method for creating a 'number counting' animation, which can be useful for storytelling and displaying subscriber or follower counts.

Q & A

  • What is the main topic of the video?

    -The main topic of the video is advanced video editing techniques for creating engaging content on platforms like YouTube.

  • How has the author's approach to video editing changed?

    -The author has transitioned from using a computer to editing videos on their smartphone, which has resulted in gaining more than 19 million views and over 350,000 subscribers.

  • What are some of the advanced editing techniques covered in the video?

    -The video covers techniques such as creating custom channel names with motion backgrounds, animating characters, changing text color in articles or screenshots, and creating number counting animations.

  • How does the author suggest creating motion backgrounds for channel names?

    -The author will teach viewers how to create custom motion backgrounds and characters to animate them, although the specific steps are not detailed in the provided transcript.

  • What is the importance of using frames in video editing according to the video?

    -Frames are important in video editing as they help define the starting and ending points of any element or animation within the video, which can significantly enhance the quality of the editing.

  • How can viewers apply the techniques shown in the video to any editing app?

    -Viewers can apply these techniques in any editing app by understanding the principles and following the steps demonstrated, such as using keyframe animation and other effects.

  • What is the purpose of using keyframe presets in the video?

    -Keyframe presets are used to manipulate the movement of animations and add smoothness to the transitions between different frames in the video.

  • How does the author suggest adding progress bars to videos?

    -The author explains how to add customizable progress bars to videos by creating text elements, adjusting their properties, and animating them from the start to the end of the video clip.

  • What is the process of creating a highlight effect on text in an article or screenshot?

    -The process involves creating a highlight strip using a photo editor, adjusting its size and blending mode, and then placing it over the text in the video to create a professional highlight effect.

  • How can viewers create a number counting animation in the video?

    -Viewers can create a number counting animation by typing the numbers in sequence, duplicating text layers, and adjusting the timing to make the numbers appear to count up dynamically.

  • What is the final result of applying the video editing techniques discussed in the video?

    -The final result is a more engaging and visually appealing video with smooth animations, custom backgrounds, highlighted text, and other effects that can enhance storytelling and viewer experience.

Outlines

00:00

📱 Mobile Video Editing Techniques

The speaker introduces advanced mobile video editing techniques, emphasizing the capability to edit videos on smartphones. They mention having over 19 million views and 350,000 subscribers, achieved by editing videos on their smartphone. The video aims to teach viewers how to create custom animations, character animations, change word colors in articles or screenshots, and add cool progress bars and number counting animations. The speaker uses their go-to video editor, 'Short', to demonstrate these techniques, starting with the importance of framing and how to use it to enhance video animations.

05:01

🎨 Customizing Video Elements with Animation

This paragraph delves into the customization of video elements through animation. The speaker explains how to add cool progress bars to videos, allowing viewers to choose colors and head designs according to their preferences. They demonstrate how to create these elements, including extending the progress bar to the end of the clip and adding an animation to it. Additionally, the speaker shows how to use 'keyframes' to manipulate the size and position of elements, and discusses the use of presets for frame animations to avoid a monotonous look, enhancing the overall video editing experience.

10:02

🔍 Highlighting Text and Creating Number Counting Effects

The speaker discusses how to highlight text in videos professionally, a technique that can be used to emphasize certain words or phrases. They also introduce a method for creating a number counting effect, which can be visually appealing and useful for storytelling with numbers, such as subscriber counts or follow-up animations. The process involves typing the desired number and extending the animation to the end of the clip, then splitting the text element and deleting the unwanted part to create a smooth transition between numbers.

15:02

📊 Magnifying Parts of an Image or Video

This section covers the process of magnifying a specific part of an image or video to emphasize details. The speaker guides through importing the image or video, then using the 'magnify' option to focus on a particular area. They explain how to adjust the radius and stroke width for the magnifier effect and suggest adding sound effects at the start of the magnification to enhance the viewer's experience. Additionally, the speaker mentions the possibility of moving the magnifier from one area to another on the screen using keyframes.

20:05

🎭 Creating and Animating Custom Characters

The speaker provides a tutorial on creating and animating custom characters for videos. They suggest using stock images from websites like PixelsPub and Freepik, and emphasize the importance of finding images with consistent outfits for the characters. The process involves importing the character image, using the 'cutout' option to remove the background, and placing the character on the screen. The speaker then demonstrates how to animate the character's entrance and movement across the screen, adding smoothness to the animation using keyframe presets.

25:05

📹 Adding Text Behind a Person and Creating Motion Backgrounds

This paragraph focuses on the effect of adding text behind a person in a video and creating motion backgrounds. The speaker explains how to use the 'cutout' feature in the photo editor to make the text transparent, then resize and place it behind the person in the video. They also demonstrate creating a motion background by typing the desired word multiple times, adjusting the opacity, and bending the text. The process involves extending the text layer to the end of the video, adding keyframes for rotation, and resizing the text to fill the screen, creating an engaging motion background effect.

30:09

🌟 Wrapping Up New Video Editing Techniques

In the conclusion, the speaker summarizes the new video editing techniques shared in the tutorial. They invite viewers to comment on their favorite technique or which one they found most useful. The speaker also mentions that this tutorial is the third in their mobile video editing playlist, encouraging viewers to check out the previous parts and stay tuned for future content.

Mindmap

Keywords

💡Video Editing

Video editing is the process of manipulating and combining multiple video clips to produce a final video product. In the context of the video, the theme revolves around advanced video editing techniques that can be performed on a smartphone, emphasizing the accessibility and creativity involved in creating professional-looking videos on mobile devices.

💡YouTube Comments

YouTube Comments refer to the feedback or reactions from viewers that appear under a video on the YouTube platform. In the script, the author mentions receiving comments expressing disbelief that the videos are edited on a mobile phone, highlighting the impressive results achievable with mobile editing tools.

💡Millions of Views

This term refers to the number of times a video has been watched on YouTube, which is a key metric for gauging a video's popularity and reach. The script mentions '19 million views,' indicating the significant audience engagement that can be achieved through proficient video editing and content creation.

💡Subscribers

Subscribers are individuals who have chosen to follow a YouTube channel to receive updates on new content. The script mentions 'over 350,000 subscribers,' showcasing the growth and community that can be built through consistent and engaging video editing and publishing.

💡Smartphone

A smartphone is a handheld personal computer in the form of a mobile device with extensive computing and communication capabilities. The video's theme emphasizes editing videos on a smartphone, demonstrating that professional-quality content can be created without the need for heavy, traditional editing equipment.

💡Frame Tool

The frame tool is a feature in video editing software that allows users to define the starting and ending points of an animation or transition. The script explains how to use the frame tool to create animations, such as elements entering or exiting the screen, which is crucial for adding dynamic effects to videos.

💡Animation

Animation in video editing refers to the process of creating motion and the illusion of life in still images or text. The script discusses various types of animations, such as fading in and out, zooming, and custom character animations, which are essential for engaging viewers and enhancing storytelling.

💡Progress Bars

Progress bars are visual indicators that show the advancement of a video or a specific segment within a video. The script provides instructions on how to add and animate progress bars in videos, which can be used to create visually appealing segments or to indicate the passage of time.

💡Highlighting Text

Highlighting text in video editing is the process of drawing attention to specific words or phrases within the video. The script describes a professional method of highlighting text in articles or screenshots, which can help in emphasizing key points or creating a polished look.

💡Character Animation

Character animation involves creating movement and expressions for characters in a video. The script explains how to animate custom characters, which adds a personal and engaging element to videos, making them more relatable and entertaining for the audience.

💡Motion Background

A motion background is a dynamic visual element that can be used behind text or other video elements to create a sense of movement or depth. The script provides a tutorial on creating a motion background with text animation, which can be used to enhance the visual appeal of a channel's branding.

Highlights

Introduction of advanced video editing techniques for mobile.

Achieving over 19 million views and 350,000 subscribers by editing videos on a smartphone.

Teaching how to create custom channel names and backgrounds with motion effects.

Animating characters and changing word colors in articles or screenshots.

Creating cool animations like progress bars and number counting.

Adding cool progress bars to videos with full customization.

Using 'Frames' tool to define start and end points for animations.

Manipulating size and position with keyframe properties.

Creating zoom-in effects using keyframes on stock videos.

Using frame presets to manipulate animation movement and add smoothness.

Highlighting text in a professional manner for articles or screenshots.

Creating a subscriber count animation to depict numbers effectively.

Adding a magnifying effect to focus on specific parts of an article screenshot or image.

Creating custom characters and animating them for engaging content.

Importing stock images and removing backgrounds using the cutout option.

Animating characters by adding keyframes for entrance and movement.

Adding sound effects to animations to enhance the viewing experience.

Creating a motion background for videos with text animation effects.

Using text bending and rotation to create dynamic motion backgrounds.

Transcripts

play00:00

एक प्रोफेशनल वीडियो एडिट करके

play00:06

youtube2 कमेंट्स और मैसेजेस आ चुके हैं

play00:09

वेयर पीपल से कि उन्हें बिलीव नहीं होता

play00:11

कि मैं वीडियोस मोबाइल पे एडिट करता हूं

play00:13

बट इट इज ट्रू आईव गॉट मोर दन 19 मिलियन

play00:16

व्यूज एंड ओवर 350000 सब्सक्राइबर्स जस्ट

play00:19

बाय एडिटिंग वीडियोस ऑन माय स्मार्टफोन

play00:21

एंड इस वीडियो में मैं यह एडवांस्ड

play00:23

एडिटिंग आपको भी सिखाने वाला हूं आई विल

play00:25

टेल यू कि अपने चैनल नेम का ऐसा मोशन

play00:27

बैकग्राउंड कैसे क्रिएट करें ऐसे कस्टम

play00:29

कैरेक्टर बनाकर उन्हें एनिमेट कैसे करें

play00:32

किसी भी आर्टिकल या स्क्रीनशॉट में वर्ड्स

play00:34

के कलर को चेंज कैसे करें नंबर काउंटिंग

play00:36

वाला यह कूल एनिमेशन कैसे बनाएं वीडियो

play00:38

में ऐसे कूल प्रोग्रेस बार्स कैसे लगाएं

play00:40

एंड और भी बहुत कुछ सीखेंगे इस एक वीडियो

play00:43

में आप इन टेक्निक्स को किसी भी एडिटिंग

play00:45

ऐप में अप्लाई कर सकते हो जैसे इन शॉर्ट

play00:47

कैप कट काइ मास्टर v ए लेकिन एक्सप्लेनेशन

play00:50

के लिए मैं यूज करूंगा मेरा गो टू वीडियो

play00:52

एडिटर दैट इज इन शॉर्ट सो लेट्स

play00:55

[संगीत]

play00:57

बिगिन आई थिंक इट्स इंपॉर्टेंट कि सबसे

play01:00

पहले हम की फ्रेम्स यूज करना सीखें बिकॉज

play01:02

इस ट्यूटोरियल में आगे बहुत सारे

play01:03

टेक्निक्स कवर्ड हैं जिनमें की फ्रेमिंग

play01:05

का यूज होगा आप मेरे वीडियोस में जो भी

play01:07

एनिमेशन देखते हो जैसे किसी एलिमेंट का

play01:10

स्क्रीन के अंदर आना बाहर जाना किसी

play01:12

टेक्स्ट का साइज बड़ा या छोटा होना या

play01:15

ग्रैजुअली स्क्रीन से फेड आउट हो जाना दिस

play01:17

इज ऑल पॉसिबल बिकॉज ऑफ की फ्रेमिंग अगर आप

play01:20

की फ्रेम्स को अच्छे से यूज करना सीख जाते

play01:22

हो देन योर एडिटिंग विल बिकम 10 टाइम्स

play01:24

बेटर दन पीपल हु डोंट यूज इट सो लेट्स

play01:27

लर्न अबाउट

play01:28

इट

play01:31

सो व्हाट इज की फ्रेम बेसिकली यह एक टूल

play01:34

है जिसके हेल्प से आप वीडियो में किसी भी

play01:36

चीज के स्टार्टिंग पॉइंट और एंड पॉइंट को

play01:38

डिफाइन कर सकते हो और उन दोनों पॉइंट्स के

play01:40

बीच एनिमेशन क्रिएट कर सकते हो फॉर

play01:42

एग्जांपल अभी यहां पर एक

play01:44

पीआईपीसी के

play01:48

लिए एंड यहां पर आप देख सकते हो एक

play01:50

इनवर्टेड ट्रायंगल वाला ऑप्शन है इसी के

play01:52

हेल्प से हम की फ्रेम्स को ऐड और रिमूव

play01:55

करेंगे तो अभी मैं यहां पर पहला कीफ्रेम

play01:57

ऐड कर देता हूं लाइक दिस यह हो गया इसका

play01:59

स्टार्ट स्टिंग पॉइंट फिर टाइमलाइन में

play02:01

कुछ सेकंड्स आगे बढ़ जाऊंगा और यहां पर

play02:04

दूसरा की फ्रेम ऐड करके इस वीआईपी को जूम

play02:07

कर दूंगा यह हो जाएगा इसका एंडिंग पॉइंट

play02:10

एंड नाउ इफ आई प्ले द वीडियो फ्रॉम द वेरी

play02:12

बिगिनिंग

play02:13

यू कैन सी हमारे

play02:28

पीआईपीएसी फिर टाइमलाइन में कुछ सेकंड्स

play02:31

आगे बढ़ जाऊंगा एंड यहां पर ऐड करूंगा

play02:33

दूसरा की फ्रेम और इस

play02:36

पीआईपीसी इड प्लेस कर

play02:39

दूंगा ये हो जाएगा इसका एंडिंग पॉइंट एंड

play02:42

नाउ इफ आई प्ले दिस यू कैन सी हमारे

play02:49

पीआईपीएसी को मैनिपुलेट किया दैट इज साइज

play02:52

एंड पोजीशन बट ऑफ कोर्स जो दूसरी

play02:54

प्रॉपर्टीज हैं उनके साथ भी हम खेल सकते

play02:56

हैं फॉर एग्जांपल ओपेसिटी सो अभी यू कैन

play02:58

सी मैं सेकंड की की फ्रेम में हूं यहां पर

play03:01

मैं इसकी ओपेसिटी को जीरो कर दूंगा एंड ऑफ

play03:04

कोर्स फर्स्ट वाले की फ्रेम में इसकी

play03:05

ओपेसिटी 100 है सो अब स्टार्टिंग पॉइंट और

play03:08

एंड पॉइंट के बीच एक न्यू फेड आउट एनिमेशन

play03:10

क्रिएट हो चुका

play03:14

है सो आई थिंक आपको समझ आ रहा होगा कि की

play03:17

फ्रेम्स का यूज कैसे करते हैं आगे जब हम

play03:19

और भी एडवांस टेक्निक्स देखेंगे तो यू विल

play03:21

नो कि ये कितना पावरफुल टूल है ऑफकोर्स

play03:23

नॉट ओनली पीईपी बट टेक्स्ट स्टकर या फिर

play03:26

जो मेन फुटेज है उसमें भी आप की फ्रेम्स

play03:28

का यूज़ कर सकते फॉर एग्जांपल यहां पर एक

play03:31

स्टॉक वीडियो इंपोर्ट कर लेते हैं लेट्स

play03:33

टेक दिस वन एंड अभी आप देख सकते हो इसमें

play03:36

कुछ खास मूवमेंट नहीं

play03:39

है तो मैं इस वीडियो के बिल्कुल

play03:41

स्टार्टिंग में आ जाऊंगा एंड पहला की

play03:43

फ्रेम यहां पर ऐड करते हैं दिस इज द

play03:45

स्टार्टिंग पॉइंट फिर टाइमलाइन में 5

play03:47

सेकंड आगे बढ़ जाते

play03:51

हैं एंड दूसरा की फ्रेम यहां पर ऐड करके

play03:55

वीडियो को जूम इन कर दूंगा यह हो गया इसका

play03:57

एंडिंग पॉइंट एंड नाउ इ आई प्ले दिस यू

play04:01

कैन सी वीडियो में एक जूम इन इफेक्ट

play04:02

क्रिएट हो चुका

play04:05

है अच्छा अब लेट्स टॉक अबाउट की फ्रेम ईज

play04:08

प्रीसेट्स अगर मैं अभी स्क्रीन पर एक

play04:11

पीईपी ऐड करूं एंड इसमें एक सिंपल सा

play04:14

लेफ्ट टू राइट एनिमेशन क्रिएट करूं यूजिंग

play04:16

की

play04:21

फ्रेम्स तो आप देख सकते हो कि यह बहुत ही

play04:24

कांस्टेंट स्पीड के साथ मूव कर रहा है

play04:25

बिकॉज ऑफ व्हिच इट लुक्स अ लिटिल बोरिंग

play04:28

तो इसे इंटरेस्टिंग बनाने के लिए हम यूज़

play04:30

करेंगे की फ्रेम ईज का इसके लिए दो की

play04:32

फ्रेम्स के बीच में जाओ फिर यहां पर

play04:34

स्वाइप करोगे तो यू विल सी देयर इज अ फीचर

play04:36

कॉल्ड ईज इस पे क्लिक करो हियर यू विल

play04:40

फाइंड नाइन बिल्ट इन प्रीसेट्स जिसके

play04:42

हेल्प से आप की फ्रेम एनिमेशन के मूवमेंट

play04:44

को मैनिपुलेट कर सकते हो एंड इसमें

play04:46

स्मूदनेस ऐड कर सकते हो लाइक करेंटली यहां

play04:49

पर डिफॉल्ट प्रीसेट सिलेक्टेड है तो आप

play04:51

देख सकते हो कि ये

play04:54

पीआईपीसी सेलेक्ट कर दूं तो यू कैन सी इट

play04:56

लुक्स सो मच बेटर ऑफकोर्स जो बाकी

play04:59

प्रीसेट्स है वो भी बहुत यूजफुल है एंड आई

play05:01

यूज देम इन माय वीडियोस सो आपको खुद से

play05:03

देखना होगा कि एक पर्टिकुलर एनिमेशन के

play05:05

लिए कौन सा प्रीसेट बेस्ट

play05:10

रहेगा सो क्योंकि हमने की फ्रेम्स यूज

play05:13

करना सीख लिया है नाउ इट्स टाइम कि हम

play05:14

उसके हेल्प से और भी फन चीजें क्रिएट करें

play05:17

अब देखते हैं कि कैसे आप अपने वीडियोस में

play05:19

ऐसे कूल प्रोग्रेस बार्स ऐड कर सकते हो

play05:21

दिस इज फुली कस्टमाइजेबल मतलब आप इस बार

play05:24

का कलर एंड हेड डिजाइन अपने पसंद से चूज

play05:26

कर सकते हो लेट्स सी

play05:28

हाउ ऑलराइट सो सबसे पहले एक वीडियो

play05:31

इंपोर्ट करेंगे जिसमें प्रोग्रेस बार ऐड

play05:33

करना है फिर हम टेक्स्ट पर जाएंगे एंड

play05:35

बहुत सारे स्पेसेस टाइप करना है हमें ऐसा

play05:38

क्यों करना है यह आप बाद में समझ

play05:42

जाओगे उसके बाद कलर व्हील वाले ऑप्शन पर

play05:45

क्लिक करो लेबल पर जाओ फिर जिस भी कलर का

play05:48

प्रोग्रेस पर्ट चाहिए उसे सेलेक्ट कर

play05:50

लेंगे फॉर एग्जांपल आई विल सेलेक्ट रेड आप

play05:53

कोई भी कलर सेलेक्ट कर सकते हो और इफ यू

play05:55

वांट आप इंग्रेडिएंट्स में से भी कोई चूज

play05:57

कर सकते हो लाइक दिस

play06:00

फिर इसे चेक करके रिसाइट कर दूंगा स्क्रीन

play06:03

पर ताकि फुल स्क्रीन में फिट हो

play06:07

जाए अब ऑफकोर्स एक प्रोग्रेस बार वीडियो

play06:10

के स्टार्ट से एंड तक रहता है तो मैं इसे

play06:12

क्लिप के एंड तक एक्सटेंड कर दूंगा फिर हम

play06:16

इस टेक्स्ट एलिमेंट को स्क्रीन के बॉटम

play06:18

में प्लेस कर देंगे सो इट लुक्स लाइक अ

play06:20

प्रोग्रेस

play06:23

बार सो अब हमारा प्रोग्रेस बार बनके रेडी

play06:26

है इसमें सिर्फ एनिमेशन ऐड करना बाकी है

play06:28

तो एनिमेशन के लिए क्लिप के सबसे एंड में

play06:30

चले जाओ एंड एक की फ्रेम यहां पर ऐड कर दो

play06:33

यह हो जाएगा इसका एंडिंग पॉइंट फिर क्लिप

play06:36

के बिल्कुल स्टार्ट में आ जाओ एंड एक की

play06:38

फ्रेम यहां पर ऐड कर दो यह इसका

play06:40

स्टार्टिंग पॉइंट है तो हम इस प्रोग्रेस

play06:42

बार को उठाकर स्क्रीन के बिल्कुल स्टार्ट

play06:44

में ले

play06:45

आएंगे लाइक

play06:47

दिस नाउ इफ आई प्ले दिस यू कैन सी हमारा

play06:50

प्रोग्रेस बार एनिमेशन रेडी

play06:58

है

play07:00

अब एक स्टेप आगे जाने के लिए हम इसमें एक

play07:03

हेड ऐड करेंगे वह कोई इमोजी हो सकता है

play07:05

कोई स्टकर हो सकता है या फिर आपके चैनल का

play07:07

लोगो भी हो सकता है एज पर योर विश तो इसके

play07:10

लिए क्लिप के बिल्कुल स्टार्ट में आ जाओ

play07:11

एंड स्टकर वाले ऑप्शन पर क्लिक करके यहां

play07:13

से आप अपने गैलरी का कोई भी स्टिकर

play07:15

इंपोर्ट कर सकते हो टू यूज एज द हेड ऑफ द

play07:17

प्रोग्रेस बार सो अभी मैं इनशॉट का एक

play07:20

बिल्ट इन स्टिकर यूज करने वाला हूं वच इज

play07:22

दिस

play07:25

वन इसके साइज को छोटा कर देंगे ए देन वील

play07:30

प्लेस इट नेक्स्ट टू द प्रोग्रेस

play07:37

बार मेक श्यर कि इसको भी आप क्लिप के एंड

play07:40

तक एक्सटेंड कर दो लाइक दिस एंड नाउ आई एम

play07:44

श्यर कि आप समझ गए होंगे कि आगे क्या करना

play07:46

है पहला की फ्रेम यहां पर ऐड कर दो फिर

play07:49

क्लिप के बिल्कुल एंड में चले जाओ एंड

play07:51

यहां पर ऐड कर देंगे दूसरा की फ्रेम फिर

play07:53

स्टिकर को उठा के बिल्कुल एंड में प्लेस

play07:55

कर देते

play07:57

हैं और यह हो जाएगा इसका एंडिंग पॉइंट एंड

play08:01

नाउ इफ आई प्ले द वीडियो यू कैन सी हमने

play08:03

एक बहुत ही कूल प्रोग्रेस बार एनिमेशन

play08:05

क्रिएट कर लिया

play08:16

है नेक्स्ट अप आई वांट टू टीच यू कि किसी

play08:19

भी आर्टिकल या स्क्रीनशॉट में वर्ड्स को

play08:21

ऐसे हाईलाइट कैसे करें नॉर्मली जैसे लोग

play08:23

टेक्स्ट को हाईलाइट करते हैं उसके

play08:25

कंपैरिजन में यह नया तरीका बहुत ही

play08:26

प्रोफेशनल लगता है सो या लेट्स लर्न दिस

play08:29

इस इफेक्ट के लिए सबसे पहले हम बनाएंगे एक

play08:31

हाईलाइट स्ट्रिप जिसका यूज हम बार-बार

play08:33

अपने वीडियोस में कर सकें तो इन शॉर्ट के

play08:36

फोटो एडिटर पर क्लिक करो न्यू प्रोजेक्ट

play08:38

पर जाओ और एक ब्लैंक फाइल इंपोर्ट कर लो

play08:40

देन क्लिक ऑन कैनवस एंड सिलेक्ट नो फ्रेम

play08:44

उसके बाद क्लिक ऑन बैकग्राउंड और जिस भी

play08:46

कलर से आप टेक्स्ट को हाईलाइट करना चाहते

play08:48

हो उसे सेलेक्ट कर लो फॉर एग्जांपल आई विल

play08:51

गो फॉर रेड एंड मैं इसे चेक कर

play08:53

दूंगा इसके बाद हम क्रॉप वाले ऑप्शन पर

play08:56

जाएंगे एंड इसे नीचे से क्रॉप कर देंगे

play08:59

ताकि हमें एक लंबी हॉरिजॉन्टल स्ट्रिप मिल

play09:02

जाए एंड देन इसे सेव कर

play09:07

दो इसके बाद इनशॉट के वीडियो एडिटर में आ

play09:10

जाओ न्यू प्रोजेक्ट पर क्लिक करो और जो भी

play09:12

आर्टिकल या स्क्रीनशॉट है उसे इंपोर्ट कर

play09:16

लो अब लेट्स से हमें स्क्रीनशॉट में

play09:19

मोबाइल वीडियो एडिटिंग इन तीन वड्स को

play09:21

हाईलाइट करना है तो टाइमलाइन पर उस पॉइंट

play09:23

पर आ जाएंगे जहां से मैं हाईलाइट इफेक्ट

play09:25

क्रिएट करना चाहता हूं देन आई विल क्लिक

play09:27

ऑन पीईपी एंड जो हाईलाइट हमने क्रिएट किया

play09:30

है उसे इंपोर्ट कर लेंगे फिर इसके साइज को

play09:33

भी एडजस्ट कर देते हैं एंड देन आई विल

play09:35

प्लेस इट ऑन द थ्री वर्थस मोबाइल वीडियो

play09:49

एडिटिंग अब आप देख सकते हो कि इस हाईलाइट

play09:51

स्ट्रिप ने बहुत ही अच्छे से इन तीनो

play09:53

वर्ल्स को कवर कर लिया है तो मैं इस लेयर

play09:55

पर क्लिक करूंगा एंड यहां पर देखो एक

play09:57

ऑप्शन है ब्लेंड इस पर क्लिक करो यहां पर

play09:59

आप देख सकते हो बहुत सारे ब्लेंड मोड्स

play10:01

हैं तो अगर आपके स्क्रीनशॉट में

play10:03

बैकग्राउंड ब्लैक है देन इन दैट केस यू

play10:06

विल सेलेक्ट डार्क एन एंड यू कैन सी यह

play10:08

तीनों ही वर्ड्स बहुत ही अच्छे से हाईलाइट

play10:10

हो चुके हैं यू कैन इवन सिलेक्ट कि इसकी

play10:11

ओपेसिटी कितनी होनी चाहिए तो मैं इसे अभी

play10:13

के लिए फुल रखूंगा वही अगर आपका

play10:16

बैकग्राउंड वाइट होता तो फिर यह वाला

play10:17

ब्लेंड मोड काम नहीं करता इन दैट केस आपको

play10:20

सेलेक्ट करना होता लाइटन या फिर स्क्रीन

play10:23

एंड यू कैन सी टेक्स्ट बहुत ही अच्छे से

play10:25

हाईलाइट हो चुका

play10:28

है

play10:31

यह नंबर काउंटिंग इफेक्ट बहुत ही कूल लगता

play10:33

है देखने में एंड इट इज रियली हेल्पफुल टू

play10:36

टेल अ स्टोरी विद नंबर्स लाइक आप इसे

play10:38

सब्सक्राइबर या फॉलो अकाउंट एनिमेशन के

play10:40

लिए यूज कर सकते हो यू कैन यूज इट टू शो

play10:42

समवनस नेटवर्थ और डिपिक्ट अ कोर्स ऑफ

play10:46

टाइम इस एनिमेशन को बनाने के लिए मैं सबसे

play10:48

पहले इन शॉर्ट में एक ब्लैंक फाइल इंपोर्ट

play10:50

कर लूंगा और इसके ड्यूरेशन को 60 सेकंड्स

play10:52

कर देते

play10:54

हैं अब लेट्स से मुझे डिकोडिंग वाटी के

play10:56

लिए सब्सक्राइबर काउंट एनिमेशन बनाना है

play10:59

तो आई विल क्लिक ऑन टेक्स्ट एंड मैं अपने

play11:01

चैनल का नेम टाइप कर दूंगा फिर इसे

play11:10

रीसाइक्लिंग तक एक्सटेंड कर

play11:14

देंगे सो टेक्स्ट पर जाओ एंड जिस भी नंबर

play11:18

से आप चाहते हो कि एनिमेशन शुरू हो उसे

play11:19

टाइप कर दो सो आई विल राइट वन एंड इसके

play11:23

साइज को बढ़ा देते

play11:27

हैं

play11:30

फिर इसे भी क्लिप के एंड तक एक्सटेंड कर

play11:32

देंगे अब जो आगे का प्रोसेस है इट इज अ

play11:35

बिट लॉन्ग बट ट्रस्ट मी इट विल बी वर्थ इट

play11:37

सो अभी देख रहे हो हम टाइमलाइन के बिल्कुल

play11:39

स्टार्ट में है यानी जीरो सेकंड्स पर तो

play11:41

अब मैं इस टेक्स्ट एलिमेंट पर क्लिक

play11:43

करूंगा और टाइमलाइन में 0.1 सेकंड्स आगे

play11:46

बढ़

play11:49

जाऊंगा लाइक दिस एंड यहां पर इस टेक्स्ट

play11:52

एलिमेंट को हम स्प्लिट कर

play11:54

देंगे फिर जो राइट साइड का हिस्सा बच गया

play11:57

है जो सिलेक्टेड है उसे डिलीट कर देंगे

play11:59

एंड नाउ यू कैन सी हमारे पास एक बहुत ही

play12:01

पतला सा टेक्स्ट एलिमेंट बच गया है सो

play12:04

वापस से टाइमलाइन के बिल्कुल स्टार्ट में

play12:05

जाओ इस परे क्लिक करो एंड देन क्लिक ऑन

play12:08

डुप्लीकेट उसके बाद यहां जो पेंसिल आइकॉन

play12:11

है उस परे क्लिक करो एंड इस टेक्स्ट को

play12:13

एडिट करके अब मैं टू कर

play12:15

दूंगा देन अगेन हम टेक्स्ट को डुप्लीकेट

play12:18

करेंगे फिर से पेंसिल आइकॉन प जाऊंगा एंड

play12:21

इस बार इसे एडिट करके थ्री कर

play12:23

दूंगा वंस अगेन डुप्लीकेट एडिट एंड आई विल

play12:28

मेक दिस फोर

play12:29

एंड फिर इसी प्रोसेस को हमें रिपीट करते

play12:31

जाना

play12:36

है सो अगर मैं अभी इसे प्ले करके दिखाऊं

play12:39

तो यू कैन सी हमने वन से लेकर 10 तक

play12:41

एनिमेशन क्रिएट कर दिया है बट ऑफकोर्स

play12:43

सिर्फ 10 तक एनिमेट नहीं करना है नंबर्स

play12:44

को तो मैं आगे भी कर लेता

play12:57

हूं

play12:59

सो अभी मैंने वन से लेकर 100 तक नंबर्स को

play13:01

टाइप किया है एक बार इसे शुरू से प्ले

play13:03

करके देखते

play13:20

हैं सो या इट डेफिनेटली डिड टेक सम टाइम

play13:23

बट यू कैन सी द फाइनल रिजल्ट इज रियली कूल

play13:25

अभी ऑफकोर्स सिर्फ 100 तक ही एनिमेट करना

play13:27

था नंबर्स को सो वन से लेके 100 के बीच

play13:29

में जितने भी नंबर्स आते हैं मैंने सभी को

play13:31

टाइप किया है बट लेट्स से आप और भी बड़े

play13:32

नंबर्स को एनिमेट करते हो जैसे 200 300 तक

play13:35

तो ओबवियसली बीच में बहुत सारे नंबर्स को

play13:37

आपको स्किप करना पड़ेगा अदर वाइज इट विल

play13:39

टेक सो मच टाइम लाइक 100 से 200 तक जाना

play13:42

है तो आप टाइप कर सकते हो 100 110 120 130

play13:46

ताकि ज्यादा टाइम ना लगे सो अब मैं इस

play13:49

लास्ट वाले टेक्स्ट लेयर पर आ जाऊंगा एंड

play13:51

इसे सेलेक्ट करके वीडियो के एंड तक

play13:52

एक्सटेंड कर दूंगा फिर इसे सेव कर देते

play13:56

हैं एंड लेट मी शो यू कि आप इस एनिमेशन को

play14:00

और भी कूल कैसे बना सकते हो ऑलराइट तो अभी

play14:03

मैंने यहां एक न्यू फाइल में एक मोशन

play14:05

बैकग्राउंड इंपोर्ट कर लिया है एज यू कैन

play14:07

सी एंड इसके ओपेसिटी को भी मैंने कम कर

play14:09

दिया है सो मैं इसके बिल्कुल स्टार्ट में

play14:11

आ जाऊंगा

play14:29

इस लेयर के बिल्कुल स्टार्ट में ऐड कर

play14:30

दूंगा यह हो गया इसका स्टार्टिंग पॉइंट

play14:32

एंड दूसरा वाला की फ्रेम इस लेयर के

play14:34

बिल्कुल एंड में ऐड कर देंगे एंड वीडियो

play14:36

को जूम इन कर

play14:39

देंगे एंड नाउ इफ आई प्ले दिस फ्रॉम द

play14:42

वेरी स्टार्ट यू कैन सी एनिमेशन पहले से

play14:44

भी बेटर लग रहा

play14:48

है सो दिस वाज जस्ट एन एग्जांपल कि य

play14:50

एनिमेशन क्रिएट करने के बाद आप इसे किसी

play14:52

भी वीडियो में कैसे यूज कर सकते

play14:57

हो

play15:00

यूजिंग दिस नेक्स्ट टेक्निक आप स्क्रीन पर

play15:02

आ रहे हैं किसी भी आर्टिकल स्क्रीनशॉट या

play15:04

इमेज के एक पर्टिकुलर हिस्से को मैग्नीफाई

play15:06

कर सकते हो तो सबसे पहले जिस भी फोटो या

play15:10

वीडियो पर यह इफेक्ट ऐड करना है उसे

play15:12

टाइमलाइन पर इंपोर्ट कर लो जैसा मैंने

play15:14

स्क्रीनशॉट को किया है फिर टाइमलाइन में

play15:16

वहां आ जाओ जहां पर मैग्नीफिकेशन क्रिएट

play15:17

करना है एंड क्लिक ऑन स्टकर देन क्लिक ऑन

play15:21

डिटेल एंड यहां पर देखो एक ऑप्शन है

play15:23

मैग्नीफायर उस पर क्लिक

play15:25

करो एंड एज यू कैन सी स्क्रीन पर एक

play15:29

आ चुका है तो जिस भी एरिया को मैग्नीफाई

play15:31

करना चाहते हो इसे वहां प्लेस कर

play15:34

दो इसके रेडियस को भी बढ़ा सकते

play15:44

हैं अब इसके भी दो सेटिंग्स है फर्स्ट

play15:47

सेटिंग से आप यह डिसाइड कर सकते हो कि

play15:48

स्क्रीन कितना मैग्नीफाई होगा तो मैं अभी

play15:51

के लिए

play15:52

इसे 20 रख देता हूं सेकंड है स्ट्रोक

play15:56

विड्थ यानी कि मैग्नीफायर के अराउंड जो

play15:58

स्ट्रोक है उसकी विड्थ कितनी होनी चाहिए

play16:00

अभी यह विजिबल नहीं है तो इसका कलर कोई और

play16:02

सिलेक्ट कर लेते हैं लेट्स टेक

play16:05

रेड एंड विड्थ को 25 कर

play16:09

दूंगा नाउ यू कैन सी हमारा मैग्नीफायर

play16:12

स्क्रीन पर ऐड हो चुका है बट यह बहुत ही

play16:14

एटली स्क्रीन पर आ रहा है तो इसके लिए हम

play16:16

यूज करेंगे साउंड इफेक्ट का मैं इसके

play16:19

स्टार्ट में आ जाऊंगा देन आई विल गो टू

play16:21

म्यूजिक एंड यहां पर मेरे पास एक बॉटल

play16:24

कोर्क साउंड इफेक्ट है इसे ऐड कर देते

play16:27

हैं

play16:32

एंड एज यू कैन सी हमारे मैग्नीफायर में एक

play16:34

साउंड इफेक्ट भी ऐड हो चुका

play16:37

है अब ऑफकोर्स इफ यू वांट आप इस

play16:40

मैग्नीफायर को स्क्रीन के एक एरिया से

play16:42

दूसरे एरिया में मूव भी करा सकते हो

play16:43

यूजिंग की फ्रेम्स लाइक पहला की फ्रेम मैं

play16:47

यहां पर ऐड कर देता हूं यह हो गया इसका

play16:48

स्टार्टिंग पॉइंट एंड दूसरा वाला इसके

play16:51

जस्ट बगल

play16:52

में एंड इस मैग्नीफायर को उठा के मैं किसी

play16:56

और वर्ड पर ले आता हूं

play17:09

[संगीत]

play17:10

एंड नाउ इफ आई प्ले दिस यू कैन सी वी हैव

play17:12

एडेड अ वेरी नाइस एनिमेशन टू

play17:19

इट सो आपने बहुत से यूट्यूब के वीडियोस

play17:22

में ऐसे कस्टम कैरेक्टर्स देखे होंगे एंड

play17:24

यू मस्ट बी थिंकिंग कि इसे कैसे बनाते हैं

play17:26

वेल ऐसा कैरेक्टर अपने लोगों के साथ बनाना

play17:29

और उसे एनिमेट करना बहुत ही इजी है एंड इट

play17:31

हार्डली टेक्स फाइव मिनट्स अभी यह

play17:33

कैरेक्टर एनिमेशन ट्रेंड में भी है सो आई

play17:35

थॉट इसे सिखाना बनता है सो लेट्स लर्न दिस

play17:38

इस एनिमेशन को बनाने के लिए सबसे पहले

play17:40

आपको इस टाइप के स्टॉक इमेजेस की जरूरत

play17:42

पड़ेगी इन्हें आप पिक्सल्स पब और फ्री पिक

play17:45

जैसे वेबसाइट से डाउनलोड कर सकते हो बट आई

play17:47

नो इट्स अ बिट डिफिकल्ट टू फाइंड इमेजेस

play17:49

जिनमें सभी कैरेक्टर्स ने सेम आउटफिट पहना

play17:51

हो लाइक यहां पर देख सकते हो सभी

play17:53

कैरेक्टर्स ने वाइट शर्ट ब्लैक सूट और एक

play17:55

ब्लैक बो पहना है सो ऐसे कंसिस्टेंट

play17:57

इमेजेस फाइंड कर करना थोड़ा सा डिफिकल्ट

play17:59

है तो अगर आपको ये चार इमेजेस चाहिए तो

play18:01

डिस्क्रिप्शन में मैं एक लिंक दे दूंगा

play18:03

जहां से आप इन्हें डाउनलोड कर सकते हो एंड

play18:04

दे आर कंपलीटली फ्री नाउ लेट्स स्टार्ट

play18:06

एडिटिंग सबसे पहले इनशॉट के फोटो एडिटर

play18:09

में आ जाएंगे एंड एक्सप्लेनेशन के लिए इन

play18:11

चारों में से कोई भी एक इमेज इंपोर्ट कर

play18:13

लेते हैं लेट्स टेक दिस

play18:15

वन फिर उसके बाद यहां पर देखो कटआउट का

play18:18

ऑप्शन है इस पर क्लिक करो इससे इसका

play18:20

बैकग्राउंड कंपलीटली रिमूव हो

play18:22

जाएगा इसे थोड़ा रिसाइट कर देते हैं देन

play18:26

यू हैव टू क्लिक ऑन पीईपी एंड आपके चैनल

play18:28

का जो भी लोगो है उसे इंपोर्ट कर लो देन

play18:31

क्लिक ऑन मास्क एंड सेलेक्ट सर्कुलर मास्क

play18:34

इफ यू वांट इसमें कोई आउटलाइन भी लगा सकते

play18:36

हो लाइक

play18:37

दिस देन आई विल चेक दिस फिर हमारे लोगो को

play18:42

रिसाइट पर प्लेस कर

play18:54

देंगे एंड देयर वी गो हमारा पहला कैरेक्टर

play18:57

रेडी है सो इसे सेव कर

play19:00

देंगे अब यही सेम प्रोसेस आपको बाकी

play19:03

कैरेक्टर्स के लिए भी रिपीट करना है

play19:04

कैरेक्टर को इंपोर्ट करो कटआउट से उसका

play19:06

बैकग्राउंड रिमूव करो एंड अपना लोगो

play19:08

इंपोर्ट करके उसके हेड पर प्लेस कर दो सो

play19:11

क्योंकि हमने सभी कैरेक्टर्स को बना लिया

play19:13

है अब देखते हैं कि इन्हें एनिमेट कैसे

play19:15

करें तो सबसे पहले मैं यहां पर एक वीडियो

play19:17

बैकग्राउंड इंपोर्ट कर लूंगा लाइक दिस एंड

play19:20

इसके स्टार्ट में हम अपने कैरेक्टर को ऐड

play19:22

करेंगे सो लेट्स टेक दिस वन फिर इसे

play19:26

रिसाइट कर देते हैं तो फर्स्ट एनिमेशन के

play19:29

लिए मैं एक की फ्रेम बिल्कुल इसके स्टार्ट

play19:31

में ऐड कर दूंगा ये हो गया इसका

play19:32

स्टार्टिंग पॉइंट एंड दूसरा वाला की फ्रेम

play19:34

जस्ट इसके बगल में ऐड कर

play19:36

देंगे ये है इसका एंड पॉइंट फिर मैं

play19:39

फर्स्ट वाले की फ्रेम पर आऊंगा एंड इस

play19:40

कैरेक्टर को उठा के स्क्रीन के नीचे भेज

play19:42

दूंगा लाइक दिस एंड एज यू कैन सी हमारे

play19:46

कैरेक्टर में एक एंट्रेंस एनिमेशन क्रिएट

play19:48

हो चुका है ऑफकोर्स अगर इसे और स्मूथ

play19:50

बनाना है तो आप की फ्रेम ईज फीचर का यूज

play19:52

कर सकते हो सो यहां पर जितने भी प्रीसेट्स

play19:55

हैं इनमें से कोई सेलेक्ट कर सकते हो आई

play19:57

विल सेलेक्ट द सेकंड वन

play19:59

एंड आई विल चेक

play20:01

दिस लुक्स गुड सेकंड एनिमेशन के लिए यहां

play20:04

पर एक जूम इन इफेक्ट ऐड करता है तो एक की

play20:07

फ्रेम यहां पर ऐड कर दूंगा एंड दूसरा वाला

play20:09

जस्ट इसके बगल में ऐड कर देंगे एंड इस

play20:12

पॉइंट पर वीआईपी को जूम इन कर

play20:18

देंगे लाइक दिस यह हो गया इसका एंडिंग

play20:21

पॉइंट वंस अगेन एनिमेशन तो क्रिएट हो चुका

play20:23

है जूम इन वाला बस इन दोनों के बीच एक की

play20:26

फ्रेम ईज प्रीसेट यूज कर लेते हैं लेट्स

play20:28

टेक दिस वन और अब शुरू से देखते हैं कि

play20:32

एनिमेशन कैसा लग रहा

play20:35

है सो या इट्स लुकिंग ग्रेट तीसरे एनिमेशन

play20:38

के लिए मैं चाहता हूं कि यह कैरेक्टर

play20:40

स्क्रीन के सेंटर से राइट साइड में मूव हो

play20:42

जाए इसके लिए मैं एक की फ्रेम यहां पर ऐड

play20:45

कर दूंगा फिर इसके जस्ट बगल में ऐड कर

play20:47

देंगे दूसरा वाला की फ्रेम और इस कैरेक्टर

play20:50

को उठा के राइट साइड प्लेस कर

play20:55

देंगे यह हो गया इसका एंडिंग पॉइंट वंस

play20:59

अगेन ईज फीचर का यूज़ करेंगे इसमें

play21:00

स्मूदनेस ऐड करने के

play21:02

लिए एंड यू कैन सी आवर एनिमेशन इज लुकिंग

play21:08

ऑसम एक फाइनल एनिमेशन ऐड करते हैं जिसमें

play21:11

यह कैरेक्टर चेंज हो जाएगा सो आई वांट कि

play21:13

यह वाला कैरेक्टर स्क्रीन के नीचे चला जाए

play21:15

और जो दूसरा एक और कैरेक्टर हमने बनाया था

play21:17

जो स्क्रीन के लेफ्ट साइड पॉइंट कर रहा है

play21:19

वो आ जाए स्क्रीन पर तो उसके लिए मैं यहां

play21:21

पर एक की फ्रेम ऐड करूंगा और थोड़ा सा आगे

play21:23

बढ़ के नेक्स्ट की फ्रेम को ऐड कर दूंगा

play21:25

फिर इस कैरेक्टर को हम स्क्रीन के नीचे

play21:27

भेज देंगे

play21:29

लाइक दिस फिर इसमें थोड़ा स्मूदनेस ऐड कर

play21:34

देंगे अब यू कैन सी य कैरेक्टर स्क्रीन के

play21:37

नीचे तो जा रहा है अब इसी पॉइंट पर हमें

play21:38

दूसरे कैरेक्टर को भी इंट्रोड्यूस करना है

play21:41

तो मैं फिर से पीईपी पर जाऊंगा एंड यह

play21:44

वाला कैरेक्टर इंपोर्ट कर लूंगा स्क्रीन

play21:45

पर इसके साइज को बड़ा कर देते हैं लाइक

play21:49

दिस एंड से राइट साइड ले आते हैं एक बार

play21:54

देख लेते हैं कि इसका ओवरऑल साइज फर्स्ट

play21:56

वाले से मैच कर रहा है कि नहीं

play21:59

सो या सेम ही है तो इस नए वाले कैरेक्टर

play22:02

के बिल्कुल स्टार्ट में आ जाएंगे बाय डबल

play22:04

क्लिक ऑन इट एक की फ्रेम यहां पर ऐड करते

play22:08

हैं यह हो गया इसका स्टार्टिंग पॉइंट और

play22:10

दूसरा वाला जस्ट इसके बगल में फिर फर्स्ट

play22:13

वाली की फ्रेम पर दोबारा से आके इसे हम

play22:16

स्क्रीन के नीचे भेज

play22:19

देंगे एंड इसमें स्मूदनेस ऐड कर देते

play22:23

[संगीत]

play22:26

हैं अब इसे एक बार प्ले करके देख लेते

play22:30

हैं सो यार एनिमेशन इज लुकिंग गुड बस इसे

play22:34

थोड़ा सा और पीछे करना है अब प्ले करते

play22:39

हैं लुक्स ग्रेट एक बार पूरे एनिमेशन को

play22:42

शुरू से देख लेते

play22:49

हैं सो लद अब हमारा कैरेक्टर एनिमेशन बनके

play22:52

रेडी है बट इसमें फाइनल टच ऐड करने के लिए

play22:54

आप एक काम कर सकते हो कि जितने भी बार

play22:56

कैरेक्टर हमारा स्क्रीन पर मूव कर रहा है

play22:58

उस पॉइंट पर आप एक साउंड इफेक्ट ऐड करो सो

play23:01

पहला मूवमेंट यहां पर हुआ है यहां पर मैं

play23:03

एक साउंड इफेक्ट ऐड कर दूंगा इसका नाम है

play23:06

वूश साउंड इफेक्ट इसका लिंक मैं

play23:07

डिस्क्रिप्शन में दे

play23:10

दूंगा इसे ट्रिम कर देते

play23:18

हैं फिर दूसरा वाला मूवमेंट हुआ है इस

play23:22

पॉइंट

play23:26

पर

play23:29

[संगीत]

play23:41

देन नेक्स्ट मूवमेंट स्क्रीन से स्क्रीन

play23:45

के सेंटर से राइट साइड गया यह

play23:49

कैरेक्टर तो यहां पर भी एक डाल देंगे व

play23:51

साउंड

play23:56

इफेक्ट फिर फोर्थ मूवमेंट यहां पर हुआ है

play24:24

राइट एंड वन लास्ट साउंड इफेक्ट ड

play24:30

हियर एंड नाउ आवर एनिमेशन इज कंपलीटली

play24:33

रेडी लेट्स प्ले इट फ्रॉम द वेरी

play24:42

स्टार्ट ओके नाउ लेट्स लर्न कि आप वीडियो

play24:45

में किसी पर्सन के पीछे टेक्स्ट कैसे ऐड

play24:47

कर सकते हो इस इफेक्ट को क्रिएट करने के

play24:49

लिए इन शॉर्ट के फोटो एडिटर में जाओ देन

play24:52

क्लिक ऑन अ न्यू प्रोजेक्ट एंड सेलेक्ट अ

play24:54

ब्लैंक फाइल देन गो टू कैनवास एंड सेलेक्ट

play24:57

16

play24:58

9 फिर यहां पर देखो एक कटआउट का ऑप्शन है

play25:01

इस पर क्लिक करो एंड यू विल सी कि यह पूरा

play25:03

फाइल ट्रांसपेरेंट हो

play25:05

जाएगा इसके बाद क्लिक ऑन टेक्स्ट एंड जो

play25:08

भी टेक्स्ट आप अपने वीडियो में ऐड करना

play25:10

चाहते हो उसे यहां पर टाइप कर दो फिर इसे

play25:14

रिसाइट एंड देन आई विल सेव

play25:18

इट इसके बाद इनशॉट के वीडियो एडिटर में आ

play25:22

जाओ एंड न्यू प्रोजेक्ट पर क्लिक करके जिस

play25:24

भी वीडियो में आप ये इफेक्ट ऐड करना चाहते

play25:26

हो उसे इंपोर्ट कर लो सो स आई विल टेक दिस

play25:28

वन फॉर एग्जांपल इससे फुल स्क्रीन में

play25:31

एडजस्ट कर देते हैं इसके बाद हम

play25:36

पीआईपीएसी फाइल क्रिएट किया है उसे मैं

play25:38

इंपोर्ट कर

play25:39

लूंगा फिर इसे

play25:44

रिसाइट आई विल प्लेस इट

play25:47

हियर फिर इस लेयर को मैं क्लिप के एंड तक

play25:50

एक्सटेंड कर दूंगा इसके बाद दोबारा से

play25:55

पीआईपीसी हमने मेन फुटेज के लिए यूज़ किया

play25:58

फिर इससे भी मैं एडजस्ट कर दूंगा फुल

play26:00

स्क्रीन

play26:02

में एंड नाउ ऑल यू हैव टू डू इ सेलेक्ट

play26:05

दिस लेयर एंड गो टू कट

play26:08

आउट एंड एज यू कैन सी हमने जो पीईपी

play26:11

इंपोर्ट किया था उसमें बैकग्राउंड का सब

play26:12

कुछ रिमूव हो गया सिर्फ इस वमन का कट आउट

play26:15

बाकी रह गया स्क्रीन पर एंड ऑफकोर्स

play26:17

ट्रांसपेरेंट टेक्स्ट वाला लेयर इसके नीचे

play26:19

था जिसके वजह से इफेक्ट बहुत ही अच्छे से

play26:21

क्रिएट हो

play26:26

गया

play26:29

सो ऐसे नॉर्मल मोशन बैकग्राउंड्स तो हम

play26:31

सभी यूज करते हैं बट जरा इसे देखो लुक्स

play26:33

कूल राइट ऐसा मोशन बैकग्राउंड आप अपने

play26:35

चैनल नेम के लिए भी बना सकते हो इन जस्ट अ

play26:38

फ्यू मिनट्स एंड अपने हर वीडियो में यूज

play26:40

कर सकते हो लेट्स सी हाउ इसे बनाने के लिए

play26:43

मैंने सबसे पहले एक ब्लैंक फाइल इंपोर्ट

play26:44

कर लिया है और इसके ड्यूरेशन को मैं 60

play26:46

सेकंड्स कर

play26:47

दूंगा बिकॉज़ मैं 1 मिनट का मोशन

play26:50

बैकग्राउंड क्रिएट करना चाहता हूं जिसे

play26:51

बार-बार अपने वीडियोस में यूज कर सकें फिर

play26:54

गो टू टेक्स्ट एंड जिस भी वर्ड का एनिमेशन

play26:56

हमें क्रिएट करना है उसे तीन चार बार टाइप

play26:58

करेंगे एग्जांपल के लिए आई विल राइट

play27:00

डिकोडिंग

play27:01

वाटी एंड सेपरेट करने के लिए मैं यूज

play27:04

करूंगा इस बुलेट सिंबल

play27:06

का देन आई विल अगेन राइट डिकोडिंग

play27:10

वाइटी

play27:12

बुलेट डिकोडिंग वाइटी वन लास्ट

play27:17

टाइम बुलेट एंड स्पेस तो इस सेम फॉर्मेट

play27:21

में आपको भी अपना टेक्स्ट एंटर करना है

play27:22

इसके बाद इस कलर व्हील वाले ऑप्शन पर जाओ

play27:25

एंड ओपेसिटी को 25 कर दो

play27:31

फिर यहां पर जो फोर्थ ऑप्शन है उस परे

play27:33

क्लिक करो एंड टेक्स्ट बेंडिंग को 100 कर

play27:36

दो देन आई विल चेक दिस फिर इस टेक्स्ट को

play27:40

रिसाइकल स्क्रीन में फिट कर देते

play27:48

हैं अब जो आगे के स्टेप्स हैं वह शायद

play27:50

थोड़े कॉम्प्लिकेटेड लगे सो जस्ट फॉलो मी

play27:53

सबसे पहले मैं इस टेक्स्ट लेयर को वीडियो

play27:54

के एंड तक एक्सटेंड कर दूंगा और इसके

play27:56

स्टार्टिंग में एक की फ्रेम ऐड कर दूंगा

play27:59

यह हो गया इसका स्टार्टिंग पॉइंट फिर हम

play28:00

वीडियो के बिल्कुल एंड में जाएंगे एंड एक

play28:03

की फ्रेम यहां पर ऐड कर देंगे इस पॉइंट पर

play28:06

मैं इस टेक्स्ट एलिमेंट को 180 डिग्री

play28:09

रोटेट करने वाला

play28:12

हूं लाइक दिस और इसे फिर से फुल स्क्रीन

play28:16

में एडजस्ट कर देते

play28:18

हैं सो अगर अभी मैं इसे शुरू से प्ले करके

play28:21

दिखाऊ तो यू कैन सी कि टेक्स्ट में एक

play28:24

बहुत ही अच्छा सा रोटेशन इफेक्ट ऐड हो

play28:25

चुका है बस एक इंपोर्टेंट चीज चेक कर लेना

play28:28

कि फर्स्ट की फ्रेम में जो टेक्स्ट का

play28:30

साइज है लास्ट की फ्रेम में भी वही

play28:31

एग्जैक्ट सेम साइज होनी चाहिए लाइक अभी

play28:34

अगर देखें तो फर्स्ट की फ्रेम में टेक्स्ट

play28:36

का साइज है 28 तो लास्ट वाले में भी 28

play28:39

होना

play28:41

चाहिए यू कैन सी यहां पे 26 है तो हम इसे

play28:43

इंक्रीज करके 28 कर देंगे नाउ इट्स

play28:50

परफेक्ट अब आगे का प्रोसेस सिंपल है इस

play28:52

टेक्स्ट लेयर को हम कॉपी करेंगे एंड इसे

play28:55

रिसाइट करके छोटा कर देते हैं

play28:58

लाइक दिस फिर एडिट प जाके देख लेता हूं कि

play29:00

इसका साइज कितना है एज यू कैन सी इसका

play29:02

साइज अभी 18 है तो लास्ट वाले की फ्रेम

play29:05

में भी मैं जाकर इसका साइज 18 कर

play29:12

दूंगा फिर से सेम चीज करेंगे इस टेक्स्ट

play29:15

लेयर को कॉपी करो एंड इसे रिसाइट करके

play29:18

छोटा कर

play29:20

दो देन गो टू एडिट एंड इसका साइज देख लो

play29:23

कितना है यहां पर इट्स 10 तो लास्ट वाले

play29:26

की फ्रेम में भी इसका साइज कर

play29:30

देंगे देन व विल रिपीट द सेम प्रोसेस जब

play29:33

तक स्क्रीन पूरा भर नहीं

play29:56

जाता

play30:08

एंड देयर वी गो हमारा मोशन बैकग्राउंड बन

play30:11

के रेडी

play30:15

है सो यह थे कुछ न्यू वीडियो एडिटिंग

play30:18

टेक्निक्स दैट आई वांटेड टू शेयर विद यू

play30:20

ऑल कमेंट करके बताओ कि आपका फेवरेट इनमें

play30:22

से कौन है या फिर व्हिच टेक्नीक डिड यू

play30:24

फाइंड रियली यूजफुल आल्सो यह ट्यूटोरियल

play30:27

मेरे मोबाइल वीडियो एडिटिंग प्लेलिस्ट का

play30:29

तीसरा वीडियो है सो इफ यू हैवेंट चेक्ड

play30:30

पार्ट वन एंड टू देन स्क्रीन पर जो

play30:33

प्लेलिस्ट है उसे देख सकते हो एंड या मैं

play30:35

आपसे वही मिलूंगा बाय

Rate This

5.0 / 5 (0 votes)

Related Tags
Video EditingYouTube TipsMobile EditingAnimation TechniquesCreative EffectsSubscriber GrowthEngagement BoostTutorial SeriesEditing AppsContent Creation