How to make a DOOM CLONE in Unity || E1M5 Pick-ups and Billboards
Summary
TLDR本视频教程将指导观众如何为游戏角色创建三种可拾取物品:健康、护甲和弹药,并展示如何使用单一拾取脚本和对现有脚本的插槽修改来实现这一功能。接着,视频会介绍如何添加图形和实现广告牌效果,使用为该项目特别准备的免费资源。教程还会展示如何设置拾取物品的层级结构,添加必要的组件,编写脚本来检测玩家触发事件,并实现拾取物品对玩家健康、护甲和弹药的影响。此外,还会教授如何使用精灵和广告牌技术来增强视觉效果,最终将所有元素转化为预制件,方便在游戏世界中的部署。
Takeaways
- 😀 视频介绍了如何为游戏玩家创建三种可拾取物品:健康、护甲和弹药。
- 🛠️ 为了实现这一点,将使用一个拾取脚本和一些脚本插槽修改。
- 🎨 视频还涉及了如何添加图形和广告牌效果。
- 📚 项目中使用了一些免费的资源,这些资源可以在视频描述中的链接找到。
- 📦 在层级结构中创建一个空的游戏对象,并将其命名为“item pickup”。
- 🔍 为了分离逻辑和图形,向拾取对象添加一个3D对象作为子对象,用于视觉显示。
- 🧩 通过添加一个box collider组件并设置为触发器,来处理碰撞检测。
- 📝 创建并命名一个拾取脚本,用于检测玩家并根据拾取类型(健康、护甲或弹药)执行相应操作。
- 🔑 通过在拾取脚本中声明布尔值和整数来区分拾取类型和数量。
- 🔄 通过修改玩家健康脚本,实现增加健康和护甲的功能。
- 🔗 在枪械脚本中添加弹药变量和方法,以便拾取弹药时更新弹药数量。
- 🎭 使用精灵和广告牌技术,为拾取物品创建视觉效果,并确保它们面向玩家。
Q & A
视频教程中要创建的三个物品分别是什么?
-视频教程中要创建的三个物品是生命值(health)、护甲(armor)和弹药(ammo)。
如何在游戏中设置物品拾取点?
-在Unity的层级结构中创建一个新的空游戏对象,命名为物品拾取(item pickup),并将其变换重置到与玩家相同的位置。
为什么需要将逻辑和图形分开?
-将逻辑和图形分开是一种好的实践,有助于代码的管理和维护,使得游戏对象的功能和外观更容易控制和修改。
如何为物品拾取点添加视觉效果?
-在物品拾取点下添加一个新的3D对象作为子对象,这个子对象将作为拾取点的视觉效果。
为什么需要移除视觉效果的碰撞器?
-因为视觉效果仅作为展示,所有的碰撞检测应该在根物品拾取对象上进行,这样可以避免不必要的碰撞干扰。
如何设置物品拾取点的碰撞器?
-为物品拾取点添加一个组件,选择Box Collider,并设置为触发器(is Trigger),以便玩家可以进入触发区域。
如何检测玩家是否触发了物品拾取?
-在物品拾取脚本中使用OnTriggerEnter函数,通过检测other(其他)碰撞器的标签是否为'player'来判断玩家是否触发了拾取。
如何为不同类型的拾取物品分配不同的变量和值?
-在拾取脚本中声明三个public布尔变量分别代表生命值、护甲和弹药,以及一个public整型变量amount来表示拾取的数量。在Unity的检视器中为每个拾取点分配类型和数量。
如何通过拾取点脚本修改玩家的生命值和护甲值?
-通过在拾取脚本中调用玩家健康组件的giveHealth和giveArmor函数,并传递拾取的数量和拾取点的游戏对象引用。
如何处理拾取点的销毁逻辑?
-在拾取脚本中,如果玩家的生命值或护甲值小于最大值,就增加拾取的数量并销毁拾取点。如果达到最大值,则不销毁。
如何为弹药拾取点编写脚本?
-需要在枪械脚本中添加一个giveAmmo函数,该函数接收弹药数量和拾取点的游戏对象引用,并根据弹药数量更新枪械的弹药变量。
如何将2D精灵图片设置为Sprite类型?
-在Unity中选中精灵图片,然后在检视器中将纹理类型设置为Sprite 2D和UI,并应用更改。
如何创建一个简单的广告牌效果?
-创建一个Sprite Rotator组件,该组件在Update函数中使用Transform的LookAt方法,使其始终面向玩家。
如何将物品拾取点转换为预制件?
-在Unity中选中配置好的拾取点,重命名并设置其拾取类型和数量,然后拖拽到预制件文件夹中,使其成为预制件。
Outlines
😀 创建玩家可拾取道具
本段介绍了如何在游戏中创建玩家可以拾取的三种道具:生命值、护甲和弹药,以及它们的不同变体。目标是使用一个拾取脚本和一些脚本槽位修改来实现。接下来,视频中将展示如何添加图形和公告牌效果,并使用为该项目准备的免费资源。首先,通过在层级结构中创建一个新的空游戏对象并命名为“item pickup”,然后添加一个3D对象作为子对象来表示视觉效果。通过调整位置和大小,设置碰撞器,并编写脚本以检测玩家触发拾取事件,从而创建拾取道具。
🛠️ 拾取道具脚本编写与测试
这一部分详细说明了如何编写拾取道具的脚本,并通过Unity测试其功能。脚本中定义了布尔值和整数值来区分拾取道具的类型和数量。通过检测玩家标签,判断玩家是否触发了拾取,并在玩家生命值或护甲值低于最大值时,通过调用玩家健康脚本中的函数来增加生命值或护甲值,并销毁拾取道具。测试中发现,当玩家生命值已满时,拾取道具不应被销毁,因此对脚本进行了相应的调整。
🔄 弹药拾取与游戏对象引用
本段讲述了如何为弹药拾取编写脚本,并在Unity中进行测试。首先,需要获取玩家的枪械脚本组件,并调用一个新函数'give ammo'来增加弹药数量。在枪械脚本中,添加了弹药相关的变量和逻辑,确保在玩家弹药数小于最大弹药数时,可以通过拾取道具来增加弹药,并在弹药数超过最大值时停止增加。测试过程中,确保了拾取道具在玩家弹药已满时不会增加弹药,并且只有在玩家需要时才会销毁拾取道具。
🎨 制作与应用公告牌效果
这部分内容涉及了如何使用精灵图集来创建视觉效果,并为拾取道具添加公告牌效果。首先,在项目窗口中创建一个名为'sprites'的文件夹,并导入精灵图集。然后,为每个拾取道具创建一个3D四边形,并设置其为Sprite材质。通过为每个四边形分配不同的精灵图,创建了具有复古外观的拾取道具。接着,通过添加'sprite rotator'组件并编写脚本来实现公告牌效果,使得拾取道具始终面向玩家。最后,将拾取道具转换为预制件,以便在游戏世界中的任何位置快速使用。
🎬 结束语
视频的结尾部分,作者提醒观众保持关注,以便继续观看后续系列视频。
Mindmap
Keywords
💡拾取物品
💡游戏对象
💡触发器
💡脚本
💡玩家标签
💡公共变量
💡组件
💡精灵
💡预制件
💡精灵旋转器
Highlights
本视频将制作三种可拾取道具:生命值、护甲和弹药,尝试使用一个拾取脚本和一些插槽修改。
使用Unity中的空GameObject创建拾取道具,并将其命名为'item pickup'。
为拾取道具添加3D对象作为子对象,用于显示视觉效果。
拾取道具的视觉效果应放置在地面上并位于玩家前方。
为root item pickup对象添加box collider组件,设置为触发器。
编写item pickup脚本,用于检测玩家并响应拾取事件。
脚本中使用'OnTriggerEnter'函数来检测玩家是否触发拾取。
通过比较标签(tag)来确认触发拾取的是玩家。
声明三种公共布尔值变量,分别代表生命值、护甲和弹药拾取。
在拾取脚本中,根据拾取类型调用玩家健康脚本的'give health'或'give armor'函数。
为防止生命值或护甲超过最大值,设置检查并限制最大值。
在玩家健康脚本中,根据拾取道具的类型增加生命值或护甲值。
创建弹药拾取道具时,需要调用枪械脚本的'give ammo'函数。
在枪械脚本中添加弹药变量,并在射击时扣除弹药。
创建sprites文件夹,并将自定义的拾取道具图像导入Unity。
使用3D Quad替换默认的拾取道具视觉效果,并调整大小以匹配触发器。
为每个拾取道具的视觉效果添加sprite rotator组件,实现billboard效果。
将拾取道具和sprite rotator脚本转换为Prefab,方便在场景中复用。
最终,演示了如何将拾取道具放置在游戏场景中,并确保它们已经具备功能且外观良好。
Transcripts
hello everyone
in this video we'll be making pickup
items for our player we're going to have
three items that our player can pick up
that being health armor and ammo
and we'll have variations of each and
we'll try to do it all with one pickup
script
and some slot modifications to our
current scripts
we'll then get into adding some graphics
and a billboard effect
in this video we'll use some assets that
i threw together just for this project
and they're free for you to use also the
links in the description
so let's get to it
let us start by setting up one pickup in
the hierarchy we're going to create a
new empty game object
and we'll name it item pickup for now
reset is transformed so it's here at the
same spot as our player
it's good practice to separate out your
logic and graphics so on the item pickup
we're going to add a new 3d object as a
child
and this will be our visuals for the
time being
let's select the whole object and just
drag it up even with the ground
and in front of the player so we can see
it
we'll select the visual again and let's
just remove the collider
the visual is only a visual and any
collision detection going on will be on
our root item pickup object
so now let's just select it and we'll
add a component
and it'll be a box collider let's make
it a bit larger than the visual
so we'll say 2 on the x 2 on the y and 2
on the z
and since it's a trigger volume and we
don't want any
actual collision stopping us we'll take
this to
is trigger so now our player can enter
the trigger so let's add a script and
set up some detection
let's add a new component to our pickup
and it'll be a script that we name
item pickup and press enter twice or
click
create and add and let's move it into
the scripts folder
and then we'll double click it to open
it in visual studio
to detect the player we want to go
beneath this update and say
void on trigger enter and this takes him
a collider called other and then now
we'll use that to see if the player
has triggered it by saying if other dot
compare tag
and we'll use the tag player
and for this to work make sure your
player is still correctly tagged as
player
so starting simple if other is player
then we want to destroy the game object
now we can do a quick save and test in
unity
yep it appears to be working so as i
mentioned before we're gonna use the
script for our three main types of
pickups
up at the top i'm gonna declare three
public bulls
they're gonna be his health is armor
and is ammo and lastly we'll declare a
public int
and we're just going to call this amount
now we can use this script on multiple
pickups and we can assign what type and
value here in the inspector
now inside the if statement that checks
for our player we'll add three more to
check what type of pickup we have
and we'll be using if is health if is
armor and if is ammo
we'll deal with our health pick up first
if we navigate to our player and open
the player health script you'll see we
have what we need right here
we have our health variable and also we
have our armor variable
but also notice their protection level
is private so to modify these we'll do
it through a function that we call from
the pickup script
we can scroll down here to the bottom
and collapse the damaged player function
and beneath it we'll write out this new
function we'll say
public void give health and have it take
in an
end it will call amount and let's also
attend to the armor by
duplicating this function and instead
we're just going to call this one
give armor
since these are public we can now call
them from within the pickup script
but first we need to grab the player
health component we can do that by
saying
our other dot get component and we want
player health and now we can access the
function with dot
give health and for the amount we'll
pass in our pickup amount
and that's this guy here and we can copy
and paste this
into our if is armor and instead
we'll call the give armor function
now that should call one function or the
other depending on the pickup type
let's go back into the playerhealth
script and make these actually do
something
in the give health function we'll just
say health plus equals amount
for now and the same for armor only
armor plus equals amount instead and in
case our pickups increase our health
over our max health allowed then we'll
set our health back to our max health
and we'll do the same for armor
so now we can save and jump into unity
for a quick test
i'm going to set this pickup to be
health and the amount we'll use 30 to
test
and i'll duplicate it a couple of times
so now we can select our player
and go down to our player health script
and then the inspector will set this to
debug
so we can take a peek i'll hit play and
then i'm going to hit our
right shift that damages our player a
couple of times
so now you can see their health is down
to 60 so we go over our first pickup and
it goes to 90.
so we go to our second pickup and it
goes to 100
so it can't go over 100 that's good but
now when we go to our last pickup it
stays at 100 but the pickup
disappears so if we're at 100 we don't
want this pickup to be destroyed
i'm going to set this debug to normal
mode and then we'll jump back in our
scripts
so in our pickup script we're going to
remove this destroy game object
and instead we're going to have our
player health determine whether or not
the pickup gets destroyed
so in here instead of the amount being
added every time this function is called
we want to check if we even need
it so we can say if our health is less
than
max health then we want to add our
pickup amount to our health
then we know if we added the health then
we need to destroy the pickup but to
destroy it from here we need
a reference to it so where we pass in
the amount will also pass in a game
object
we'll call it pickup and then down here
we'll just say destroy
the pickup if we go back into our pickup
script now you'll notice that it's
complaining because this give health
call is now expecting a game object
so next to our amount we'll just type
game object
that's whatever object that the script
is attached to
so back in our player health we'll do
the same process for the give armor
function
we'll say if armor is less than max
armor
then we want our armor plus equal to our
mount
and then we want to also destroy a
pickup
and then up here next to our amount
we'll pass in
a game object called pickup and once
more inside of our pickup script
we'll pass in our game object
and just to be a little more clear we'll
say these are
this dot game object so now if we save
all of our scripts and go into unity and
play test
we'll make the same scenarios before and
you'll see that the third pickup no
longer disappears because we can't use
it and if i make an armor pick up real
quick you'll see that i can't actually
pick it up
until i damage the player first but that
reminds me
we don't want our player to start with
any armor so in our player health script
let's scroll up to our start function
and remove this line where it says set
armor to max armor
now we can save and start on our ammo
pickup
so for ammo it's similar to this git
component call but for our player health
it's on the root
for this we'll be needing our gun script
and as you can see
it's a child of our player so here we'll
say
other dot and we're looking for get
component in children
and the component we want is gun and
we'll call a similar function to these
others
but this one will name give ammo
and it's also going to take an amount
and it's going to pass in
this game object now let's create this
function in our gun script so we'll
navigate to our player
and the gun game object and double-click
our gun script to open it up
so we already have a fire rate and some
damage variables
but let's add an ammo variable beneath
the next time to fire we want a public
int
max ammo and a private int called ammo
next we want to move to our update and
in our if condition
we need to add in
and our ammo is greater than zero so
then you can fire if we have ammo and
then down
inside of our fire at the very end we'll
deduct our ammo
by saying ammo minus minus
and this will subtract one ammo now we
can collapse this fire method
and write our new function down below it
and since we know how this is structured
now we can just write it all out
we'll say public void and we're going to
say give
ammo and then it's going to be int
amount game object pickup
and then we're going to say if ammo is
less than max ammo
ammo plus equal amount and then we're
going to destroy
pickup and then we're going to say if
ammo
is greater than our max ammo then we
need to set ammo
equals max ammo
so if we save that and go check our
pickup script all of our functions are
happy
so we can go into unity and we're going
to finish off the system by setting our
max ammo and our gun script
and i'll just use 100 here
we'll start with just one pickup and
we'll make sure that all the variables
are zeroed out
now let's create a new folder inside of
our project window and we're gonna call
it sprites
and i'm gonna drag my sprotts in and
these are the ones from the link in the
description
but feel free to use your own
after i get them in here i'm going to
control click and select all of them
in the inspector i'm going to set the
texture type to sprite 2d and ui
and scroll down and click apply to
change them all
so on that first pickup we made let's
delete the visual we have now
and instead we'll add a 3d quad
we'll name this visual and remove its
collider as we did the cubes
and we'll scale it up a bit maybe two on
the x and two on the y
and now it kind of matches up with our
trigger volume
let's grab it and pull it out the ground
a little bit now that's the backbone of
all of our prefabs so let's duplicate
this six times
or however many sprites you're using i
agree this feels janky but i've had
trouble with quads and swapping
materials before
so each sprout is going to get its own
blank quad so once you have all of these
and they're spread out a bit we're going
to expand them all so we can see the
visual object
then we'll just select the first quad
visual
and for this one i'm going to use the
big med kit so i'm just going to drag
this
on and then here in the material i'm
going to change the shader
to sprite and default
then you pretty much just rinse and
repeat with all of your sprites
so on the smaller meg kit the scale is
just a little too big so i'm gonna go
ahead and change it to one
and one and then i also ended up doing
that
on the small armor and both of the ammo
pickups
so now we got some nice retro looking
pickups but now let's use billboarding
textures to make it more
doom-like so we're going to select one
of our visual quads
it doesn't matter which one and we're
going to add a component
and we're going to call it sprite
rotator
and then we'll just double click it open
it up making a basic billboard script is
really easy
in our update we're going to take this
transform and say
dot look at and this is a built-in unity
function that takes in a transform
we'll name ours the same as theirs with
target
and then at the top we'll declare a
private transform name
target and then in the start we'll
assign the target by finding our
player's transform by using
find object of type and then we'll look
for
player move since we know that's on our
player
and then we'll say dot transform
and that's pretty much it you can save
and go back into unity
now we can apply it to all the other
ones so we can hold ctrl and we'll
select
all the other visuals and then we'll
just hit add component
and then add our new sprite rotator
so this point in the video i realized
that the pickups that i was working on
was missing the pickup script so i'm
just going to select
all the pickups and i'm going to add the
pickup script to it
now we can finally turn these into
prefabs and doing so is a bit grindy but
pretty simple we'll select our first one
here
and what we need to do is name it we'll
name this one big meg kit
and then we'll pick what kind of pickup
it is and then i want this one set as
50. after that is pretty much copy and
paste
the small meg kit i used 10 for the big
armor
i used his armor and 25
and then for the small armor i used five
the big ammo
is ammo and it's set to 10 and the small
ammo i have set
to 5. now they're sorted out we can go
down in our project window and we're
going to move our sprite
rotator into the scripts folder and
we're going to go into the prefab folder
and we're going to create a new one
called pickups now let's use ctrl click
to select all of our prefabs here
and then inspector we're going to go and
we're going to reset the position
and then we'll drag h1 into our prefab
folder
and that will make them prefabs and once
it's a prefab you can delete it out of
the scene
and then you'll see that we're able to
just grab
any pickup we want and just slap it
anywhere we want in our game
and they're already functioning and they
look great
well that's about it for this video i
hope you stay tuned and catch more of
the series
spine camp out
Browse More Related Video
![](https://i.ytimg.com/vi/ugiNsb9pc8k/hq720.jpg)
Unreal Engine 5 RPG Tutorial Series - #14: Equipment System
![](https://i.ytimg.com/vi/KUWGsdt2JOo/hq720.jpg)
How to make a DOOM CLONE in Unity || E1M6 Doors and Keys
![](https://i.ytimg.com/vi/JzZjPsVbibI/hq720.jpg)
How to make a DOOM CLONE in Unity || E1M1 First Person Player
![](https://i.ytimg.com/vi/xjffkO3sIEU/hq720.jpg)
Simple Inventory (PART 1: Adding Items to Player Inventory)
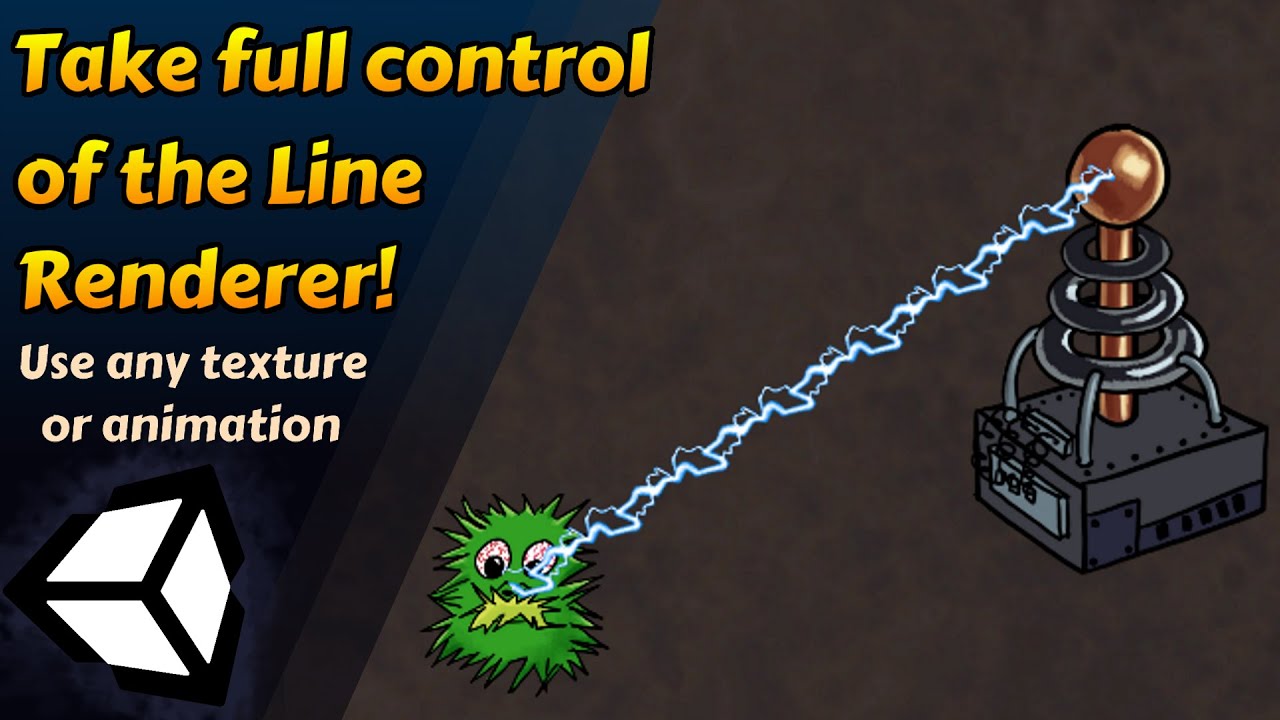
![](https://i.ytimg.com/vi/5e3biNOXD0o/hq720.jpg)
How To Make a DOOM CLONE in Unity || E1M7 Basic UI
![](https://i.ytimg.com/vi/2brno65Gr-8/hq720.jpg)
How to make a DOOM CLONE in Unity || E1M4 Player Health and Armor
5.0 / 5 (0 votes)