メーカーのひた隠し非分解部品で修理して利益を優先した結果、、、悲劇が・・・

シークレット CAR プロフェッショナル-Secret Car Professional
27 Jan 202416:27

Summary

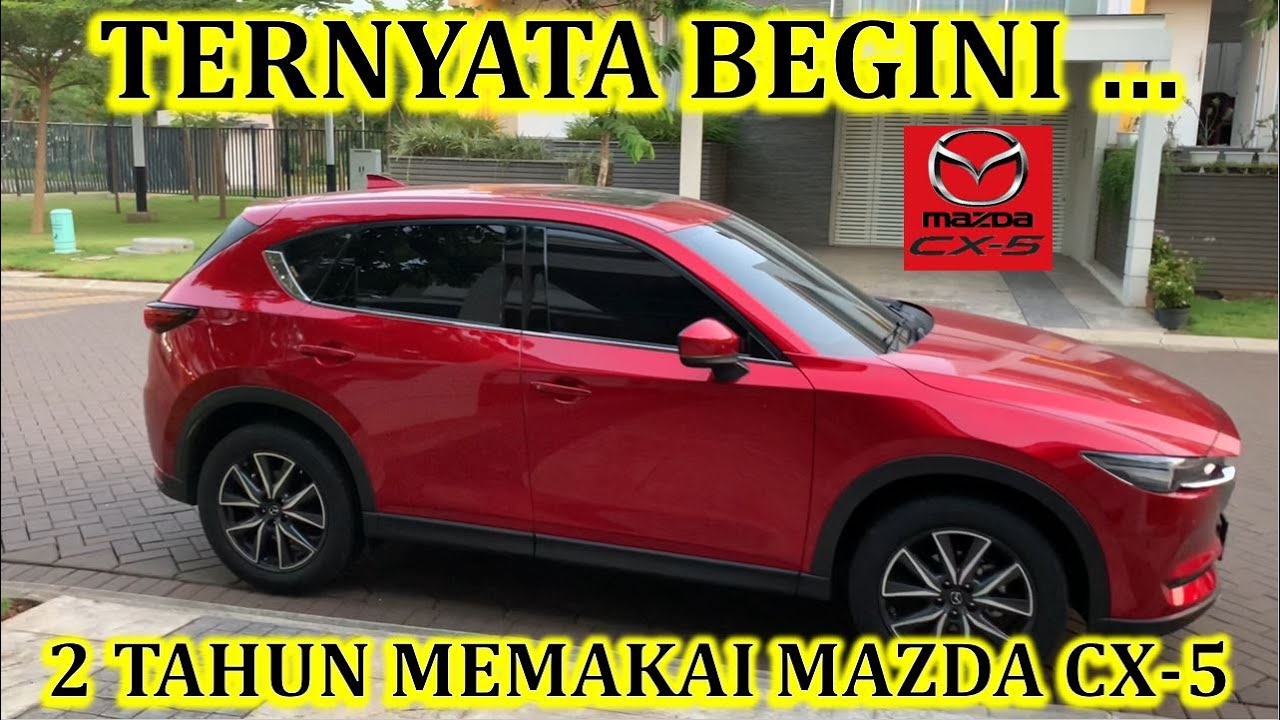
TLDRIn this informative video, the host, Secret, tackles a common issue with the Mazda CX-5's side mirror, which fails to retract due to gear slippage. Despite being a frequent problem, the vehicle's low mileage suggested a premature failure. Secret demonstrates a cost-effective repair solution, opting not to use the expensive parts listed in the official parts list. The repair involves meticulous disassembly, including the removal of the mirror, cover, and indicator, revealing a mismatch in motor parts between model variants. The video follows Secret's ingenious fix using a hidden part from the manufacturer, complete with detailed steps to dismantle, diagnose, and rebuild the motor assembly with a replacement gear. The process highlights the importance of precision to avoid additional costs and concludes with a successful repair, saving costs significantly compared to traditional part replacement methods.

Q & A

  • What issue did the Mazda CX-5 experience?

    -The Mazda CX-5 experienced a failure with its left side mirror, which stopped folding in.

  • What is considered a common failure for the Mazda CX-5's side mirror?

    -A common failure for the Mazda CX-5's side mirror is the gear inside spinning freely and preventing the mirror from folding.

  • What parts are required to be replaced for fixing the Mazda CX-5's side mirror, and what is the cost?

    -For fixing the Mazda CX-5's side mirror, all parts except for the mirror part itself need to be replaced, costing around 22,000 yen for parts and nearly 30,000 yen including labor.

  • What was the approach taken to repair the Mazda CX-5's side mirror?

    -The approach taken was to repair the mirror using parts not listed on the part list to save costs.

  • What preliminary steps were taken before disassembling the Mazda CX-5's side mirror for repair?

    -The preliminary steps included removing the mirror part carefully, especially noting its fragility due to cold weather, and disconnecting the defogger wiring and BSM coupler.

  • How did the motor part used in the repair of the Mazda CX-5's side mirror differ from expectations?

    -It was discovered that the motor part used in the early model (K type) was different from what was expected for the later model, which required a different part.

  • What was the major challenge encountered during the repair of the Mazda CX-5's side mirror?

    -The major challenge was finding and using a part that was deliberately hidden by the manufacturer, as the motor part needed was different from the initial expectation.

  • What was identified as the cause of the malfunction in the Mazda CX-5's side mirror?

    -The cause of the malfunction was identified as a gear within the mirror's folding mechanism spinning freely without engaging.

  • What strategy was used to obtain the correct parts for the repair?

    -The strategy involved disassembling a new motor to extract the gears needed for the repair, hoping they matched the required specifications.

  • What was the outcome of the repair, and how did it impact the cost?

    -The repair was successful, using a combination of new and existing parts to rebuild the mirror's motor mechanism, resulting in a cost-effective solution compared to replacing the entire assembly.

Outlines

00:00

🔧 Introduction to Mazda CX-5 Side Mirror Repair

The video begins with an introduction to a common issue with the Mazda CX-5's side mirror, which stops retracting. This problem, attributed to gear failure within the mirror mechanism, is described as a classic fault for this model. The presenter outlines the initial diagnostic, mentioning that the repair typically involves replacing several parts excluding the mirror itself, with costs amounting to roughly 30,000 yen including labor. However, the focus of this video is on a cost-effective repair solution using an unspecified part not listed in the parts catalog. The presenter then proceeds to dismantle the mirror, starting with the removal of the mirror glass, which is particularly challenging due to the cold weather making the parts brittle. The video emphasizes the care taken to avoid breaking the expensive mirror glass and the subsequent steps of carefully removing the cover and indicator to avoid further damage and additional costs.

05:13

🛠 Dismantling and Identifying the Problem

The presenter continues with the disassembly process by removing the mirror's housing and motor, highlighting differences between early and late model parts that complicate the repair. Despite these challenges, there is a determination to proceed with the repair using a hidden part not originally intended for this repair. The discovery that the motor part used in the previous models differs from the one in the later models prompts a more in-depth exploration. The presenter then focuses on extracting and examining the faulty gear causing the malfunction. Initial attempts to simply replace the damaged gear prove unsuccessful, leading to the decision to disassemble the entire motor assembly to address the issue directly.

10:19

🔨 Repairing and Reassembling the Motor

After dismantling the motor, the presenter finds the problematic gear and attempts a repair by sourcing a similar gear from a new motor, hoping for compatibility. The video demonstrates the meticulous process of disassembling the new motor to harvest the needed gear. Fortunately, the gears from the new motor match, allowing for a successful transplant. The repair process is likened to rebuilding, where the outer case of the motor remains the same, but the internals are replaced with new components. The presenter emphasizes the careful reassembly of the motor and the use of a vise to securely fasten the components, ensuring the motor functions correctly with the new parts.

15:20

🚗 Final Assembly and Operational Testing

The final stages of the repair involve reattaching the motor to the mirror base and conducting operational tests to ensure everything functions correctly. The presenter meticulously reconnects the wiring, secures the mirror to its base, and performs a final tightening of the screws. After confirming the mirror's retracting function works flawlessly, the reassembly is completed by reconnecting all the couplers and carefully installing the mirror glass to avoid damage. The video concludes with the presenter reflecting on the challenges faced due to initially incorrect part assumptions but ultimately showcasing a successful repair. The effort contrasts the presumed simplicity of the task with the actual complexity and satisfaction derived from overcoming unexpected challenges. The video ends with gratitude expressed to the viewers and an invitation to subscribe to the channel for future updates.

Mindmap

Keywords

💡Mazda CX-5

The Mazda CX-5 is a model of car mentioned in the video, specifically being the subject of a common repair issue. It is a compact SUV manufactured by Mazda, known for its reliability, style, and driving dynamics. In the context of the video, the Mazda CX-5 experiences a malfunction with its side mirror, which fails to retract. This problem serves as the central theme of the video, guiding the viewer through the diagnosis and repair process of this specific vehicle component.

💡Side mirror retraction failure

Side mirror retraction failure refers to the issue where the vehicle's side mirror does not fold inwards as intended. This problem is highlighted in the video as a common fault with the Mazda CX-5. The failure is attributed to the internal gears within the mirror's folding mechanism spinning freely without engaging, preventing the mirror from retracting. The video uses this malfunction to explain the troubleshooting and repair process, emphasizing the need for careful disassembly and repair to avoid additional damage.

💡Gear

A gear is a rotating machine part having cut teeth or, in some cases, inserted teeth (known as cogs), which mesh with another toothed part to transmit torque. In the video, the failure of the side mirror to retract is diagnosed as a problem with the gears inside the mechanism. The gears are supposed to engage and drive the retraction motion but are found to be freely spinning (empty rotation), indicating wear or a design flaw. This diagnosis leads to the exploration of a repair solution that involves replacing or fixing the faulty gear.

💡Disassembly

Disassembly refers to the process of taking apart a machine or structure to diagnose a fault or perform a repair. The video extensively covers the disassembly of the Mazda CX-5's side mirror to address the retraction failure. This process includes removing the mirror glass, the cover, and finally accessing the internal motor and gears. The careful disassembly is crucial to avoid damaging the delicate parts like the mirror glass and the cover's clips, which can add to the repair costs.

💡Motor

In the context of the video, the motor refers to the electric motor used to retract the side mirror. The motor is a key component of the mirror's folding mechanism, driving the gears that in turn fold the mirror. The discovery that the motor assembly differs between the early and later models of the CX-5 highlights the challenges of automotive repairs, such as the need for specific parts and the potential for unexpected complications.

💡Rebuild

Rebuild in the video refers to the process of repairing the side mirror by using parts that are not originally listed for the model being worked on, essentially refurbishing the malfunctioning unit with functional parts from a different source. This is demonstrated by disassembling a new motor to use its gears in the faulty assembly, illustrating a cost-effective repair strategy that avoids the high cost of complete part replacement.

💡Torx screws

Torx screws are a type of screw characterized by a six-point star-shaped pattern on the head, requiring a special Torx screwdriver to remove or tighten. The video mentions the use of Torx screws to secure the mirror assembly to the vehicle. This detail underscores the importance of having the right tools for vehicle repairs, as specialized screws like Torx are commonly used in automobiles to ensure secure fastening of components.

💡Wiring harness

The wiring harness refers to the assembly of electrical wires and connectors that transmit signals and electrical power within the vehicle. In the repair process detailed in the video, the wiring harness needs to be carefully disconnected and reconnected to remove the mirror assembly without damaging the electrical connections. This step is crucial for maintaining the functionality of the mirror's electronic components, such as the turn signal and the anti-fog heating element.

💡Paint and labor costs

Paint and labor costs are mentioned as significant factors in the repair process. The video highlights the potential for high expenses due to the need for painting parts like the mirror cover if damaged during disassembly, as well as the labor involved in the meticulous repair process. These costs contribute to the overall expense of the repair, motivating the DIY approach taken in the video to minimize expenses by avoiding damage and using alternative repair methods.

💡DIY repair

DIY repair, or Do-It-Yourself repair, refers to the approach taken in the video where the vehicle owner undertakes the repair process themselves to save on costs. The video provides guidance on how to perform the repairs, emphasizing the importance of having the right tools and knowledge to successfully complete the task.

Highlights

The video is abnormal, and we are working hard to fix it.
Please replace the link and try again.

Transcripts

play00:02

[音楽]

play00:18

はいどうもシークレットです今回はこちら

play00:23

の松田CX5になるんですけどほぼ絶対に

play00:29

壊れる

play00:30

こちらの左側のサイド

play00:34

ミラー格納しなくなってしまいましたま

play00:38

定番の故障といえば定番の故障なんです

play00:42

けど距離はまだなんと

play01:00

よに中のギアが空回転し格納しなくなって

play01:06

いると考えられるんです

play01:09

が部品はカバーウインカーカメラあと

play01:16

こちらのミラー部分以外の斡旋交換となり

play01:22

金額は2万2000円いたします工賃を

play01:26

合わせると約3万円近くするので今回は

play01:33

こちらのパーツリストに乗ってない部品を

play01:37

使用して修理していきたいと思い

play01:46

ますそれではまずこちらの鏡部分を

play01:51

取り外していき

play01:53

ますちなみに今真冬でかなり硬くなって

play01:58

いるので気をつけて外していき

play02:01

ますちなみにこのミラー部分だけで1万円

play02:06

するのでもし割れてしまっ

play02:10

たら最悪ですま無事にこのように外れたの

play02:15

で曇り止めの配線とBSMのカプラーを

play02:21

取り外し

play02:28

ます

play02:30

次にカバーを取り外しますまこちらの

play02:35

カバー慎重に取り外さないと爪部分が折れ

play02:39

てしまい使い物にならなくなるので集中し

play02:43

て取り外していき

play02:45

ますもし爪部分が割れてしまうと塗装台と

play02:51

物台で約1万5000円吹っ飛んでいき

play02:58

ます

play03:00

無事にカバーが取り外せれました裏側の爪

play03:05

もこのようにバッチし折れることなく残っ

play03:09

てい

play03:10

ますそれでは次にウインカー部分を

play03:14

取り外していき

play03:28

ます

play03:32

ここで気がついたんですがなんとモーター

play03:37

部品が全然違いまし

play03:39

たK型の前期はこちらのモーターを使用し

play03:45

ていたので後期型も同じかと思っていたん

play03:49

ですが完全にしてやられまし

play03:53

たけどここで引き下がるシークレットでは

play03:57

ありませ

play03:58

んなんとかてこのメーカーがひた隠してい

play04:03

た部品を使って修理していきたいと思い

play04:08

ますそれでは分解する続きをやっていき

play04:12

ます今やっている作業はモーター部分のみ

play04:18

を取り外すので全ての配線とカプラーを

play04:23

取り外しカプラーからの配線も取り外して

play04:28

いきます

play04:33

先に軽くこちらのトルクスを使いミラー

play04:37

本体を固定している3つのボルトを緩めて

play04:42

いき

play04:46

ますそれではカプラー部分から配線を抜い

play04:51

ていき

play04:58

ます

play05:13

全てのカプラーの配線が外れたので先ほど

play05:17

緩めていたボルトを完全に外していき

play05:23

ますあとは配線を引っこ抜くだけでミラー

play05:28

本体部分のになりまし

play05:38

たそれでは格納するためのモーター部分を

play05:43

取り外していき

play05:58

ます

play06:08

これでモーターのみになりまし

play06:14

た前期型はこのように格納するモーター

play06:19

単体なんですが後期型はミラーを動かす

play06:24

モーターの土台までセットになってしまっ

play06:28

ています

play06:31

さてどのようにして壊れている部分を修理

play06:35

していこうか悩んでいるんですけどま

play06:39

とりあえず壊れている方どのような感じで

play06:43

壊れているのか開けて中みを見ていきたい

play06:46

と思い

play06:49

ますはいそれでは

play06:53

オープンモーターと奥の方に白いギア

play06:57

みたいなが見えます

play07:00

まずはモーターを引っこ抜き1つ目のギア

play07:04

を抜き

play07:06

ますそしてもう1つの

play07:09

ギア問題はこちらのギアなんですがこの

play07:13

ように空回転してしまってい

play07:17

ますワゴンRみたいにこちらのギアだけ

play07:21

抜けるかと思ったんですが全く抜ける気配

play07:25

がなかったの

play07:26

で最終手段の全て分解していき

play07:43

ますこれで原因と思われるギア部分が

play07:47

取り外せれまし

play07:49

たそして問題の

play07:54

ギア我やけはなかったんですがセンター

play07:59

部分の穴が広がってしまいこのようにから

play08:04

回転してしまってい

play08:09

ますそれではこちら新品のモーター分解し

play08:15

て中身のギアーを取り出していこうかと

play08:18

思い

play08:19

ますま同じギアを使っていることを祈り

play08:23

ながら分解していき

play08:28

ましょう

play08:41

モーターや基盤は全く同じやつを使って

play08:45

いるみたいですま基盤に刻印してある

play08:49

こちらの品番がちょっと違うみたいなん

play08:52

ですがま気にしないでおき

play08:58

ましょう

play09:15

では肝心のギア部分綺麗に取り外せれまし

play09:19

たま当たり前なんですがまから回転はして

play09:24

いませんま部品も同じようなので型の

play09:29

ケースに先ほど取り外していた新品のギア

play09:34

たちを組み付けていき

play09:36

ますまこの作業ケースは中古品中身は新品

play09:42

ということでまリビルトみたいなもんです

play09:45

ねま実際組み立ててみてきちんと動く保証

play09:50

はないんでままずはね綺麗にきちんと

play09:54

組み立てていきたいと思い

play09:57

ますそしてこちらの固定金具は手で

play10:02

押さえ込んで入れることは不可能なので

play10:06

万力を使用して奥まで入れ込んでいき

play10:19

[音楽]

play10:25

ますこれで綺麗にはまりました

play10:30

モーターも新品の方を使用し

play10:35

ますあとはカバーを取り付けるんですがま

play10:39

このカバーも新しい方を使用し

play10:43

ます全く形一緒です

play10:49

ねそれでは配線を

play10:52

取り付け先に動作確認を行いますカードが

play10:57

確認しました急限

play11:02

28正常に作動しているみたい

play11:07

です動作確認が問題なかったのでミラー

play11:11

本体部分にモーターを組み付けていき

play11:17

ますあは取り外していたビスを締め込んで

play11:21

いき

play11:23

[拍手]

play11:27

ます

play11:34

[拍手]

play11:36

これでモーター格納部分が完了したので

play11:39

車体本体に取り付けていき

play11:43

ます取り外した時と逆の手順で今度は

play11:48

組み付けていくので配線を1本1本

play11:51

モーター部分に通していき

play11:57

ます

play12:20

配線を通し終わったので今度は土台に

play12:23

ミラー部分を固定していき

play12:27

ます

play12:34

それではビスを本締めしていき

play12:42

ますミラーの格納も問題なく動作してい

play12:47

ますそれでは取り外していたカプラー類を

play12:51

元通りに戻し

play12:57

ます

play13:00

カプラーの配線なんですが逆側につけて

play13:04

しまうとウインカーが光らなかったり

play13:07

ミラーを動かす時に逆に動いてしまったり

play13:10

するので取り外した時の写真や動画を見

play13:14

ながら正確にはめ込んでいき

play13:27

ます

play13:57

play14:11

次にミラー部分を組みつけていくんですが

play14:15

ま外す時と同様組み付ける時も割れない

play14:18

よう

play14:19

に慎重にはめ込んでいき

play14:27

ます

play14:32

[拍手]

play14:38

ミラーの動きも確認しましたが問題あり

play14:41

ませんでしたが確認しました

play14:48

[音楽]

play14:49

8それでは最後にカバー部分を取り付けて

play14:54

作業を終了とさせていただき

play14:57

ます

play14:59

今回は私の勘違いで部品が違ったせいで

play15:04

ここまで作業の時間がかかってしまいまし

play15:07

たが実際Ke型の前期のモーター部分だけ

play15:12

を交換するんであれば簡単に交換はできる

play15:15

んですが今回はモーター部分の中身まで

play15:20

全て分解して作業したのでかなり大変でし

play15:24

た実際今回は通常通りの部品とで

play15:29

1万2000円ほどしかもらっていません

play15:31

がやっている作業コーチンとかを考えると

play15:36

ミラーアセの方がかなり楽かもしれませ

play15:41

んそれでは本日もご視聴ありがとうござい

play15:45

まし

play15:46

たもしよろしければチャンネル登録も

play15:50

よろしくお願いし

play15:53

ますそれではまた次回の動画でお会いし

play15:57

ましょう

play16:19

[音楽]

play16:25

さよなら