Membuat File CX Designer - Push button dan Bit Lamp
Summary
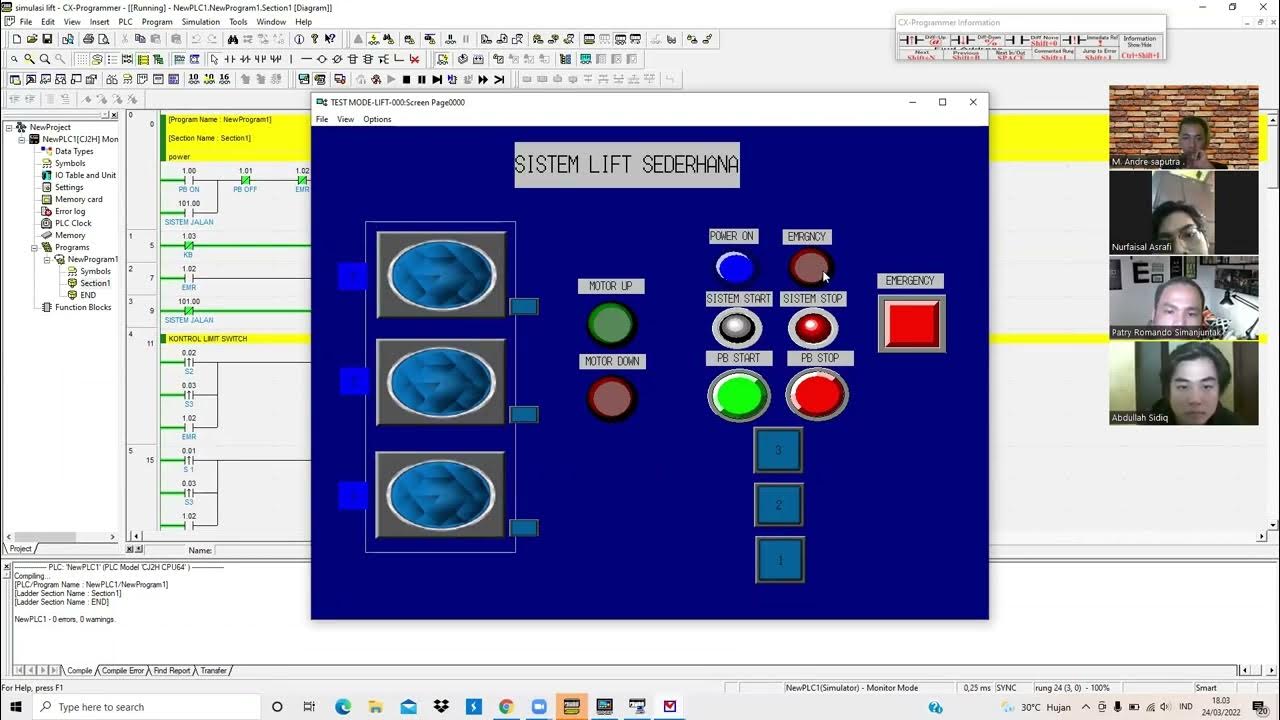
TLDRThis video tutorial instructs viewers on creating a PLC simulation display file using CX-Designer software. It covers setting up a structured folder system, initiating a new project, and adding pushbuttons and lights to a workspace. The tutorial also explains how to align elements neatly and assign addresses to inputs and outputs, ensuring a clean and organized simulation interface.
Takeaways
- 📂 Start by creating a structured folder system for organizing files.
- 🔧 Use CX-Designer software to create a new project for the PLC simulation.
- 💻 Name the project appropriately, avoiding spaces, and save it in the designated folder.
- 🖥️ Open the CX-Designer software and navigate to the initial screen to start the project.
- 🔘 Add pushbuttons to the workspace by clicking the icon and dragging it onto the black worksheet.
- 🔲 Hold the Shift key while dragging to create a perfectly square shape for the pushbuttons.
- 🕹️ Copy and paste the pushbuttons to create a total of four, arranging them neatly.
- 🔄 Use 'Edit Align' to align all pushbuttons at the top for a tidy appearance.
- 💡 Assign addresses to each pushbutton and indicator light, using channels for inputs and outputs.
- 📍 Inputs (pushbuttons) are assigned to channel 'A' with bit addresses from 0.00 to 0.03.
- 🌐 Outputs (indicator lights) are assigned to channel 'Y' with bit addresses from 1.00 to 1.03.
- 💾 Save the file using the save icon, 'File Save' option, or Ctrl+S to retain all changes.
Q & A
What is the purpose of creating a PLC simulation display file?
-The purpose is to simulate the operation of a PLC (Programmable Logic Controller) using a software interface to design and test control systems.
How many push buttons and lamps are included in the simulation display?
-The simulation display includes four push buttons and four lamps.
What is the first step recommended for organizing the project files?
-The first step is to create a new folder structure to keep the project files organized, such as a 'hasil' folder and subfolders like 'cx-programmer'.
Which software is used to create the PLC simulation display?
-The software used is CX Designer.
How do you start a new project in CX Designer?
-You start a new project by clicking 'File' and then 'New Project', and then naming the project, for example, 'simulasi PLC'.
What should be considered when naming the project in CX Designer?
-When naming the project, avoid using spaces and consider using underscores or camelCase for readability.
How do you add push buttons to the workspace in CX Designer?
-You can add push buttons by clicking the push button icon on the left side of the workspace and then dragging it onto the black workspace area.
What is the recommended method to align objects perfectly in a square shape?
-To align objects in a square shape, hold the 'Shift' key while dragging the object.
How can you copy and paste objects in the CX Designer workspace?
-You can copy objects by right-clicking and selecting 'Copy' or using 'Ctrl+C', and then paste them by right-clicking and selecting 'Paste' or using 'Ctrl+V'.
What is the process to align all objects to the top?
-To align all objects to the top, select all the objects, right-click, choose 'Edit', and then 'Align', and select 'Top'.
How are the addresses set for the push buttons and lamps in the simulation?
-The addresses are set based on the input and output channels. For inputs like push buttons, channels start from 0.00 to 0.15, and for outputs like lamps, channels start from 1.00 onwards.
What is the significance of the black workspace in CX Designer?
-The black workspace is the area where you design and arrange the elements of your PLC simulation.
Outlines

This section is available to paid users only. Please upgrade to access this part.
Upgrade NowMindmap

This section is available to paid users only. Please upgrade to access this part.
Upgrade NowKeywords

This section is available to paid users only. Please upgrade to access this part.
Upgrade NowHighlights

This section is available to paid users only. Please upgrade to access this part.
Upgrade NowTranscripts

This section is available to paid users only. Please upgrade to access this part.
Upgrade NowBrowse More Related Video
Simulasi Lift sederhana 3 Lantai dengan menggunakan PLC pada CX-Programmer dan CX-Designer

Ladder Logic Examples - PLC Programming Example for Practice

TUTORIAL DASAR PLC OUTSEAL

Create a Virtual PLC in FT Logix Echo

How to Program PLC Using Function Block Diagrams | OpenPLC

How to Download, Install, Program and simulate WPLSoft Delt PLC Software
5.0 / 5 (0 votes)