Benchwork and Layout part 1
Summary
TLDRThe video script details a step-by-step process for marking and drilling a print on a granite plate. It emphasizes the importance of precision and cleanliness, avoiding contamination with substances like daikon. The tutorial demonstrates using two types of pipe gauges for accurate measurements and setting dimensions. It also shows how to mark lines at specific heights using a digital gauge and a precision square. The process includes center punching the marked areas for drilling, ensuring the accuracy of the drill press setup. The final steps involve drilling the holes and preparing them for reaming and tapping.
Takeaways
- π¨ The process begins with marking three drilling points on a print using daikon, ensuring not to contaminate the precision-ground granite plate.
- π Two types of pipe gauges are used: one with a dial and one with a digital display, each requiring different methods to set to zero and ensure accuracy.
- π The script describes setting up dimensions on the gauges for measurements of 0.5 inches, 1 inch, 1.5 inches, and 2.25 inches from the bottom and side of the block.
- π© The setup involves loosening set screws, adjusting the gauges to the desired measurements, and then tightening the set screws to secure the measurements.
- βοΈ A precision square is used to support and mark thin parts, with the objective of creating a line at each marked dimension.
- π§ The script details the process of turning the block 90 degrees to work on the right-hand side, using a different gauge to set the dimensions.
- π© The gauge settings are adjusted to match the required measurements, with a focus on the precision of the adjustments.
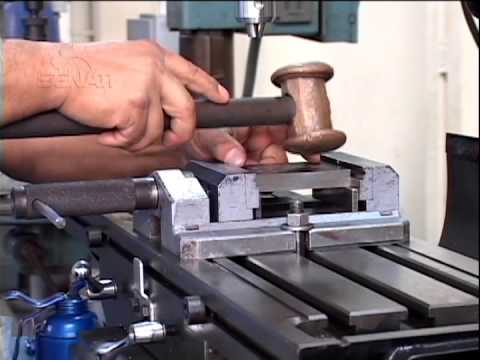
- π¨ Center punching is performed to mark the exact spots for drilling, starting with a small punch and hammer, and then using a larger punch for deeper marks.
- π© The center punch marks need to be precise, with adjustments made to ensure they are centered along the marked lines.
- π οΈ The final steps involve setting up the drill press, using a center drill, and drilling the marked spots, followed by reaming and tapping the holes as required.
Q & A
What is the purpose of using daikon in the process described in the script?
-Daikon is used as a marking tool to mark the spots for drilling on the print, but it is important not to get it on the granite plate as it could dirty the precision-ground surface.
Why is it important to keep the granite plate clean during the marking process?
-The granite plate is precision ground flat, and any contaminants like daikon could affect its accuracy, so it's best to avoid getting it dirty.
What are the two types of pipe gauges mentioned in the script, and how are they used?
-There are two types of pipe gauges mentioned: one with a dial and one with a digital display. They are used to measure and set the dimensions for drilling by adjusting to the desired depth and zeroing the gauge before marking.
How does one ensure the gauge is set to zero before marking the print?
-For the digital gauge, one moves the handle until it stops, then presses two buttons to ensure it's at zero. For the dial gauge, one moves the hand wheel down until it touches the bottom and then hits the reset button to zero.
What are the three different dimensions marked on the print from the bottom?
-The three dimensions marked on the print from the bottom are half an inch up, one inch up, and one and a half inches up.
How is the first dimension set on the gauge?
-The first dimension is set by loosening the set screw, moving the gauge to the half-inch mark, tightening the set screw, and using fine adjustments to ensure it's exactly at 0.5 inches.
What is the purpose of using a precision square when marking a thin part?
-A precision square is used to back up and support a thin part when marking to ensure accuracy and stability during the marking process.
Why is it important to scratch a line rather than cut deeply when marking the print?
-Scratching a line is sufficient to mark the drilling spot without damaging the part, and it provides a guide for the drill to follow without needing to cut deeply.
How are the dimensions set for the right-hand side of the print?
-The dimensions for the right-hand side are set using a different gauge with a finger lever. The gauge is adjusted to the desired depth (three-quarters of an inch, one inch, one and a half inches, and two and a quarter inches) and then locked into place before marking.
What is the purpose of center punching the marked areas?
-Center punching is done to create a small indentation at the exact center of the marked spot, which helps guide the drill bit to start drilling in the correct position.
Why is it necessary to adjust the center punch position after the initial tap?
-Adjusting the center punch position after the initial tap ensures that the punch mark is exactly at the center of the marked line, providing an accurate starting point for drilling.
Outlines
π¨ Setting Up for Precision Drilling
The paragraph begins with the process of preparing a print for drilling, emphasizing the importance of marking three specific areas without contaminating a precision-ground granite plate. The speaker uses daikon dye to mark the spots, being careful not to damage the granite. Two types of pipe gauges are introduced: a digital one with a hand wheel for zeroing and a dial gauge for fine adjustments. The process of setting the gauges to specific dimensions (0.5 inch, 1 inch, and 1.5 inches) is explained, including the use of a precision square for backing up thin parts. The speaker demonstrates how to mark the print with the gauges, ensuring the marks are light and precise for drilling.
π Measuring and Marking Dimensions
This paragraph continues the process of marking the print, focusing on the right-hand side of the block. The speaker uses a different gauge with a finger lever to set the dimensions (0.75 inch, 1 inch, 1.5 inch, and 2.25 inches). The gauge is zeroed, and the speaker demonstrates how to adjust it to the required measurements. The process of marking these dimensions onto the print is shown, with an emphasis on ensuring the marks are clear and accurate. The speaker also explains the importance of not rushing when using the digital gauge to avoid missing the correct measurement.
π© Center Punching the Marked Areas
The paragraph describes the next step in the process, which is center punching the marked areas to prepare for drilling. The speaker uses a small punch and hammer to create a small indentation at the center of each marked line. The importance of accuracy is stressed, with the speaker adjusting the punch's position to ensure it is centered. The process is repeated for each marked line, with the speaker zooming in to show the details of the center punching. The goal is to create a mark deep enough for the drill to catch but not so deep that it damages the material.
π Final Preparations for Drilling
In this final paragraph, the speaker concludes the setup for drilling by center punching the marked areas. The focus is on the precision of the center punch to ensure that the drill will start in the correct spot. The speaker then discusses the next steps, which involve setting up the drill press to drill the center drill and the three holes, followed by reaming one hole and tapping the other two. The paragraph ends with a summary of the preparations made, including laying out the part, center punching, and the upcoming drilling process.
Mindmap
Keywords
π‘Daikon
π‘Granite Plate
π‘Pipe Gauges
π‘Digital Readout
π‘Set Screws
π‘Center Punch
π‘Drill Press
π‘Reaming
π‘Tapping
π‘Precision Square
Highlights
Using daikon to mark drilling points on the print, avoiding contact with the granite plate to keep it clean.
Introduction to two separate pipe gauges, one digital and one with a hand wheel, for precision measurement.
Demonstration of how to set the digital gauge to zero and ensure accuracy with the hand wheel.
Setting the first dimension using the digital gauge to half an inch and marking it on the print.
Using a precision square to support thin parts during marking to ensure accuracy.
Marking the second dimension at one inch and adjusting the gauge accordingly.
Marking the third dimension at one and a half inches, with a focus on precision and careful measurement.
Turning the block 90 degrees to work on the right-hand side and using a different gauge for this task.
Setting the gauge to mark the dimensions of three quarters of an inch, one inch, and two and a quarter inches.
Using a hand wheel to adjust the gauge and lock it into place for accurate marking.
Center punching the marked areas with a small punch and hammer to create a starting point for drilling.
Adjusting the punch to ensure it is centered on the mark before applying more force for a deeper indentation.
Using a larger punch for a more defined center mark to guide the drill press accurately.
Setting up the drill press with a center drill to prepare for drilling the marked spots.
Drilling the three holes and reaming one hole, followed by tapping the other two holes.
Emphasizing the importance of precision and cleanliness in the drilling and marking process.
Transcripts
first thing we're going to do is going
to take
the print
and we've got three places that we're
going to need to mark for drilling so
I'll put a little bit of daikon in there
a little bit of DICOM there and a little
bit of Dyke over there now you'll notice
when I put the dye come on I didn't do
it on this granite plate because we
don't want to get anything on this
granite plate this is precision ground
flat so we don't want we're not we don't
want any daikon that kind of stuff if by
some chance you happen to get some on
here we can clean it off but it is best
if you try to avoid getting into
situations where you have to do that now
we have two separate pipe gauges that we
can use one has dial and one be a closer
look we have digital
you want to move this one with the
handler when you come down when you feel
it stop and there's a make sure it's at
zero and you can hit these two buttons
to make sure that it's there this one
there isn't a hand wheel but you just
want to move it nice and slow push down
and then once it hits the bottom you
just hit the reset button down here to
zero this will get a closer view they
see me moving the hand wheel down until
you feel the resistance touches and you
want to make sure that the zero is in
place for this one you want to slide it
up and down by hand
[Applause]
these are tight once it hits the bottom
hit the zero button right on top looking
at this print you can see that we have
three different dimensions from the
bottom so on this block half inch up one
inch up an inch and a half up and from
this side we've got three quarters of an
inch up inch and a half up and two and a
quarter inches up so to set our first
dimension I'm going to loosen this one
and I'm going to set this more in the
Senate some of us run that all the way
down and when a movement looking at my
digital move it up to the half-inch mark
I've got pretty close I'm going to
tighten this set screw first then I can
use the fine adjustment here to bring
this 0.5 0 0
I've got it in place I can lock this one
now
this actually is fairly thick and will
stand dirty by itself if you had a thin
part you needed to mark you could use a
precision square like I have here to
back it up and all we're gonna do here
is we're going to reach up a little bit
here and just drag that across send mark
a line at half inch now the next one is
at one inch so we'll do the exact same
thing I'll loosen both of these set
screws bring it up to one inch
reasonably close tighten the top one and
then I want to adjust this till it's at
one inch
tighten this lower one
and
just that across described that line and
I am putting a little bit of pressure on
there just so that I can hold it in
place all you're doing is scratching
you're not trying to to cut anything
you're not trying to leave a huge mark
and the last one is that one and a half
this way
Kira coughs we'll move it up just a
little bit by hand tighten this one up
and on this digital it's a little slow
to read so you can make a movement too
fast and you'll you'll miss your number
one point five and I won't move that
across just to mark it and we'll zoom in
on this so you can see
those lines that I have
so there you can see there you can see
the lines that I described we're gonna
be working from this right-hand side so
we're going to turn this block 90
degrees to work on to this right-hand
side we're going to use this gauge
instead now and for this one it's kind
of lock right here a little finger lever
so we'll loosen it we'll bring it up and
as you recall we had three quarters of
an inch an inch and a half of 1.5 and
2.25 so two and a quarter so we're gonna
bring this up and if you'll notice here
I'm going to go ahead and zoom in on
that a little bit so you could watch me
move it so here is down at the bottom is
a zero these are have been zeroed
what I'm going to do is move that wheel
up there's one two three four get to
five those are times 0 and this one's
easier just lock it down and to notice
that's where it has here this made five
so that's 500 and then each of this one
is a hundred thousands broken into
thousands so we want to move this up a
little bit
250,000 so then lock it into place and
now scratch across there we're gonna go
we're gonna do the three quarter one
again just to make sure so we're going
to loosen this up use the hand wheel on
this one to move it up and down
Rebeca zero
six 750,000
they're 750 so we're going to remark
these will work this take it down like 0
1 2 3 4
there is 5
well there is the correct location there
and the other one is inch and a half so
listen this move this up there is it one
inch there one two four five lock that
in place
scratch across there and then that part
is done
now what we're going to do here is we're
going to Center punch those areas we're
going to start with a small punch hammer
here we're just going to lightly tap it
to get it in place so you've got your
hammer and your punch let me zoom in
here so you can see what I'm trying to
do so what I'm going to do set the side
so you can see it so what I want to do
is find the center of that mark so I'm
going to look
and I try to move the top to the side
so if I can see where that point hits
along that line along that line and then
when I got where I want it I think it is
I'm just kind of lightly tap it first
take a look at it see if that looks like
it's on the center pointing up that got
a little mark there I can send her back
in and hit it a little bit harder and
just see if I can get even closer so you
can see this see how it's a little bit
off it's not exactly in the center I
need to move that just a little bit to
one side so I'm gonna just a little bit
at this point you can usually move it to
the right spot and let's get this where
you can see it a little bit better
like you
let's camp
so you can get it from my perspective
being on center
that
warp and once I've got my mark where I
need it I'll get it
couple of harder taps
and we'll take a larger punch and I've
got on the handle so it's got a good
solid back and now we have that the
center that looks to me like I still
need to move a little bit that direction
so I still can
[Applause]
and then if you look at it
instead of looking at it at an angle
yeah that's looking pretty square in the
center now we're gonna do the same thing
with these other two back out a little
bit so you can see me do it
take
tiny perch
[Music]
[Applause]
[Music]
[Applause]
okay you'll notice I wasn't trying to
hammer a nail through there I was just
marking that spot but I wanted to deep
enough that my senator drill will catch
on to that and drill in the right spot
so at this point we have laid out our
part we Center punched it so now we're
going to go to the drill press we're
going to set up and drill our center
drill and then drill our three holes and
then ream one hole and we'll tap the
other the other two
Browse More Related Video
Benchwork and Layout part 2
Drill Press Safety
UJI KUANTITATIF KARBOHIDRAT MENGGUNAKAN SPEKTROFOTOMETRI
Center Drilling, Drilling and Countersinking Video
Drilling Machine Operations: Boring, Reaming, Counter Sinking, Spot Facing, Tapping | Shubham Kola
CARA MEMBUAT VERTIKAL TOWER HIDROPONIK DARI AWAL SAMPAI PANEN
5.0 / 5 (0 votes)