Wireless Electric Vehicle Charging System ,wireless power transmission Project #technology #science
Summary
TLDRThis video demonstrates how to build a wireless power transmission system using a primary and secondary coil, a transistor, and an LED bulb. The project begins by crafting the base, followed by winding an aluminum wire into a primary coil. After setting up the transistor and connecting the necessary components, the secondary coil is created with fewer turns. The system is powered by a battery, and the wireless power transmission is tested by lighting an LED bulb. The tutorial provides step-by-step instructions, allowing viewers to easily replicate the project and explore wireless power transfer principles.
Takeaways
- 😀 Start by using plywood as the base for your wireless charging station project.
- 😀 Decorate the base as per your preference, such as adding tree designs for decoration.
- 😀 Use aluminum wire to create a primary coil by winding it 15 times around a spool or by hand.
- 😀 Carefully remove the insulation from the aluminum wire using scissors or a blade to expose the metal for proper connection.
- 😀 Join the coil's ends to form a circuit, with one joint and two individual points for connection.
- 😀 Connect a transistor to the coil and attach a 1 kΩ resistor to complete the circuit.
- 😀 Label the charging area on the plywood using paper to indicate where the wireless charging will happen.
- 😀 Attach the primary coil to the plywood at the labeled charging location using tape or adhesive.
- 😀 Create a secondary coil by winding the aluminum wire 15 times and secure it to the board.
- 😀 Connect an LED bulb to the secondary coil and test the charging station by powering it on and checking if the LED glows, indicating successful wireless power transfer.
Q & A
What is the main purpose of this project?
-The main purpose of this project is to demonstrate how to create a wireless power transfer system, which can be used to charge devices without direct physical connections.
What materials are needed for this wireless power transfer project?
-The materials required for this project include plywood, aluminum wire, a transistor, a resistor (1 ohm), an LED, a battery, a switch, ammeter, and basic crafting tools like scissors and wire cutters.
How do you create the primary and secondary coils?
-To create the coils, you need to wind aluminum wire 15 times to form a coil. Afterward, remove the insulation from the wire and create a joint with the two individual ends to form the primary coil. The secondary coil follows the same process but only needs 15 turns.
Why is it necessary to remove the insulation from the wire?
-The insulation is removed from the wire to expose the aluminum part, which allows proper electrical contact and ensures the coil can function as intended in the wireless power transfer setup.
What is the role of the transistor in this project?
-The transistor is used to control the flow of current in the circuit, allowing for the transmission of power from the primary coil to the secondary coil, which powers the LED.
How do the primary and secondary coils transfer power wirelessly?
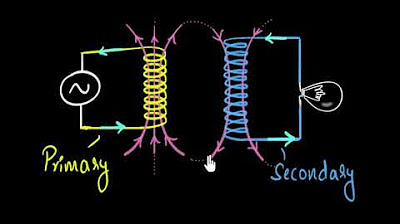
-The primary coil generates a magnetic field when powered, which induces a current in the secondary coil, allowing the power to be transferred wirelessly to the LED or any other device connected to the secondary coil.
What function does the resistor serve in this project?
-The resistor limits the current flowing through the circuit, preventing excessive current that could damage components like the transistor or LED.
How is the LED connected to the system?
-The LED is connected by attaching the positive terminal to the secondary coil's positive lead and the negative terminal to the battery, with the switch controlling the negative connection.
What happens when the power is turned on and the coils are aligned?
-When the power is turned on and the primary and secondary coils are aligned, the LED will glow, indicating that wireless power transmission is successfully occurring between the two coils.
How can you ensure the system works correctly?
-To ensure the system works correctly, verify that all connections are secure, the coils are properly wound, and the components like the transistor, resistor, and ammeter are correctly positioned in the circuit. Proper alignment of the coils is essential for efficient power transfer.
Outlines

Этот раздел доступен только подписчикам платных тарифов. Пожалуйста, перейдите на платный тариф для доступа.
Перейти на платный тарифMindmap

Этот раздел доступен только подписчикам платных тарифов. Пожалуйста, перейдите на платный тариф для доступа.
Перейти на платный тарифKeywords

Этот раздел доступен только подписчикам платных тарифов. Пожалуйста, перейдите на платный тариф для доступа.
Перейти на платный тарифHighlights

Этот раздел доступен только подписчикам платных тарифов. Пожалуйста, перейдите на платный тариф для доступа.
Перейти на платный тарифTranscripts

Этот раздел доступен только подписчикам платных тарифов. Пожалуйста, перейдите на платный тариф для доступа.
Перейти на платный тарифПосмотреть больше похожих видео

Banyak Yang Gagal!! Begini Cara Rakit Mini Tesla Coil Supaya Berhasil | Simak Videonya

Electromagnetic induction Model | physics working model for class 12 | wireless power transmission

DIY Solar Power Bank with Wireless Charging System

Transformers - working & applications (step up and step down) | A.C. | Physics | Khan Academy

Faça uma MINI BOBINA DE TESLA caseira

Video Animasi tentang Cara Kerja Transformator / Trafo versi English
5.0 / 5 (0 votes)
