3. Prerequisites to setup F5 lab || How to install Webserver on windows 10 machine || F5 Big-IP LTM
Summary
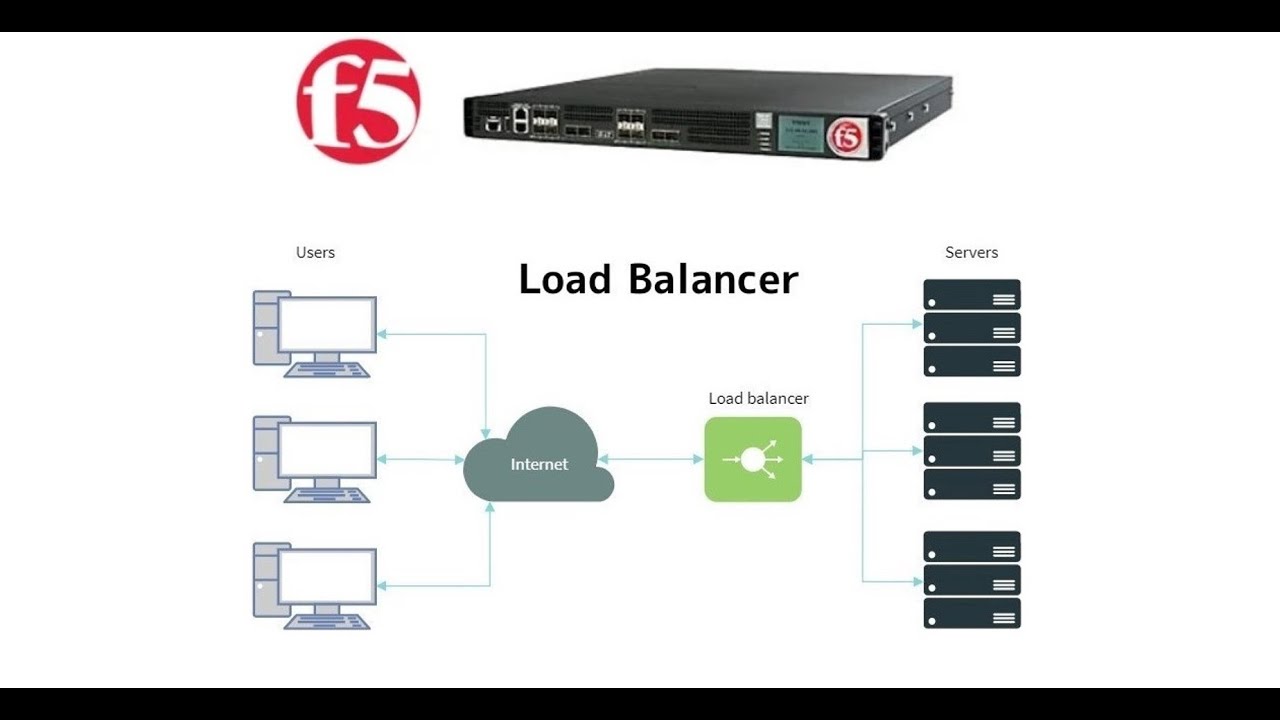
TLDRThis YouTube tutorial from Noor Networks guides viewers on preparing a lab environment with a Big IP LTM appliance, three web servers, and a client machine. It emphasizes setting up a management machine for Big IP configuration and walks through configuring a web server with a static IP, installing IIS services, and creating a basic HTML page to test server functionality. The tutorial also previews upcoming steps like adding VMware Networking and deploying an F5 load balancer.
Takeaways
- 🌐 The tutorial is focused on preparing a lab environment using a Big IP LTM appliance with web servers and a client machine.
- 💻 A management machine is necessary for configuring and managing the Big IP appliance.
- 🔧 The lab setup includes three web servers on the internal side and one client machine on the external side.
- 📍 The tutorial demonstrates how to prepare one web server, with instructions for the other two to be done similarly.
- 🖥️ The web server is a Windows 10 machine with 2GB of memory, a 40GB hard disk, and a single processor.
- 🛠️ Network adapters will be configured according to the network design during the lab setup.
- 🌐 The IP address for the web server is set to 10.1.1.10 with a subnet mask of 255.255.255.0 and a default gateway of 10.1.1.100.
- 🔄 The tutorial covers enabling IIs services and configuring the web server using HTML pages.
- 📄 A simple HTML page is created and saved as 'web server.html' to be used for testing the web server.
- 📁 The HTML file is placed in the 'web server' folder within the 'inetpub/wwwroot' directory.
- 🔄 The IIs service is used to create a new website, assigning the correct IP address and port, and setting the default document.
Q & A
What is the main focus of this YouTube tutorial?
-The main focus of this YouTube tutorial is to prepare the prerequisites for a lab involving a Big IP LTM Appliance, including setting up a web server and configuring network settings.
What is the role of the management machine in this lab?
-The management machine is used for the configuration and management of the Big IP Appliance. It is the machine through which the Big IP will be administered.
How many web servers are required for the lab?
-Three web servers are required for the lab.
What is the IP address of the web server one?
-The IP address for web server one is 10.1.1.10.
What is the default gateway for the web server one?
-The default gateway for web server one is 10.1.1.100.
What network adapter settings will be changed later in the lab?
-The network adapter settings will be changed according to the network design when the networking lab is being prepared.
What is the purpose of creating an HTML page for the web server?
-The purpose of creating an HTML page is to have a test page that can be used to verify the successful setup of the web server and to provide a real feel of the lab environment.
What is the content of the HTML page created in the tutorial?
-The HTML page contains a title 'Web Server One', centered content that says 'Welcome to Web Application Server', and a line stating 'F5 Load Balancer Lab Practice'.
How is the HTML file deployed to the web server?
-The HTML file is saved as 'web server.html' and placed in the 'web server' folder within the 'inetpub/wwwroot' directory on the C drive.
How can you verify if the web server is working correctly?
-You can verify if the web server is working correctly by browsing to the IP address of the web server and checking if the HTML page is displayed.
What is the next step after setting up the web servers?
-The next step is to download the F5 load balancer image, deploy it in VMware, complete the necessary configuration and licensing, and then proceed to the advanced level of the lab.
Outlines
🌐 Setting Up the Lab Environment
The tutorial begins by introducing the lab environment, which includes a Big IP LTM Appliance, three web servers on the internal side, and one client machine on the external side. The presenter mentions a missing management machine, which is essential for configuring the Big IP Appliance. The focus is on preparing a web server as a prerequisite for the lab. The presenter guides through setting up a Windows 10 machine with specific hardware requirements and configuring its IP address, subnet mask, and default gateway. The network adapter settings will be adjusted later according to the network design. The tutorial also hints at future VMware Networking configurations and the addition of a VM Network for better understanding.
🖥️ Configuring the Web Server
The presenter proceeds to configure the web server by enabling the Internet Information Services (IIS) and the FTP server through the Windows features. The necessity of these services is explained as a future requirement for the lab. The tutorial then demonstrates how to create a simple HTML page using Notepad, which includes a title, body, and centered content. The HTML page is saved as 'web server.html' on the desktop. The content of the page is designed to be representative of a web application server, with specific mentions of 'F5 load balancer' and 'lab practice', indicating the lab's focus on load balancing.
📁 Deploying the Web Server
The final part of the tutorial involves deploying the web server. The presenter shows how to save the created HTML file in the appropriate directory within the server's file system. Then, using the IIS Manager, a new website is configured with the physical path pointing to the directory containing the HTML file. The site is set up to use HTTP on the web server's IP address and port 80. The HTML file is specified as the default document for the site. The presenter tests the website by browsing to it and confirms that it works as expected, displaying the content created in the HTML page. The tutorial concludes with a reminder to subscribe to the YouTube channel for further tutorials on downloading and deploying the F5 load balancer image, and completing necessary configurations and licensing.
Mindmap
Keywords
💡YouTube
💡Lab Topology
💡Big IP LTM Appliance
💡Web Servers
💡Management Machine
💡VMware Networking
💡IIS Services
💡HTML Page
💡FTP Server
💡DNS Server
💡Load Balancer
Highlights
Introduction to the lab topology involving a big IP LTM Appliance, web servers, and a client machine.
Explanation of the need for a management machine for configuring the big IP Appliance.
Emphasis on preparing web servers as a major prerequisite for the lab.
Guidance on creating a Windows 10 machine with specific memory and hard disk requirements for the web server.
Instructions on configuring the IP address and default gateway for the web server.
Details on future changes to the network diagram for better understanding.
Demonstration of powering on the virtual machine and configuring its network settings.
Tutorial on enabling IIs services and FTP server for the web server.
Creation of a simple HTML page for testing the web server.
Explanation of how to save the HTML file and preview it in the File Explorer.
Steps to create a folder in the web server's directory and place the HTML file there.
Instructions on setting up the site in the IIs service manager.
Guidance on making the site the default page in the web server.
Testing the site to ensure it's working correctly.
Discussion on creating similar web servers (web server 2 and web server 3) with unique HTML pages.
Anticipation of the next tutorial involving downloading and deploying the F5 load balancer image.
Conclusion of the tutorial and encouragement for viewers to subscribe and share the channel.
Transcripts
hello everyone welcome to my YouTube
channel Noor Networks
in this tutorial we are going to prepare
the prerequisites which will be helpful
to proceed with our lab this is our lab
topology where we have a big IP LTM
Appliance and on the internal side we
have three web servers on the external
site we have one client machine
and apart from that one thing which I am
missing over here is the management
machine management machine will be
basically a machine which we will be
using for the configuration purpose of
big IP you can do the administration and
management of the big IP Appliance
through that particular machine so that
we will be adding
and nothing to worry about when we will
be doing a lab on networking at that
time I will show you like how you will
be preparing this particular lab to
proceed further I will be explaining you
in detail about a VMware Networking
how the network adapters will be used
for for the big IP each and everything
will be in detail but for now what we
are going to do is we will be
preparing the web server the major
prerequisite which I could see over here
to proceed with the lab is we need a web
server
the three web server we require over
here
so over here in this tutorial I will be
preparing one web server and the rest to
you have to do as it is
I will show you how to do it so let's
proceed with the
I mean I can say the prerequisite where
we are going to prepare one web server
for our
lab and the rest to you can follow in
the same way
now we are going to open the VMware
so guys over here
you can see app server one is the one
which I have created for now okay just
forget this ad server web server and all
because this we won't be using the web
server when I have already created which
is a Windows 10 machine
with the memory of 2GB hard disk you can
take 40 DB also that is enough processor
one is enough
network adapter and all we will change
as per our Network design when we will
proceed further
and anyhow I will be making some more
changes in the network diagram our lab
topology for the better understanding I
will be adding a VM Network also over
there so that you can understand very
clearly
now let's power on this virtual machine
okay
guys if you can see the machine IP
address for the web server one
should be
10.1.1.10 so we will be configuring this
IP address with the default gateway
10.1.1.100 it is not visible but the
default gateway will be that this one
the internal interface IP address
apart from this VMware Networking we
will do all of the together so that you
will have a better understanding because
in this laptopology I have not even
added the VMware Networking but in the
coming tutorial when actually we will be
doing a lab these are the prerequisites
when we will be doing a lab at that time
I will add a VMware Networking as well
for you
so over here the very first we are going
to change the
IP address
even you can use Windows 7 machine also
if you have or Windows 10 is absolutely
let's make it to 10.1.1.10
subnet mask
255.25.255.0 and the default gateway
will be
10.1.1.100 as per our Network design
DNS server we don't need it now if you
can keep it whatever if you have it's
okay if you know then also Okay click on
OK over here click ok to save the
configuration you have changed the IP
address of your machine now
now we will proceed to the web server
configuration
the very first step what you have to do
is you will go to control panel over
here
going to control panel
go to programs and features
turn windows features on or off over
here we are going to turn on the IIs
services
if you will see this is a internet
information service IIs
this we are going to open and let's open
the FTP server also in the coming time
we will be doing a FTP uh pool also that
is a different
topic anyhow I will explain but for now
this is the requirement because this is
our future requirement along with IIs
just open this FTP server also click on
OK
all right
close this
now your IIs services are
enabled
we will start to create one page over
here see you get you can create a test
page but you know what I'm going to do
is we will write a small HTML page over
here uh for that what you have to do
click on right click new or you simply
have to open the notepad basically guys
let's open the notepad directly
and you can simply write test and you
can save it
but instead of that let's uh write a
small HTML code
so
for that very first you have to start
open the HTML
then we will add a small title
open the title
uh let's give the title name web server
one
over here just add a note that same
whatever we are doing over here to
create a web server similar thing we are
going to do in web server 2 and web
server 3. only the title will be web
it's a web server one over here over
there it will be web server 2 and web
server 3 respectively
so once you have created the title let's
close this title now
for closing you will be using this thing
the slash means you're closing whatever
you are opening you are using the slash
to close it
hit enter let's create a HTML body
for doing so it's the same thing open
the body
now note down one thing you have you
want the page to be in the center right
So Right Center
then over here right
server
one and
just one thing guys remove this title as
web server just skip web server because
for identification purpose I am saying
when we will be doing the lab at that
time I will show you why we have uh done
this purposely so it says server one
and
thereafter you have to go to the second
line so you will break this line so the
syntax is BR
for breaking this line
then add the subject not subject the
content I can say page content let's
give the page content as welcome to
okay web application welcome to web
application
server
and you have to
again break the line
and one more thing one more line we will
add as
F5
load balancer
lab practice
guys I would have shown you straight
away like just simply creating a page
with hi everyone or test something but I
want a small uh you know HTML page to be
created so it will you will get a real
feel in the lab
now once we have created a title we have
written a body in the center now is the
time to close all the tag which we have
open so if you see the center tab is
open so we'll close the center tag now
foreign
tag is also open right so we will close
the body tag also
is there any else HTML is also open
right so we will close the HTML also
now what we are going to do we have
created a small HTML page over here just
simply
save as
uh
web server Dot
HTML and save as type all files
and you can save it over here on the
desktop for the while
save it
close it
now if we will try to open this
you should be able to see that HTML page
over here
see you are able to see it is in the
center with the server one as it
a heading over here then the content
over here and even the title web server
over here okay so means uh what content
we have created is as per hour
requirement now you will open your
Explorer File Explorer you will go to
your C drive
then go to inet Pub
then go to www root folder
and over here
create one folder
with the name
web server and this particular file
which we have created dot HTML file we
will put it over here
click continue
now once this is done
you will open the IIs service
is app you will open
over here we are going to create our
site
just right click over here
if you will see this one or else you
when you open this over here you will
find sites
so just add website right click over
here and add a website
give the name site name
web server
it is asking for physical path you know
where we have kept it in C
I net Pub
www root
in that we have a web server
okay
then
we are going to use http
and the IP address of our web server
10.1.1.10 port number is 80. hostname we
will leave it for now keep this check as
it is and click on OK
this is done
now what we are going to do
we will make this particular site as a
default page
so
when you go Underside the web server
which you have recently created just you
will find a default document
open this document
and add over here the name of the site
you know the website name the the file
name web server Dot HTML
click on OK button
once this is done now it is a time to
test whether our site is working or not
so just clicking over here you will
click on browse over here and it should
work for you
and guys you can see it is working right
let me show you again
over here
in the web server you have to Simply
browse this
and it is working which means that your
web server one is created successfully
you have created a website in one of
your server similarly you are going to
create a web server too and web server
3. the same configuration you will be
doing for your web server 2 and web
server 3. just to identify uh make the
difference between the server in Real
Environment this is not the case but in
our lab we should understand like
whenever the traffic is hitting to that
particular server how you will
understand for that purpose I am writing
server one server 2 server three so in
the HTML page uh over here you have
written server one on web server two you
will write server 2 on web server 3 you
will write server 3. once this
prerequisite is ready then we can
proceed with our lab
so guys this is how you will be
preparing your prerequisite basically
you will be creating your web server for
proceeding with your lab that's all guys
in this tutorial in the next tutorial we
will be downloading the F5
load balancer image we will be deploying
it in our VMware and necessary
configuration licensing part we will
complete and thereafter we will move to
the advanced level so that's all guys in
this tutorial thanks for watching if you
haven't subscribed to my YouTube channel
yet please subscribe it now and do share
with your friend thanks and see you in
the next tutorial
Посмотреть больше похожих видео
5. Setup F5 Big-IP LAB || Configuring VM Network Adapters || F5 Big-IP LTM
1. Introduction to F5 Big IP || LTM (Local Traffic Manager)
Creating a Azure Cloud Server: A Step-by-Step Tutorial (IaaS)
9. Types and Methods of Load Balancing || F5 Big IP LTM
4. Install F5 Big-IP LTM in VMware || How to get free F5 load balancer licences || F5 Big-IP LTM
Install and Configure DHCP Server in Windows Server 2019 Step By Step Guide
5.0 / 5 (0 votes)