💥POWERPOINT | EASY INFOGRAPHIC IN LESS THAN 10 MINUTES ! | STEP BY STEP 💥

LOVER OF POWERPOINT
18 Mar 202409:39

Summary

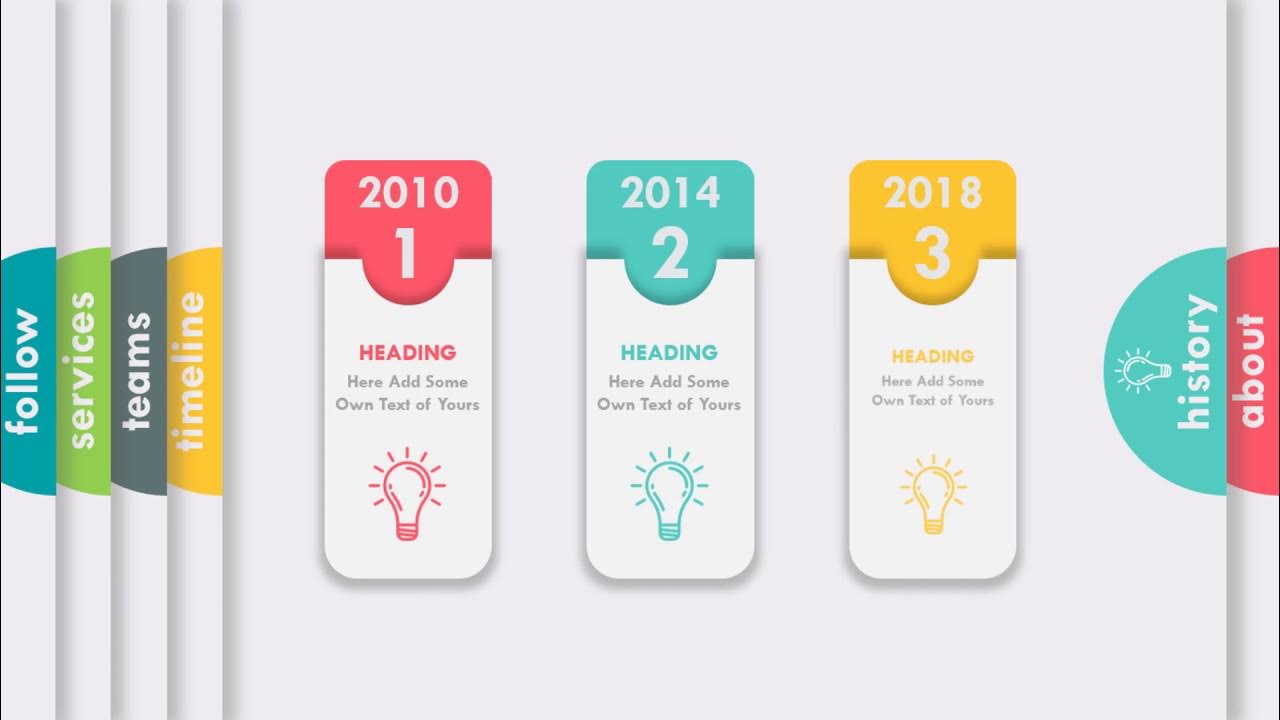
TLDRThis tutorial video walks viewers through creating an infographic slide with a 50% brightness background. The presenter demonstrates how to insert and manipulate shapes, including circles and rectangles, to create a layered design. They also guide on adding icons, text boxes, and lines with various styles. The video further shows grouping and duplicating elements for efficiency, and concludes with adding animations to enhance the slide's visual appeal. The presenter encourages viewers to like and subscribe for more informative content.

Takeaways

  • 🎨 'Choosing a background with 50% brightness sets the tone for the slide.'
  • 🔄 'Duplicating shapes using control+d allows for quick editing of multiple similar elements.'
  • 🔵 'Using a color and transparency selection for shapes helps in creating visual depth.'
  • ➖ 'Subtracting shapes, like a circle from a rectangle, creates unique design elements.'
  • 🔗 'Inserting icons from a library adds visual interest and can convey specific messages.'
  • 📝 'Adding text boxes with relevant text provides information and context to the slide.'
  • 📏 'Using lines with specific dash types can enhance the design and guide the viewer's eye.'
  • 🔄 'Duplicating and resizing circles offers a way to create a cohesive design element.'
  • 🔗 'Grouping elements such as icons and text allows for easier manipulation and animation.'
  • 🎭 'Applying animations like fly-in effects brings the slide to life and captures attention.'

Q & A

  • What is the first step the speaker takes when creating their slide?

    -The first step is to choose a background for the slide with a brightness of about 50%.

  • How does the speaker insert a circle shape in their slide?

    -The speaker inserts a circle shape with no outline and then sets the color.

  • What keyboard shortcut does the speaker use to duplicate a shape?

    -The speaker uses the keyboard shortcut 'control+d' to duplicate a shape.

  • Why does the speaker send the duplicated circle shape backward?

    -The speaker sends the duplicated circle shape backward to layer it behind the original circle, creating a layered effect.

  • How does the speaker adjust the transparency of a shape?

    -The speaker adjusts the transparency by selecting the shape, then choosing the color and transparency options in the format shape settings.

  • What does the speaker do after inserting a tiny circle shape?

    -After inserting a tiny circle, the speaker inserts a rectangle to subtract from the circle, creating a specific design element.

  • Where does the speaker find icons to insert into the slide?

    -The speaker finds icons to insert from a source indicated as 'insert icons', though the specific platform or application is not mentioned.

  • How does the speaker ensure the text boxes are aligned properly?

    -The speaker uses the align and center options to ensure the text boxes are properly aligned within the slide.

  • What is the purpose of inserting a line with a specific dash type?

    -The speaker inserts a line with a specific dash type to aesthetically fit the design of the slide.

  • How does the speaker duplicate and resize circles for their design?

    -The speaker duplicates circles by selecting them and using 'control+d', then resizing them to be smaller and placing them within the blue shape.

  • What is the process for grouping elements together in the slide?

    -The speaker groups elements by selecting them while holding the shift key and then choosing the group option, which allows for easier manipulation and duplication of multiple elements.

  • How does the speaker apply animations to the shapes in the slide?

    -The speaker applies animations by selecting a shape and choosing the 'fly in' animation, adjusting the effect options, duration, and start time. They then use the animation painter to copy the animation to other shapes and adjust the delay for each.

Outlines

00:00

🎨 Designing a Slide with Shapes and Icons

The paragraph describes the process of creating a slide presentation. It starts with choosing a background and adjusting its brightness to 50%. The creator then adds a circle shape with no outline and selects a color. This circle is duplicated to create a larger one, which is sent backward in the layering. The format of the shape is adjusted for color and transparency. A tiny circle and a rectangle are added, with the circle being used to subtract from the rectangle to create a specific shape. The creator then inserts icons found in the 'insert icons' feature, and adds text boxes with music playing in the background. A line is added with a chosen dash type, and text is inserted as needed. The circles are selected and duplicated to create smaller circles, and a shape is added for infographics with an icon and text. The process involves grouping elements and duplicating groups for efficiency, allowing for easy changes to icons, shapes, and text.

05:02

🔗 Grouping and Animating Slide Elements

This paragraph continues the slide creation process by focusing on text boxes with titles and descriptions, grouping icons and circles, and then grouping them with text to form a single unit. The creator duplicates this group to apply changes such as icon and text updates across multiple slides efficiently. The paragraph also covers applying animations to shapes, such as a fly-in effect from the left, adjusting duration, and setting the animation to start with the previous action. The animation is then copied to other shapes with adjustments to delay for a staggered effect. The video concludes with a teaser of the final product and a call to action for viewers to like and subscribe.

Mindmap

Keywords

💡Background

In the context of the video, 'background' refers to the visual setting or the digital canvas on which all other elements of the slide are placed. The script mentions choosing a background with 50% brightness, which suggests that the background is a fundamental part of the slide design, influencing the overall aesthetic and readability of the slide content. A well-chosen background can enhance the visual appeal and ensure that the information presented stands out.

💡Shape

Shapes are geometric figures used in the video to create visual elements on the slide. The script describes inserting and manipulating shapes like circles and rectangles, which are then used to build more complex designs. Shapes are essential in infographics as they help organize information and can be used to highlight key points or create visual interest. For instance, the script mentions duplicating a circle to create a layered effect and using the 'subtract' function to combine shapes.

💡Duplicating

Duplicating in the video script refers to the process of creating an exact copy of a slide element, such as a shape or text box. This is a common technique in design to save time and maintain consistency across a presentation. The script illustrates duplicating a circle and then adjusting its size to create a smaller version, which is a practical way to reuse design elements and ensure a cohesive look.

💡Transparency

Transparency in the video script pertains to the opacity level of a shape or object on the slide. Adjusting transparency can help with the layering of elements, making sure that text or important information is visible and not obscured by overly opaque shapes. The script describes setting the transparency of a circle to achieve a specific visual effect, which is crucial for maintaining clarity and visual hierarchy in the design.

💡Icon

Icons in the video are small graphical representations used to convey specific ideas or information quickly and efficiently. The script mentions inserting icons, which are likely to be part of the infographics to represent concepts or data points. Icons are a powerful design element as they can simplify complex information and make the slide more engaging and easier to understand.

💡Text Box

A text box in the video script is a container for written content on the slide. Text boxes are essential for presenting information, such as titles, descriptions, or data points, alongside visual elements. The script describes inserting text boxes and adding text, which is a key step in creating informative and well-structured slides. Properly designed text boxes can enhance readability and guide the viewer's attention to important information.

💡Dash

In the context of the video, 'dash' refers to the style of a line, which can be a simple straight line or have various patterns like dots or dashes. The script mentions choosing a type of dash for a line on the slide, which is an important design decision that can affect the overall look and feel of the presentation. Dashes can be used to guide the viewer's eye, separate sections, or add a stylistic touch to the design.

💡Grouping

Grouping in the video script is the action of combining multiple slide elements into a single unit. This is done to simplify the editing process, as it allows for easier manipulation of the grouped elements as one. The script describes grouping icons, circles, and text boxes, which is a practical approach to ensure that related design elements stay aligned and can be duplicated or animated together.

💡Animation

Animation in the video refers to the addition of motion or effects to slide elements to make the presentation more dynamic and engaging. The script discusses applying a 'fly in' animation to a shape, which is a way to draw attention to that element when the slide is presented. Animations can help to emphasize key points, guide the viewer through the content, and add a professional touch to the presentation.

💡Infographics

Infographics in the video script are visual representations of information, data, or knowledge intended to present complex information quickly and clearly. The script mentions creating an infographic with shapes, icons, and text, which is a common use of design elements to convey information in a visually appealing and digestible format. Infographics are particularly effective in presentations as they can summarize data or concepts, making them more accessible and memorable.

Highlights

Choosing a background with 50% brightness for the slide

Inserting a shape with no outline and a specific color

Duplicating the shape using control+d to create a larger one

Sending the larger shape backward in the layer order

Adjusting the color and transparency of the shape

Inserting a tiny circle shape

Inserting a rectangle to subtract from the circle

Choosing no outline and white color for the new shape

Inserting icons from a library

Adding text boxes with specific text

Inserting a line with a selected dash type

Writing custom text in text boxes

Centering text within the text boxes

Duplicating circles by holding the shift key

Inserting a shape for infographics with an icon and text

Making circles smaller and arranging them within the blue shape

Grouping elements like icon and circle for alignment

Inserting text boxes for titles and descriptions

Grouping multiple elements to create a single unit

Duplicating groups for quick layout repetition

Changing icons and text in each duplicated shape

Applying fly-in animations to shapes

Customizing animation options like duration and effect

Using the animation painter to copy animations to other shapes

Adjusting delay for each animated shape

Final product presentation and call to like and subscribe

Transcripts

play00:00

hello to

play00:02

everyone okay first I'm choosing

play00:06

background for my

play00:09

slide I'm using brightness about

play00:15

50% after that I'm inserting shape

play00:22

Circle no

play00:25

outline

play00:26

color then I'm duplicating shape

play00:31

control+

play00:35

d a larger than first one then I'm

play00:40

sending it

play00:43

backward I'm selecting that shape format

play00:47

shape and I'm choosing color and

play00:50

transparency and this is what I

play00:58

get then um

play01:00

inserting this

play01:03

[Music]

play01:06

shape a tiny tiny

play01:14

Circle then I will insert a rectangle

play01:17

because I want subtract these two I'm

play01:21

selecting Circle then rectangle and

play01:25

subtract no outline and white color for

play01:29

this

play01:30

shape then I'm inserting

play01:36

icon you can find all these icons on

play01:41

insert

play01:42

icons but I have done it before to not

play01:46

lose time on this

play01:49

video then I'm inserting some text boxes

play01:52

with some

play01:56

[Music]

play01:58

text

play02:21

then I will insert

play02:28

line

play02:31

and I will choose the type of Dash which

play02:34

will fit me for this Slide the

play02:39

best so I'm selecting this

play02:43

one then I'm inserting some text of

play02:46

course you can write here whatever you

play02:48

want or whatever you need to write

play02:57

[Music]

play02:58

here

play03:09

a little bit of

play03:13

[Music]

play03:23

centering then I'm selecting my circle

play03:27

and second Circle which I

play03:32

duplicate you can select it by holding

play03:34

shift

play03:37

key then I duplicate it and I've got

play03:42

these small

play03:51

circles you can duplicate these

play03:54

circles select the circle then control+

play03:58

d

play04:02

[Music]

play04:11

after this I'm inserting a shape where I

play04:16

will put my icon and some text for

play04:25

infographics then I'm selecting my first

play04:28

Circle I'm doing duplicating

play04:31

it and I'm making it a little bit

play04:35

smaller I'm putting it to my blue

play04:39

shape I'm using some

play04:52

icons you can

play04:53

select icon and this circle holding the

play04:58

shift key and then you go to Al line

play05:02

Center and

play05:04

middle now I'm just inserting some text

play05:07

boxes

play05:08

with title and some

play05:20

[Music]

play05:28

description

play05:43

I'm selecting icon and

play05:46

circle and I'm grouping

play05:51

them then I'm selecting uh title text

play05:56

box with title

play05:58

description the first blue shape and

play06:02

shape with circle and icon you're

play06:06

selecting all of it holding shift

play06:09

key when I select them then I group

play06:14

them to make one group and after that

play06:17

I'm just

play06:19

duplicating that

play06:22

group that's the easiest way and now you

play06:25

can change icons in shapes and titles on

play06:58

description

play07:01

because I'm changing icons in every

play07:04

shape after this

play07:07

step I would need

play07:10

to group again other

play07:17

shapes you will see it

play07:28

soon

play07:52

so I'm selecting this

play07:54

icon and complete shape and group them

play07:59

so so they are now one

play08:05

group and I'm just repeating that to

play08:09

other

play08:18

shapes then I will apply some animations

play08:22

to shapes so I'm selecting first shape

play08:25

and I'm applying fly in animation

play08:28

changing

play08:30

effect options from left changing

play08:34

duration

play08:35

bouncing on effect

play08:38

options and start with

play08:42

previous then I'm selecting first shape

play08:45

and I'm just clicking on animation

play08:49

painter and I'm just pasting the

play08:53

animation on other shapes and I'm just

play08:57

changing delay

play09:00

for

play09:01

every

play09:05

shape so that's it for this video and

play09:09

for this slide you will see the final

play09:12

product

play09:13

soon and I hope you guys will like this

play09:16

video and this

play09:19

infographics so please don't forget to

play09:23

like And

play09:28

subscribe

Rate This

5.0 / 5 (0 votes)

Связанные теги
InfographicsSlide DesignPresentation TipsIconographyAnimation EffectsVisual AestheticsContent CreationDesign TutorialCreative ProcessEducational Video
Вам нужно краткое изложение на английском?