How I Develop Black And White Film At Home
Summary
TLDRThis video offers a comprehensive guide to developing 35mm film at home using a Patterson film processing starter kit. The host shares a step-by-step process, including equipment setup, chemical preparation with D76 developer, and the use of the Massive Dev chart for timing. Emphasis is placed on maintaining a consistent 20°C temperature for optimal development results. The video also covers film loading, agitation techniques, and post-development washing and drying methods, concluding with a call to engage with the community on film developing experiences.
Takeaways
- 📷 The video creator is working on a film photography project, using a Leica MP and a 35mm lens for a year to focus on creativity.
- 🎞️ They choose to develop film at home to avoid the cost and the idea of strangers handling their negatives.
- 🛠️ A film processing starter kit from Patterson is recommended, which includes essential items for under $100.
- 🧪 The kit contains items like graduates, a developing tank, reels, chemicals, and a film drying clip, but additional items like a changing bag and smaller graduates are needed.
- 💧 Chemicals discussed include D76 developer, Ilfostop stop bath, and Kodak Codefix fixer, with a wetting agent like Photo-Flo to prevent water spots.
- 🔩 The Patterson tank and reels are detailed, explaining how to load 35mm film onto the reels in complete darkness.
- ⏱️ The Massive Dev chart is mentioned as a resource for development times and as an app with a timer for the development process.
- 🌡️ Maintaining a consistent temperature of 20 degrees Celsius for the developer is crucial for consistent results.
- 🚿 After development, a series of water washes and a final wash with Photo-Flo is performed to clean the film and prevent water spots.
- 📝 The process of developing film at home is outlined in a step-by-step manner, emphasizing the importance of organization and timing.
Q & A
What is the purpose of the narrator's film photography project?
-The purpose of the narrator's film photography project is to focus on the creative side of shooting with film by limiting themselves to a specific camera, lens, and film combination for the next year.
Why does the narrator choose to develop their own film at home?
-The narrator develops their own film at home to avoid the expense of sending it to a lab and because they don't like the idea of strangers touching their negatives.
What is included in the Patterson film processing starter kit mentioned in the script?
-The Patterson film processing starter kit includes three 600 ml graduates, a developing tank with two reels, some Milford chemicals, two sets of film drying clips, a nine-inch thermometer, a chemical stir stick, and a 35-millimeter cassette opener.
What additional equipment did the narrator purchase to complement the starter kit?
-The narrator purchased a changing bag, smaller graduates for precision measuring, and one-gallon jugs to store mixed chemicals.
What developer, stop bath, and fixer does the narrator use for their film processing?
-The narrator uses D76 developer diluted one to one, Ilfostop as the stop bath, and Kodak Codefix as the fixer.
How does the narrator ensure the correct temperature for the developer solution?
-The narrator uses a 20 degrees Celsius water bath to equalize the temperature of the developer solution and keeps the tank in the water bath during the development process to maintain a stable temperature.
What is the development time for Ilford HP5 using D76 developer according to the Massive Dev chart?
-According to the Massive Dev chart, the development time for Ilford HP5 using D76 developer diluted one to one at ISO 400 is 13 minutes at 20 degrees Celsius.
How does the narrator load the film onto the reels in the dark?
-The narrator loads the film onto the reels by feeling for the entrance gate's teeth, guiding the film onto the reel, and then twisting the reel to advance the film onto it.
What is the process for washing the film after development?
-The narrator uses the Ilford method of fill, agitate, dump, and repeat, starting with five inversions and increasing to 20 inversions with each cycle.
How does the narrator prevent water spots on the film during drying?
-The narrator adds three ml of Photoflo, a wetting agent, to 600 ml of distilled water after washing the film to prevent water spots from forming during drying.
What is the narrator's next step after developing the film?
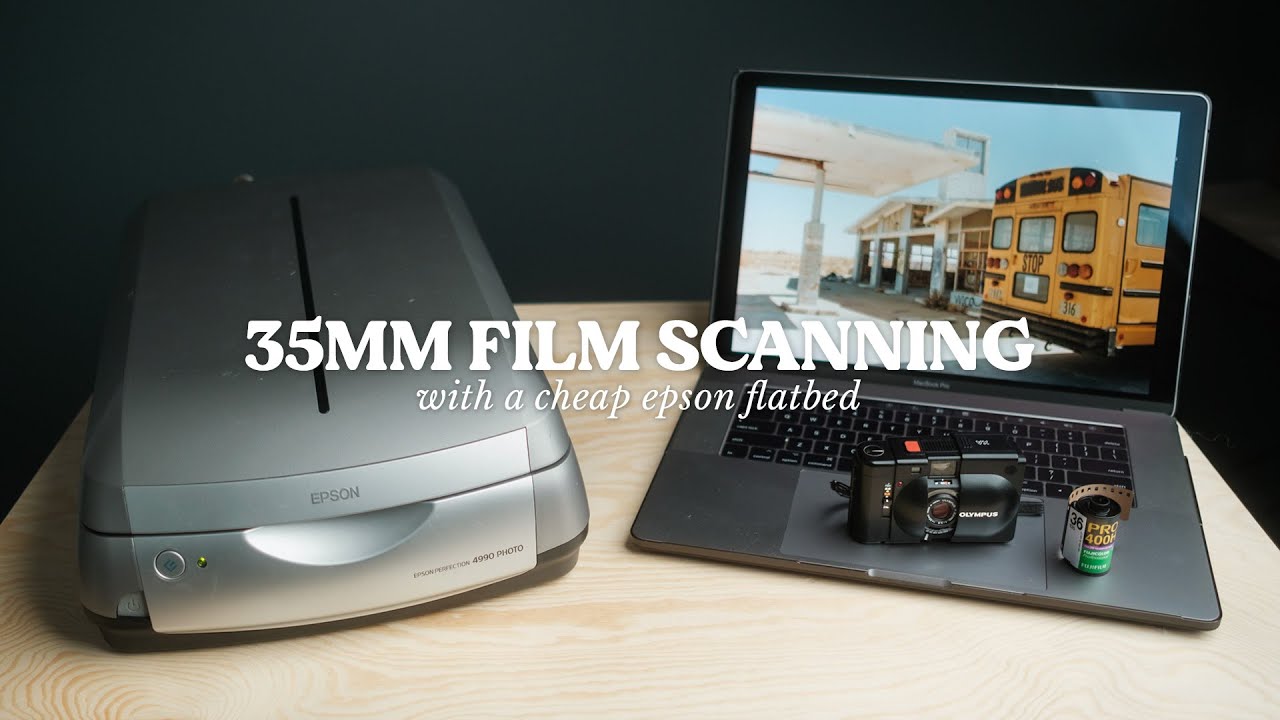
-The narrator's next step is to figure out scanning the developed film, which will be the topic of another video.
Outlines
📸 Film Photography Project and Developing Process
The speaker is working on a film photography project, using HP5 film on a Leica MP camera with a 35mm lens. They aim to focus on the creative aspect of shooting by limiting their gear to this specific camera and lens combination. They discuss their decision to develop film at home to avoid the expense and potential handling issues associated with sending it to a lab. The speaker details the equipment they use, including a Patterson film processing starter kit, which contains various items like graduates, a developing tank, reels, chemicals, a thermometer, and a film cassette opener. They also mention additional items like a changing bag, smaller graduates for precise measuring, and one-gallon jugs for chemical storage. The speaker then explains the process of film developing, which involves developer, stop bath, and fixer, and shares their choice of chemicals: D76 developer, Ilfostop, and Kodak Codefix, along with a wetting agent to prevent water spots. They also discuss the importance of using the correct temperature for the developer and maintaining it throughout the process.
🌡️ Temperature Control and Film Developing Techniques
The speaker emphasizes the importance of maintaining a consistent temperature of 20 degrees Celsius for the developer during the film developing process. They describe their method of using a water bath to achieve and maintain this temperature. The speaker also provides a tip for distinguishing between developer and fixer by using a rubber band on the developer's graduate. They explain the process of pouring the developer into the tank, starting the timer, and performing agitation every two seconds for the first 30 seconds, then once a minute for the remainder of the development time. After development, they describe the process of using a stop bath, followed by a fixer, and the importance of using a wetting agent like Photoflo to prevent water spots during drying. The speaker concludes by discussing the washing and drying process, including using a bathroom with hot water to create humidity for dust-free drying, and hanging the film to dry. They invite viewers to share their experiences and preferences for film and developer combinations and encourage them to develop their own film at home.
Mindmap
Keywords
💡Film Photography
💡Leica MP
💡HP5
💡35mm
💡Developing
💡Patterson Film Processing Starter Kit
💡D76 Developer
💡Ilfostop and Kodafixer
💡Changing Bag
💡Massive Dev Chart
💡Photoflo
Highlights
The film photography project is focused on using HP5 film on a Leica MP camera with a 35mm lens for a year.
The aim is to limit gear choices to focus on the creative process of shooting with film.
The decision to develop film at home is driven by a desire for control over the process and cost considerations.
Patterson's film processing starter kit is recommended for beginners, offering essential equipment at an affordable price.
The kit includes a developing tank, reels, chemicals, drying clips, a thermometer, and a film cassette opener.
Additional equipment needed includes a changing bag, smaller graduates for measuring, and one-gallon jugs for chemical storage.
D76 developer is chosen for its affordability and consistency, mixed in a 1:1 ratio with water.
Ilfostop is used as a stop bath, and Kodak Rapid Fixer is the fixer of choice.
Photo-Flo is added to the final wash to prevent water spots on the film during drying.
The Massive Dev Chart by DigitalTruth.com is a valuable resource for film development times and recipes.
The process of loading film onto the reels is explained, emphasizing the need for complete darkness or a changing bag.
The importance of maintaining a consistent temperature of 20 degrees Celsius for the developer is discussed.
A step-by-step guide on how to mix and use the developer, stop bath, and fixer is provided.
The use of a water bath to maintain the temperature of the developer during the development process is highlighted.
Agitation techniques and timings are detailed for even development of the film.
Instructions for washing and drying the developed film to prevent dust and water spots are given.
The video concludes with a call to action for viewers to share their film developing experiences and subscribe for more content.
Transcripts
my film photography project is underway
and I'm happily shooting hp5 on my Leica
MP and 35 crime for the next year I'm
limiting myself to this camera lens and
film combo so I can stop thinking about
gear and focus on the creative side of
shooting with film and so far it's going
great
[Music]
but these pictures don't just magically
appear out of thin air at some point
you're going to have to develop your
film you can send it to a lab but that
can get real expensive real quick
because I don't like the idea of
strangers touching my negatives with
their fingers so I developed my own film
at home and that's what I want to talk
about today there's a few steps involved
but it's easier than you might think
let's start with the equipment I use now
I'm no stranger to the dark room but I
haven't touched film in nearly a decade
plus a recent brush with minimalism
convinced me to get rid of anything that
I wasn't actually using so I had to
start from scratch and buy everything
all over again stupid minimalism
fortunately Patterson makes a film
processing starter kit that has just
about everything you need for under 100
bucks it comes with three 600 mil
graduates a developing tank with two
reels some Milford chemicals that I'm
probably not going to use but whatever
two sets of film drying Clips a nine
inch thermometer a chemical stir stick
thingy and a 35 millimeter cassette
opener it's like a bottle opener for
your film works the kit sells for 99.95
at b h but if you bought all the
individual pieces you'd pay over 150
bucks so it's definitely a good deal and
it's the kit I got but but I still
needed a few more things to be running
at full speed for me I also grabbed a
changing bag so I can load film with the
lights on a couple of smaller graduates
for precision measuring and finally some
one gallon jugs to store my mixed
chemicals and speaking of chemicals
let's talk about those chemicals film
processing is basically a three-step
process with developer stop bath and
fixer for developer I'm using d76
diluted one to one now there are a ton
of developer choices and everyone has
their favorite but d76 is reasonably
priced and predictable so it's a great
place to start and you have to mix it
from powder but just follow the
instructions of the package and you
should have no problem whatsoever the
kit even comes with a special Magic One
stir stick thingy so there's no excuses
mix it it's fine stop bath and fixer are
less critical but I happen to be using
ilfostop and codefix throwing a wetting
agent like photo flow to prevent water
spots from forming when the film is
drying and you've got everything you
need to develop film at home but before
we do any of that we got to talk about
these plastic reels Patterson tank comes
with plastic Wheels can be broken apart
and reassembled for 120 film if needed
but we're doing 35 so we're going to
keep this all small and nice loading
your film onto the reels is pretty easy
Once you know how they work if you look
along the outer edge of the Reel you'll
find the entrance gate surrounded by
these sort of larger teeth the teeth
make the entrance Point really easy to
find by feel in the dark there are ball
bearings just past the gate on both
sides of the Reel these little guys sit
in the sprocket holes and Advance the
film forward when you twist The Reel
back and forth the rest of the Reel is
just a spiral for the film to advance
onto that's how they work let's get some
film on there just remember anytime
you're dealing with film outside the
cartridge you need to be in complete
darkness I'm going to keep the lights on
so you can see what I'm doing but don't
do that with your own film or you'll
ruin it quick once you're in the dark
you can open the cassette grab your
scissors and trim off the film meter
this creates a straight line in the
Leading Edge and makes it much easier to
get your film on the Reel keep your film
a little squeeze along the edges to snap
it to attention locate the gate by
feeling for those teeth then guide your
film onto the reel
let's see oh that's not the gate
that's the gate there we go so again
so easy look how easy it is locate the
gate by feeling for the teeth then guide
your film onto the Reel once it's
through the gate you can sort of pull it
around halfway onto the Reel and start
twisting to load it just magically goes
into place
nine years and later
when you reach the end of the film snip
off the little plastic roller then give
the Reel a couple more twists to advance
the rest of the film all the way onto
the Reel when both reels are done you
can slide them on the stem put them back
in the tank replace the funnel click it
close to make the tank light tight and
the film is ready for a developer but we
still need to know how long to process
our film so this is a good time to talk
about the massive Dev chart by
digitaltruth.com the massive Dev chart
is a free website that contains recipes
for pretty much every film and developer
combination there is but they also make
an app version that includes the full
massive Dev charge database plus a
fantastic dark room timer so if we
select ilford hp5 plus d76 one to one
and ISO 400 we can see the development
time is 13 minutes at 20 degrees Celsius
and this page is actually a timer that's
preset with all of the correct times for
every stage of the development process
the timer is actually super well
designed it has a three second warning
to let you know when it's time to
agitate the developer and it even has a
metronome during agitation so you can
keep the beat and do everything exactly
the same way every time now we know
we're development time and the timer's
all set up let's get the chemicals ready
if you're processing two reels or 35
millimeter film The Patterson tank needs
600 mils of solution now I'm doing d76
one to one so I mixed 300 mils of stock
solution with 300 mils of water to get
600 mL of working solution while you're
at it you might as well measure out 600
meals of stop bath and fixer at the same
time quick tip here developer and
fixture look almost identical when
they're in the graduates so I keep a
rubber band around my developers
graduate so I always know what's what
now according to my recipe the developer
needs to be at 20 degrees Celsius and
depending on your room temperature you
may need to raise or lower that
temperature I usually run a 20 degree
celsius water bath and set the graduate
holding the developer in that bath and
eventually they'll equalize to 20
degrees and everyone will be happy it's
also important to keep the developer at
20 degrees throughout the development
process so anytime I'm not handling the
tank by adding chemicals or agitating I
keep the tank sitting in that same water
bath and that keeps the temperature
pretty stable throughout the 13 minute
development time without the water bath
I've seen the temperature raise as much
as 2 degrees Celsius during developing
and that would affect contrast and I
don't want that so just keep it in the
bath and you're fine I don't really
worry if the stop bath and picture or a
degree or two warmer or cooler the
developer is the one that matters so
when that's at 20 degrees Celsius we're
finally ready to develop some film
finally hey line up all three graduates
in order of developer stop bath and
fixer and launch the massive Dev app so
everything's ready to go quickly pour
the developer into the tank replace the
outer lid give it a burp to seal it then
start the timer and begin your first
round of agitation it's a bit of a
juggling act to get everything started
so having everything lined up and well
organized is really important here
practitioner I'm currently doing one
inversion every two seconds for a total
of four inversions and I give the tank a
little twist on every inversion just to
keep things mixing around all nice and
good after the last inversion I give the
tank a little tap then put it back in
the 20 degree celsius water bath and
wait for the next cycle agitation
happens once a minute for the duration
of your development time for me that's
13 minutes
13 minutes is standing there
shaking that thing eventually you'll get
to the last minute I usually start
pouring out the developer with about 15
seconds left on the timer that's about
how long it takes me to pour the
developer in so everything evens out
immediately add the stop bath agitate
and let sit for a minute when that's
done empty out the stop bath and add the
fixer fixing typically takes about five
minutes just follow the times in the app
and you'll be fine when fixing's done
pour out the chemicals and you're ready
to watch the film I use the ilford
method of fill agitate dump and repeat
seems to work fine the idea is you add
fresh water to the tank place the lid do
five full inversions dump out the water
add fresh water do 10 inversions Dumbo
the water add fresh water do 20
inversions dump all the water and your
film should be cleaned as a whistle when
you're done washing fill the tank with
600 mils of distilled water and add
three mils of photoflo this is a wetting
agent that prevents water spots from
forming when the film is drying you
don't have to use photo flow it's just
the one I've always used there's a
number of different brands but don't
skip this step because you don't want to
deal with water spots on negatives it's
hideous let that sit for a second and
we're ready to dry the film you need to
clean dust free place to dry your film
you can get specialized drying cabinet
minutes but I just use my bathroom run
the hot water full blast for a couple
minutes to create some humidity in the
room this helps any dust in the air
settle before you hang your film to dry
remove the film from The Reel and attach
the clips with the black weighted one on
the bottom then all you have to do is
hang your film and close the bathroom
door on your way out wait a few hours
for the film to dry in that's it that's
really everything I do to develop 35
millimeter film at home now all I got to
do is figure out scanning but that's
another video hey I want to hear from
you guys are you developing your own
film at home what's your favorite film
and developer combination how do you
feel about these plastic reels post your
ideas in the comments down below and
keep that conversation going and as
always if you like this video hit that
thumbs up and don't forget to subscribe
I'm trying to reach my goal of 10 000
subscribers and I'd love to have you
along for the ride I got a ton of film
photography videos coming up and I'd
hate for you to miss any of them but for
now I'm carpool's future and that's
enough of me now get out there and
develop some film already it's fun if
you like standing in the same spot for
13 minutes shaking plus container filled
with chemicals I mean what's not to like
Посмотреть больше похожих видео
5.0 / 5 (0 votes)