Pengukuran | Jangka Sorong | IPA Kelas 7 SMP/MTs | EDURAYA MENGAJAR

Eduraya Teknologi
1 Apr 202104:04

Summary

TLDRThis instructional video demonstrates how to use a vernier caliper to measure the thickness, diameter, and depth of holes in objects with a precision of 0.01 mm. The video explains the parts of the caliper, including the fixed and movable jaws, and the main and vernier scales. It guides viewers through the process of measuring the thickness of a book, from adjusting the caliper jaws to reading the measurement by aligning the main scale with the vernier scale's precise line. The tutorial concludes by encouraging viewers to practice using the caliper themselves.

Takeaways

  • 📏 The script is a tutorial on how to use a vernier caliper to measure the thickness of an object.
  • 🛠 There are specialized tools for measuring thickness, such as a vernier caliper, which is different from a mistar.
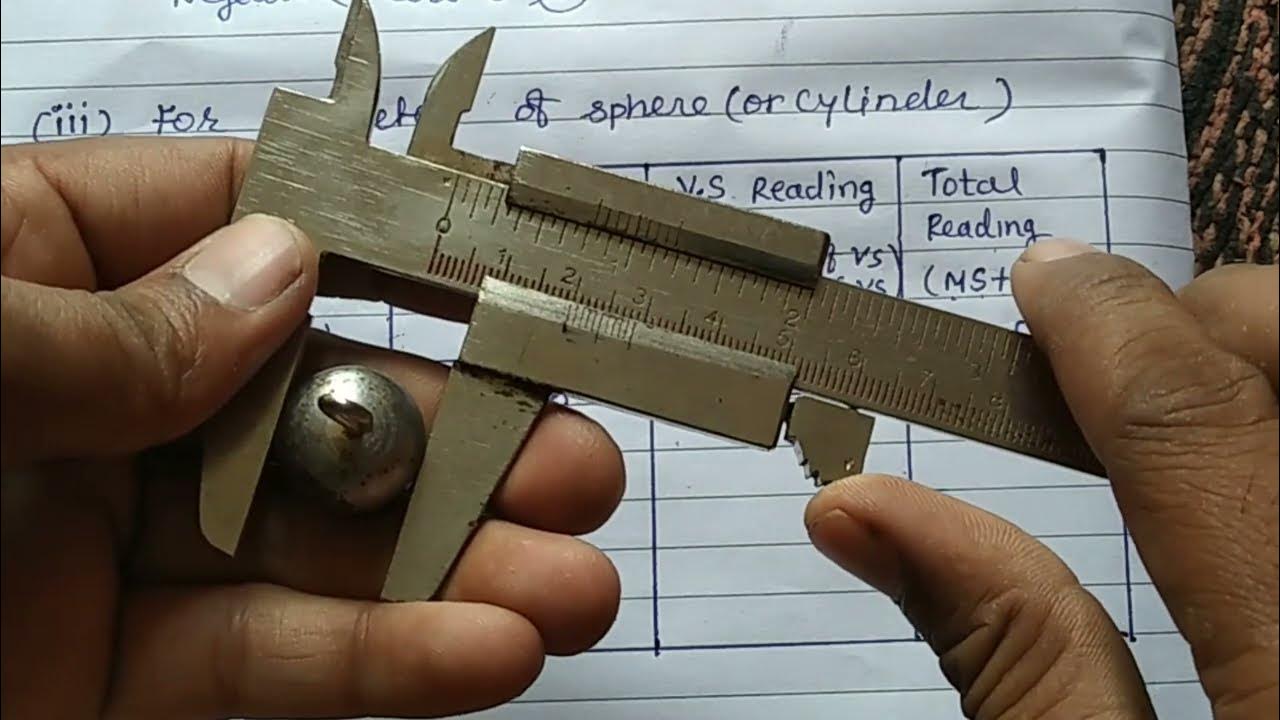
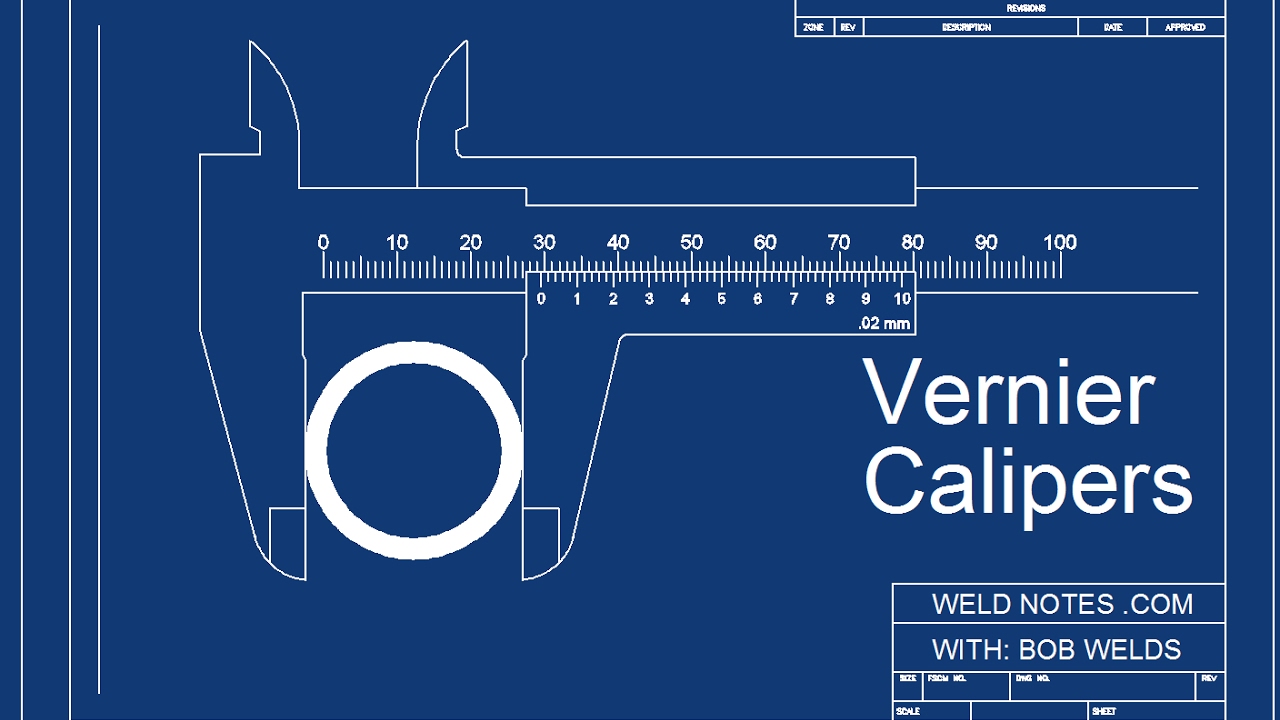
  • ✅ The vernier caliper can measure not only thickness but also the diameter of an object with a hole and the depth of the hole.
  • 🔍 The precision of the vernier caliper is 0.01 mm, allowing for very detailed and accurate measurements.
  • 🔧 The caliper consists of a fixed upper jaw and a fixed lower jaw, as well as a movable upper and lower jaw for adjusting the measurement range.
  • 🔑 The caliper has a locking screw to secure the jaws in place once the measurement is taken.
  • 📐 The caliper features two scales: a main scale and a vernier scale, which work together to read the measurement.
  • 📚 The tutorial demonstrates measuring the thickness of a textbook using the vernier caliper.
  • 🔄 To take a measurement, the user must turn the locking screw to open the jaws, place the object between the jaws, and then close the jaws again.
  • 📏 Reading the measurement involves looking at the main scale for whole numbers and the vernier scale for the decimal portion, using a line that aligns with the vernier scale.
  • 🎓 The example given results in a measurement of 2.28 cm, calculated by adding the whole number from the main scale to the decimal from the vernier scale.

Q & A

  • What is the purpose of the tool described in the script?

    -The tool described in the script is used for measuring the thickness, diameter, and depth of holes in objects with a high degree of precision.

  • What is the accuracy level of the measuring tool mentioned?

    -The measuring tool has an accuracy level of 0.01 mm, allowing for very precise measurements.

  • What are the different parts of the measuring tool discussed in the script?

    -The different parts of the measuring tool include the fixed upper jaw, the fixed lower jaw, the movable upper jaw, the movable lower jaw, and the vernier scale.

  • How does one use the measuring tool to measure the thickness of an object?

    -To measure the thickness of an object, one must rotate the lock knob to open the lower jaw, place the object between the jaws, adjust the movable jaws to fit the object, and then close the lock knob. The measurement is then read from the main scale and the vernier scale.

  • What is the function of the vernier scale on the measuring tool?

    -The vernier scale on the measuring tool is used in conjunction with the main scale to provide more precise readings, allowing for measurements to be taken to the nearest 0.01 mm.

  • How does one read the measurement from the main scale and vernier scale?

    -One reads the measurement by noting the position of the zero mark on the vernier scale relative to the main scale, and then counting the number of lines on the vernier scale that align with the main scale, each line representing 0.01 mm.

  • What is the significance of the 'toothed rack' mentioned in the script?

    -The 'toothed rack' is likely a part of the vernier caliper mechanism that allows for the fine adjustment of the jaws to measure the object accurately.

  • How does the script demonstrate the measurement of a book's thickness?

    -The script demonstrates the measurement of a book's thickness by placing the book between the jaws, adjusting the jaws to fit the book, and then reading the measurement from the scales.

  • What is the final measurement of the book's thickness given in the script?

    -The final measurement of the book's thickness is 2.28 cm, as calculated by adding 0.08 cm (from the vernier scale) to 2.2 cm (from the main scale).

  • What is the importance of ensuring the vernier caliper is positioned straight when measuring?

    -Ensuring the vernier caliper is positioned straight is important for accurate measurements, as any tilt can lead to incorrect readings.

  • What is the purpose of the 'locking screw' on the measuring tool?

    -The 'locking screw' on the measuring tool is used to fix the position of the jaws once the object is placed between them, ensuring the measurement remains stable while the reading is taken.

Outlines

00:00

📏 Measuring Thickness with a Vernier Caliper

This paragraph introduces a tool for measuring the thickness of objects, specifically mentioning that a mistar is not used for this purpose. Instead, a vernier caliper is recommended. The vernier caliper is highlighted for its precision, with an accuracy of 0.01 mm, allowing for detailed and accurate measurements. The paragraph explains the parts of the caliper, including the fixed upper and lower jaws, and the movable jaws. It also mentions the use of a thimble at the end of the tool for measuring the depth of holes in objects. The importance of the scale on the caliper is emphasized, with two types of scales: the main scale and the vernier scale. The process of using the caliper to measure the thickness of a textbook is demonstrated, including opening the jaws, placing the object between the jaws, and reading the measurement from both the main scale and the vernier scale. The reading technique involves noting the position of the zero mark on the vernier scale and counting the lines between the main scale and the vernier scale. The example concludes with a calculation of the thickness of the textbook as 2.28 cm.

Mindmap

Keywords

💡Measurement

Measurement refers to the process of determining the value of a quantity, such as length, weight, or time. In the context of the video, measurement is the core theme, as it demonstrates how to use a specific tool to measure the thickness of an object. The video emphasizes the importance of accurate measurement, showcasing a tool that can measure with a precision of 0.01 mm.

💡Caliper

A caliper is a precision instrument used for measuring the dimensions of an object, such as its thickness, diameter, or depth of a hole. The video script mentions a 'jangka sorong,' which is an Indonesian term for caliper. It is used to measure the thickness of a book, illustrating its practical application in obtaining detailed dimensional information.

💡Thickness

Thickness is a measure of how thick an object is, typically expressed in units of length. In the video, the thickness of a book is being measured using the caliper, highlighting the term's relevance in the context of physical dimensions and the necessity for precise tools to obtain accurate readings.

💡Diameter

Diameter is a term used to describe the length of a straight line passing through the center of a circle or sphere, touching two opposite points on the edge. The script mentions that the caliper can also measure the diameter of an object, indicating its versatility in measuring different dimensions.

💡Depth

Depth refers to the measurement of how deep something is, typically from the surface to the bottom. The video script explains that the caliper can be used to measure the depth of a hole in an object, showcasing another practical application of the tool.

💡Precision

Precision in measurement indicates the degree of exactness or refinement. The video emphasizes the precision of the caliper, which can measure to the accuracy of 0.01 mm, highlighting the importance of precision in obtaining reliable and detailed measurements.

💡Scale

A scale in the context of measurement tools refers to the graduated markings on a device that allow for the reading of measurements. The video describes two types of scales on the caliper: the main scale and the vernier scale. Understanding how to read these scales is crucial for using the caliper correctly.

💡Vernier Scale

A vernier scale is an additional scale on a measuring instrument that provides more precise readings by aligning with the main scale. The video explains how to read the vernier scale on the caliper, which is essential for achieving the high level of precision the tool offers.

💡Reading

In the context of measurement, 'reading' refers to the act of interpreting the measurement displayed on a tool's scale. The video script provides a detailed explanation of how to read the caliper's scales, which is a fundamental skill for anyone using such a device.

💡Accuracy

Accuracy in measurement is the closeness of a measured value to the true value. The video script stresses the importance of accuracy by demonstrating how to use the caliper correctly to ensure that the measurements are as close to the true values as possible.

💡Thickness Measurement

Thickness measurement is the process of determining the distance between two parallel surfaces of an object. The video provides a step-by-step guide on how to measure the thickness of a book using the caliper, which is a common task in various fields requiring dimensional analysis.

Highlights

Introduction to measuring the thickness of an object without using a mistar.

Use of a caliper to measure thickness, diameter, and depth of holes in objects.

The caliper's precision level is 0.01 mm, allowing for detailed and accurate measurements.

Explanation of the parts of the caliper, including fixed and movable jaws.

Demonstration of how to use the caliper to measure the thickness of a textbook.

Instructions on adjusting the caliper jaws to fit the object being measured.

Ensuring the caliper is positioned straight for accurate measurements.

How to read the main scale and vernier scale on the caliper.

Step-by-step guide on reading the measurement from the caliper's scales.

Calculating the measurement by combining the main scale and vernier scale readings.

Final measurement result of 2.28 cm after reading the caliper scales.

Encouragement for viewers to practice using the caliper themselves.

Conclusion of the tutorial with a sign-off until the next material.

Musical outro signaling the end of the tutorial.

Transcripts

play00:00

Hai kalau kamu ingin mengukur ketebalan

play00:08

suatu benda seperti ini apakah kamu juga

play00:11

memakai mistar it's tentu tidak ya Ada

play00:15

alat sendiri untuk mengukur ketebalan

play00:17

suatu benda loh kamu bisa menggunakan

play00:20

jangka sorong seperti ini nih selain

play00:23

bisa mengukur ketebalan jangka sorong

play00:26

juga bisa mengukur diameter suatu benda

play00:28

jika benda tersebut berlubang kemudian

play00:32

jangka sorong bisa digunakan untuk

play00:34

mengukur kedalaman lubang suatu benda

play00:36

loh menariknya alat ini memiliki tingkat

play00:39

ketelitian 0,01 mm Wah kamu bisa

play00:44

mengukur ukuran suatu benda dengan lebih

play00:47

teliti dan akurat Oke ini adalah

play00:50

bagian-bagian dari jangka sorong ya Nah

play00:54

ada rahang tetap atas dan ada rahang

play00:57

tetap bawah kamu

play01:00

bisa menggeser rahang tetap ini ya

play01:01

kemudian ada rahang Sorong atas dan

play01:06

rahang Sorong bawah rahang Sorong inilah

play01:09

yang bisa kamu geser kalau ini tombol

play01:12

kunci dan itu di ujung alat ini ada

play01:16

tangkai itu untuk mengukur kedalaman

play01:19

suatu benda nah kemudian yang harus kamu

play01:23

perhatikan itu skalanya skalanya ada dua

play01:26

ya yang atas itu skala utama dan yang

play01:30

bawah itu Skala nonius atau vernier

play01:34

lewat skala ini kamu bisa membaca hasil

play01:37

pengukurannya aku akan memakai jangka

play01:40

sorong ini untuk mengukur ketebalan buku

play01:43

pelajaranku caranya putar tombol kunci

play01:47

untuk membuka rahang bawah kemudian

play01:50

Letakkan buku pelajaran di antara rahang

play01:52

ini geser rahang jangka sorong agar

play01:55

rahang tepat pada buku lalu putar lagi

play01:58

tombol kuncinya

play02:00

Hai dan pastikan posisi jangka sorong

play02:02

benar-benar lurus Setelah itu kita bisa

play02:05

lihat kalanya untuk melihat kalanya yang

play02:09

paling atas itu skala utama dan bagian

play02:12

bawah itu skala nonius lalu cara

play02:15

membacanya kamu perhatikan Skala yang

play02:18

bagian atas dari angka 2 sampai 3 ya Nah

play02:23

setiap Skala yang kecil-kecil ini

play02:25

nilainya 0,1 Jadi dua koma 12 koma 22

play02:33

koma 3 dan seterusnya kemudian

play02:37

Perhatikan angka nol yang ada di skala

play02:39

nonius ini perhatikan posisinya ya Angka

play02:43

nol ini terletak diantara 2,2 dan 2,3

play02:48

nah yang digunakan yang bagian depan

play02:51

yaitu 2,2 Setelah itu kita baca skala

play02:56

nonius caranya dengan mencari

play03:00

nah atau garis yang berimpit coba

play03:02

perhatikan garis yang atas sini berimpit

play03:06

dengan garis yang bawah jadi inilah yang

play03:09

digunakan sebagai acuan kemudian hitung

play03:13

garis tersebut 12345678 Oke jadi bisa

play03:26

dituliskan delapan kali 0,01 hasilnya

play03:31

2,2 ditambah 0,08 hasilnya sama dengan

play03:37

dua koma 28 cm Oke sekarang kamu bisa

play03:43

mencoba membaca jangka sorong sendiri ya

play03:46

Sekian dulu materi kali ini sampai jumpa

play03:49

di materi lainnya

play03:52

[Musik]

play04:00

hai hai

Rate This

5.0 / 5 (0 votes)

Связанные теги
MeasurementVernier CaliperAccuracyThicknessDepthTutorialEducationalPrecisionTool UsageEngineering
Вам нужно краткое изложение на английском?