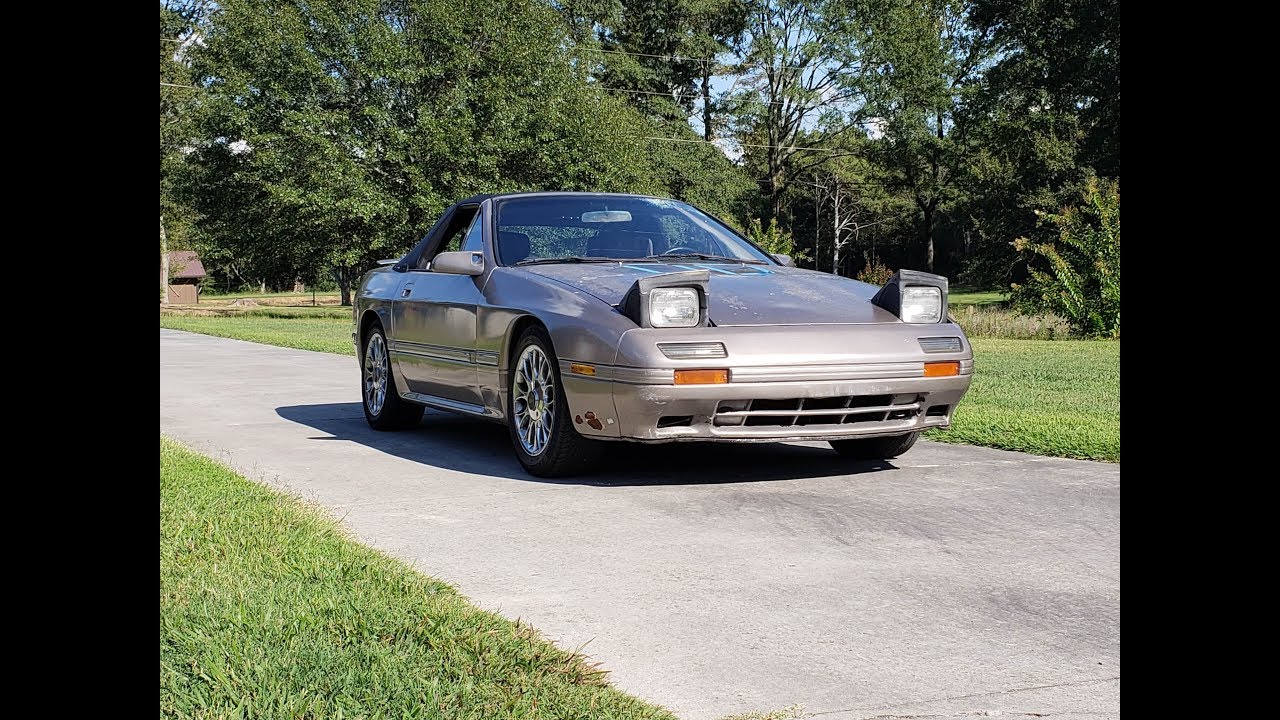
過去に補修されたベコベコのフェンダーをまっさらな状態に戻して鈑金修理からやり直す!【#35 Mazda RX-7 FD3Sレストア】

シュンヤのガレージライフ
26 Jan 202431:38

Summary

TLDRThe video shows the process of restoring and repainting the front fenders on an FD3S Mazda RX-7. The fenders are dented and warped, so the host uses body filler and hammering techniques to smooth and shape the metal. He strips the old paint, applies primer, body filler to dents, sands it all down, and repaints the fenders in a matching grey color. The work is tedious but the car edges closer to completion. Overall, it demonstrates metal shaping skills and step-by-step bodywork and repainting on a classic sports car.

Takeaways

  • 😀 The video focuses on restoring and repainting the front fenders of an FD3S Mazda RX-7
  • 😮‍💨 The fenders were warped and dented, requiring extensive body work
  • 🛠️ The paint was stripped to bare metal before hammering out dents and welding holes
  • 👷‍♂️ Patching putty was applied in layers to smooth imperfections before priming
  • 🎨 The ducts and fender wells were also stripped, repaired and repainted
  • 🤔 Matching the complex curves of the RX-7 fenders proved very challenging
  • 🔨 Despite difficulties, steadily hammering and sanding achieved good results
  • 😊 Seeing the car come together brings a great sense of accomplishment
  • 🎉 The blue parts are gone, giving the car a uniform gray appearance now
  • 🚗 The restoration work continues, with the car inching closer to completion

Q & A

  • What is the car model being restored in the video?

    -The car being restored is a Mazda RX-7 FD3S.

  • What body parts are being worked on in this video?

    -In this video, the front fenders are being repaired and painted.

  • What processes are involved in repairing the fenders?

    -The main processes are removing the paint, hammering out dents, applying body filler, sanding, and painting.

  • Why was it challenging to repair the curved fender panels?

    -The curved FD3S fender shape with flowing lines was very difficult to shape properly through sanding alone.

  • Why was working on previously repaired panels extra difficult?

    -Since repairs were already done, the metal had to be returned to a bare state which added complexity.

  • What tools and materials are used in the body work?

    -The main tools used are various hammers, dollies, sandpaper, filler, primer, paint. Chemical paint stripper is also used.

  • How is progress being made towards completion?

    -With the blue parts removed, the grey primer gives the car a uniform look showing the lines clearly. The end goal is coming into vision.

  • What color will the car be painted eventually?

    -The final color has not been revealed yet, but the host has asked the owner what color she wants.

  • What work still needs to be done on the car?

    -The hood, rear door, and aero parts still need to be worked on and painted.

  • Why does the host find the work rewarding?

    -As the completion nears, the host feels a sense of accomplishment and fulfillment in bringing the vision to life.

Outlines

00:00

😀 Introducing the Work on the FD3S Fender

The video introduces the work to be done on restoring and modifying the fenders of an FD3S Mazda RX-7. It points out dents, distortions, and other imperfections on the fender panels that need to be addressed.

05:00

😊 Removing Paint and Prepping the Fenders

The paint is stripped off the fenders using a chemical stripper. The stripped bare metal fenders are hammered to smooth out dents and distortions. Welded spots are also cleaned up in preparation for applying putty.

10:02

😃 Hammering the Fenders into Shape

The fenders are hammered from behind using various hammers and dollies to gently shape the metal into the desired contoured form without over-stretching the metal.

15:40

🛠️ Filling Low Spots with Putty

Putty is applied to low spots and imperfections in the fender contours left after hammering to smooth and fill them prior to priming and painting.

20:42

😁 Prepping and Priming the Fender

The fender surface is cleaned, sanded and sealed to prepare for priming. Primer is then sprayed on to provide a base coat for the final finish.

25:44

👍 Painting the Fender

The fender is finally painted in gray surfacer, unifying the look and bringing the car closer to completion. The transformation from dull unfinished metal to sleek painted panel is satisfying.

30:47

😅 Reflecting on the Difficult Restoration Process

The complex curved shape of the FD3S fenders made this a particularly challenging restoration project. The repairs made prior to the current work also added difficulty. Overall an educational but difficult process.

Mindmap

Keywords

💡修理

The video focuses on repairing a car. The narrator frequently uses the word "修理" which means "repair" in Japanese. He talks about repairing the dents, distortions, and rust on the car's fender panels. This relates to the main theme of restoring an old car.

💡板金

"板金" refers to "sheet metal work" in Japanese. The narrator does extensive sheet metal work on the car's fenders to fix dents and reshape the panels. This specialist metal work is core to restoring the car body.

💡歪み

"歪み" means "distortion" or "warp" in Japanese. The narrator points out distortions and warping in the car's fender panels that need to be fixed through sheet metal work. This relates to the repair process.

💡塗装

"塗装" means "painting" or "coating" in Japanese. The narrator strips the old paint and applies new primer and paint coats to the fender panels. Painting is an important step in refinishing the car.

Highlights

The discovery of a novel mechanism for regulating cell division that could lead to new cancer therapies.

An innovative statistical model that more accurately predicts extreme weather events and climate change patterns.

A breakthrough in materials science enabling the development of lighter, stronger metal alloys for aerospace and automotive applications.

The successful demonstration of a new technique for gene editing that could help treat genetic diseases.

New evidence supporting the theory that neurological disorders originate in the gut-brain axis.

A pioneering methodology for synthesizing pharmaceutical compounds using bio-inspired green chemistry.

The discovery of previously unknown neural pathways involved in learning, memory and cognition.

A proposed framework to address systemic biases in artificial intelligence systems for facial recognition.

The development of ultra-efficient solar cells using novel nanomaterials.

Evidence that challenges the established timeline of early human migration out of Africa.

A new paradigm for the origin and evolution of terrestrial planets that matches astronomical observations.

Elucidation of the specific biochemical factors that trigger the onset of Alzheimer's disease.

A proposed methodology to alleviate algorithmic bias in financial lending risk models.

The development of a new class of antibiotics effective against drug-resistant bacteria.

Evidence supporting the existence of liquid water oceans under the icy surface of Saturn's moon Enceladus.

Transcripts

play00:02

艶ボケしていて凹み具合がわからないな

play00:08

ここが凹み これが歪み

play00:14

この辺も少し波打っている

play00:21

こちら側のここも酷いな

play00:27

ここに怪しいのがいる

play00:31

おはようございます シュンヤです

play00:33

今日のFD3Sレストアは フェンダーの板金塗装です

play00:37

フェンダーの状態は良くもなく悪くもなく そこそこな感じです

play00:43

大きい凹みはないです この辺が一番大きい凹みかな

play00:49

ここが一番凹んでいる場所 こんな感じ

play00:54

凹みで言えばこの程度だから 全然いいのですが

play00:58

エアロの取り付けてた穴が開いていたり 塗装が流れていたり

play01:05

あとフェンダーの耳が中途半端に折られていて この辺がズタズタな感じになっていたり

play01:11

こちらのフェンダーも耳が折れていて 潰れています

play01:17

その歪みがここに来ている 少し波打っているのでこういう所を直して

play01:22

フェンダーを綺麗にしていきたいと思います

play01:27

まずは邪魔になるものを外します ここのフェンダーのダクトを外します

play01:34

固定しているバネを外して クリップの爪を起こせば抜けてくる

play01:42

[作業音]

play01:49

取れました

play01:51

こんな感じでバネでこちら側を押さえられていて クリップで嵌っているだけです

play01:56

外すのはとても簡単です

play02:00

ここのダクトの部分は一体みたいです

play02:09

ここのメッシュのネットになっている部分は 青い塗料で塗られています

play02:17

裏側から見るとこういう感じで 樹脂溶着で完全固定されているから

play02:25

どうしようかな でも分離できなくはなさそうすね

play02:29

ここのネットの部分だけ別で塗れるかな どうやって作業するか考えておきます

play02:35

とりあえずダクトを外したので あとはこのフェンダーの塗装剥がし

play02:41

この塗装の下がどうなっているかが 分からないから全部塗装を剥がします

play02:46

塗装の剝離はドアをした時と同じように 剥離剤を使って塗装剥がしをしていきます

play02:52

裏側に剥離剤が回ると その処理が面倒になってしまうので

play02:57

裏に行かないように こんな感じで養生をしました

play03:00

こういう穴の所から裏に剥離剤が入って 裏がぶよぶよになります

play03:06

そうするとそこから錆びてくるから 地味にこのマスキング作業が重要だったりします

play03:12

裏側も剥離すれば問題ない話なのですが

play03:15

裏側は問題なさそうだから 今回はこんな感じで作業していきます

play03:20

今の塗装の厚みはこんな感じです 結構膜厚があります

play03:31

ここのフェンダーの耳の部分などは 塗装が浮いて剥がれてくる

play03:39

多分ここはエアブローをかけたら 剥がれてくる部分だと思うのですが

play03:44

こんな感じで意外と塗装の膜厚があります

play03:48

青い塗料が2回塗られているみたいで ソリッドの青で丸ペンしていて

play03:53

その後にブルーメタリックを塗っているから 意外と厄介な塗装剥がしになりそうです

play04:02

剥離剤を塗っていきます

play04:05

[作業音]

play04:22

ペーパーで傷をつけるのを忘れた

play04:26

ここまで来たら仕方がない このまま塗っていきます

play04:30

[作業音]

play04:55

そして乾かないようにビニールをかけておきます

play05:00

これで剥離剤の効果が出るようになるから 乾くと全然剥がれてくれなくなる

play05:23

30分経ったので剥がしていきます さてうまく剥がれているでしょうか

play05:30

悪くないんじゃない

play05:34

[作業音]

play05:53

いい感じに剥がれているね

play05:55

[作業音]

play06:03

アンダーコートが剥がれないです

play06:09

アンダーコートはどうしても膜厚が分厚いから うまくいかないですね

play06:15

[作業音]

play06:27

少し残ったね でも多分ノミでいける

play06:32

[作業音]

play06:35

塗装が柔らかくなっているから 全然ノミで削れます

play06:38

[作業音]

play06:50

そしたら次は反対側ですね こちらもやっていきましょう

play06:54

[作業音]

play06:59

こちらは剥がれ方が違う

play07:06

[作業音]

play07:52

一通り塗装剥がしが終わったのですが そこそこ落ちましたね

play07:59

こちらのフェンダーは新品に交換されていて この黒い部分は新品部品についている電着塗装です

play08:10

その上に黄色いプライマーが塗られていて さらに2回か3回ぐらい色替えされてます

play08:16

結構塗装の膜厚が分厚かったです

play08:19

こちらのフェンダーは新車の時のフェンダー

play08:22

この白いのが純正の塗装で その上にソリッドの青が塗られて

play08:27

もう1度ブルーメタリックが塗られて 2回ぐらい色替えされています

play08:33

やはりアンダーコートが塗られている部分は 膜厚が凄いから1度では落ちないですね

play08:39

染み込まないというか 剥がれきらないというか

play08:42

こんな感じで残ってしまいました

play08:45

上側はパテがついて板金してあったので この辺も全然剥がれなかったです

play08:52

パテも剥離剤では全然剥がれないです こんな感じで所々残っています

play09:00

ただ大体の塗装は剥がし終わったから あとはペーパーで削れば綺麗に落とせると思うので

play09:08

ここからはペーパーで削っていきたいと思います

play09:12

[作業音]

play09:52

綺麗に剥がし終わりました

play09:58

反対側

play10:02

そしたら続いてエアロの固定していた穴を 溶接で埋めていきます

play10:09

[作業音]

play10:40

[作業音]

play10:48

[作業音]

play10:54

フェンダーの角の部分の塗装が 落とせていなかったので

play10:59

不織布タイプのベルトサンダーを使って 落としていきます

play11:04

これだと鉄板を削り過ぎないで 塗装だけ綺麗に剥がせます

play11:08

[作業音]

play11:33

やっと下地の準備が整った 鉄板のみにできた

play11:40

あとは叩いてこの鉄板の形を整えていくだけですね

play11:45

分かりやすいようにマジックで印をつけてみました 丸い所が凹んでいる場所

play11:50

三角形が出っ張っている場所です 結構波打っている

play11:56

凹んでいる場所も結構ある

play12:00

反対側のフェンダーもこんな感じ

play12:03

元々ここの塗装は艶がひけた状態だったから 分かりにくかったけど

play12:10

思っていたよりも酷い状態だったかもしれない

play12:13

こんなに歪んだ状態なら バーナーで剥がしても変わらなかったかな

play12:21

とりあえず叩いて形を整えていくしかないので ひたすら鉄板を叩いて綺麗にしていきます

play12:31

使っていく道具はこちら 鉄板の裏に当てる当て板のドリーですね

play12:37

これと普通のハンマー そしてヤスリハンマー

play12:43

これはヤスリを折り曲げたもので これで叩くと絞りながら叩くことができるのもです

play12:48

このギザギザの目が鉄板を伸ばさないように 丁度いい具合で叩けるもの

play12:53

あと普通の絞りハンマー これも使って鉄板を伸ばさないように

play12:57

少しずつ形を整えていきます

play13:01

まずは溶接した所から 少し溶接の熱で歪みが入ったみたいで

play13:07

凹んだ感じかな だから裏から出さないとダメだね

play13:12

[作業音]

play13:46

フェンダーの耳が折れて 入り過ぎているので起こします

play13:52

[作業音]

play14:01

あまりここが折れているとフェンダーの内側につく インナーフェンダーというか

play14:07

プラスチックのカバーみたいなライナーが ここに引っかからなくなるから

play14:13

完全に起こすと 車高を下げた時にタイヤに当たったりするから

play14:19

少し内側に曲げているけど ライナーも引っかかる部分を残しつつ

play14:26

いい感じで曲げておきます

play14:29

違う形のドリー

play14:31

これならここにこうして引っ掛けられるから 形を整えやすい

play14:36

[作業音]

play14:52

[作業音]

play15:40

カーブのついたヤスリハンマー 平ヤスリと半丸ヤスリの違い

play15:47

これはカーブがついているから 逆カーブの所を叩きやすい

play15:52

[作業音]

play16:08

一通り叩き終わってこれでパテをつけても 大丈夫かなというぐらいまでになりました

play16:15

この折れて真っ平になっていた部分は 丸みを持たせて復元することができました

play16:30

このぐらいだったらパテをつけても 分からなくなると思います

play16:35

違いが分かるかな

play16:37

古い映像でビフォー

play16:41

アフター

play16:43

こうして見ると 違いが分かるのではないでしょうか

play16:47

あと他の部分のパテが元々ついていた所も 戻したので

play16:53

最初についていたパテの量より 薄くつけられるのではないかなという感じですね

play17:00

こうして艶出しスプレーをかけて 見えないかな、見えるかな

play17:07

シャッターの縞々模様の映り込みで 凹み具合が分かりますかね

play17:12

まだ少し凹んだ感じにはなっているけど 元の状態よりは良くなった

play17:20

上手い板金屋さんは鉄板を叩いて 均し板金と言ってパテをつけずに

play17:25

そのまま仕上げられる人もいるみたいですが

play17:29

僕はそこまでの腕がないので あとはパテに頼ろうと思います

play17:35

もっと練習しないとダメだね

play17:38

いつになったら均し板金でパテをつけずに 作業ができるようになるかな

play17:43

まだこちらのフェンダーの鉄板を叩いてないので これから鉄板を叩いて形を作りたいと思います

play17:49

作業は同じ映像が続いてしまうので こちらのフェンダーの板金はスキップします

play17:55

少し動画は進んでパネル全体を 120番のペーパーでもう1度研ぎなおしをして

play18:01

下地用の洗剤で綺麗に洗って 更に溶接した場所が錆びてきたら嫌なので

play18:11

ここは必殺錆封じを刷毛塗りで塗っておきました

play18:15

あとフェンダーアーチの部分も錆が出ていたので 刷毛で必殺錆封じを塗っておきました

play18:23

必殺錆封じも乾いたので これからプライマーを塗装していきたいと思います

play18:29

[作業音]

play18:53

それではパテをつけていきます

play18:56

全体的に歪んでいる感じだったから パテも広い面積につけていきます

play19:03

[作業音]

play19:53

パテを塗り終わりました

play19:57

メインでパテをつけたのは フェンダーのアーチの部分と

play20:01

あと元々板金してパテがついていた場所と この上の部分ですね

play20:07

この辺もパテは塗ったのですが 歪み抜くために薄く塗ったような感じです

play20:15

カメラで映るか分からないですが この辺は下の白いプライマーが

play20:19

透けて見えるような感じになっています

play20:21

こちら側も眼で見るとはっきりと ここが白いねという感じに見えます

play20:29

反対のフェンダーも似たような感じ

play20:33

全体的に歪みも凄く畝っていたから 仕方がないですねパテが沢山ついてしまいました

play20:41

とりあえずパテは終わったから炙って硬化させて ペーパーで研いで形を作っていきたいと思います

play20:49

[作業音]

play21:02

続いてこちらエアダクトはくっついていて どう作業をしようか考えていて

play21:10

様子を見ながら片方を作業してみたら 結構いい感じに作業が進んだので

play21:16

こちら側は撮影しながら 作業をしていきたいと思います

play21:20

まずはここの網は別部品で外れるのですが

play21:25

溶着で止められているので これを切り落として外します

play21:31

切り落とすというより プラスチックに傷を入れて剥がすような感じかな

play21:38

カッターの刃も奥までは入っていかないから 表面に切り込みを入れて

play21:49

これで取れた

play21:58

そして次は塗装剥がしですね

play22:01

見えるかな 少し畝っていて歪みがあるので

play22:09

塗装を剥がしながら 面も出して削っていきます

play22:14

これはひたすら削るだけですね

play22:16

これ自体がABS樹脂でプラスチックだから 剥離剤を使うとプラスチックが溶けるので

play22:24

ひたすらペーパーで削っていきます

play22:27

[作業音]

play22:56

ある程度は機械で塗装剥しが終わりました こういう平面な部分で機械が当てられる所だけです

play23:03

こういう角の部分や裏側は塗装が残ったままです

play23:09

ここは機械が当たらないので 手作業で塗装剥がしをしていきます

play23:15

削り終わりました

play23:16

綺麗にこの裏側も全部 塗装を手作業でひたすら剥がしていました

play23:23

そしたら次は裏側ですね

play23:25

このネットをここに固定するのですが 固定方法はネジ止めにしようと思っています

play23:31

ここに溶着されているのが残っているので まずはここに穴を開けます

play23:37

[作業音]

play23:45

これでネジ止めができる

play23:48

ただこのままだとこの足の状態では ネジ止めるには心細いかなと思うので

play23:55

ここにプラリペアを盛って 土台を嵩増ししようと思っていますが

play24:00

ここに塗装がついているから このままだと密着が悪いと思うので

play24:04

ブラストで塗装剥がしをしてきます

play24:06

[作業音]

play24:37

綺麗に塗装を剥がし終わりました

play24:39

そしたらこの足の部分に プラリペアを盛っていきます

play24:44

まずは脱脂をします

play24:46

[作業音]

play24:52

このままだとプラリペアが流れてしまうので こうしてアルミテープで土手を作って

play25:00

この部分にプラリペアをこうして盛る

play25:03

[作業音]

play25:10

液体を流す

play25:11

[作業音]

play25:28

こんな感じになりました

play25:32

あとは形を整えて

play25:37

[作業音]

play25:43

これの中心部分に穴を開けます

play25:47

[作業音]

play25:53

これでネットをここにセットして タッピングビスで止めます

play26:03

いい感じに固定ができました これでオッケーです

play26:08

これでダクトも板金はオッケー あとはサフェーサーを入れたら完成ですね

play26:14

フェンダーはサブチャンネルで パテ研ぎをしておきました

play26:19

こんな感じになりました

play26:21

結局1度では形が出なくて パテを2度乗せました

play26:28

でも歪も抜けたし綺麗な面が出たと思います

play26:32

気になる方は 是非サブチャンネルをご覧ください

play26:35

あとはサフェーサーを入れていくだけなのですが 少し巣穴が開いていたりするので

play26:42

エバーコートで巣穴を拾ってから サフェーサーを入れていきます

play26:46

まずは脱脂をします

play26:47

[作業音]

play26:58

そしてエバーコートを 巣穴に塗り込んでいきます

play27:03

[作業音]

play27:23

お待たせいたしました やっとサフェーサーを塗る時間です

play27:30

この板金から解放された気持ちを込めて 皆さんそれではご一緒に

play27:36

塗装タイム!行ってみよう

play27:39

[作業音]

play28:24

塗装翌日 上手に塗れました

play28:34

これがこちら向きで

play28:43

いい感じだね

play28:45

[作業音]

play29:30

車の形になったてきた 少しずつ完成が近づいてきた

play29:38

これでこの車から青い部品がなくなったね

play29:42

全体がサフェーサーのグレーな感じで 車のラインというか雰囲気が

play29:48

統一感があるように見えてきましたね

play29:52

いいな、綺麗になったな まだまだ塗装は先だけど楽しくなってきた

play30:01

やはりこうして車が完成に近づいてくると やり甲斐というか込み上げてくるものがあります

play30:08

頑張った甲斐があるね

play30:15

まだボンネットとバックドアが残っているし エアロ類も作業しないといけないけど

play30:23

もう僕はかみさんから 何色に塗るか聞いているので

play30:27

頭の中にはどういう色になるか イメージがあります

play30:32

もう今の僕の目からは この車の形そして色が完成した姿が見えています

play30:40

青い塗料がなくなるとイメージしやすくなるね

play30:46

本日はFD3Sフロントフェンダーの 板金の動画でした

play30:51

なかなか難しい このFD3S独特の丸い流れるような曲線の形状

play30:58

研ぎで作るのが凄い大変だった

play31:00

サブチャンネルで作業したから この動画ではあまり伝わらないかもしれないけど

play31:03

凄い大変だった

play31:05

あと何回か補修が入っている車だったから その手直しを真っさらな状態にして

play31:12

作業しないといけなかったからね そういうところが大変でした

play31:16

これが新品のパネルで作業をするのだったら 全然難しくないのですが

play31:20

一度修理しているというのは 意外と大変だったりします

play31:24

徐々にこの車の完成が近づいてまいりましたので 車の完成を見逃さないように

play31:30

是非チャンネル登録よろしくお願いします

play31:32

最後までご視聴ありがとうございました

play31:34

また次回お会いいたしましょう

play31:36

バーイ

Rate This

5.0 / 5 (0 votes)

日本語の要約は必要ですか?