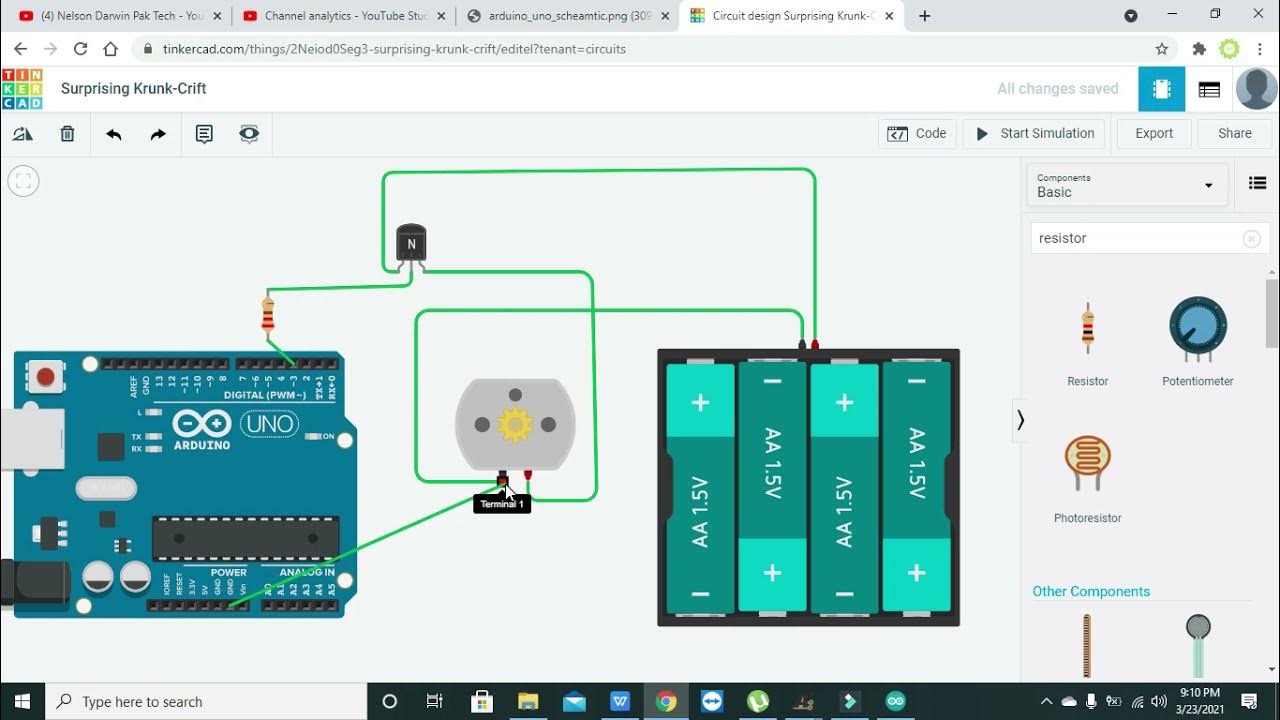
Arduino Self-Driving Car Lesson 3: Controlling Motor Speed
Summary
TLDRThis video teaches how to control the speed of a motor using an Arduino and pulse width modulation (PWM). Instead of running a motor at full speed or stopping, the video explains how to gradually ramp up and down the motor's speed. By manipulating the enable pin and using PWM pins, the speed can be adjusted to fine-tune the motor's performance, which is useful in robotic vehicles. The tutorial walks through wiring the circuit in Tinkercad, writing the code, and implementing the analog write command to control motor speed effectively.
Takeaways
- 🔧 Learn how to control the speed of a motor, allowing for variable speeds instead of just stop-and-go.
- 🔋 The motor's speed can ramp up and down gradually, not just switching between full speed and stop.
- 🎮 Using PWM (pulse width modulation) through specific Arduino pins, you can control motor speed more precisely.
- 🔀 Two Arduino pins control the motor’s direction, and now a third pin can manage speed by connecting to the enable pin.
- ⚙️ PWM rapidly turns pins on and off to simulate different average voltages, creating the effect of variable speed.
- 🖥️ The `analogWrite` command controls motor speed, taking values between 0 and 255 to represent different levels of speed.
- 🔄 The script shows how to adjust motor speed independently of direction using the `analogWrite` command.
- 🏎️ This method allows for fine-tuning in cases where the vehicle drifts off course, compensating for motor differences.
- 🛠️ Modify your code to control both motors independently and experiment with different speed values to adjust performance.
- 📐 By adding inputs to your functions, you can make the robot drive forward at varying speeds without rewriting code for each speed.
Q & A
What is the purpose of controlling the motor's speed in a robotic vehicle?
-Controlling the motor's speed allows for smoother movement, helps the vehicle drive and turn at different speeds, and compensates for any drift if the vehicle tends to veer off course when moving straight.
What is pulse width modulation (PWM) and how does it help control motor speed?
-PWM is a technique where the digital pins on the Arduino rapidly switch between high (5V) and low (0V). By adjusting how long the signal stays high or low, PWM can mimic different voltage levels, effectively controlling the motor's speed.
Why can't the Arduino provide true analog output for motor speed control?
-The Arduino lacks a true analog output capability, so it uses PWM to simulate analog signals by rapidly turning the digital pins on and off, creating an average voltage that controls motor speed.
How can you use the analogWrite command to control motor speed?
-The analogWrite command accepts a value between 0 and 255, where 0 is no speed (motor off) and 255 is full speed. By specifying different values, you can control how fast the motor spins.
Why is it important to use PWM pins for motor speed control?
-PWM pins are essential because they are the only pins capable of generating the PWM signal required to simulate analog output, which is necessary for controlling the motor’s speed.
What happens if the PWM value is set too low, for example, 10?
-At very low PWM values like 10, the motor might not spin because the voltage is too low to overcome internal friction. The motor may make a whining noise but will not move.
How can you fix a robotic vehicle that drifts to one side while driving straight?
-You can use the analogWrite command to adjust the speed of the motors independently. For example, if the vehicle drifts to the right, you can slow down the left motor until the vehicle drives straight.
How does adding speed control make the drive forward function more flexible?
-By adding speed inputs to the drive forward function, you can control how fast the vehicle moves without having to write separate functions for different speeds. This makes the function more versatile for different scenarios.
What additional components are needed to make the vehicle react to its environment?
-To make the vehicle react to its environment like a real autonomous car, you need to add sensors that can detect obstacles and other elements in the surroundings. These will be covered in the next steps of the project.
Why is it beneficial to use different speeds for the motors when turning the vehicle?
-Using different speeds for the motors allows for smoother, gradual turns, as opposed to abrupt changes in direction. This gives more precise control over the vehicle's movements.
Outlines

このセクションは有料ユーザー限定です。 アクセスするには、アップグレードをお願いします。
今すぐアップグレードMindmap

このセクションは有料ユーザー限定です。 アクセスするには、アップグレードをお願いします。
今すぐアップグレードKeywords

このセクションは有料ユーザー限定です。 アクセスするには、アップグレードをお願いします。
今すぐアップグレードHighlights

このセクションは有料ユーザー限定です。 アクセスするには、アップグレードをお願いします。
今すぐアップグレードTranscripts

このセクションは有料ユーザー限定です。 アクセスするには、アップグレードをお願いします。
今すぐアップグレード関連動画をさらに表示

What is Pulse Width Modulation? How to generate PWM signal ? Pulse Width Modulation Explained

motor speed controller with arduino in tinkercad | motor speed controller with PWM in tinkercad

Arduino - Aula 23 - Experimento 9 - Motor com potenciômetro

ESP32 Servo Motor Web Server with Arduino IDE

Sisdig pertemuan 6

Penjelasan tentang Modulasi PWM dan Modulasi FM Menggunakan Proteus
5.0 / 5 (0 votes)
