Blood Spatter: How to Make Spatter
Summary
TLDRThis educational video demonstrates a blood spatter experiment using PPE, including safety glasses, lab coats, and covered shoes. The process involves taping paper to prevent movement, creating blood spatter with 'vampire blood' and a pipette, and collecting data by dropping at various heights. One partner drops the blood while the other records the results. The video guides viewers on how to properly mark and measure the spatter, and suggests letting it dry before analysis. For those unable to perform the experiment, a link to a Google Doc with pre-collected data is provided. The video concludes with a teaser for the next part, which will cover measurement, graphing, and interpretation of blood spatter.
Takeaways
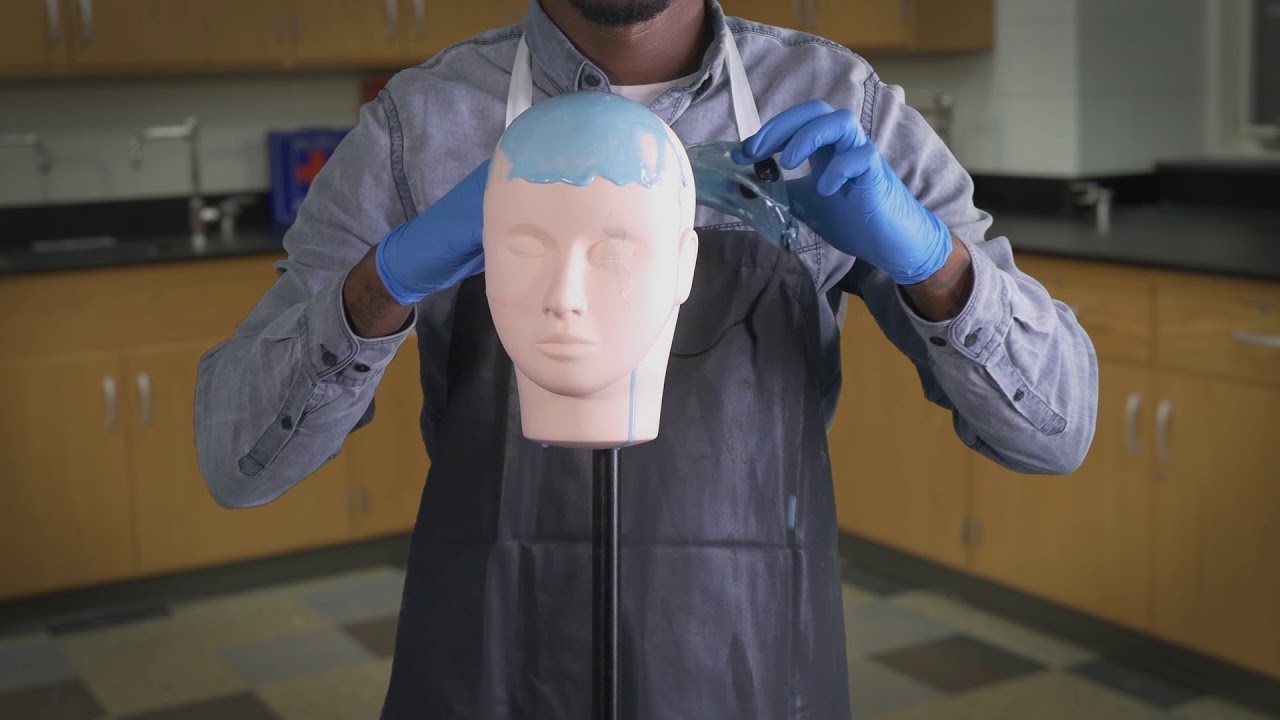
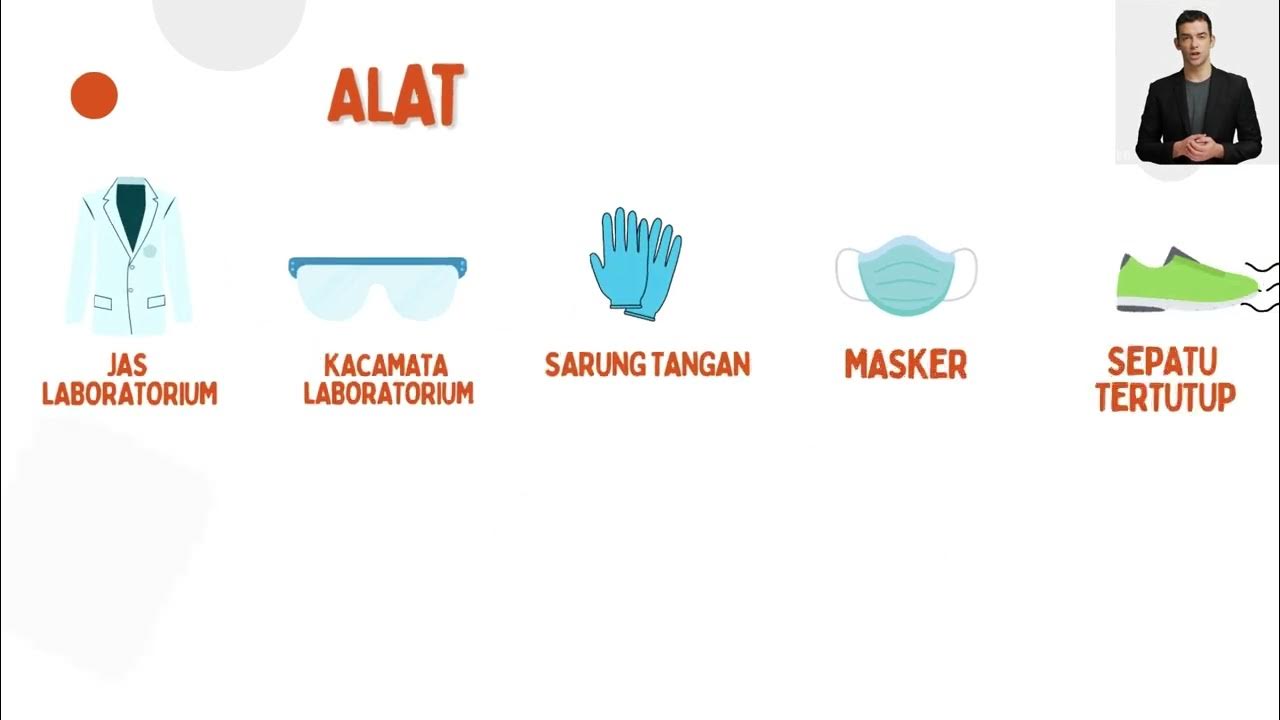
- 👓 The video discusses Personal Protective Equipment (PPE), including safety glasses, lab coats, and toe-covered shoes.
- 🔬 They use paper taped down to prevent it from moving during the experiment.
- 🧪 'Vampire blood' is mentioned as a substance for creating blood spatter in the experiment.
- 💧 A container and pipette are used to create droplets for the blood spatter.
- 📏 The height of the droplets is measured using a meter stick.
- 🔍 One partner is responsible for creating the droplets while the other records the data.
- 📝 There is a focus on achieving good, non-overlapping droplets for accurate data collection.
- 🎯 The script mentions the importance of marking and recording the height of the droplets accurately.
- ⏱️ The blood spatter needs to dry for a few hours or overnight before measurements are taken.
- 🔗 A Google Doc link is provided in the video description for those who cannot perform the experiment, containing real blood spatter data.
- 📈 The video series will continue with instructions on how to measure, graph, and interpret the blood spatter data in a subsequent video.
Q & A
What personal protective equipment (PPE) is mentioned in the script?
-The PPE mentioned includes safety glasses, lab coats, and toe-covered shoes.
Why is paper taped down in the experiment?
-The paper is taped down to prevent it from blowing away during the blood spatter experiment.
What is used to simulate blood for the blood spatter experiment?
-Vampire blood is used to simulate real blood for the blood spatter experiment.
What tools are used to create the blood droplets?
-A container and a pipette are used to create the blood droplets for the experiment.
What is the initial height at which the blood droplets are dropped in the experiment?
-The initial height at which the blood droplets are dropped is 20 centimeters.
Why is it important to avoid getting blood on the meter stick?
-It is important to avoid getting blood on the meter stick to ensure accurate measurements and to prevent contamination of the experiment.
What is the process for marking and recording the blood spatter on the paper?
-One partner drops the blood while the other records the height and marks the paper where the droplets land.
Why is it necessary to let the blood spatter dry before measuring?
-The blood spatter needs to dry before measuring to ensure accurate measurements and to prevent smudging or distortion of the spatter pattern.
How long is recommended for the blood spatter to dry?
-It is recommended to let the blood spatter dry for at least a few hours, or overnight for best results.
What resource is provided for those who cannot perform the blood spatter experiment themselves?
-A link to a Google Doc with pre-recorded blood spatter data is provided for those who cannot perform the experiment.
What will the next video cover after this one?
-The next video will explain how to measure, graph, and interpret the blood spatter data.
Outlines

このセクションは有料ユーザー限定です。 アクセスするには、アップグレードをお願いします。
今すぐアップグレードMindmap

このセクションは有料ユーザー限定です。 アクセスするには、アップグレードをお願いします。
今すぐアップグレードKeywords

このセクションは有料ユーザー限定です。 アクセスするには、アップグレードをお願いします。
今すぐアップグレードHighlights

このセクションは有料ユーザー限定です。 アクセスするには、アップグレードをお願いします。
今すぐアップグレードTranscripts

このセクションは有料ユーザー限定です。 アクセスするには、アップグレードをお願いします。
今すぐアップグレード関連動画をさらに表示

SAINS Tingkatan 4 KSSM I BAB 1 I Langkah Keselamatan di dlm Makmal I 1.1 Peralatan Perlindungan Diri
How to Dress for the Lab? And what about Personal Protective Equipment (PPE)? Video 3

Proper Dress and PPE / Lab Safety Video Part 1

Keselamatan Kerja di Laboratorium | Tata Tertib & Simbol Bahan - Sains
Keselamatan Kerja di Laboratorium IPA Mata Kuliah Pendalaman Materi IPA

APD Pengelasan K3 (Keselamatan & Kesehatan Kerja)
5.0 / 5 (0 votes)
