ReSetting Breeder Bin - New Method of Separating the Adults from the Cocoons

RockinWorms
5 Mar 202322:57

Summary

TLDRIn this informative video, Jayne from Loxahatchee, Florida, shares her expertise on red wiggler compost worms and mealworms. She demonstrates a new method for separating adult worms from cocoons using sifters, which she believes is less stressful for the worms. Jayne also emphasizes the importance of maintaining the right moisture level in the breeding bins and shares tips for setting up a nursery bin to encourage cocoon hatching. The video is a valuable resource for those interested in vermicomposting and worm care.

Takeaways

  • 😀 Jayne's channel focuses on red wiggler compost worms and mealworms, with the video discussing red wigglers specifically.
  • đŸ•”ïžâ€â™€ïž The standard procedure for a brooder event is 21 days, allowing adult worms to make cocoons without hatching them.
  • 🔄 At day 21, the process involves removing adult worms and placing them in a new bin with fresh bedding, leaving the cocoons in the old bedding to hatch.
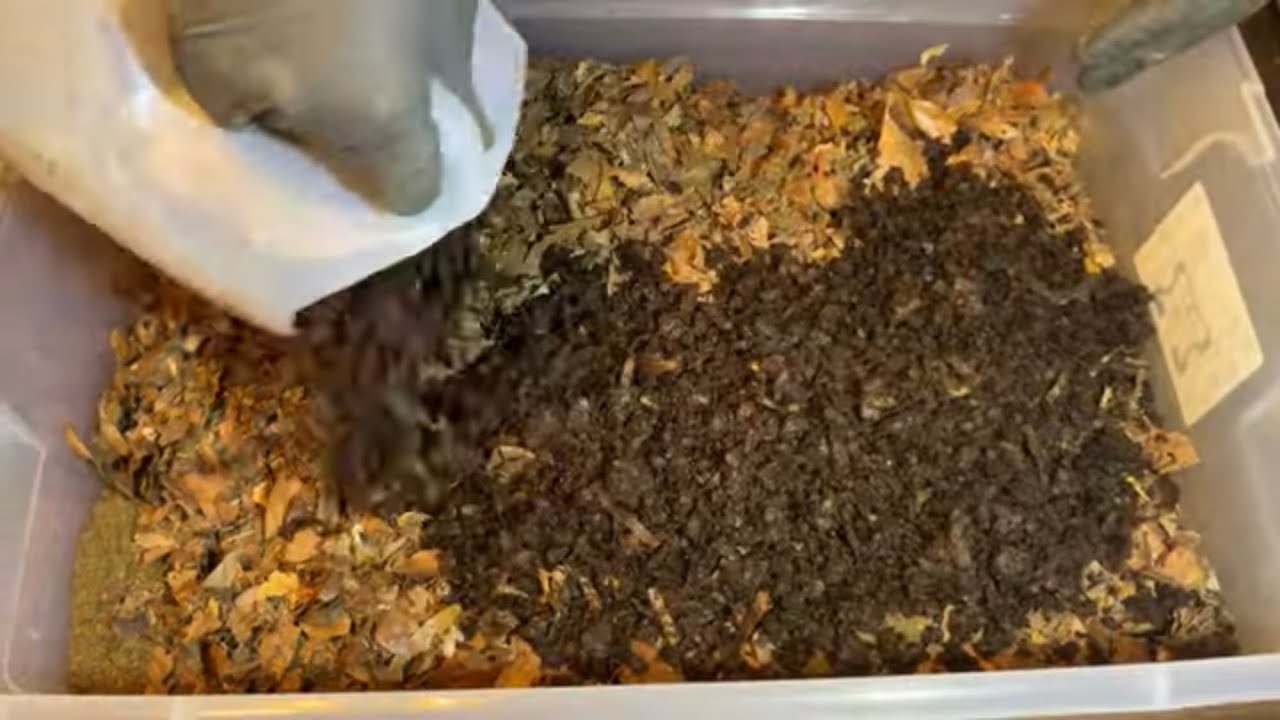
  • đŸ§Ș Jayne uses a mix of cow manure, leaves, and pre-composted materials for the new bedding bin.
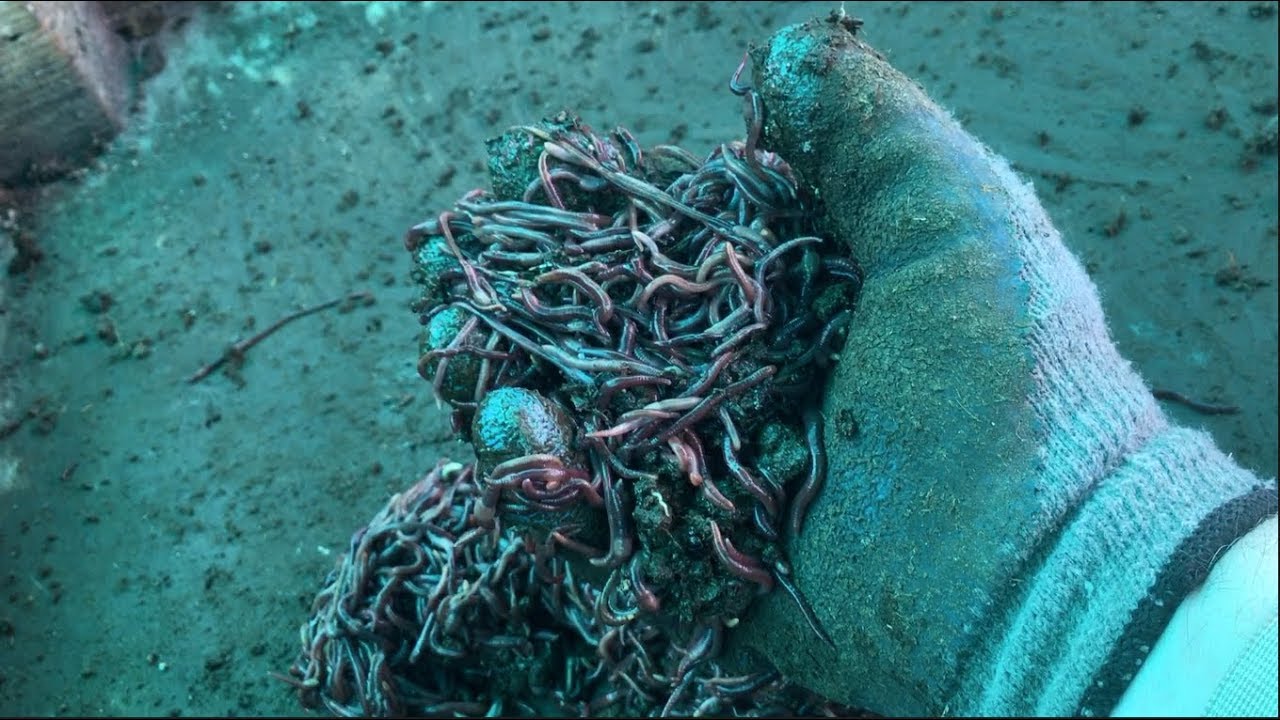
  • 🔧 Jayne is trying a new sifting method to separate adult worms from their bedding, using sifters with different mesh sizes.
  • 💡 The new sifting method is believed to be less stressful for the worms compared to the light separation method.
  • đŸŒ± It's suggested that adding some adult worms back to the nursery bin with cocoons can improve hatch rates.
  • 🔍 Jayne emphasizes the importance of checking the health of the worms and the moisture level of the bedding.
  • 📝 Small starting quantities of worms are encouraged for beginners to get started without a large investment.
  • 💧 Before closing the bins, Jayne sprays them with a molasses water solution to encourage bacteria growth, beneficial for the worms.
  • 📆 Jayne labels the bins with the current date and the next check date, helping to manage the worm breeding process effectively.

Q & A

  • What is the primary focus of Jayne's channel?

    -Jayne's channel primarily focuses on red wiggler compost worms and mealworms.

  • What is the standard procedure for a brooder event in red wiggler worms?

    -The standard procedure for a brooder event is to allow it to go for 21 days, which gives adult red wigglers time to make cocoons without the cocoons hatching.

  • What is the purpose of separating the adult worms from the bedding at day 21?

    -The purpose is to leave behind the bedding with cocoons to hatch and grow in a nursery bed, while the adult worms go into a new fresh bedding bin to produce more offspring.

  • What is Jayne's own mix for the new bedding bin for adult red wigglers?

    -Jayne's own mix consists of cow manure, leaves, and pre-composted bedding materials like coffee grounds, cardboard, and vegetable juice.

  • Why does Jayne think the light separation method is stressful for the worms?

    -The light separation method is considered stressful because worms dive down to avoid the light, getting crowded and closer to the light source, which can cause them to stretch out and bubble, signaling stress.

  • What alternative method is Jayne trying to separate adult worms from the bedding?

    -Jayne is trying a sifting method using new sifters with quarter-inch and eighth-inch screens to separate the adult worms from the bedding.

  • Why does Jayne add some of the adult worms back into the nursery bin with the cocoons?

    -Jayne adds adult worms back into the nursery bin because she has found that it improves the hatching rate of the cocoons, possibly due to the adults aerating the bedding and signaling to the cocoons.

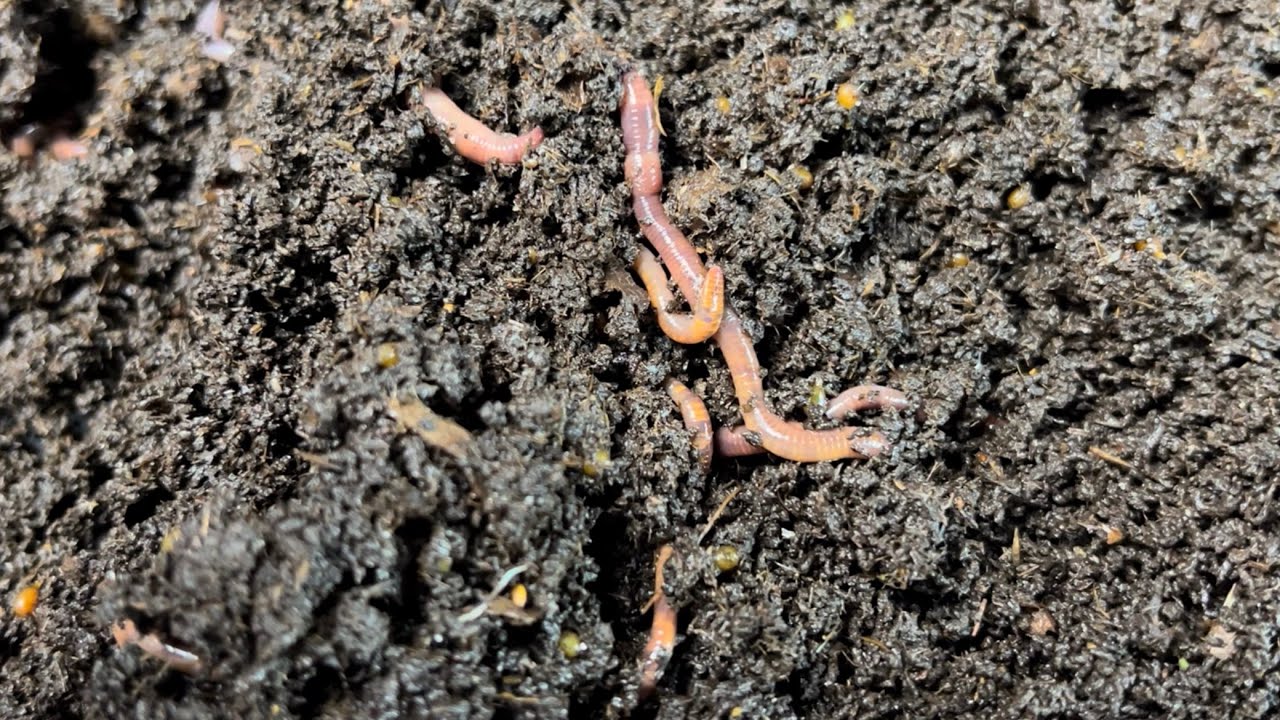
  • What are the two characteristics of a red wiggler worm that Jayne mentions?

    -The two characteristics of a red wiggler worm are a bulgy clitellum and a yellow-tinged tail.

  • How does Jayne check the moisture level of the bedding in the breeder bin?

    -Jayne checks the moisture level by squeezing the bedding; if it holds into a clump instead of falling away like dry sand, it indicates that there is still moisture present.

  • What does Jayne spray on the new breeder bin before closing it up, and why?

    -Jayne sprays a molasses water solution (made with non-sulfured molasses) on the new breeder bin to feed the bacteria, which the worms then feed on, promoting a healthy bin environment.

  • Why does Jayne combine the old bedding with cocoons from the small bin into a larger bin?

    -Jayne combines the old bedding and cocoons to reduce the number of bins she needs to manage, making the worm-keeping process more manageable.

  • Why doesn't Jayne feed the worms in the old bedding with cocoons immediately after sorting?

    -Jayne doesn't feed the worms immediately because the old bedding already contains pre-composted materials, leaves, and cow manure, providing enough food for the worms as the cocoons hatch.

Outlines

00:00

🐛 Red Wiggler Breeding Process

Jayne introduces her channel focusing on compost worms and mealworms and discusses the red wiggler breeding process. She explains the standard 21-day procedure post brooder event, which allows adult worms to create cocoons without hatching. The process involves removing the adults and placing them into a new bedding bin with a mix of cow manure, leaves, and pre-composted materials. The old bedding, now a nursery bed, is left undisturbed for cocoon hatching. Jayne also mentions trying a new sifting method to separate adults from bedding, using sifters with different mesh sizes, aiming to reduce stress on the worms.

05:04

🔩 Alternative Worm Separation Method

Jayne details her new method of separating adult worms from their bedding, which involves using sifters with quarter-inch and eighth-inch screens. She contrasts this with the traditional light separation method, which she finds time-consuming and stressful for the worms. Jayne emphasizes the importance of minimizing stress during handling and the benefits of her new approach, which includes the opportunity to inspect the health of the worms and the presence of cocoons. She also discusses the practice of adding some adult worms back to the nursery bin to improve hatch rates, hypothesizing that their activity may signal a healthy environment to the cocoons.

10:07

đŸŒ± Checking Worm Health and Bin Conditions

In this paragraph, Jayne continues to describe her worm sifting process, noting the ease and speed of identifying and selecting healthy adult worms. She uses this opportunity to assess the overall health of the worms and the breeding bin. Jayne explains the importance of maintaining proper moisture levels in the bedding, demonstrating how to check for moisture retention. She also discusses the use of an eighth-inch mesh to catch any worms that fall through the quarter-inch mesh, ensuring that no worms are missed during the sorting process.

15:09

📝 Finalizing Breeder Bin Setup and Maintenance

Jayne concludes the setup of her new breeder bin by placing the sifted and selected adult worms into a pre-composted bedding bin with food and moisture already present. She explains the use of molasses water as a sweet spray to encourage bacteria growth, which the worms feed on, and the importance of not using sulfured molasses. Jayne then describes the process of sealing the bin with a newspaper cover and a plastic cover to retain moisture, especially in her Florida environment. She emphasizes the need for regular checks and updates on the bin's status, including labeling with dates for future reference.

20:16

đŸœ Post-Breeding Bin Management

The final paragraph covers the management of the old bedding with cocoons. Jayne plans to combine the contents of the small bin with a larger one to reduce the number of bins to manage. She advises against making the bedding too deep, as red wigglers prefer the top layers. Jayne mentions that the old bedding already contains sufficient food for the developing worms, and she will monitor and increase feeding once hatching begins. She wraps up by reminding viewers to feed back with questions or comments and encourages them to like and subscribe for more content.

Mindmap

Keywords

💡Red Wiggler Worms

Red Wiggler Worms are a type of composting worm known for their ability to efficiently break down organic matter. In the video, they are the primary focus, as the host discusses their breeding and care, emphasizing their importance in the composting process. The script mentions them in the context of a 'breeder bin' and their role in creating cocoons, indicating their significance in the worm population's lifecycle.

💡Composting

Composting is the process of decomposing organic materials into a nutrient-rich humus for use in gardening and agriculture. The video's theme revolves around vermicomposting, which involves using worms to aid in this decomposition. The host demonstrates techniques for maintaining a healthy composting environment for the red wigglers, including separating adults from cocoons and ensuring proper bedding conditions.

💡Breeder Bin

A Breeder Bin is a specific type of container used for housing worms that are intended for breeding purposes. In the script, the host describes a small breeder bin with 150-200 red wigglers that has been set up for 21 days, which is a standard procedure to allow for cocoon formation without hatching, highlighting the bin's role in the worm's reproductive cycle.

💡Cocoon

A Cocoon is a protective casing spun by worms, in this case, red wigglers, during their development stage. The script discusses the importance of cocoons in the breeding process, mentioning that they hatch into new worms. The host's method of separating adults from cocoons ensures that the cocoons are left in the bedding to hatch undisturbed.

💡Bedding

Bedding in the context of vermicomposting refers to the material that the worms live in, which consists of a mixture of various organic substances. The host describes creating a new bedding bin with cow manure, leaves, and pre-composted materials for the adult worms, illustrating the importance of a suitable environment for the worms' health and reproduction.

💡Sifters

Sifters are tools used to separate different sizes of materials, in this case, to separate adult worms from the bedding and cocoons. The host introduces a new method of using sifters with different mesh sizes to efficiently and with less stress on the worms, separate the adults for transfer to a new bedding bin.

💡Stress on Worms

Stress on Worms refers to the adverse effects on the worms' health and well-being due to unfavorable conditions or handling methods. The script mentions that the host is trying a new method to reduce stress on the worms during the separation process, indicating a concern for the worms' welfare and the efficiency of the breeding process.

💡Nursery Bed

A Nursery Bed is the area where the cocoons are left to hatch and grow into young worms. The host explains that the old bedding, now a nursery bed, will be left undisturbed to allow the cocoons to hatch and develop, emphasizing the importance of a nurturing environment for the new worms.

💡Moisture

Moisture is a critical factor in maintaining a healthy worm bin, as it affects the worms' survival and the decomposition process. The host checks the moisture level in the bedding to ensure it remains suitable for the worms, mentioning that it should hold a clump but not be overly wet, which is vital for the worms' comfort and health.

💡Hermaphrodites

Hermaphrodites, in the context of red wigglers, refers to worms that possess both male and female reproductive organs. The script mentions that despite being hermaphroditic, red wigglers still require interaction with another worm to reproduce, which is an interesting biological aspect of these worms and relevant to their breeding.

💡Molasses Water

Molasses Water is a solution made by dissolving molasses in water, which is used to sweeten the worm bin and potentially feed the bacteria that the worms consume. The host sprays the new breeder bin with molasses water, suggesting that it may encourage bacterial growth and benefit the worms, although the exact mechanism is not fully understood.

Highlights

Introduction to Jayne's channel focusing on red wiggler compost worms and mealworms.

Explanation of the 21-day standard procedure for separating adult red wigglers from cocoons.

Demonstration of a new method for separating adult worms using sifters with different mesh sizes.

Comparison of the new sifting method to the traditional light separation method, emphasizing reduced stress on worms.

Description of the new breeder bin setup with a mix of cow manure, leaves, and pre-composted materials.

The importance of leaving cocoons undisturbed in the old bedding to hatch and grow.

Observation of cocoon formation as evidence of successful breeding.

Discussion on the benefits of starting with a small number of worms for beginners.

Technique for checking the health of worms and the breeding bin by observing moisture retention in the bedding.

The use of molasses water to encourage breeding in the new breeder bin.

The process of closing the breeder bin with a newspaper cover and plastic to maintain moisture.

Combining old bedding with cocoons into a larger bin to simplify ongoing management.

Note on not needing to feed the cocoons immediately due to the presence of pre-composted bedding.

Invitation for viewers to share their methods for sorting breeders and an openness to learning new techniques.

Emphasis on the hermaphroditic nature of red wigglers and their ability to produce cocoons after meeting.

Identification tips for red wigglers based on their clitellum and yellow-tipped tail.

Transcripts

play00:02

hi everyone I'm Jayne at Rock and worms in Loxahatchee Florida and welcome to my

play00:10

channel my channel primarily focuses on red wiggler compost worms and mealworms

play00:16

tonight's video is going to be regarding once again the red wigglers so

play00:22

this is a small breeder bin I have maybe 150 200 worms in here I'm not

play00:30

really sure and the breeder bin has been going for

play00:34

21 days which is the standard procedure when you have a brooder event and what

play00:39

that does is allow the adult red wigglers time to make cocoons but not

play00:45

time for those cocoons to hatch so what we want to do at day 21 is pull

play00:52

out the adults let's show some of them in here pull out the adults

play00:58

and leave behind the bedding which will have the cocoons

play01:04

in it and then the cocoons will subsequently hatch in the bedding

play01:09

and grow up there it becomes a nursery bed the adult

play01:14

word wigglers will go into a new fresh bedding bin this is my um my own mix

play01:23

which is basically cow manure leaves and pre-composted bedding

play01:31

which is you know coffee and cardboard and vegetable juice and all that good

play01:37

stuff so that's where the red wiggler adults are going to go in here to make

play01:42

more babies and the old bedding with the cocoons in it will

play01:48

be left alone so to speak so the cocoons can hatch all right so let's get started

play01:55

I've tried a couple different methods for separating out

play01:59

adult wigglers from their bedding and I am now

play02:05

trying this method the previous method was the standard light separation method

play02:10

which works fine it just takes a long time and I think it's very stressful on

play02:15

the worms so I'm going to give this a try I'm using my new sifters I've only

play02:19

had them for like two weeks and this is the quarter inch screen and below it

play02:25

I have the eighth inch screen and then again I have it uh resting in my canning

play02:31

Kettle but these also do fit a five gallon bucket if you want to use a five

play02:35

gallon bucket so what I did is I took a handful

play02:39

of the breeder bin contents and I put them in

play02:45

the screen and what I'm going to Simply do

play02:48

is start picking out

play02:52

the adults

play02:57

and I just move it around a little bit to see the adults

play03:01

and when I get all of them in this

play03:08

I'm going to put them in here in fact um I'm going to switch the operation

play03:13

here a little bit because I'm having some difficulty with lighting

play03:17

and I'm going to have to move my new breeder bin

play03:23

to the side even though it's a little awkward

play03:27

because I'm right-handed it's more important that I'd be able to

play03:31

see the worms over here let me let's do this let's

play03:36

give this a try that's what you know what that's what raising worms are all

play03:40

about you try things and if it's not working the way you want it you try

play03:44

something new and eventually you figure out what works best for you

play03:48

all right so here's another one see all right so that's going to go into my new

play03:54

bin there we go now that I have the bins in a different

play03:57

order I have to read acclimate myself

play04:02

so what I'm doing is taking a scoop

play04:07

putting it in spreading around a little bit I can even shake the bin a little

play04:13

bit to get some of the bedding out of the

play04:15

way and I'm picking out

play04:19

the adults now one of the reasons I'm trying this

play04:24

is because like I said I've used the light separation method previously and

play04:31

what you do there is you put the bedding in a pile

play04:35

and you put it under a light and what happens is the word the worms dive down

play04:43

to the bottom of the pile in order to avoid the light

play04:47

handful of worms into the body and as you work down there's more and

play04:53

more worms in less and less space and they're getting closer and closer to the

play04:59

light because there's less bedding and this tends to be stressful on the worms

play05:03

and they can start stretching out to try to dig down they

play05:12

can start actually bubbling which is them emitting a get away from me signal

play05:20

and again shows that they're stressed so I am hoping that this method will be

play05:26

less stressful on the worms because I'm not spending a lot of time

play05:32

driving them down handling them I'm picking them out

play05:38

putting them where they're going to go so I'm not touching them again

play05:44

and moving on

play05:50

now the other thing is just as an FYI

play05:55

when I set up the nursery bin which will be the contents of this breeder bin

play06:01

minus the Breeders I add back in some of the breeder worms

play06:09

some of the adults I have found in my experience that I get a better hatch

play06:15

rate from the cocoons if there are some other worms in there I'm not sure

play06:23

exactly why that is I hypothesize it's because the bigger worms are active

play06:32

they're aerating the bedding

play06:36

and perhaps they're even signaling to the cocoons that hey it's great out here

play06:41

hats and join us

play06:45

so what that also means is as I am sifting out

play06:50

the breeder bins

play06:53

and I'm picking through the adults if I don't get every adult out and it ends up

play07:02

in the now Nursery bin it's okay I was

play07:07

going to add in some worms anyways so I don't have to be crazy to make sure

play07:14

I get every worm out okay another handful into the new

play07:21

bedding oh hey look at this here is a cocoon right there that's

play07:28

exactly what we want to see and this is proof that the Breeders have been doing

play07:34

their job they're making cocoons yay good job good job all right so that's

play07:41

going to go into the then over there to wait for me

play07:46

and I just keep doing this

play07:53

down to the end but let's take a little pause and let's look at some of these

play07:57

breeders look at him her it they're her my

play08:02

hermaphrodites which means they have both male and female sexual organs and

play08:09

they still need two to tango but they both

play08:13

walk away with the ability to make cocoons after they meet so here is one

play08:18

again you can see that lovely

play08:23

right there all nice and bulgy and you can also see the yellow tip this are

play08:29

these are two characteristics of a red wiggler worm so if you see this you're

play08:33

pretty sure you got Red wigglers If You Don't See

play08:37

either one of these characteristics you've got some other type of worm

play08:42

here's another one again

play08:45

nice bulgy clotalum and a nice yellow tinged tail

play08:52

so let's put these with their buddies and just keep going

play08:59

through oh here's another couple cocoons here there there's going to be cocoons

play09:04

and here's another one over here I'm interrupting myself another one over

play09:08

here there's going to be cocoons all through this bedding which is again what

play09:13

we wanted to see

play09:19

okay okay now this is a small breeder bin

play09:25

and you should know that small amounts of

play09:30

worms to start with is perfectly great it's fine it's a good

play09:36

way to get started and not invest a lot of money in buying worms not to have to

play09:41

invest a lot of money in setup and bins and and uh you know buying lots of food

play09:48

for your worms you can start small see if you like it which you will and

play09:55

then just grow your herd from there oh

play10:01

here's a handful okay

play10:06

again and with your buddies

play10:10

you can see this is fairly fast actually to pick out the worms

play10:18

and keep moving it's also uh I I'm finding I'm liking this

play10:25

um for the reasons I said earlier because it seems less stressful on the

play10:30

worms because I'm handling them once and then putting them into their next three

play10:34

week home a bunch more cocoons

play10:39

but also by doing this I have an opportunity to see my worms

play10:47

and check on them this one looks done keep going

play10:54

so because I'm actually seeing my worms I can see are they healthy looking are

play11:01

they chubby are they fat are they skinny does their color look good did I have

play11:07

any unknown worm get in there somehow some way

play11:14

so it's a nice um way to check on

play11:19

the worms health and the health of the bin

play11:24

because I'm going to show you something regarding the health of the bin here

play11:28

when I get the next handful so hang on now this worm has already

play11:34

kind of looped itself in between some of the grids

play11:38

and I'm not going to worry about pulling him out because I still have other

play11:42

sifting to do here or sorting to do here he'll work his way down so I don't have

play11:48

to stress him by pulling on him okay

play11:52

so let me dump it out again if he happens

play11:56

to come out into the Cocoon uh old bedding that's fine in fact I have

play12:02

somebody right here and I'm just going to drop them in there

play12:07

with the cocoons

play12:11

and now if my cameraman would swing back over

play12:16

this is the this is the reason I have the 1 8 inch mesh underneath the quarter

play12:23

inch mesh because some of the worms do drop through and it's easier for me to

play12:29

pick them out at this level than if they were all the way down

play12:37

at the bottom of my pan or my five gallon bucket if I

play12:41

was using that so having the eight eight inch sifter underneath just makes

play12:48

pulling out any worms that might have gone through the quarter inch

play12:52

that much easier

play12:56

okay so oh here's a whole bunch of cocoons look at these

play13:01

awesome so exciting so here's the other thing

play13:08

um for checking on the health of your breeder bin specifically because that's

play13:13

what I'm talking about as I'm scooping this up I can feel that there's still

play13:19

moisture in here and you can check that I'm going to just pull this guy out so I

play13:23

don't squeeze them if I squeeze the bedding I'm not I'm squeezing hard I'm

play13:29

not getting any moisture out but when I open it up it still forms a clump that

play13:35

means there's moisture in there and it's not dry like sand where if I squeeze I

play13:41

open my hand it just Falls away right it holds into a clump so I know that this

play13:46

bedding is holding moisture for the amount of

play13:51

time I need those worms in there uh breeding so

play13:55

it's another good thing that

play13:59

um the check

play14:01

here I'm dumping the rest [Music]

play14:04

how your bins are working are they holding moisture are they drying out

play14:09

as well as you know are your worms looking good and healthy

play14:12

so I'm almost done with this little bin so

play14:17

I'm pretty happy with this method but you know there's more than one way to do

play14:23

things so if you are using a different way

play14:28

to sort out your breeders please comment below I'm always open to learning new

play14:35

and better ways and sharing the information

play14:39

we have between ourselves so we all learn and we all get better

play14:44

okay oh I got another one here last little handful it looks like goes

play14:50

into the bin oh here's another one and again

play14:54

it's fine if I miss a couple

play14:59

because they're going to go in with the cocoons anyways and

play15:04

tell the cocoons What a Wonderful Life it is and how they need to come out

play15:08

and join the party okay

play15:13

all right I think that's pretty good all right so

play15:17

last dump into this bin here okay and lastly I'm

play15:24

going to take the stuff I sift that the stuff that sifted and went through the

play15:30

quarter inch to the eighth inch and I'm going to give

play15:35

it a quick um

play15:37

pass through see if I have any worms in there

play15:40

I don't but look at all these cocoons can you see them

play15:45

look at all these cocoons scattered throughout

play15:50

this is fantastic I'm so excited all right so these uh

play15:56

these are going to go into the cutting and Cocoon

play16:02

temporary housing there okay

play16:06

last thing to dump and the cocoons is any

play16:11

bedding that went through the eighth inch screen as well

play16:15

foreign

play16:22

finishing these guys up for the night

play16:27

so all my breeders are now in this bin this

play16:33

bin again is pre-composted has food in it leaves they're all set and ready to

play16:40

go for another three weeks I'll talk about exactly what I do to set up my

play16:45

breeder bedding in another video but suffice to say the Breeders are in here

play16:51

they're good to go so all I need to do now

play16:55

is close them up and get them to work making babies Oh

play17:01

yes thank you my executive producer reminded me I forgot I wanted to show

play17:07

you this as well um what I like to do before I close it

play17:11

up is spray them with some molasses water

play17:16

it's you know a teaspoon two teaspoons of

play17:22

molasses Blackstrap I use Grandma's Molasses

play17:26

non-sulfur that's the important part it needs to be non-sulfured molasses and I

play17:32

dissolve it in a little bit of hot water swish it up and then of course I fill it

play17:37

with cold water because I don't want to put hot water on my worms but this has

play17:41

been room temperature for a couple of days so I'm just going to give them a

play17:45

quick spray now

play17:48

the joke is that compost worms have a sweet tooth but of

play17:54

course they don't have any teeth at all but I don't know if they're actually uh

play18:00

drinking the liquid or the the sweet liquid is actually feeding the bacteria

play18:06

which then the worms feed on themselves but regardless

play18:11

putting a little sweet water on them Works a charm

play18:16

so now I am going to put a new newspaper cover on

play18:22

you need another sheet

play18:28

and I'm going to put that on and I'm actually going to do

play18:35

one more light Spritz on the underside of the

play18:41

Gale circular

play18:45

they're good to go spray back

play18:49

and I'm going to put on a plastic cover now I put on a plastic cover because I

play18:56

live in Florida I have the AC on even though it's beginning of March and if I

play19:01

don't put a plastic cover on it dries out the bedding really quick and

play19:06

I have to be in there adding moisture all the time it's not good for the worms

play19:10

and quite frankly I don't have time to go in every day and check them like that

play19:13

so putting on the plastic helps me if you live in a moisture environment

play19:17

you may not need the plastic all right so these

play19:22

um adult breeders are ready to get back to

play19:25

work now I will update the label I'll make a label that puts on the date

play19:32

of today and um when I'm going to

play19:38

um look at them again in three weeks just

play19:41

because life is busy and it's easy to look at the dates and know oh I got to

play19:45

do my worms this weekend so I'm gonna put them back on the Shelf

play19:50

I'll label them later and then I have here

play19:56

this is the old bedding with all the cocoons in them

play20:02

now what I'm going to do with this

play20:08

warming is a a little bit of a messy job um what I'm gonna do with this is I am

play20:15

going to add them

play20:20

where is my here it is

play20:23

it's okay it's not going to find where I put it

play20:26

um I have three breeder bins at this moment

play20:31

I did the first two earlier today and I'm doing the last uh third one with you

play20:36

guys here tonight so this is some cocoons and

play20:43

um old bedding from some of the earlier

play20:46

bins I did okay so what I'm gonna do is I'm gonna combine the bedding and

play20:52

cocoons from this small bin into this larger bin

play20:59

because it makes less bins that I have to manage on an ongoing basis so don't

play21:05

be afraid to combine your bins when you can to make life easier on you now the

play21:13

only thing you want to keep in mind you can see some of the worms here

play21:17

because I do add in the adult worms to the cocoons remember

play21:23

one of the things you want to just remember is don't get your bedding too

play21:27

deep red wigglers are a surface worm they like the top five to six inches of

play21:33

bedding or land if they're out in the wild so you don't want your bin to be

play21:39

super deep but these bins are only five and a half six inches deep to begin with

play21:44

so as long as I don't overflow it the uh the depth is just fine

play21:50

so again these are all my cocoons and a couple adults

play21:55

to keep everybody company I'm gonna close them up

play22:00

with the old

play22:04

topping and put on their plastic and they're good to go

play22:09

now the last thing I'm going to say is wait you didn't feed them right I didn't

play22:13

feed them well remember this is the old bedding and the old dining already has

play22:18

all the pre-composted bedding that I make in there it has the leaves in there

play22:24

it has a cow manure in there from before so there's still plenty of food in there

play22:29

for those cocoons when they start hatching but I'll be checking on them in

play22:33

a week or two to see if I start having hatch and I'll start increasing the feed

play22:39

at that time but that's it for now um

play22:43

if you have any questions or comments please add them below below otherwise

play22:48

don't forget to like And subscribe and that's it for tonight thank you very

play22:52

much for joining me and I'm yours in the dirt have a good one Jayne

Rate This
★
★
★
★
★

5.0 / 5 (0 votes)

Étiquettes Connexes
Red WigglerCompostingBreedingWorm CareEco-friendlyGardening TipsSustainable LivingFlorida WormsCompost BinBiodegradable
Besoin d'un résumé en anglais ?