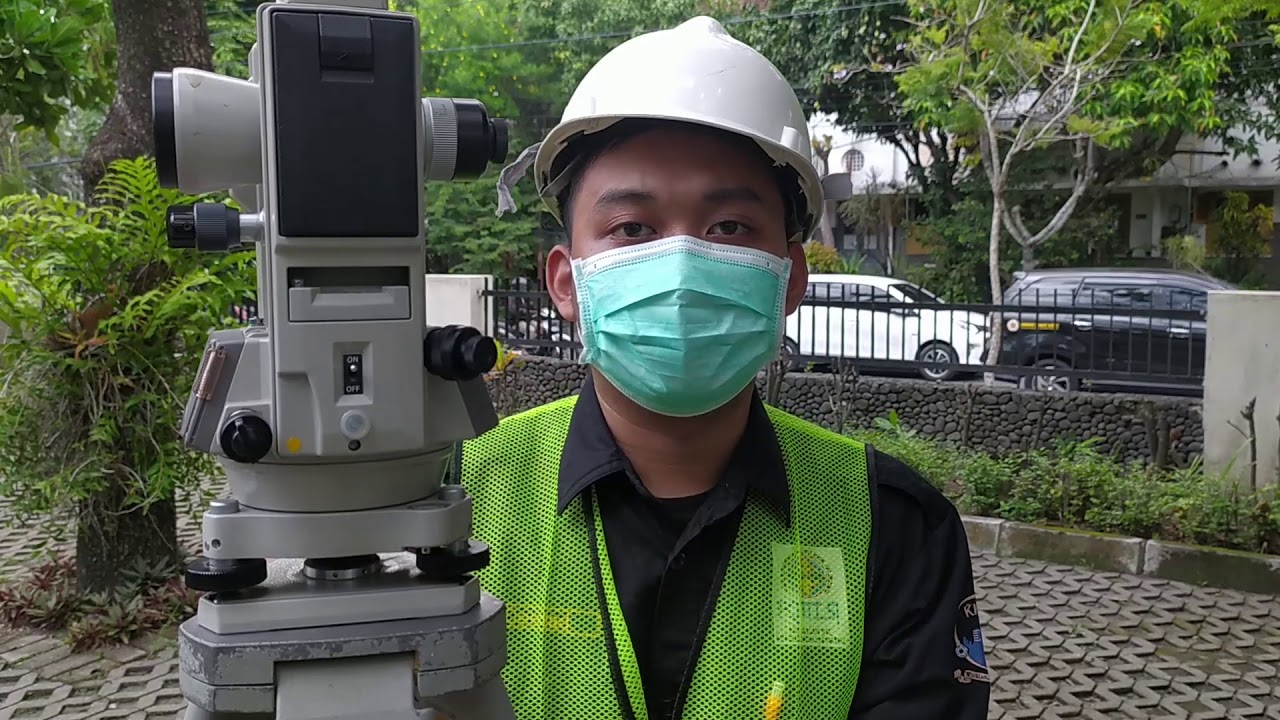
Theodolite - Measuring Angles
Summary
TLDRThis instructional script details the setup and use of a theodolite for precise angle measurements in surveying. It covers tripod leveling, theodolite mounting, and bubble level adjustments for accuracy. The tutorial explains the use of adjustment knobs for both vertical and horizontal axes, recording angles in face left and right modes to ensure calibration, and focusing techniques to minimize parallax. It also describes the use of an optical plummet for aligning the instrument over a specific point and measuring distances between surveying stations.
Takeaways
- 🧰 Once the tripod is level, attach the theodolite using the locking screw, ensuring it's finger tight.
- 🔧 Use the three adjustment screws to center the bullseye level, adjusting two screws together and the third separately.
- 📐 The theodolite has a secondary bubble level for higher accuracy; align it within the markers by turning the instrument 90 degrees and repeating the adjustment.
- 🔍 The theodolite includes an eyepiece, sight, focus rings, and several adjustment knobs for precise targeting and measurement.
- 🔒 The vertical and horizontal adjustment knobs have locks that must be engaged for fine adjustments to work.
- 🔢 For angle measurement, use face left and face right modes to eliminate calibration issues by averaging measurements from both modes.
- 🔭 Focus the crosshairs through the eyepiece using a piece of paper to ensure sharpness and reduce parallax.
- 🎯 Use the sight on top of the instrument for initial targeting, then fine-tune through the eyepiece with horizontal and vertical locks applied.
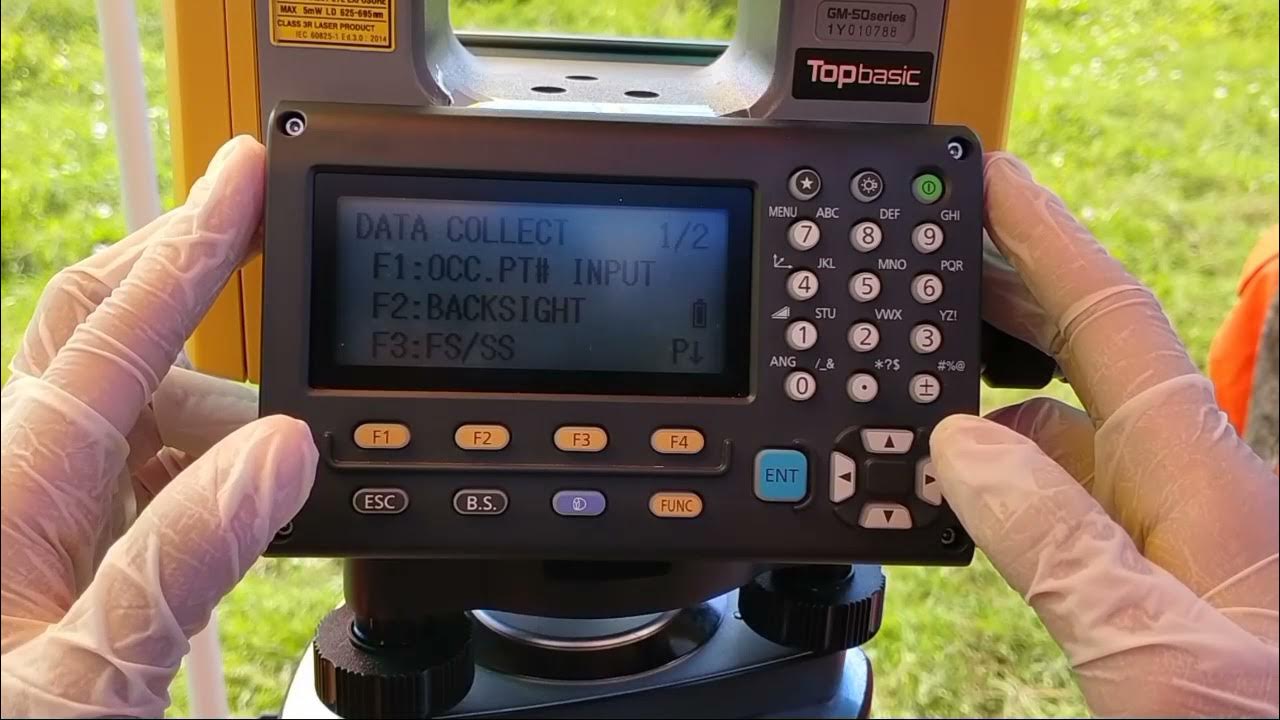
- 📏 Record horizontal angles on the booking sheet, starting with zeroing the instrument and recording measurements at different targets.
- 📊 Average the face left and face right measurements to calculate the final angle for further calculations.
Q & A
What is the first step in setting up a theodolite?
-The first step is to ensure the tripod is level, then place the theodolite on top of the tripod using the locking screw, making sure it is finger tight but not over-tightened.
How do you adjust the bullseye level on a theodolite?
-Use the three adjustment screws to bring the bullseye level into the center circle. Two screws are used together to move the bubble in or out, and the single screw is used to center the bubble directly.
What is the purpose of the secondary bubble level on the theodolite?
-The secondary bubble level is set to a higher degree of accuracy and is used to ensure the instrument is set up correctly for precise measurements.
How do you ensure the secondary bubble level is correctly aligned?
-Adjust the instrument using the two adjustment screws until the bubble is between the two markers. Then, turn the instrument 90 degrees and repeat the procedure using the single adjustment screw.
What are the functions of the adjustment knobs on the eyepiece of a theodolite?
-The adjustment knobs on the eyepiece are used for focusing the crosshairs and adjusting the vertical and horizontal angles of the theodolite.
Why is it necessary to lock the vertical adjustment before making fine adjustments?
-The vertical lock prevents the instrument from moving in a vertical manner, allowing for precise targeting of the prism and accurate angle measurements.
What is the significance of using both face left and face right modes when measuring angles with a theodolite?
-Using both modes helps eliminate any calibration issues with the instrument by measuring the same angle from two different orientations.
How do you reduce parallax when using a theodolite?
-Hold an A4 page in front of the lens and adjust the focus on the eyepiece back and forth until the crosshairs are sharp and in focus.
What is the purpose of the optical plummet on a theodolite?
-The optical plummet allows the user to see a point on the ground directly beneath the prism, useful for setting up over a known surveying point or measuring distances between two points.
How do you record angles in a booking sheet when using a theodolite?
-Record the angles in a U-shape pattern, making two measurements for each angle in both face left and face right modes. Calculate the average of the two measurements for each angle to use in further calculations.
What is the process for measuring the distance between two points using a theodolite's optical plummet?
-Align the optical plummet with a known point, have a colleague mark the point on the ground, repeat at a second station, and then measure the distance between the two marked points using a tape measure.
Outlines
📐 Setting Up Theodolite and Leveling
This paragraph details the initial setup of a theodolite for surveying. It begins with leveling the tripod and securing the theodolite using a locking screw. The focus is on aligning the bullseye level to the center circle using adjustment screws, ensuring the bubble is centered for a rough measurement of the instrument's horizontal alignment. A secondary, more accurate bubble level is also discussed, which must be correctly aligned between two markers for precise measurements. The paragraph also describes the components of the digital theodolite, including the eyepiece lens, adjustment knobs, and focus rings for crosshairs and distance.
🔧 Adjusting and Locking Theodolite for Precision
This section explains the process of adjusting and locking the theodolite for precise angle measurements. It covers the use of vertical and horizontal adjustment knobs, which include inner rings for locking the instrument in place and fine adjustment knobs for targeting the prism. The importance of applying the horizontal lock before making fine adjustments is emphasized. The paragraph also describes the theodolite's digital display, optical plummet, and the method of recording angles in both 'face left' and 'face right' modes to account for any calibration issues, ensuring accurate measurements.
🎯 Targeting and Recording Angles with Theodolite
The paragraph outlines the procedure for targeting and recording angles using a theodolite. It starts with removing horizontal and vertical locks to use the site on top of the instrument to aim at the target. Once the target is aligned, locks are applied, and the eyepiece is used to focus on the object and adjust the crosshairs. The process of setting the zero angle and recording the first angle is explained, followed by rotating the instrument 180 degrees to record the angle in a 'face right' mode. The importance of using both modes to eliminate calibration errors is highlighted.
📊 Recording and Calculating Angles in Surveying
This section delves into the recording of angles in a booking sheet and the process of calculating the average of multiple angle measurements. It describes the initial setup of the theodolite, the recording of angles to two different targets, and the method of calculating the difference between two face left and two face right measurements. The average of these differences is used for further calculations, ensuring the accuracy of the surveying data.
🌐 Utilizing Optical Plumber and Distance Measurement Techniques
The final paragraph discusses the use of the optical plummet for precise point targeting and the method of measuring distances between two surveying points. It explains how to align the instrument over a known point using the optical plummet's focus and target. The technique of using a colleague to mark a point on the ground and measuring the distance between two such points using a measuring tape is also covered, providing a comprehensive guide to distance measurement in surveying.
Mindmap
Keywords
💡Theodolite
💡Tripod
💡Leveling
💡Bullseye Level
💡Adjustment Screws
💡Spirit Level
💡Optical Plummet
💡Crosshairs
💡Prism
💡Face Left/Right Mode
💡Booking Sheet
Highlights
Setting up a theodolite involves leveling the tripod and securing the theodolite with a locking screw.
Adjustment screws are used to center the bullseye level and align the bubble within the circle for accurate leveling.
A secondary, more accurate bubble level on the theodolite requires alignment between two markers for precise measurements.
The theodolite's eyepiece includes a focus ring for adjusting the visibility of crosshairs.
Vertical and horizontal adjustment knobs allow for precise targeting of a prism or surveying point.
Locks are essential for securing the theodolite's position before making fine adjustments.
Digital display and optical plummet are integral parts of a theodolite for angle measurement and alignment.
Two measurement modes, face left and face right, are used to eliminate calibration issues in angle recording.
Parallax error is minimized by using a sharp focus on crosshairs, demonstrated by focusing on an A4 page.
The sighting method involves using a white triangle to aim at the target before locking and adjusting through the eyepiece.
Zero angle setting is crucial for accurate angle measurements, demonstrated by a double press of the zero angle button.
Recording angles involves targeting objects, using fine adjustments, and noting measurements on a booking sheet.
The booking sheet records angles in a U-shape pattern, allowing for the calculation of average angles for accuracy.
The optical plummet is used for aligning the theodolite directly over a known surveying point on the ground.
Focus adjustment is necessary for the optical plummet to ensure clear visibility of the target circle and dot.
Measuring the distance between two stations involves using the theodolite's plummet and a measuring tape.
The process of setting up and using a theodolite is critical for accurate surveying and construction projects.
Transcripts
once our tripod is level
we're going to take the theodolite from
the box and offer it up to the
top of the tripod again using the
locking screw
to hold it into place
remember the lock and screw is to be
finger tight and not to
over tighten it now
we're going to try and use the three
adjustment screws to bring
the bullseye level into
the center circle so remember using
these screws
these two screws in together are out
together
to bring the bullseye level into
the center and then
using the single screw to bring the
bubble
directly into the center
so again using the two adjustment screws
in together
right together with thumbs to bring the
bubble in line with the circle of the
bullseye level
then using the single adjustment screw
to bring the bubble into the center
of the bullseye level
on the theodolite we have our bullseye
level and that's
set up correctly but we also have a
secondary
bubble level here on the instrument
itself
this second one is set up to a higher
degree of accuracy
so the bubble bullseye level down here
is kind of a rougher
course measurement for how horizontal or
flat the instrument is set up at
here this instrument this spirit level
uh bubble level here is set to a higher
degree of accuracy
for us to use this instrument correctly
this
bubble level must be set correctly in
between
the two markers to do that
again you align the instrument up with
the two adjustment screws that you're
using
and either in together or out together
move the adjustment screws in this case
by a small amount
because the bubble level is nearly
correct
so that the bubble is in between
the two markers
once the spirit level spurt bubble
is within the two markers we turn the
instrument
90 degrees
and we repeat the procedure for getting
this bubble
within the two markers but this time
we're just going to use
the single adjustment screw
so no matter where we turn the
instrument it should be
the bubble should be it should be in
between the two markers
just check at several locations
given the bubble
level time to respond
checking it at several points
nine instrument is set up ready to be
used
to describe the elements of our digital
theodolite
we have an eyepiece
lens we have a site
on top of the optic and we have
a number of adjustment knobs on the
eyepiece
we have a focus ring for the crosshairs
on the actual body of the
optical lens we have a distance focus
ring so whenever you're looking at your
target you'll bring it into focus
using the adjustment of this ring here
we have a number of adjustment knobs
this is a
vertical adjustment here it comprises
two parts
the inner ring will lock
the instrument so it cannot be moved in
a vertical
manner and you can rotate it up and down
with the lock applied on you can no
longer move it
and then with the inner adjustment knob
you can
move the eyepiece
up and down by small amount so you can
target
your prism
exactly likewise
this is the adjustment knob or the lock
and the adjustment knob for the vertical
axis
turn it around here we have the
adjustment knob
for the horizontal axis so
they apply the lock so the instrument
can no longer
be turned around apply it on
and then you can use the second
adjustment
knob to rotate the instrument by a small
horizontal angle
note for these fine adjusts for the
horizontal
and for the vertical angle
they will not function unless the
horizontal lock
is actually applied so with the
horizontal lock off the spine adjust
doesn't have any effect the lock has to
be applied first
before the any adjustment will actually
take place we have our
bullseye level digital display
here we have an optical plummet
so looking through this eyepiece
we will actually see a point on the
ground
directly beneath the prism
the theodolite like a total station has
two ways to
record angles what i mean by that either
face left or face right
initially we take angle measurements in
the face left mode
what i mean by that is face left
looking through the eyepiece where is
the
measurement part of the instrument the
measuring part of the instrument
is this side here or an easier way
to describe it is the battery pack
upgrade pack this is the battery pack so
wherever the battery pack
is the measurement side of the
instrument
is on the other side this case looking
through the eyepiece
the measurement part of the instrument
is on the
on the left we're recording this angle
when we look through our target
looking at the prism recording the angle
in a face left mode
we will then turn to target
our second present and record
the angle
once the angle has been recorded we'll
then flip
the instrument turn it 180 degrees
turn the eyepiece 180 degrees so we
target back at the
same seconds target now
the measurement part of the instrument
is on the right hand side so now we are
recording the angle in the face right
mode
target the prism record the angle turn
back
to where we initially were and target
the prism in this case and record the
angle
again this is in a face right angle
then we go to our booking sheet we can
work out the difference between the two
angles and
take an average the reason for doing
this
is that if there is any calibration
issues with the instrument
by measuring it face left
and then subsequently measuring the same
angle
but now in a face right mode
angle there back to there any
calibration issues
will be eliminated
so that we're using this one correctly
we need to have
the cross hairs that you see through the
eyepiece and sharp focus
this is to reduce parallax so you take
a plane a4 page hold it
in front of the lens and
with the focus on the eyepiece we adjust
it back and forth
until the crosshairs are nice and sharp
with the horizontal and the vertical
locks removed
we're going to use the site on top of
the instrument
to target or point towards the target
that we are using
so looking through the target remotely
you'll see a little white triangle and
we're going to aim the point of the
triangle
towards the target that we are using in
this case
it is the center of the prism then we
can
apply the horizontal and
vertical locks and then move to look
through
the eyepiece
looking through the eyepiece we can use
the distance focus string
to bring the object into focus
and then use the horizontal
and the vertical flame adjust
to bring the prism
into line
with the target
back to our display and we can then
set our zero angle so a double press
of the zero z angle we set the
horizontal angle
to zero removing the vertical
and horizontal locks we can then
move the instrument to target our second
object
using the site again to line it up
before you look through the eyepiece
apply the horizontal and vertical locks
and then look through the eyepiece and
use the fine adjusts
to bring it exactly into the center of
our second target
in this case it's going to be a second
prism
looking through the eyepiece
looking through the eyepiece using the
distance focus
we can bring our object into
focus and they are using the
line adjusts we can move the crosshairs
so that in this case it is exactly
in the center of the prism
looking back at the display we can
record our first angle
of being 38 degrees
43 minutes and 50 seconds
this first angle was record as recorded
and a face left left manner
remember the measurement part of the
instrument is on the left hand side
the battery being on the right with the
angle recorded
remove the vertical and horizontal locks
rotate the instrument 180 degrees rotate
the eyepiece
180 degrees targets
back on the original object
using the site
to line you up
approximately apply the
horizontal
apply the horizontal and the
vertical locks we can then look through
the eyepiece
and target the
prism exactly using the distance focus
we can bring the prism directly into
view
and then using the fine adjust
we can move the crosshair
you can move the crosshairs exactly in
the center of the target
the way the instrument is set up the
measurement part of the instrument is on
the right hand side
and then we can go and record the third
angle
third horizontal angle 118
degrees 43 20.
and then we're going to go back
remove the horizontal and vertical locks
go back and target the initial
present in this case
we use the site initially
to get it lined up so you're pointing in
the right direction
once you're pointing approximately in
the right direction
you apply the horizontal
and the vertical locks then you can look
through the eyepiece
and then use the fine adjusts
to bring the crosshairs onto the target
exactly
using the distance focus we bring our
target
into focus the center of the prism then
using the fine adjust
we can move the crosshair target
into the exact center of the prism
then we can record the final angle
which is 170 degrees
58 minutes 30 seconds
when we are doing our measurements there
is a way for us
to actually record the angles into a
booking sheet
initially when we set up our theodolite
at point a we looked at the prism
at point b and targeted the theodolite
to prison b we would say when we fill in
the booking sheet our instrument is at
point station a and we observed
our target at station b
we zero to the satellite and here we
record an
angle of zero minutes zero
zero degrees zero minutes zero seconds
the theodolite was then rotated
clockwise
and targeted on our second target
prism
c
and the horizontal angle recorded
when we did that that gave us an angle
of
38 degrees 27
minutes and 0 seconds
both measurements to start off with were
done with the
instrument and face left mode
the theodolite was then rotated around
180 degrees and the eyepiece rotated
so that you are now looking back at
prism
c but the instrument
was in a face right mode
angle recorded in that situation
was 318 degrees
27 minutes
20 seconds the
light was then rotated back to
prism b and the horizontal angle
recorded
that was 180 degrees
14 minutes and 30
seconds so when filling in
part of the booking table we fill it in
first we do our two face left
measurements
zero it rotate
and record the angle flip it around
just face right record the angle
back to the original target record the
angle
so you're filming in the angles
and like a u-shape and the four cells
to do calculations with the angles which
angle we actually use because we've
actually measured the angle twice
we take the difference between the two
face left measurements
and write it in the red box so the
difference between
38 27 0 and 0
gives you 38 degrees 27
minutes zero seconds
doing the same with the two face right
measurements difference between 218
27 20 180 1450
the difference there is 20. there are 38
12 30.
you can see the two angles are
reasonably similar
but the angle we'd use in further
calculations is the average
of these two angles so type in your 27
20 38 27 0 add to that
the 38 12 30
and together divided by two and the
average of those two angles
is 38 degrees 19
minutes 45 seconds and
this is the angle that would be used
in further calculations
on the side of the strip instrument is
the optical plummet
so here with the optical plummet you
will look with your i3 here
and with a present in the body of the
instrument
prism in here it will then enable you to
look
directly beneath the instrument
through the locking screw to a point on
the ground
that is directly underneath the
instrument
this is used whenever you're trying to
set up over a pin or you're trying to
get a distance measurement between
two points
two rings this ring doesn't move doesn't
adjust
anything this ring here will bring this
site
that you see when you look through the
eyepiece into focus
previously we've used a crosshair as our
target
in this plummet we have a circle with a
dot in the center so it's a slightly
different type of target
this adjustment ring on the outside is
used to bring
the focus ring
and the target circuit dot into
focus whenever you're looking through it
here you can see the circular ring and
the
dot in the center and the dot in the
center a sort of small ring in the
center
is used to align the instrument directly
over a known point or surveying point in
the ground
for our measurements we want to know
where i want to measure the
distance between two stations so
one way to do it is to take your foot
and to
gradually reduce or move your foot back
until your top of your toe is
at the
center of the inner ring
and then a colleague can mark that point
and on the ground
with a piece of chalk using a tip
measure
we can then repeat that at a second
station
and use a 50 meter tip measure to
measure the distance between the two
stations
Ver Más Videos Relacionados
[TUTORIAL 1] DASAR MENGGUNAKAN TOTAL STATION TOPCON GM-101 SERIES | ANAK TEKNIK
Ilmu Ukur Tanah Basic (Part 2)
solve the problems whenever obstacles occur in chain survey
Deflection Angle Method/Rankine's Method of Setting out of Simple Circular Highway Curve
Civil Engineering/Surveying/leveling/types of leveling /Profile levelling
Surveying 1 - Introduction to leveling
5.0 / 5 (0 votes)