BELAJAR SETTINGAN MANUAL KAMERA DSLR & MIRRORLES
Summary
TLDRIn this video, the creator offers an updated tutorial on how to manually set up DSLR or mirrorless cameras, specifically using a Canon 1500D. Aimed at beginners, the video explains key concepts like ISO, shutter speed, and aperture (the exposure triangle). It covers essential settings for different lighting conditions and emphasizes how each setting affects the final image. The tutorial also touches on lens aperture, bokeh effects, and practical tips for capturing moving objects. Viewers are encouraged to practice these settings to improve their photography skills and better understand their camera's manual controls.
Takeaways
- 😀 Manual camera settings are essential for beginners to control exposure, including shutter speed, aperture (f-stop), and ISO.
- 😀 Shutter speed, aperture, and ISO form the 'exposure triangle,' which affects how your camera captures light and motion.
- 😀 In bright conditions, lower ISO and increase shutter speed for optimal exposure; in low light, increase ISO and decrease shutter speed.
- 😀 A higher ISO value can cause 'noise' or graininess in the image, especially above 1000/2000.
- 😀 A slower shutter speed can capture motion blur, while faster speeds freeze movement, which is useful for photographing moving objects.
- 😀 In low-light conditions, using a tripod can help prevent camera shake when using a slow shutter speed.
- 😀 Aperture (f-stop) determines how much light enters the camera and affects depth of field; smaller f-stop values (like f/1.4) let in more light and create a blurred background (bokeh).
- 😀 A large aperture (small f-number) creates a shallow depth of field, making objects in the background blurry; a small aperture (high f-number) increases depth of field.
- 😀 To avoid blurry images at low shutter speeds, use a tripod or increase the ISO to maintain proper exposure.
- 😀 Different lenses have varying maximum aperture values (f/2.8, f/5.6, etc.), and zoom lenses typically have variable aperture sizes depending on the zoom level.
Q & A
What is the main purpose of the video?
-The main purpose of the video is to teach beginners how to manually set a DSLR or mirrorless camera, covering key settings such as ISO, shutter speed, and aperture.
Why does the speaker use a Canon 1500D as an example?
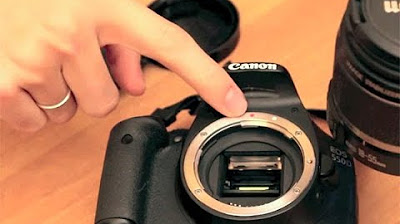
-The speaker uses a Canon 1500D because it has a user-friendly menu that is easier for beginners to navigate, although the settings can apply to other brands like Sony, Nikon, and Fuji.
What are the three key components the speaker refers to when manually setting a camera?
-The three key components are shutter speed, aperture (F-stop), and ISO, which are essential for achieving proper exposure in photography.
What is the general rule for setting ISO and shutter speed in different lighting conditions?
-In bright conditions (like during the day or outdoors), the ISO should be lowered, and the shutter speed can be increased. In low-light conditions (like indoors or at night), the ISO should be increased, and the shutter speed should be lowered.
How does changing shutter speed affect the captured image?
-Increasing the shutter speed helps freeze fast-moving objects, while a slower shutter speed can cause movement to blur. A slower shutter speed can also cause camera shake if not stabilized.
What is the effect of a high ISO setting on the image?
-A high ISO setting can introduce noise or graininess into the image, making it appear less clean, especially in low-light conditions.
How does the speaker explain the relationship between aperture (F-stop) and light intake?
-The aperture determines how much light enters the camera. A smaller F-stop number (e.g., F1.4) results in a wider opening, allowing more light in, while a higher F-stop number (e.g., F8) results in a smaller opening and less light intake.
What is the impact of changing the aperture size on depth of field?
-A smaller aperture (larger F-stop number) increases the depth of field, making more of the scene appear in focus. A larger aperture (smaller F-stop number) creates a shallow depth of field, isolating the subject and blurring the background.
Why is it important to adjust the ISO when using a lens with a wide aperture (e.g., F1.4)?
-When using a lens with a wide aperture like F1.4, more light enters the camera, so the ISO needs to be lowered to prevent overexposure. The exposure must be balanced to avoid overly bright images.
What is the recommended shutter speed for handheld photography?
-The recommended shutter speed for handheld photography is at least 1/80 seconds to avoid camera shake and ensure sharp images.
Outlines

Esta sección está disponible solo para usuarios con suscripción. Por favor, mejora tu plan para acceder a esta parte.
Mejorar ahoraMindmap

Esta sección está disponible solo para usuarios con suscripción. Por favor, mejora tu plan para acceder a esta parte.
Mejorar ahoraKeywords

Esta sección está disponible solo para usuarios con suscripción. Por favor, mejora tu plan para acceder a esta parte.
Mejorar ahoraHighlights

Esta sección está disponible solo para usuarios con suscripción. Por favor, mejora tu plan para acceder a esta parte.
Mejorar ahoraTranscripts

Esta sección está disponible solo para usuarios con suscripción. Por favor, mejora tu plan para acceder a esta parte.
Mejorar ahoraVer Más Videos Relacionados


5.0 / 5 (0 votes)
