Cara Setting OLT GPON Tanpa VLAN Langsung Plug n Play ONT ke Mikrotik
Summary
TLDRThis tutorial demonstrates how to configure an OLT (Optical Line Terminal) for a GPON (Gigabit Passive Optical Network) setup without using VLANs. It covers the initial configuration steps, including adjusting network settings, remote management, and automatic ONT (Optical Network Terminal) registration. The process is designed for users migrating from cable or media converters to GPON, simplifying the setup by making it plug-and-play. The video also explains how to manage IP addresses, configure VLAN IDs for remote management, and ensure connectivity with PPPoE. The configuration is applicable to different OLT models, offering flexibility and ease for network administrators.
Takeaways
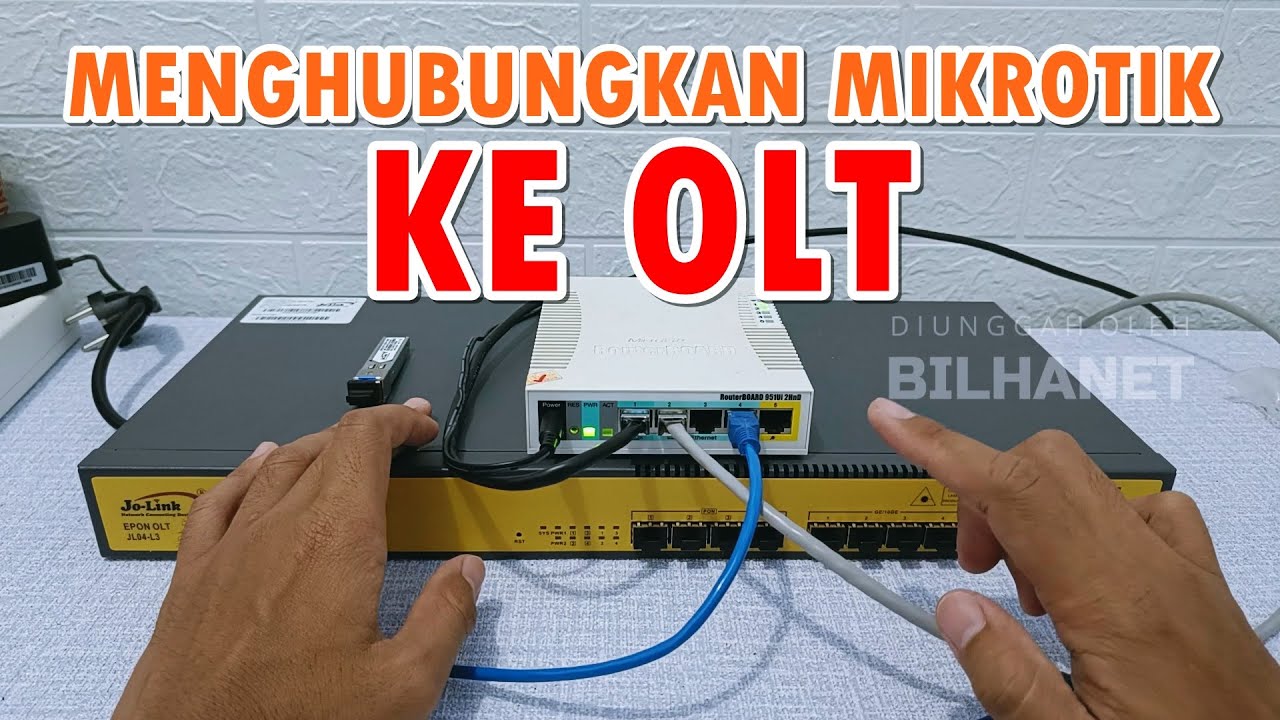
- 😀 Ensure that the OLT (Optical Line Terminal) configuration is done without VLANs for simplicity, making the setup compatible with existing setups such as cables or media converters.
- 😀 When configuring an OLT, it's important to remove the network cable from the Mikrotik before accessing the web management interface to avoid conflict with hotspot login pages.
- 😀 Set the computer’s IP to be on the same network segment as the OLT’s management IP (default: 192.168.8.200) to ensure successful connection to the OLT interface.
- 😀 Using private/incognito browsing mode in Firefox is recommended to avoid issues when accessing the OLT's management interface via HTTPS, especially with self-signed certificates.
- 😀 After logging into the OLT’s web management, make sure that the relevant ports (GE1, GE2) are active and labeled appropriately for easier identification.
- 😀 Modify the default OLT password and update configuration settings such as the device name for better management and security.
- 😀 Setting up VLAN ID for remote management (e.g., VLAN 82) is important to facilitate remote access to the OLT without affecting its core functionality.
- 😀 Ensure that the OLT automatically adds newly connected ONTs to its 'auto-list' without needing manual activation, making the process plug-and-play.
- 😀 Use the Line Profile settings on the OLT to configure automatic recognition and registration of ONTs, enabling seamless network connectivity.
- 😀 When the configuration is complete, confirm that the ONT is online and can establish a PPPoE connection, ensuring internet access through the Mikrotik router.
Q & A
What is the purpose of this tutorial?
-The tutorial explains how to configure a GE-PON 1PON OLT (Optical Line Terminal), specifically focusing on setting up a plug-and-play system without using VLANs. It covers the setup from OLT to ONT (Optical Network Terminal) and includes steps for remote management.
Why is VLAN not used in this configuration?
-The tutorial aims to show how to configure the system without VLANs, which can simplify migration for users transitioning from traditional cabling or media converters. The setup is made to be compatible with plug-and-play, ensuring minimal configuration changes after migrating to the OLT.
What is the significance of using a single Ethernet cable for both uplink and remote management?
-By using one Ethernet cable for both uplink and remote management, the setup reduces the number of cables required and streamlines the configuration process. This is achieved by setting up a specific VLAN (ID 82) dedicated to remote management of the OLT.
What should you do if you experience trouble accessing the OLT's web management page?
-If you have difficulty accessing the OLT’s web management page, it is recommended to disconnect any cables from the Mikrotik that could interfere with the connection. After that, set your computer's network settings to be in the same IP range as the OLT’s default management IP.
How do you configure your computer to access the OLT management page?
-You need to adjust your computer's network settings to manually assign an IP address within the same subnet as the OLT’s default management IP (e.g., 192.168.8.1). The OLT’s default management IP is 192.168.8.200, and the subnet mask is 255.255.255.0.
Why is it recommended to use 'Incognito' or 'Private' mode in the browser?
-Using 'Incognito' or 'Private' mode in the browser is suggested because some browsers may face issues with accessing the OLT’s web management page over HTTPS, especially when the OLT's SSL certificate is self-signed. This mode ensures a clean session without cached data interfering.
What should you do after successfully accessing the OLT's web interface?
-Once you access the OLT’s web interface, it's recommended to change the default admin password and configure the OLT’s settings as per your network requirements. If you plan to use VLAN for management, create the necessary VLAN ID and assign it to the OLT's interface.
How can you enable automatic registration of ONTs (Optical Network Terminals)?
-To enable automatic registration of ONTs, configure the OLT to use a profile that supports auto-learning. This way, when an ONU (Optical Network Unit) is connected, it will automatically appear in the OLT’s ONU list without manual activation.
What is the purpose of the ‘Line Profile’ in the OLT configuration?
-The 'Line Profile' in the OLT configuration defines the parameters for the ONT's connection, including settings like bandwidth and service type. It is used to ensure that the OLT can properly manage and allocate resources to each connected ONT.
How do you configure the OLT to provide PPPoE (Point-to-Point Protocol over Ethernet) to the ONT?
-To configure PPPoE for the ONT, you need to ensure that the ONT has the correct PPPoE credentials. Once these are set, the OLT will allow the ONT to connect automatically and establish a PPPoE session, providing internet access.
Outlines

Esta sección está disponible solo para usuarios con suscripción. Por favor, mejora tu plan para acceder a esta parte.
Mejorar ahoraMindmap

Esta sección está disponible solo para usuarios con suscripción. Por favor, mejora tu plan para acceder a esta parte.
Mejorar ahoraKeywords

Esta sección está disponible solo para usuarios con suscripción. Por favor, mejora tu plan para acceder a esta parte.
Mejorar ahoraHighlights

Esta sección está disponible solo para usuarios con suscripción. Por favor, mejora tu plan para acceder a esta parte.
Mejorar ahoraTranscripts

Esta sección está disponible solo para usuarios con suscripción. Por favor, mejora tu plan para acceder a esta parte.
Mejorar ahoraVer Más Videos Relacionados

Topologi FTTH OLT: Membuat ODC dan ODP untuk Distribusi ke Client
Konfigurasi Mikrotik untuk OLT + Setting EPON OLT Mode PPPoE dan Hotspot
ODN ( Optical Distribution Network ) Red de distribución óptica
CARA MEMBUAT SERVER INTERNET DENGAN PROXMOX, MIKROTIK, OLT , SWITCH MANAGED

20_1 Perancangan Topologi Jaringan FTTH
TUTORIAL - KONFIGURASI VLAN PADA CISCO PACKET TRACER - 2022
5.0 / 5 (0 votes)
