Cara membuat kerajinan dari bambu yang mudah | nih yang lagi cari tugas kerajinan di skolah
Summary
TLDRIn this creative video tutorial, the host guides viewers on crafting a decorative bamboo lamp. They start by preparing dried bamboo, cutting it into parts, and refining the edges. The bamboo pieces are then arranged in ascending order of length and glued together. A plastic cover is added inside, and a base is created with a small hole for the lamp's bulb. Finally, the lamp is wired and adorned with colorful decorations, resulting in a beautiful DIY bamboo lamp.
Takeaways
- 🎥 The video is a tutorial on making a decorative lamp from bamboo.
- 👋 The presenter welcomes viewers to the channel and encourages new subscribers to hit the subscribe button and notification bell.
- 🌟 The video aims to be beneficial and entertaining for the audience.
- 🔨 The first step involves preparing dried bamboo and cutting it into several parts.
- 📏 The bamboo edges are smoothed and cut to the desired size, with a guitar pick being used as a tool for cutting in the example.
- 🌳 Bamboo pieces of varying lengths are cut, with a measurement of approximately one centimeter difference between each.
- 📐 Two round bamboo pieces are prepared for the base of the lamp.
- 🔲 A plastic sheet or cardboard is used for the lampshade, cut to fit the size of the decorative lamp.
- 🔨 Bamboo pieces are glued together in a specific order, from shortest to longest, to form the lamp's structure.
- 💡 The lamp's base is constructed with a hole in the middle for the light bulb, and additional decorations can be added for a personalized touch.
- 🔌 The electrical components, including the wire and bulb socket, are assembled into the lamp's base.
- 🎉 The final step includes securing the lamp's structure and showcasing the completed decorative bamboo lamp.
Q & A
What is the main purpose of the video?
-The main purpose of the video is to provide a tutorial on how to create a decorative lamp using bamboo.
What is the first recommendation the presenter gives to new viewers of the channel?
-The presenter recommends new viewers to click the subscribe button and turn on the notification bell to join in building the channel and to receive updates.
What material is primarily used for making the decorative lamp in the video?
-The primary material used for making the decorative lamp in the video is bamboo.
What should the bamboo be like before it is used for the lamp?
-The bamboo should be dry and then split into several parts.
How should the edges of the bamboo be treated after being split?
-The edges of the bamboo should be smoothed out after being split.
What tool is suggested for cutting the bamboo to the desired size?
-A guitar pick with a length of 12 cm is suggested for cutting the bamboo to the desired size.
How many bamboo pieces are needed for the lamp, and what should they be like?
-Two bamboo pieces that have been cut into a round shape are needed for the lamp.
What is the method for attaching the cut bamboo pieces together?
-The cut bamboo pieces should be attached in order from the shortest to the longest by gluing them at the ends.
What material can be used as an alternative to plastic mica for the lampshade?
-Cardboard or drawing paper can be used as an alternative to plastic mica for the lampshade.
How should the lampshade be secured to ensure it doesn't move?
-The lampshade should be secured with glue so that it doesn't move.
What is the final step in assembling the decorative lamp?
-The final step in assembling the decorative lamp is to attach the wire and the light bulb to the lampshade and then add a decorative touch like butterflies.
Outlines

Dieser Bereich ist nur für Premium-Benutzer verfügbar. Bitte führen Sie ein Upgrade durch, um auf diesen Abschnitt zuzugreifen.
Upgrade durchführenMindmap

Dieser Bereich ist nur für Premium-Benutzer verfügbar. Bitte führen Sie ein Upgrade durch, um auf diesen Abschnitt zuzugreifen.
Upgrade durchführenKeywords

Dieser Bereich ist nur für Premium-Benutzer verfügbar. Bitte führen Sie ein Upgrade durch, um auf diesen Abschnitt zuzugreifen.
Upgrade durchführenHighlights

Dieser Bereich ist nur für Premium-Benutzer verfügbar. Bitte führen Sie ein Upgrade durch, um auf diesen Abschnitt zuzugreifen.
Upgrade durchführenTranscripts

Dieser Bereich ist nur für Premium-Benutzer verfügbar. Bitte führen Sie ein Upgrade durch, um auf diesen Abschnitt zuzugreifen.
Upgrade durchführenWeitere ähnliche Videos ansehen
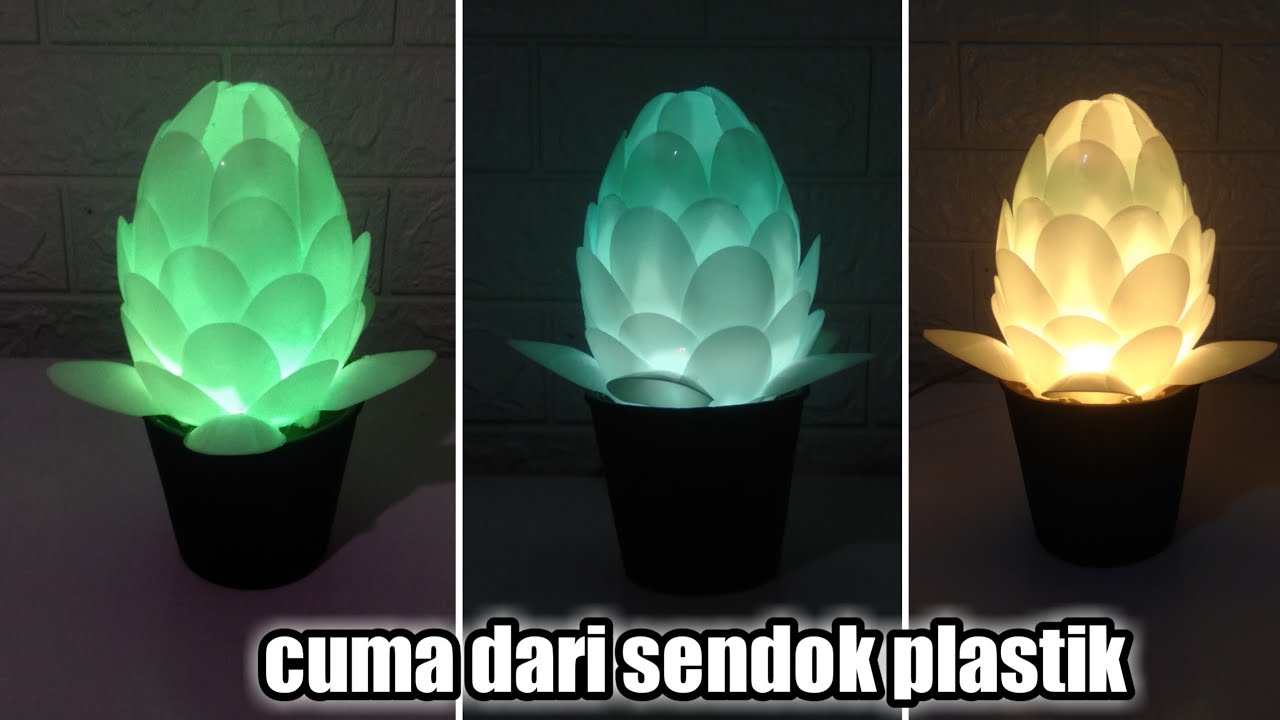
Lampu tidur sederhana lampu hias dari botol bekas dan sendok plastik
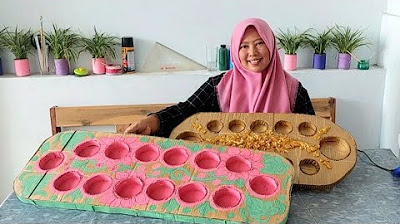
Cara membuat papan dakon, congklak dari bahan kardus bekas.

Cara Membuat Lampu Tidur | Lampu Hias Dinding Atap | Lampu Tidur Proyektor, Pakai Lampu LED Bekas !!
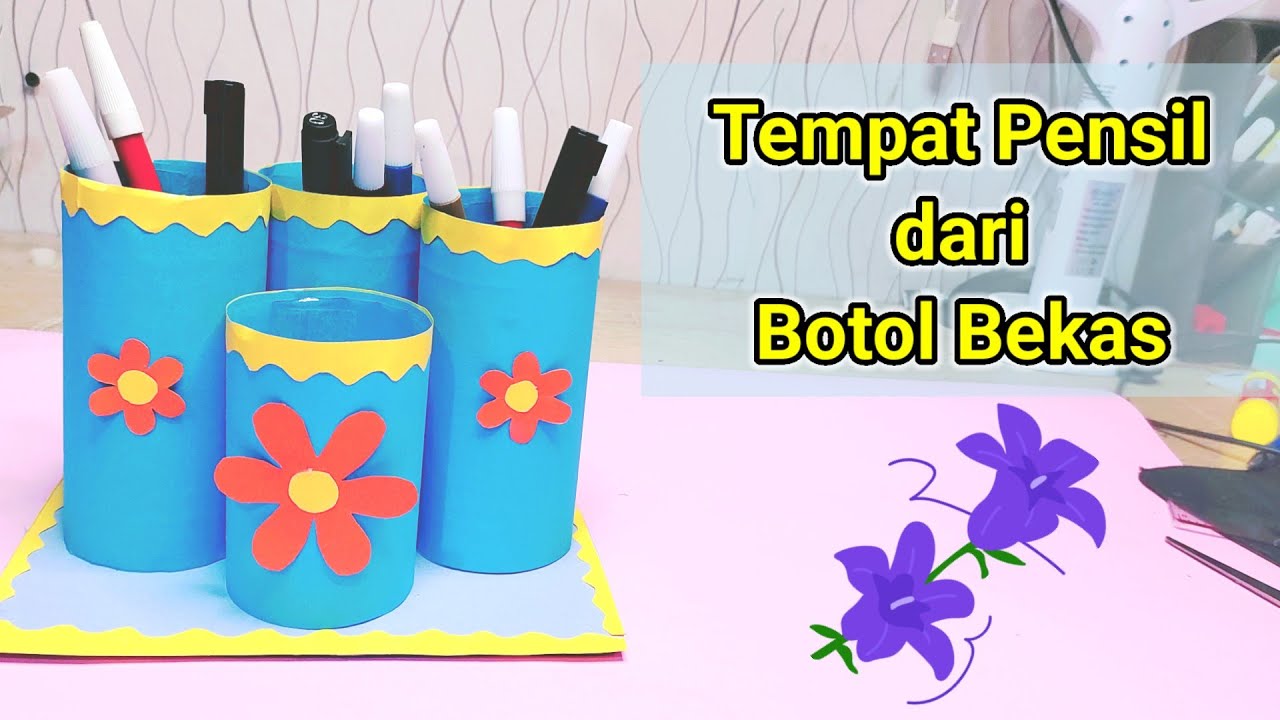
Tempat Pensil Dari Botol Bekas / Contoh Kegiatan P5 Kurikulum Mereka
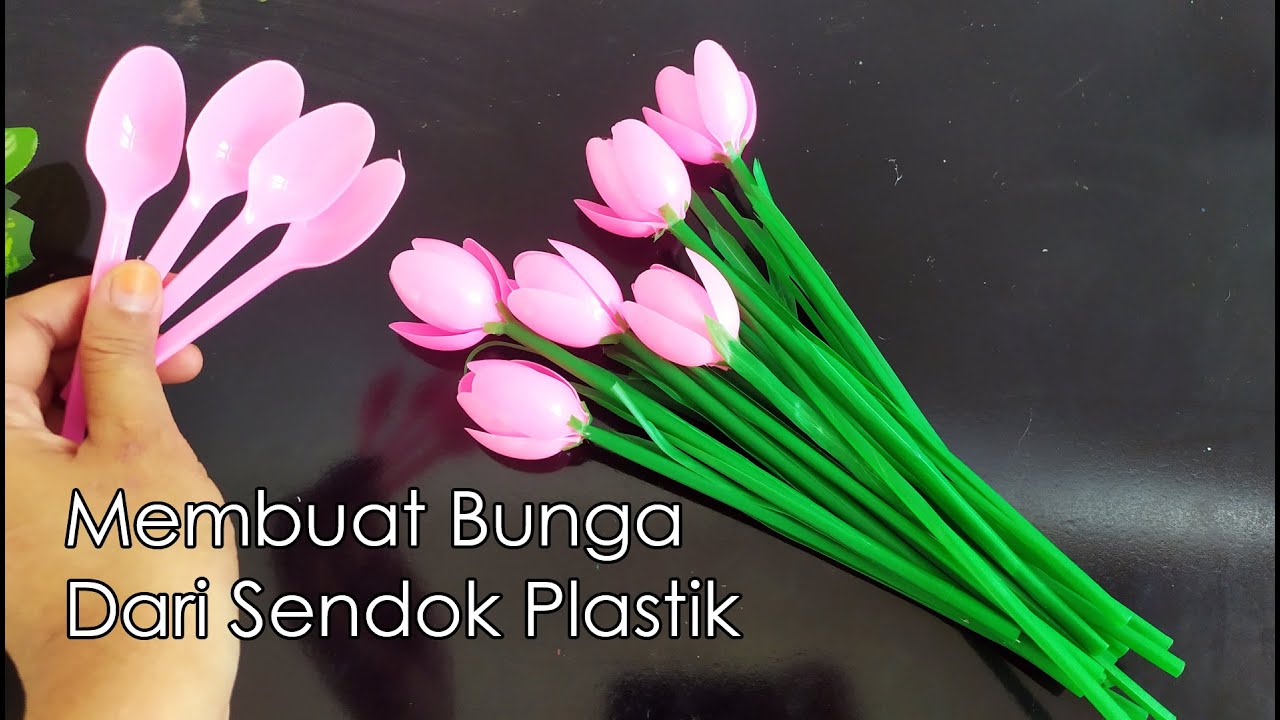
Creative Idea: Plastic Spoon Turned into Pink Tulip Flowers
Making a simple DIY Drawstring Bag | Sewing Tutorial
5.0 / 5 (0 votes)
