Prospettiva centrale (o frontale) di un parallelepipedo
Summary
TLDRThis video guides viewers through the process of drawing a parallelepiped in central perspective. It explains how to position the object with one face parallel to the picture plane and how to use auxiliary orthogonal projections to establish key reference points. Step by step, the video demonstrates the use of measurements, vanishing points, and vertical lines to accurately construct the parallelepiped’s perspective. By following the detailed instructions, viewers learn how to represent the object in three-dimensional space, ensuring precise proportions and perspective. The tutorial concludes by refining the drawing, adding hidden edges, and finalizing the artwork.
Takeaways
- 📐 The script explains how to draw a rectangular prism (parallelepiped) using central (frontal) perspective, where one face is parallel to the picture plane.
- 🖼️ Central perspective is used when the object is observed frontally and has at least one face parallel to the picture plane.
- 📏 The example solid has a rectangular base of 6 × 10 cm and a height of 7 cm, initially reduced in scale for auxiliary constructions.
- 📊 Orthogonal projections (plan and elevation) are prepared as auxiliary drawings to define key elements like viewpoint and horizon line.
- 👁️ The viewpoint (point of view) is carefully positioned so the entire object fits within a reasonable visual cone.
- 📍 The picture plane trace is drawn parallel to one base edge, determining the object’s distance from the observer.
- 🎯 In central perspective, all lines perpendicular to the picture plane converge toward a single vanishing point called the principal point.
- 📐 A distance point is constructed using a 45-degree line from the viewpoint, helping to correctly represent depth measurements.
- 📌 Key reference points from the plan (such as base corners and depth edges) are transferred onto the ground line in perspective, respecting scale.
- 📉 The horizon line represents eye level and is established by transferring and scaling measurements from the auxiliary elevation.
- 📦 The base of the parallelepiped is constructed first on the ground plane using convergence lines toward the principal and distance points.
- 📏 Vertical edges are drawn at true height starting from the ground line, then projected toward the appropriate vanishing point.
- 🧩 Using rulers and set squares, missing vertices are completed by projecting known points toward the vanishing point.
- ✏️ Visible edges are reinforced with solid lines, while hidden edges are dashed to complete the final perspective drawing.
Q & A
What is central perspective in the context of drawing a parallelepiped?
-Central perspective, also called frontal perspective, is used when at least one face of the object is parallel to the picture plane, making it possible to represent the object with parallel edges facing the viewer.
Why is the base of the parallelepiped drawn parallel to the ground plane in this exercise?
-The base is parallel to the ground plane to create a stable reference point for constructing the object in central perspective. It also ensures that the object's orientation remains consistent throughout the drawing process.
How do the auxiliary projections help in constructing the parallelepiped?
-The auxiliary projections, specifically the floor plan and vertical elevation, help position the viewer's perspective and establish the horizon line, which is essential for creating an accurate perspective drawing.
What is the significance of reducing the measurements in the preparatory drawings?
-The measurements are reduced to maintain a manageable scale for the construction process. This helps in clearly visualizing the relationships between the various elements of the parallelepiped before scaling them back up to real dimensions.
What does the vanishing point represent in this perspective drawing?
-The vanishing point represents the point at which all parallel lines converge in perspective, giving depth and a sense of three-dimensionality to the object. It is crucial for establishing how the object recedes into space.
What role does the principal point play in constructing the perspective?
-The principal point determines the position of the viewer's eye level in relation to the object. It is used to guide the drawing of lines and helps ensure that the entire object fits within the visual cone defined by the viewer's perspective.
How is the height of the parallelepiped determined in the perspective view?
-The height is determined by measuring from the ground line to the horizon line on the vertical elevation, then using these measurements to define the vertical perspective lines that represent the object's height.
Why is it important to double the measurements when transitioning from the preparatory drawing to the final perspective?
-Doubling the measurements ensures that the drawing is accurate in real-world scale. The preparatory drawing used reduced measurements for simplicity, but the final perspective needs the full size to properly represent the object.
What are the key steps involved in drawing the parallelepiped in perspective?
-The key steps include establishing the base and horizon line, determining the vanishing point, positioning the viewer's point of view, and using guidelines to draw the object's edges. These elements help ensure accuracy and depth in the final drawing.
What is the purpose of using tools like the compass and protractor in this process?
-The compass and protractor are used for precision in measuring distances and angles, ensuring that all lines are drawn correctly according to the principles of perspective. These tools help in accurately transferring the dimensions and angles from the preparatory drawings to the final perspective.
Outlines

Dieser Bereich ist nur für Premium-Benutzer verfügbar. Bitte führen Sie ein Upgrade durch, um auf diesen Abschnitt zuzugreifen.
Upgrade durchführenMindmap

Dieser Bereich ist nur für Premium-Benutzer verfügbar. Bitte führen Sie ein Upgrade durch, um auf diesen Abschnitt zuzugreifen.
Upgrade durchführenKeywords

Dieser Bereich ist nur für Premium-Benutzer verfügbar. Bitte führen Sie ein Upgrade durch, um auf diesen Abschnitt zuzugreifen.
Upgrade durchführenHighlights

Dieser Bereich ist nur für Premium-Benutzer verfügbar. Bitte führen Sie ein Upgrade durch, um auf diesen Abschnitt zuzugreifen.
Upgrade durchführenTranscripts

Dieser Bereich ist nur für Premium-Benutzer verfügbar. Bitte führen Sie ein Upgrade durch, um auf diesen Abschnitt zuzugreifen.
Upgrade durchführen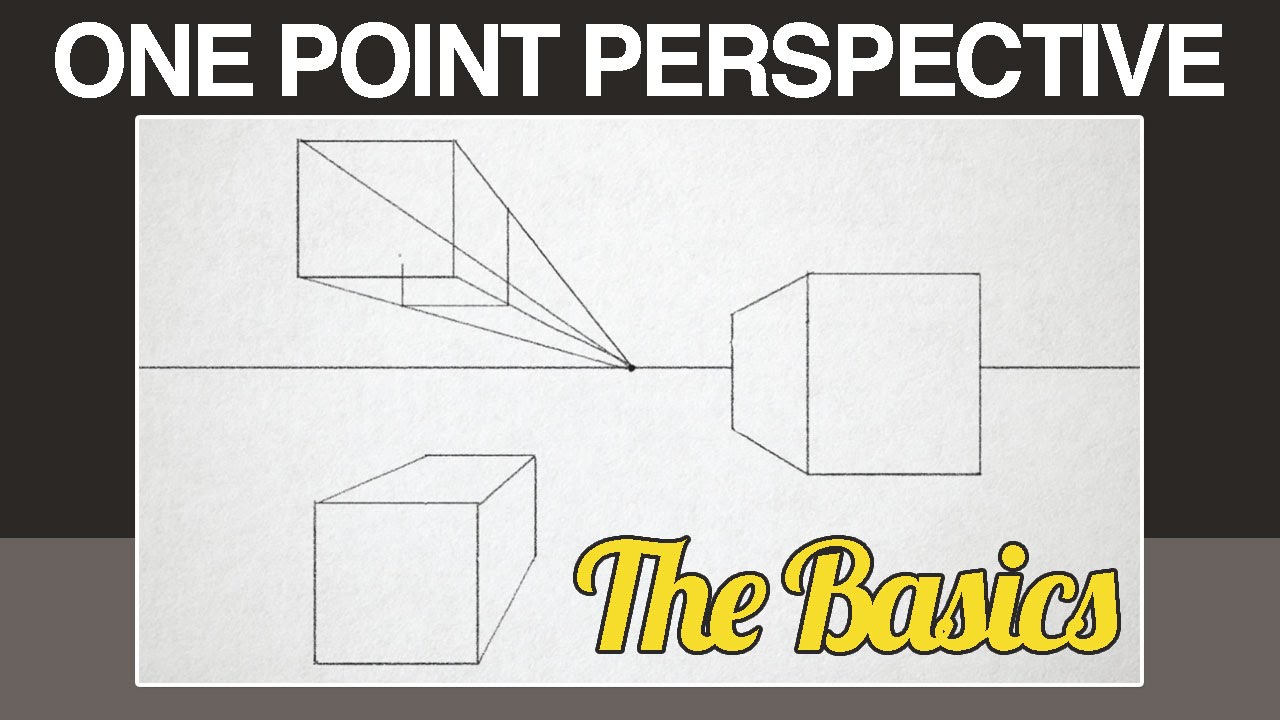


5.0 / 5 (0 votes)
