How to Draw Backgrounds (3-Point Perspective)
Summary
TLDRIn this tutorial, Mark Krly takes viewers through the process of drawing in three-point perspective, demonstrating how to avoid common distortions and achieve realistic results. He explains the importance of proper point placement for accurate perspective and walks through a real-time example, including drawing a structure, human figure, and a floating droid. Mark also shares techniques for drawing circles in perspective, offering insights on how to integrate figures and objects into a scene. This comprehensive guide is aimed at artists looking to master the intricacies of three-point perspective for their drawings.
Takeaways
- 😀 Three-point perspective is a technique used for drawing from a bird's eye view, with three vanishing points for creating depth and dimension in your artwork.
- 😀 One of the main issues with three-point perspective is distortion, especially when the vanishing points are placed too close together.
- 😀 To avoid distortion, the vanishing points should be placed outside the frame of the drawing, far enough apart based on the paper's size.
- 😀 The process of drawing in three-point perspective begins with establishing vertical lines, which then guide the rest of the drawing.
- 😀 While drawing, adding surface lines and rectangles helps define the structure, making it feel more solid and real.
- 😀 When drawing a figure in three-point perspective, it's important to use vertical and horizontal lines to maintain proper proportions and avoid floating figures.
- 😀 By using the perspective lines, you can make the human figure appear grounded in the environment, such as standing firmly on a rooftop.
- 😀 Building objects, such as a floating droid, also requires using perspective to ensure that every part of the object fits the three-point system.
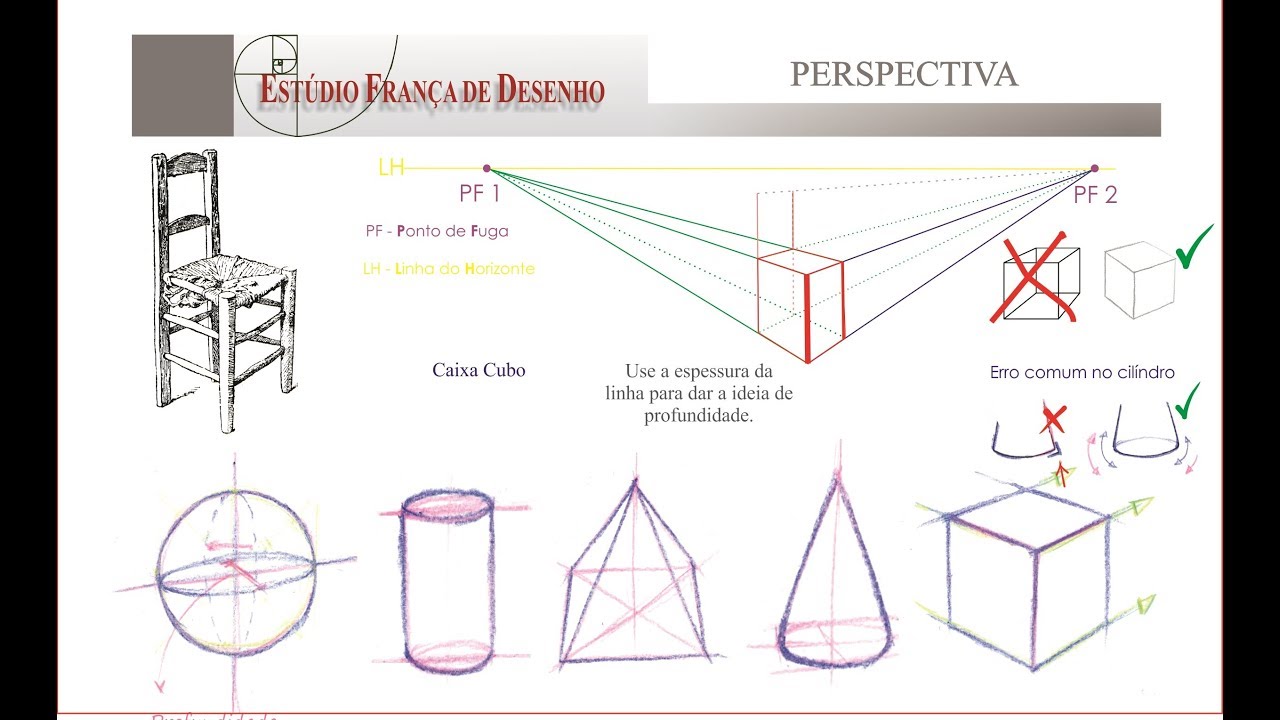
- 😀 Drawing complex shapes like circles on surfaces requires breaking them down into simple geometric forms that conform to the perspective.
- 😀 Three-point perspective can be applied to any drawing, from simple objects to complex sci-fi scenes, helping to make objects look accurate in space.
Q & A
What is the primary focus of the video?
-The primary focus of the video is teaching viewers how to draw in three-point perspective, especially in a bird's eye view of a building, and demonstrating how to apply this technique in a realistic and non-distorted way.
What common mistake does the instructor highlight when drawing in three-point perspective?
-The instructor points out that a common mistake is placing the three perspective points too close together, which can lead to a distorted, fisheye-lens effect.
How does the instructor suggest you position the perspective points?
-The instructor advises positioning the three points outside the frame of the drawing, with one point at the bottom and the other two at the sides, ensuring they are spaced far enough apart to avoid distortion.
Why is it important to consider the size of your paper when placing the perspective points?
-The size of the paper influences the placement of the points, as the distance between them should be adjusted based on how large or small the paper is to maintain proper perspective.
What steps does the instructor take to draw the initial rectangular box in three-point perspective?
-The instructor begins by drawing vertical lines that follow the perspective points, and then adds a few horizontal lines to create the edges of the rectangular box, eventually shaping it to follow the three-point perspective.
How does the instructor integrate the rooftop into the scene?
-After drawing the rectangular box, the instructor adds a rooftop structure by using more lines to define the surface, making the structure more solid by incorporating additional surface rectangles.
What challenges does the instructor face when drawing a human figure in three-point perspective?
-Drawing a human figure in three-point perspective is tricky because the human body doesn't naturally follow right angles, so the instructor uses vertical and horizontal lines to guide the figure’s proportions and placement in the scene.
How does the instructor ensure the human figure looks naturally placed in the scene?
-The instructor uses perspective lines to help position the human figure correctly within the scene, ensuring it appears to be standing firmly on the rooftop, and adjusts the figure’s proportions based on the three-point perspective.
What is the process for integrating a floating Droid into the scene?
-The instructor begins by creating a simple rectangular shape that follows the three-point perspective and then builds on it, adding details and components to shape the floating Droid while maintaining the perspective.
How does the instructor demonstrate fitting a circle into a square surface in perspective?
-The instructor first draws a square on the surface of the Droid's structure, subdivides it into smaller sections, and then connects the corners to gradually form a circle that fits flat on the surface, maintaining the correct perspective.
Outlines

This section is available to paid users only. Please upgrade to access this part.
Upgrade NowMindmap

This section is available to paid users only. Please upgrade to access this part.
Upgrade NowKeywords

This section is available to paid users only. Please upgrade to access this part.
Upgrade NowHighlights

This section is available to paid users only. Please upgrade to access this part.
Upgrade NowTranscripts

This section is available to paid users only. Please upgrade to access this part.
Upgrade Now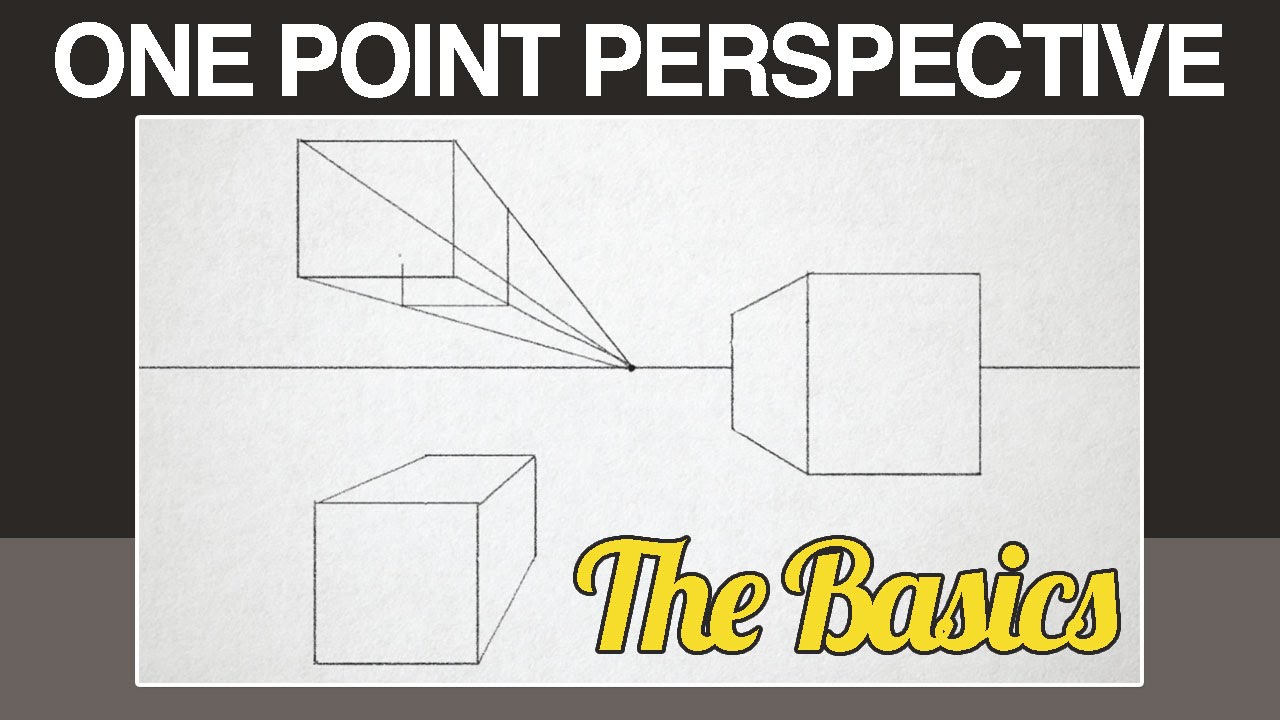


5.0 / 5 (0 votes)