Materi 04 Material
Summary
TLDRThis video tutorial covers the essentials of material functions in 3D modeling, focusing on enhancing object realism through color, texture, light reflection, and transparency. It introduces two types of material editors: compact and slide, with a preference for the compact version for easier learning. The tutorial demonstrates how to apply colors and materials to objects, manipulate properties like base color, reflection, metalness, glossiness, and transparency, and use the material editor's interface effectively. It also explores adding textures to objects and adjusting bitmap settings, concluding with a Q&A segment for viewer engagement.
Takeaways
- 🎨 The video discusses materials and their functions in making objects appear more realistic in terms of color, texture, reflection, transparency, and contour.
- 🛠️ Two types of material editors are introduced: compact and slide material editors, with the compact version being easier for learning purposes.
- 🔑 The 'M' key is a shortcut to apply materials to objects.
- 🎨 The script explains how to create and apply colors to objects using the material editor, enhancing realism by adding glossiness, reflection, and transparency.
- 🖼️ The 'sample window' or 'slot' in the material editor can be customized and contains samples that can be modified or reset.
- 🔄 There are two methods to apply materials to objects: activating the object and clicking the 'Mat' button, or by dragging the material to the object.
- 🔍 The script suggests using the 'render' button or pressing 'F9' for a preview of how materials will look on objects.
- 🔑 Parameters like 'metalness', 'roughness', 'glossiness', and 'IOR' (Index of Refraction) are discussed to control the reflective properties of materials.
- 🌟 The 'transparency' parameter is explained, showing how it affects the visibility of an object's color and its ability to be seen through.
- 🌈 'Sub Surface Scattering' is introduced for blending colors to create a non-uniform color appearance on objects.
- 💡 'Emission' is explained as a way to create self-illuminating objects, like neon lights, by applying a specific color.
Q & A
What is the function of materials in 3D objects?
-Materials make 3D objects appear more realistic by adding properties like color, texture, light reflection, transparency, and depth. They can also simulate objects that emit light, such as lamps, or objects with reflective surfaces.
What is the difference between the compact and slide Material Editor in the video?
-The compact Material Editor is simpler and easier for beginners, while the slide Material Editor provides more advanced settings. The video recommends using the compact Material Editor for easier learning.
How can you apply a material to an object in the Material Editor?
-There are two ways to apply a material to an object: 1) Select the object and click the 'Assign Material to Selection' button in the Material Editor. 2) Drag and drop the material directly onto the object.
How do you change the color of an object using the Material Editor?
-To change an object's color, choose a sample slot in the Material Editor, select 'Base Color' in the material properties, and pick a color from the RGB or hue/saturation options. Then click OK to apply the color.
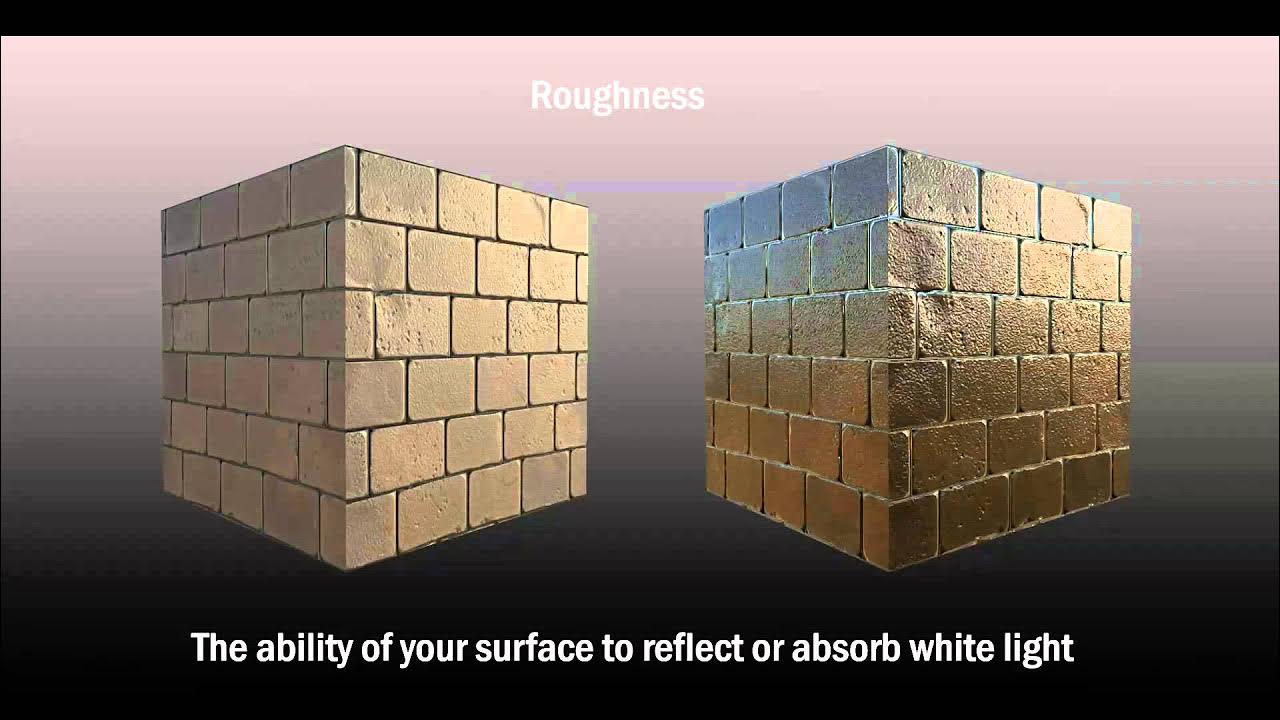
What is the purpose of the Glossiness and Roughness settings in the Material Editor?
-Glossiness controls how shiny or reflective a surface is, while Roughness determines how dull or rough the surface appears. Glossiness and Roughness are inversely related; increasing one decreases the other.
How does Metalness affect the appearance of a material?
-Metalness defines the metallic look of a material. Higher metalness values make the object appear more metallic, while lower values give it a more non-metallic, matte finish.
What is the function of the IOR (Index of Refraction) in material settings?
-IOR controls the intensity of reflections on the material. Higher IOR values create stronger reflections, often used for materials like glass or mirrors, while lower values make the reflection weaker.
How does transparency work in the Material Editor?
-Transparency defines how see-through an object is. A value of 0 means the object is opaque, while a value of 1 makes it fully transparent. Intermediate values create partial transparency.
What is Emission, and when is it used in materials?
-Emission gives an object a glowing effect, simulating a light source. It is commonly used for objects like neon lights or lamps. You can adjust the color and intensity of the emission to make the object emit light.
How can you add a texture to an object in the Material Editor?
-To add a texture, click on the texture slot in the Material Editor, select 'Bitmap' from the list, and choose an image file to apply as the texture. This texture can then be applied to various objects like boxes, spheres, or cylinders.
Outlines

Dieser Bereich ist nur für Premium-Benutzer verfügbar. Bitte führen Sie ein Upgrade durch, um auf diesen Abschnitt zuzugreifen.
Upgrade durchführenMindmap

Dieser Bereich ist nur für Premium-Benutzer verfügbar. Bitte führen Sie ein Upgrade durch, um auf diesen Abschnitt zuzugreifen.
Upgrade durchführenKeywords

Dieser Bereich ist nur für Premium-Benutzer verfügbar. Bitte führen Sie ein Upgrade durch, um auf diesen Abschnitt zuzugreifen.
Upgrade durchführenHighlights

Dieser Bereich ist nur für Premium-Benutzer verfügbar. Bitte führen Sie ein Upgrade durch, um auf diesen Abschnitt zuzugreifen.
Upgrade durchführenTranscripts

Dieser Bereich ist nur für Premium-Benutzer verfügbar. Bitte führen Sie ein Upgrade durch, um auf diesen Abschnitt zuzugreifen.
Upgrade durchführenWeitere ähnliche Videos ansehen

Edit Viral 3D Videos on Mobile 🔥🔥

Beginner Blender 4.0 Tutorial - Part 5: Shading

Texture Maps Explained - PBR Workflow

Add A Texture to An Object - Blender Tutorial

Part 1-Blender Beginner Tutorial (Basic Navigation, Shortcut Keys)

Dasar Desain Grafis X SMK - 02 Tata Letak - F. Gelap Terang; G. Tekstur; H. Ruang
5.0 / 5 (0 votes)
