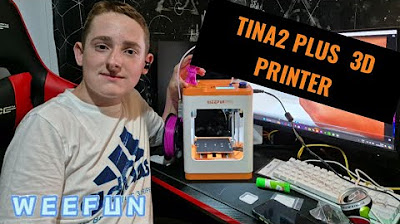
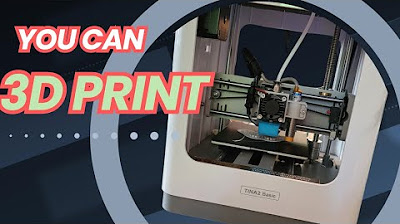
Tina 2S kids 3D printer. Better than the toybox. ENTINA 3D printer

Jeff Reviews4u
24 Aug 202411:44

Summary

TLDR本视频介绍了一款名为Tina 2s的儿童友好型3D打印机。这款打印机价格合理,操作简单,支持多种连接方式,包括有线、micro SD卡和应用程序。它具有自动调平功能,使得打印准备过程变得轻松。视频中展示了打印机的开箱、设置、打印过程以及通过应用程序进行操作的步骤。最终,打印机成功打印出了各种有趣的模型,如兔子、坦克和光剑支架,展示了其打印精度和多功能性。

Takeaways

  • 🖨️ 视频中介绍了一款名为Tina 2s的3D打印机,适合儿童使用。
  • 🌈 Tina 2s有多种颜色可选,价格因颜色而异。
  • 💰 与竞争对手Toy Box相比,Tina 2s的价格是其一半。
  • 📦 开箱后需要移除泡沫和胶带,并取下轴上的保护盖。
  • 📌 包装内包含了样品打印件、USB驱动器、胶水棒、样品丝材、电源和连接线等。
  • 📱 Tina 2s支持通过Wi-Fi和专用应用程序进行操作,这是其一大特色。
  • 📏 3D打印机的尺寸较小,打印板尺寸为4.25英寸×4.5英寸。
  • 🔌 电源开关设计在电源线上,方便控制打印机的开关。
  • 🔥 打印过程中,打印机的打印头会加热至210°C以熔化丝材。
  • 🐰 首次打印的样品是一个兔子模型,展示了打印机的基本打印能力。
  • 📱 通过应用程序,用户可以方便地选择和打印不同的3D模型。
  • ⏱️ 打印一个模型大约需要1小时14分钟,打印完成后需要进行简单的清理。
  • 👦 尽管Tina 2s适合儿童使用,但建议在成人监督下操作。
  • 🔗 视频描述中提供了Tina 2s的购买链接,方便感兴趣的观众购买。

Q & A

  • Tina 2s 3D打印机有哪些颜色可供选择?

    -Tina 2s 3D打印机有几种不同的颜色可供选择,但具体的颜色在脚本中没有详细说明。

  • Tina 2s 3D打印机的主要竞争对手是什么?

    -Tina 2s 3D打印机的主要竞争对手是名为'玩具盒'(Toy Box)的3D打印机。

  • Tina 2s 3D打印机的价格区间是多少?

    -Tina 2s 3D打印机的零售价格在116美元到180美元之间。

  • Tina 2s 3D打印机的尺寸是多少?

    -Tina 2s 3D打印机的高度约为10.1/2英寸,宽度和深度都是7.3/4英寸。构建板的尺寸为4.1/4英寸宽和4.1/2英寸深。

  • Tina 2s 3D打印机是否需要用户进行床面校准?

    -Tina 2s 3D打印机配备了自动校准床,因此用户不需要手动进行床面校准。

  • Tina 2s 3D打印机支持哪些连接方式?

    -Tina 2s 3D打印机支持三种连接方式:通过附带的有线连接、通过附带的微型SD卡或通过可以下载的应用程序。

  • Tina 2s 3D打印机是否包含切片程序?

    -是的,Tina 2s 3D打印机包含自己的切片程序,但用户也可以使用支持Tina 2s的其他切片程序,如Cura。

  • Tina 2s 3D打印机的保修期是多久?

    -Tina 2s 3D打印机提供24个月的保修期。

  • Tina 2s 3D打印机是否适合儿童使用?

    -Tina 2s 3D打印机适合儿童使用,但考虑到年龄因素,建议在成人监督下使用。

  • Tina 2s 3D打印机的打印效果如何?

    -Tina 2s 3D打印机的打印效果非常好,打印线条平滑且均匀,能够打印出各种不同的玩具和物品。

Outlines

00:00

🖨️ 探索Tina 2s 3D打印机

本段介绍了Tina 2s 3D打印机的外观和操作过程。首先,展示了3D打印机在高速下的工作状态,以及最终打印出的杯子模型。接着,讨论了Tina 2s的颜色选择和价格,并指出其竞争对手是Toy Box。在开箱过程中,提到了需要移除的泡沫和胶带,以及一个可能在开机时损坏机器的轴盖。盒子内包括了一些样本打印件、USB驱动器、胶水、样本丝材、电源和连接电脑的连接器。特别强调了Tina 2s完全通过应用程序和Wi-Fi进行控制。最后,讨论了打印机的尺寸,包括构建板的大小,并展示了如何设置打印机,包括插入丝材和开始打印的过程。

05:01

🐰 Tina 2s 3D打印机的首次打印体验

这一段描述了Tina 2s 3D打印机的首次打印体验。作者没有进行任何床面校准或技术维护,直接从盒子里取出打印机进行测试。首次打印使用的是随打印机附带的卡片上的模型,作者对3D打印机的工作声音和运动进行了描述,强调了其平滑的打印过程。随后,作者介绍了如何通过扫描二维码下载并设置Tina 2s的应用程序,并通过应用程序控制打印机。在打印了一只兔子模型后,作者对打印结果进行了展示和评价,并说明了如何通过应用程序进行后续的打印操作。

10:03

🔗 Tina 2s 3D打印机的多功能连接方式和使用体验

在最后一段中,作者总结了对Tina 2s 3D打印机的整体印象。提到了其价格区间在116至180美元之间,并认为这是一个不错的交易。作者赞赏打印机提供了三种与设备通信的方式:通过附带的线缆、微SD卡或通过可下载的应用程序。特别提到了打印机的自动调平功能,使得设置变得非常简单,所有打印件都按预期打印出来。作者还提到了打印机自带的切片程序,但也可以使用支持Tina 2s的其他程序,如Cura。最后,作者提到了打印机附带的24个月保修期,并强调了孩子们可以安全使用这款打印机,尽管作者会监督他的儿子使用。

Mindmap

Keywords

💡3D打印机

3D打印机是一种能够根据数字模型文件通过逐层打印的方式制造三维物体的设备。在视频中,3D打印机是主要的讨论对象,特别是Tina 2s型号,它被描述为适合儿童使用,具有多种连接方式和易于操作的特点。

💡Tina 2s

Tina 2s是视频中讨论的一种特定型号的3D打印机。它被提及为具有多种颜色选择、价格适中,并且是儿童友好型的。视频中详细展示了Tina 2s的开箱、设置过程以及打印效果。

💡切片程序

切片程序是3D打印过程中使用的一种软件,它将三维模型分解成打印机可以理解的薄层。视频中提到,Tina 2s自带切片程序,但用户也可以使用支持该型号的其他切片程序,如Cura。

💡自动调平

自动调平是3D打印机的一个功能,它能够自动调整打印平台的水平,以确保打印质量。视频中提到Tina 2s具有自动调平功能,这意味着用户不需要手动进行床面调平,提高了打印的便捷性。

💡WiFi连接

WiFi连接是Tina 2s 3D打印机的一个特点,允许用户通过无线网络远程控制打印机。视频中展示了如何通过扫描QR码将打印机连接到家庭WiFi网络,从而实现无线打印。

💡微SD卡

微SD卡是一种小型存储卡,用于存储数据。在视频中,Tina 2s附带了一个微SD卡,其中包含了可以打印的文件,用户可以直接使用这些文件进行打印。

💡打印材料

打印材料指的是用于3D打印的物质,如塑料丝材。视频中提到了如何安装和更换丝材,以及如何通过打印机的LCD屏幕控制打印材料的装载和卸载。

💡打印床

打印床是3D打印机中用于放置打印物体的平台。视频中讨论了Tina 2s的打印床尺寸,并提到了打印床加热的过程,这是为了确保打印材料能够正确地粘附在床面上。

💡打印速度

打印速度是指3D打印机完成打印工作的速度。视频中虽然没有直接提到Tina 2s的打印速度,但从打印兔子模型所需的时间(约1小时14分钟)可以推断出其打印速度。

💡应用程序

应用程序(App)是用于控制和监控3D打印机操作的软件。视频中提到了Tina 2s的应用程序,它允许用户通过智能手机控制打印机,并提供了教程和打印文件的选择。

💡保修期

保修期是指产品在一定时间内如果出现质量问题可以免费维修或更换的期限。视频中提到Tina 2s提供24个月的保修期,这为用户提供了一定程度的购买保障。

Highlights

3D打印机在高速下仍能展示出不同的运动细节。

Tina 2s 3D打印机是一款适合儿童使用的模型,价格合理。

Tina 2s的直接竞争对手是Toy Box,但Tina 2s价格更便宜。

Tina 2s 3D打印机拥有多种颜色可选,价格也有所不同。

开箱后需要移除泡沫和胶带,以确保打印机正常工作。

Tina 2s 3D打印机内部包含样品打印件和一些配件,如USB驱动器、胶水、样本丝材等。

Tina 2s 3D打印机完全支持通过Wi-Fi和应用程序进行控制。

Tina 2s的尺寸较小,打印平台尺寸为4.25英寸×4.5英寸。

电源开关设计在电源线上,方便用户控制打印机的开关。

Tina 2s的打印区域照明良好,便于观察打印过程。

Tina 2s 3D打印机的自动调平功能使得设置过程非常简单。

Tina 2s 3D打印机支持通过USB、micro SD卡或应用程序进行打印。

Tina 2s 3D打印机配备了24个月的保修期。

Tina 2s 3D打印机适合儿童使用,但建议在成人监督下操作。

Tina 2s 3D打印机能够打印出多种不同的玩具和物品。

Tina 2s 3D打印机的打印线条非常平滑且均匀。

用户可以通过应用程序轻松地控制Tina 2s 3D打印机。

Tina 2s 3D打印机的打印速度和质量给用户留下了深刻印象。

Transcripts

play00:00

I could sit back all day and watch a 3D

play00:03

printer in action doesn't that look

play00:06

sweet even under high speed you can see

play00:09

the different movements of this 3D

play00:11

printer of course here's the final

play00:13

product not necessarily a usable cup but

play00:15

it's still neat to see the process

play00:17

welcome back to another Jeff reviews for

play00:19

you and as you saw we are looking at a

play00:21

pretty sweet 3D printer this is called

play00:24

the Tina 2s you know what though enough

play00:27

talk let's get right into this have a

play00:30

couple different colors available and

play00:31

they're of course different prices if

play00:33

you've been looking for a 3D printer for

play00:35

your kid this is actually a pretty

play00:37

decent model and guess what its biggest

play00:39

competitor is called the toy box and

play00:41

this is half the price initial unboxing

play00:44

you want to make sure you take out those

play00:45

foam here plus there's tape wrapped all

play00:47

the way around the axis in there so you

play00:49

want to make sure you get all that stuff

play00:51

out before you turn this on one last

play00:54

thing to remove is this shaft cover you

play00:56

do not want to leave that on because

play00:58

well that could potentially damage it

play01:00

when you turn it on inside the box you

play01:02

can see they actually included some

play01:03

sample prints which you can expect to

play01:06

have printed from your Tina 2s they also

play01:08

have some other supplies here there's a

play01:10

USB drive there is a glue stick they

play01:14

have a sample size filament here of

play01:16

course a power supply there is a

play01:18

connector that connect to your computer

play01:20

if you're going to do it that way of

play01:21

course there is directions the coolest

play01:23

feature is this is completely app

play01:25

enabled that's how we are going to be

play01:27

using it through the Wi-Fi program and

play01:29

the app but I am excited about that

play01:32

let's talk about the dimensions now I'd

play01:33

filmed this previously but something

play01:35

happened to the audio so I'm actually

play01:36

redoing it the height of this is about

play01:40

10 and 1 12 in from left to right it's 7

play01:43

and 3/4 of an inch the same thing from

play01:44

front to back 7 and 3/4 of an inch

play01:48

because this is a smaller 3D printer the

play01:50

build plate itself is on the smaller

play01:51

side it's 4 and 1/4 of an inch across

play01:53

and from front to back it's just over 4

play01:56

and 1/2 in the port right here is on the

play01:58

side where you're going to connect your

play02:00

power plug I did think this is

play02:02

interesting the actual switch to the

play02:04

unit is on the plug itself so when you

play02:07

plug it in and you want to turn it on

play02:09

and off the switch is actually on the

play02:11

wire to the plug let's flick the

play02:14

switch we can see our screen light up on

play02:16

the top and there's the name of course

play02:18

look at this I didn't know that blue was

play02:20

going to go around that's cool what you

play02:22

did not see is the arm for with the

play02:24

filament head went all the way up to the

play02:26

top let's now start setting this up to

play02:29

ex the filament take that sticker off

play02:31

there on the top of course our language

play02:33

is going to be English so let's push

play02:34

that down to accept that yes the next

play02:37

step we want to do is install our

play02:40

filament we're going to hit next as it's

play02:42

heating the nozzle I'm going to get our

play02:44

sample filament here and get it ready

play02:46

the filament head is still warming up

play02:49

what we're going to do is we going to

play02:50

open up this spot right here and that's

play02:51

what's going to hold our filament wheel

play02:54

so let me get this ready we're going to

play02:56

slip this right on this direction now I

play02:58

did cut this part to a point the

play03:00

directions actually recommend that too

play03:02

so what we're going to end up doing is

play03:03

we're going to end up feeding it up

play03:04

through

play03:06

here and as it comes up we're actually

play03:08

going to take the nozzle that was

play03:09

already connected up here to the head

play03:11

and we're going to stick it down into

play03:12

here and then of course that filament

play03:14

will go up through the tube and out

play03:17

through the nozzle tip we've reached the

play03:19

temperature they have this set to 210° C

play03:22

now I'm supposed to actually insert the

play03:25

filament and start the process this is

play03:28

pretty simple there's a hole down here

play03:31

we're also going to pull this plunger up

play03:33

here the spring and let that go up we

play03:36

want to make sure that comes up through

play03:38

here at the top we've got our tube ready

play03:41

we're just going to feed this all the

play03:42

way through before we officially get

play03:45

started let's push this tube down in

play03:48

here now it's nice and tight so let's

play03:50

hit this button I do appreciate how lit

play03:54

up this print area is right now it's

play03:57

actually pretty amazing so what I think

play03:59

is happening now is because I've seen

play04:00

the wheel spin a little bit is the wire

play04:02

is being pulled up and through and we're

play04:04

going to start to see it come out here

play04:05

in just a little bit there it comes just

play04:07

like we thought we are now completely

play04:10

loaded a little Pro tip I actually

play04:12

brought this entire tube out just so it

play04:15

wasn't stuck in there because when the

play04:16

print head starts moving you don't want

play04:18

that getting jammed so just make sure

play04:19

you pull that out when you're ready to

play04:21

print after about 20 seconds of the

play04:24

filament coming out of the print head

play04:26

this screen has now changed we are going

play04:28

to continue because we are already

play04:31

through next thing we're going to do is

play04:32

we're going to insert our card right

play04:34

into here our card is installed we are

play04:37

told that there's actually some files on

play04:39

here that we can print so I do want to

play04:40

try that let's see can I oh I can spin

play04:44

the wheel I don't know what this rabbit

play04:46

thing is but we're going to print

play04:49

that let's click print now notice I'm

play04:52

doing that all right from here at the

play04:54

top it's very user friendly and

play04:56

convenient now however let's see how the

play04:58

print looks looks right now the bed is

play05:01

heating up for getting ready for our

play05:03

first print I did not do any bed

play05:05

leveling I've not done any kind of tech

play05:07

maintenance at all this is just right

play05:09

outside the box I'm interested to see if

play05:12

it's going to start to print this first

play05:14

print that we did of course was on the

play05:16

card that it came with but I wanted you

play05:17

to see and hear the movement of this 3D

play05:20

printer let's just take a quick

play05:27

listen no I'm not tricking you that is

play05:29

actually the sound of this 3D printer

play05:32

you do notice that the z-axis moves back

play05:34

and forth the xais will go left to right

play05:36

and of course you do have upward motion

play05:38

on the Y AIS when the print starts

play05:41

getting taller but this is a very smooth

play05:44

printing 3D printer so tell me what are

play05:48

your thoughts of this little kidfriendly

play05:50

3D printer something you're interested

play05:52

in let me know down in the comment

play05:54

section below I would love to hear from

play05:57

you we're still in the process of

play05:59

completing our our first print so what I

play06:00

want to do is I want to set up the app

play06:02

and actually right here in the

play06:03

instruction there's a QR code that you

play06:05

scan that same QR code is also a sticker

play06:08

on the top of your Tina 2s so they do

play06:11

have it in two locations we have

play06:13

downloaded the app and we are ready to

play06:16

go all logged in I'm going to use this

play06:17

little tiny phone stand that came with

play06:19

our Tina 2s something that you can 3D

play06:22

print on your own but they also sent one

play06:24

so right here what we're going to do is

play06:26

I bought a Tina 2s there are some

play06:29

tutorials that we're going to go through

play06:31

if you would like to I'm just going to

play06:32

click next and go through these and

play06:35

we'll click okay and start printing once

play06:39

this rabbit or our first print is done

play06:42

we will be using the app from here on

play06:44

out that's something I really think that

play06:46

people will use and I'm looking forward

play06:48

to showing that to you I might have a

play06:50

special guest come help me with that

play06:52

part after about an hour and 14 minutes

play06:54

it looks like our rabbit is done I will

play06:56

have some cleaning up to do because I

play06:57

notice right here on the ears that it

play07:00

sort of started to spread a little bit

play07:01

but I think that can be cleaned off

play07:03

pretty easily let me take it off and

play07:05

show you what it looks like up close

play07:06

personal the rabbit actually looks

play07:08

pretty good I just shaved off the excess

play07:10

filament there that didn't need to be

play07:11

there and we have a pretty decent rabbit

play07:14

we want to make sure we set up our 3D

play07:17

printer now to the app so I have the app

play07:19

open right here in device manager you

play07:21

can see that I'm going to click on all

play07:24

devices we're going to add an online

play07:26

device so there's a QR code right here

play07:29

on the top of our 3D printer that we are

play07:31

going to need to scan it's also will

play07:34

populate the same code I believe right

play07:36

here on the screen if we went through

play07:38

we're going to go down here to where it

play07:39

says control on our screen come down

play07:42

here to WiFi network where's our Wi-Fi

play07:45

QR code now that should be the same code

play07:47

as this it looks very similar we're

play07:50

going to hit

play07:52

next let's hit

play07:54

scan let's see oh and it popped it up

play07:57

right away that was pretty cool let's

play07:59

hit submit now our printer is online and

play08:03

ready to go now that we've connected our

play08:05

device to our 3D printer we also want to

play08:08

make sure we access the home Wi-Fi now

play08:11

this does use a Wi-Fi connection to

play08:13

communicate between the printer and your

play08:15

phone but you have to be connected so

play08:17

let's configure our Wi-Fi you can see

play08:19

there are one of two different ways we

play08:20

can either scan it which is what I'm

play08:22

going to do or you can search using the

play08:25

Bluetooth if you weren't successful

play08:27

using the QR code you can also use a

play08:29

Bluetooth I tried it both ways and I was

play08:31

able to connect once you see that you're

play08:33

connected it'll say Wi-Fi network has

play08:36

been successful now that the app is up

play08:38

and running let's see what we can print

play08:41

ooh maybe this folding

play08:43

knife it looks like there's a few

play08:46

different files we have to print I can

play08:48

do

play08:49

that we just sent the file to the

play08:52

printer right now the bed is heating up

play08:56

takes a little time to download just be

play08:59

patient

play09:00

I changed the filament a few times check

play09:03

out this cool knife of course if you

play09:06

want to remove the filament we're going

play09:07

to go into the same menu go down to

play09:11

prepare unload

play09:14

filament now of course it's going to

play09:16

heat up again we were already there

play09:18

pretty close at least so now it's going

play09:19

to start to heat back up again once it

play09:21

reaches the temperature it'll sort of

play09:22

just push it out of the print head and

play09:24

then you just manually wind it down the

play09:26

LCD screen had said wait for filming to

play09:29

unload but now that's gone off so what

play09:30

I'm going to do is I'm actually going to

play09:32

pull up on this little trigger and just

play09:33

start pulling my filament back out

play09:36

because it's already disconnected from

play09:37

the print head we just want to get it

play09:39

out of the machine now we can put this

play09:42

all together save it for the next time

play09:44

we print in this video we are taking a

play09:47

look at a 3D printer that was meant for

play09:49

kids called the Tina 2s so what did I

play09:52

think of it first things first let's

play09:53

talk about that price point I saw it

play09:55

retail anywhere between $1 160 and $180

play09:58

and in my opinion that's a pretty good

play09:59

deal I love that you have three ways to

play10:02

communicate with this 3D printer one

play10:04

through the included wire two through

play10:06

the included micro SD card or three

play10:09

through the app that you can download

play10:11

all three of them are very convenient

play10:13

and very responsive my favorite thing

play10:17

was right out of the box this thing was

play10:18

ready to print and because of that auto

play10:21

leveling base I did not have to do

play10:23

anything to set up and all of my prints

play10:25

have come out just like they were

play10:27

supposed to it's also important

play10:29

important to note that it does come with

play10:30

its own slicer program but you can use

play10:32

your own program as long as it supports

play10:35

the Tina 2s I use Cura and it was right

play10:37

there on there ready to go it does come

play10:39

with a 24mon warranty and most important

play10:42

kids can use it and yes I do let my son

play10:44

use it although because of his age I am

play10:46

supervising when he's using it but he's

play10:48

had a lot of fun printing a lot of

play10:51

different toys if this is something to

play10:53

interest you I will have a link down in

play10:55

the description this is Jeff with Jeff

play10:57

reviews for you as always thanks for

play10:59

stop it by and I hope you have a great

play11:01

day check out those print lines they are

play11:04

super smooth and uniform I want to give

play11:07

you a small sampling of what we were

play11:09

able to print this is the knife that my

play11:10

son wanted to print we have a tank the

play11:12

rabbit a Lego man there's some

play11:13

lightsaber holders there is so many

play11:16

different things that you can print I

play11:17

really like these flexy things those are

play11:19

really extra cool you know what there's

play11:21

almost no limit to the things that you

play11:23

can print with this 3D printer I really

play11:26

do appreciate that you stay around for

play11:28

my entire review of the Tina 2s you know

play11:30

what we've reviewed a few other kids

play11:32

toys what I'm going to do is I'm going

play11:33

to link one right up here and I would

play11:34

love it if you would click on this link

play11:36

and when you do about the magic of the

play11:38

internet I'm going to join you right

play11:40

here so go ahead click it it's safe I

play11:42

promise

Rate This

5.0 / 5 (0 votes)

Ähnliche Tags
3D打印机儿童科技易用设备家庭娱乐产品评测自动调平App控制教育工具性价比高用户友好
Benötigen Sie eine Zusammenfassung auf Englisch?