26 - Denoising and edge detection using opencv in Python
Summary
TLDRIn this Python tutorial, Trini from the 'Python for Microscopists' YouTube channel explores OpenCV's image processing capabilities, focusing on denoising and edge detection. She demonstrates various blurring techniques like averaging, Gaussian blur, and custom filters, emphasizing the importance of kernel size. Trini also introduces edge detection using the Canny algorithm, showcasing its effectiveness in identifying image edges. The tutorial is aimed at those interested in pre-processing microscope images for tasks like segmentation and object detection.
Takeaways
- 😀 The tutorial focuses on OpenCV, a library used for machine vision and image processing, including microscope images.
- 🔍 Denoising and blurring are discussed as important pre-processing steps for image segmentation.
- 💻 The IDE used is part of the Anaconda distribution, and OpenCV, NumPy, and Matplotlib are the primary libraries imported.
- 📸 The image 'BSC_Google_9e.jpg' is used as an example, which is a microscope image with added noise.
- 🛠️ Denoising methods include averaging, Gaussian blur, and median filtering, which are performed by convolving an image with a kernel.
- 📊 A custom 5x5 kernel is created using NumPy, normalized to maintain the original image's energy.
- 🔧 The cv2.filter2D function is used for custom filtering, and cv2.blur and cv2.GaussianBlur are used for built-in blurring techniques.
- 📈 The tutorial compares different denoising methods, highlighting the effectiveness of Gaussian blur and median filtering in retaining edges.
- 👁️🗨️ Bilateral filtering is introduced as a favorite method for noise removal while preserving edges, which is crucial for microscope images.
- 🏞️ Edge detection is covered, with a focus on the Canny edge detection method, which is useful for identifying significant transitions in images.
Q & A
What are the two main topics discussed in the Python tutorial video by Trini?
-The two main topics discussed are denoising or blurring and edge detection, which are important pre-processing operations for image segmentation.
Why is OpenCV used in the tutorial?
-OpenCV is used because it is a library primarily dedicated to machine vision applications and has very good tools for image processing, including microscope images.
What is the purpose of importing NumPy in the context of this tutorial?
-NumPy is imported for array manipulations, specifically to generate a matrix for defining a kernel used in the denoising process.
How does the denoising process work in the tutorial?
-Denoising involves manipulating the image using a kernel to reduce noise. This can be done through averaging, Gaussian blur, or other filtering techniques like median or bilateral filtering.
What is the significance of normalizing the kernel by dividing it by 25 in the tutorial?
-Normalizing the kernel by dividing it by 25 ensures that the total energy of the image is not altered during the convolution process, maintaining the original image's characteristics.
Why is a 5x5 kernel used in the denoising example?
-A 5x5 kernel is used to apply a larger area of averaging, which can be more effective in reducing noise while preserving image details compared to smaller kernels.
What is the difference between the custom filter and the Gaussian blur in the tutorial?
-The custom filter uses a simple averaging method with an all-ones kernel, while Gaussian blur uses a kernel with values that decrease based on the distance from the center, emulating a bell curve.
How does the median filter help in retaining edges during denoising?
-The median filter retains edges by replacing the central pixel value with the median of the pixel values in the kernel, which is effective in removing noise while preserving edges.
What is the bilateral filter and why is it one of Trini's favorite filters?
-The bilateral filter is a non-linear, edge-preserving, and noise-reducing smoothing filter. It is favored because it effectively removes noise while keeping edges sharp, which is crucial for image processing tasks like image segmentation.
What is the Canny edge detection method and how is it used in the tutorial?
-The Canny edge detection method is an edge detection operator that uses a multi-stage algorithm to detect a wide range of edges in images. In the tutorial, it is used to highlight the edges of a neuron in a microscope image.
What are the next steps in image processing after denoising and edge detection as suggested by Trini?
-After denoising and edge detection, the next steps suggested are image thresholding and segmentation, which are further pre-processing operations leading to more advanced image analysis.
Outlines
💻 Introduction to OpenCV for Image Processing
In this tutorial, Trini introduces the audience to OpenCV, a library primarily used for machine vision applications but also equipped with robust tools for image processing, including microscope images. The focus of the lecture is on two essential pre-processing operations: denoising/blurring and edge detection, which are crucial for tasks like image segmentation. Trini demonstrates how to import OpenCV and other necessary libraries such as numpy and matplotlib within the Python environment, specifically using the IDE provided by the Anaconda distribution. The video aims to guide viewers through the process of reading and manipulating images using these libraries.
🔍 Exploring Denoising Techniques in OpenCV
Trini delves into the topic of denoising, explaining the process of reducing noise in images through techniques like averaging, Gaussian blur, and median filtering. The tutorial demonstrates how to create a custom filter using a kernel, which is a matrix used for convolution operations. The video shows how to define a 5x5 kernel using numpy, normalize it, and apply it to an image using OpenCV's filter2D function. Trini also compares the results of using this custom filter to the built-in blur function in OpenCV, highlighting the subtle differences and the importance of kernel size in the denoising process.
📊 Comparing Different Blurring and Denoising Filters
The video continues with an exploration of various blurring and denoising filters available in OpenCV. Trini compares the effects of using a regular blur, Gaussian blur, and median blur on an image. Each filter is applied to the same image, and the results are displayed side by side to illustrate the differences. Gaussian blur is highlighted for its effectiveness in denoising while preserving edges, and median blur is noted for its ability to retain edges more effectively than Gaussian blur. The tutorial also briefly mentions bilateral filtering and non-local means filtering as additional methods for denoising that are particularly useful for preserving texture in images.
🧠 Edge Detection Techniques in Image Processing
Moving on to edge detection, Trini demonstrates the use of the Canny edge detection algorithm in OpenCV. The video shows how to read a microscope image of a neuron and apply the Canny function to detect edges. The parameters for the Canny function are discussed, and the results are presented, showing how the algorithm effectively identifies the neuron's edges and the synapses. The tutorial emphasizes the importance of choosing the right pre-processing operations based on the type of image and the information that needs to be extracted.
🔄 Wrapping Up and Looking Forward to Further Processing
In the final part of the tutorial, Trini summarizes the pre-processing operations covered, including denoising, blurring, and edge detection, and their relevance to further image processing tasks such as segmentation and object detection. The video concludes with a reminder to the audience to subscribe to the channel for more educational content on Python and image processing. Trini expresses gratitude for the viewers' engagement and motivation to continue creating informative videos.
Mindmap
Keywords
💡OpenCV
💡Denoising
💡Blurring
💡Edge Detection
💡Kernel
💡Convolution
💡Numpy
💡Matplotlib
💡Gaussian Blur
💡Median Filter
💡Bilateral Filter
Highlights
Introduction to OpenCV, a library for machine vision and image processing.
Focus on denoising or blurring and edge detection as important pre-processing operations for image segmentation.
Importing necessary libraries: OpenCV, numpy, and matplotlib for image manipulation and plotting.
Reading an image with noise to demonstrate denoising techniques.
Explanation of denoising methods including averaging, Gaussian blur, and median filtering.
Creating a custom kernel for denoising using numpy and applying it with cv2.filter2D.
Demonstration of the effect of different kernel sizes on the denoising process.
Comparison between custom filter and OpenCV's built-in blur function.
Introduction to Gaussian blur and its implementation in OpenCV.
Comparison of linear and nonlinear filtering methods, including median and bilateral filters.
Discussion on the importance of retaining edges in denoising, especially for microscope images.
Practical demonstration of median and bilateral filters on a noisy image.
Introduction to edge detection and its significance in image processing.
Explanation and application of the Canny edge detection algorithm in OpenCV.
Demonstration of edge detection on a microscope image of a neuron.
Highlighting the importance of choosing the right pre-processing operations for specific types of images.
Conclusion and预告 of upcoming tutorials on image thresholding and segmentation.
Call to action for viewers to subscribe for more Python image processing tutorials.
Transcripts
hey guys this is Trini and you're
watching Python tutorial videos on my
channel Python for microscopists on
YouTube in today's tutorial let's
continue talking about open CV which is
the library primarily dedicated to
machine vision type of applications but
has very good tools for image processing
even microscope images or even
microscope images so in today's lecture
let's just focus on two topics one is
denoising or blurring and the other one
is edge detection again a couple of very
important pre-processing operations that
you may need to perform if you are
interested in image segmentation for
example so let's go ahead and jump into
spider which is again the IDE that's
part of anaconda distribution now to
import OpenCV just to remind everyone
import cv2 and typically there are three
things that I kind of import by default
and let's go ahead and do that open CV
numpy because you never know when you
need to do some sort of a array
manipulations no array map so we're
doing CV two and numpy and other one is
matplotlib even though I plan on
actually using open CV to show images I
may have to plot the histogram for
example and for that pie plot is pretty
pretty useful so let me go ahead and do
that from matplotlib import I plot as
PLT okay so these are the libraries that
we want and now let's go ahead and read
our image so the first topic is
denoising so let's import an image that
actually got some noise I've Google
searched for an image and
just added some random noise to it so
let's go ahead and use that image and
this is CB 2 dot M Reid and it's in
images and it's called Google no I think
it's called BSC I can actually go to my
file explorer look at images and this is
BSC underscore or Google and underscore
9e Google I see dot jpg and let's go
ahead and read it in color again the way
we do that is one zero means if we are
reading the image as a gray level image
this is I believe a gray level image to
begin with so let's let's know how to
read it as as one now one of the first
let me take a step back like whenever we
do be noising we are manipulating the
image somehow and how do we do denoising
I mean we can either do averaging you
know average of a few pixels that kind
of minimizes the noise you can do
Gaussian blur in like apply a Gaussian
filter and then blur it you can do like
for example a filter called median
whatever process you follow all we are
doing is you take a kernel the kernel
can be a three by three matrix for
example it can be a five by five matrix
whatever it is you take a kernel and you
convolve it meaning you kind of multiply
it you know by progressively moving it
on your image your image is nothing but
a very big matrix or a very big array or
kernel is a smaller array that we are
stepping through the image so that we
can actually define this kernel if you
import or if we use a predefined process
you know within OpenCV or whatever
psychic image it comes with a predefined
kernel but we can define our own and
that method within OpenCV is done via CV
2 dot filter to D so it's CV 2 dot
filter and to be I believe is uppercase
okay we'll figure this out in a second
so this is what we need but the
arguments here is the first one is an
image but then we need to define a a
kernel okay so the first one is image
and then let's let's get to this in a
second so how do we define our kernel
well this is nothing but this is the
reason why I imported numpy because we
know how to generate a a matrix of all
ones okay so this is done by NP dot once
and let's just do 5x5 array and then I'm
gonna convert this this this needs to be
I want this to be a float32 type okay
and P dot float32
and the reason why I want this as a
float32 and not an integer is we are
doing some max to the image so we want
these to be float and more importantly
the reason I want it to be is because
I'm dividing this by 25 5x5 of all ones
means I have 25 ones in my matrix I am
normalizing this by dividing it by 25 so
all the elements within the matrix add
up to one okay
you do not want to change the energy of
your image of your original image so by
multiplying it by one we are not
altering the total energy contained
within this image that's the reason why
I'm normalizing it by 25 here if this is
a three by three matrix I would divide
this by nine okay so this is our kernel
and we are all set actually so let's
actually define let's go ahead and use
this okay let me give a little bit of
room there so we have our image we have
our kernel so let's just call this our
filter okay
our filter I think filter is a built-in
term so let's just use filt underscore
to be okay so my 2d filter is nothing
but C v2 dot filter 2d and I have my
image and
we can look up at the documentation
actually but I need to define my kernel
right there okay and this is nothing but
convolution using the kernel that we
have just defined okay let's go ahead
and look at the image CV to dot M shell
and we know how to look at this and I'm
going to call this let's actually put
both original image and originally image
is IMG and CV two dots
I'm sure and let's call this 2d custom
okay and this is fil t 2d and every time
you use cv 2 dot M shell again see v2
dot weight uppercase K okay weight key
and how long do we want to wait until we
provide until we provide a figure you
know until we close it see v2 dot dish
okay so let's go ahead and run this and
you see the original image here which is
noisy and you see the blurred image or D
noise to image it's actually not bad
it's D noise except we act let's go
ahead and close this except we are you
know convolving it with a filter of five
by five let's go ahead and do three by
three and nine okay that's fungus and
see how the extent of blurring actually
this is not bad
it did D noise a little bit but it also
did not blur the image a lot okay so
three by three seems to work very well
on this specific image let's leave our
kernel size to three by three for now
and I'm going to show you a few other
types of filters another type of filter
that we have is blur so see let's call
this or equal to it's nothing but C v2
dot blur that's it and then we need to
just give our image
and our input image is called image and
then now we need to give what the what
the kernel size is you know for this
image and I'm cheating here a bit on the
other side I have the documentation for
all of this so I need to so I can I can
make sure you know I do this video in a
smooth way otherwise I'll make a bunch
of mistakes go back and correct them
okay so you can also go ahead and cheat
nothing wrong with that as long as you
cut down your execution time you know
this is it's a good way of learning so
this is a built-in function so let's go
ahead and let's go ahead and try to see
this image blur and let's run this
so this is our blurred image which also
is denoise this is our original image
and let me move this to this side and
this is the one on the right hand side I
have my custom filtered image and on the
left hand side this is a blurred image
although I should go back and see what
did I use for my blur it's not fair to
compare five by five yeah let's go to
three by three okay because I was
expecting not much difference between
these two because blur is nothing but
exactly the CV to dot collector to D
yeah this is nothing but that except
here we are defining the kernel size the
kernel size is three by three and it's
it's defining the kernel here I define
the kernel and I just gave that kernel
as an input here so let's do this one
more time and I should yeah on the left
hand side I have blur on the right hand
side I have custom filter they almost
look exactly the same okay so but the
good thing with custom filter is now I
don't have to I mean using all ones is
the easiest way of doing it but then you
can define a Gaussian kernel you can
define your own lawrencium type of
kernel if you are good at defining your
kernels then you can define whatever and
then actually get the best out of this
so that's why see v2 dot filter 2d
exists in addition to this we also have
a Gaussian blur
as the name suggests this is nothing but
instead of all once in the kernel it
uses a gaussian macaw sein is nothing
but a bell curve you know when you do a
distribution of random numbers for
example you end up with this normal
distribution right so it's almost a
Gaussian it's not exactly at all so it's
almost a Gaussian so instead of one
dimension if you do that in 2d the
Gaussian looks like a mountain okay no
so that's what Gaussian blur actually
does the central values are larger and
the values taper off as you go away from
the center but when you add all the
numbers they should add up to one again
and by doing Gaussian blur it does take
care of this so see v2 dot D you know I
think it's uppercase again that's why
I'm cheating here because I do not want
to make these little mistakes Gaussian
blur and the way we do here is obviously
what are we blurring we are blurring our
image yeah by how much are we learning I
and also zero and you can actually go
ahead and look at documentation what
zero means so what is it saying
I'm defined Gaussian okay that's fine oh
sorry equal to okay
so let's also add Gaussian blur down
here so we can actually look at what it
is how it looks like we call this and
before looking at this image let's also
well actually let's let me also define
one more now all up until this point you
know Gaussian blur and everything I
believe even Gaussian is called a linear
convolution you know process now there
is a nonlinear process so and usually
these non linear ones retain edges so
one of those is median the other one is
called bilateral so let's look at median
and bilateral in a minute but let's run
these so you can see how Gaussian looks
like there you go this is a regular blur
we looked at that and this is our
Gaussian blur
much better than these other ones
but they all look pretty much the same
you know again now which kernel did I
use for Gaussian again five by five if I
actually do three by three it probably
looks better than the other two so let's
go ahead and run this one more time so
this is my Gaussian blur and this is my
2d custom filter just have to tell the
difference you know
although Gaussian looks slightly better
to me when it comes to edges so let's
see if our median filter has any better
job than gaussian median is a good
option if you want to do if you want to
retain edges so that I already mentioned
that so this is called CV 2 dot again
let me go ahead and cheat median blur
okay median upper case B okay and we are
doing that on our image and our kernel
size let's actually keep it three you
just need to say three you don't need to
do three by three so let's go ahead and
also look at this median we call it
median blur I like to call this median
filter because we are filtering in a way
the image so let's just call this median
underscore blur let's go ahead and print
all of these are show all these images
and median showed up here and let's go
ahead and compare median and Gaussian I
don't know if you can tell from the
video but Gaussian seems to be a bit
more blurred than median you see median
retained all the edges they all I mean
this is the original image by the way
it'll compare original and million
that's not bad I mean the edges are
sharp here they're just a relatively
sharp over there and most of the noise
seems to be gone okay so let's stop
showing other images right now so let's
actually delete the 2d custom blur and
also Gaussian blur we understand what
they do let me go ahead and add one more
one of my favorite filters
bilateral learn I said one of my
favorite because this is very good for a
noise removal and retain the edges even
better than medium blur let's hope to
see see that here CV - and what do we
called by later oh I think F is again I
do not have that here so what do I do
let's go ahead and do image and again
for to understand the parameters you can
actually go and you know search online
for what the input parameters actually
mean this is typically the kernel size
this can be the patch size you know how
fast you want to move on the images so
each filter has its own way of dealing
with the kernel and the parameters
basically are one way of I mean the way
you're telling exactly how you want the
filtering to be done so let's call this
bilateral and this is bilateral
underscore blur I think we got
everything okay let's go ahead and run
this and here is the bilateral and
original image the noise is not that
much cleaned as you see compared to the
original maybe we can play with the
parameters and see but the edges are
much sharper compared to the medium
filter one thing I'm not gonna show
right now is something called non-local
means filter I in fact I didn't even
know I've never looked up for a
non-local means filter on open CV I know
it actually exists in psychic image so I
keep using the one from psychic image
and I have covered that in one of my
previous videos anyway so I'm not going
to cover that in this specific tutorial
but again the name is non-local means
filter okay NLM does an amazing job
filtering microscope images denoising
microscope images and yet retaining the
texture because texture is very
important in microscope images no need
to mention that okay so these are
various denoising or blurring
you know functions now let's actually
look at an edge detection and edge
detection function so in fact let's only
look at again there are a lot of
different choices if you look at psychic
image which I already covered anyway so
I'm going to just show you one of the
ones that I probably did not cover
inside get image which is canny edge
detection okay so let's go ahead and
read the image and I'm also going to
leave these print or in show statements
right there so let's read a because we
are going to do edge detection let's go
ahead and look at an image called neuron
okay and then zero and let's go ahead
and show original image first so you
know exactly what I'm talking about okay
this is nothing but our image so let's
show the original image and this is what
I'm talking about this obviously a
microscope image and it's a neuron and a
whole bunch of lines or you know if
you're a biologist you know the
technical term synapses I guess you know
our axons I don't know the difference
but anyway the a bunch of lines you know
from image processing point of view
streaks going from this neuron so let's
just do let's just do edge detection so
it's nothing but edges equals C v2 dot
uppercase C canny and what do we want to
do our image and again you can look up
the parameters but if this is nothing
but the minimum value for canny is 100
the maximum is 200 so let's see how that
image looks like you can play with that
this is nothing but your minimum and
maximum values okay and now let's just
show our canny this is it
just one line and that does the edge
detection and it looks exactly like
original image that is because I'm
looking at
okay so let's look at edges and now
there you go so it kind of detected this
hard edges where the transition takes
place in this case we have the neuron
right there and then there is a very big
change in gray level from the from this
from this neuron you know to the
surrounding to the background so this is
one way again when do you use this it
completely depends on your type of image
and what the information you are trying
to extract out of this image so these
are again a couple of pre-processing
operations that you could do again
leading up to image segmentation or
object detection whatever you want to do
you know further image processing let's
extend this let's look at a couple more
in a pre-processing operations in our
next video and possibly get into image
thresholding and maybe segmentation
thank you very much for watching this
video again please do not forget to
subscribe to this channel which keeps me
motivated to make more such videos and
and and teach you guys you know whatever
I know when it comes to Python image
processing thank you very much
Weitere ähnliche Videos ansehen
25 - Reading Images, Splitting Channels, Resizing using openCV in Python
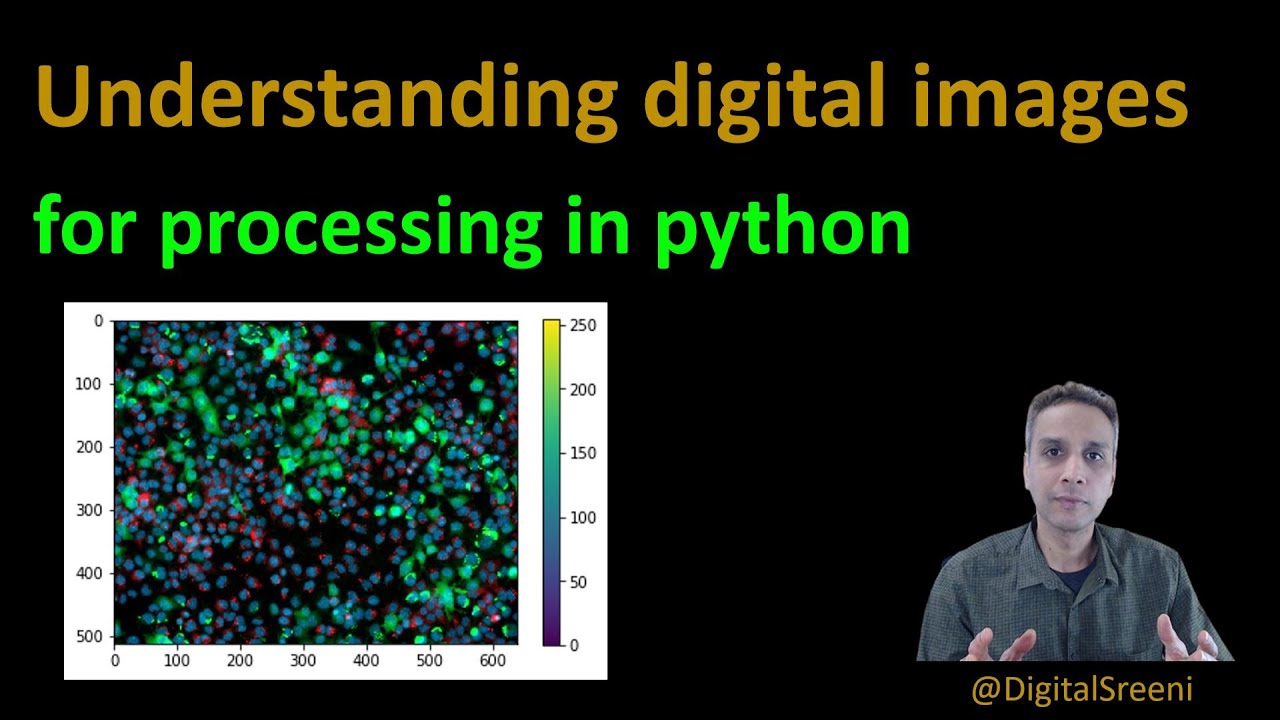
How Blurs & Filters Work - Computerphile
PNEUMONIA Detection Using Deep Learning in Tensorflow, Keras & Python | KNOWLEDGE DOCTOR |
Building an Object Detection App with Tensorflow.JS and React.JS in 15 Minutes | COCO SSD
Auto Annotation for generating segmentation dataset using YOLOv8 & SAM
#21 OPENCV - PYTHON | Canny Edge Detection EXPLAINED | Coding SOBEL, LAPLACIAN and CANNY Filters
5.0 / 5 (0 votes)