Ketidakpastian Pengukuran Tunggal Fisika 10 SMA KMerdeka
Summary
TLDRThis video explains the concept of uncertainty in measurements, focusing on how to calculate it for single measurements using various tools like vernier calipers, rulers, and micrometers. It introduces the formula for uncertainty (ΔX = 1/2 × smallest scale) and demonstrates how to report measurement results with uncertainty. Practical examples include calculating uncertainty for a wooden ruler, caliper, and micrometer, with step-by-step breakdowns for clarity. The lesson emphasizes the importance of uncertainty in measurement, helping viewers understand how to accurately represent measurement results.
Takeaways
- 😀 Uncertainty in measurement can be categorized into two types: single measurement and repeated measurement.
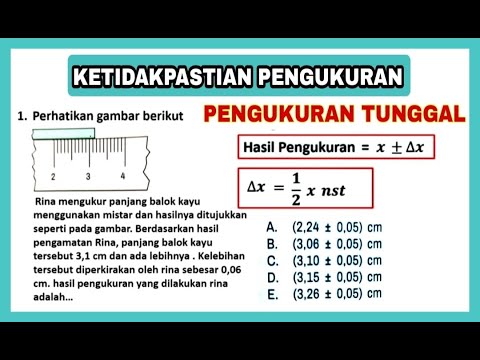
- 😀 Delta X (ΔX) represents the uncertainty in a measurement, and it is calculated as half of the smallest scale of the measuring instrument.
- 😀 The formula for calculating uncertainty in single measurements is ΔX = 1/2 × smallest scale of the instrument.
- 😀 When expressing measurement results with uncertainty, the format used is: X ± ΔX.
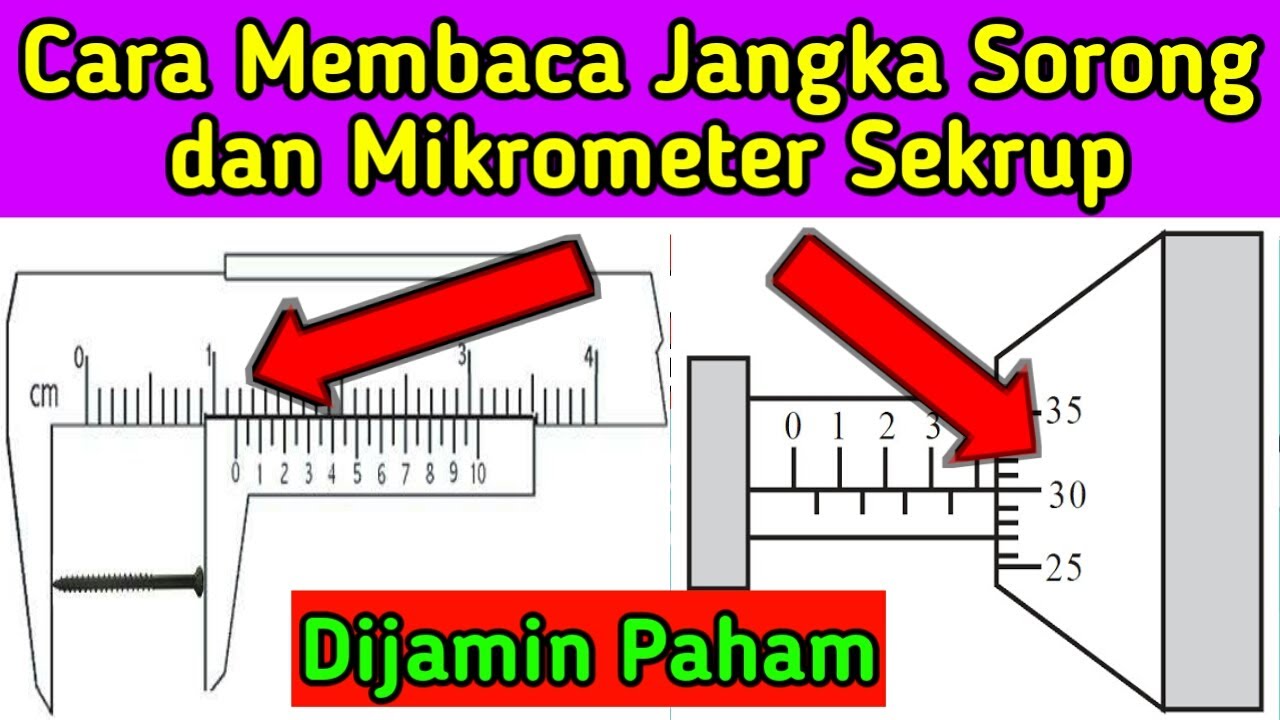
- 😀 For a single measurement with a caliper (Jangka Sorong), if the smallest scale is 0.1 mm and the observed value is 22.8 mm, the uncertainty is calculated as 0.05 mm, resulting in 22.8 ± 0.05 mm.
- 😀 A ruler (Mistar) with a smallest scale of 0.1 cm provides an example where the result 5.1 cm is written as 5.1 ± 0.05 cm, indicating a range between 5.05 cm and 5.15 cm.
- 😀 The uncertainty calculation for a micrometer screw gauge (Micrometer Sekrup) is based on the smallest scale of 0.01 mm, leading to a result of 2.77 mm ± 0.005 mm.
- 😀 In each example, uncertainty is calculated using the formula and added or subtracted from the measured value to express the range of possible values.
- 😀 The key to accurately reporting measurements is understanding the smallest scale of the measuring tool and applying the uncertainty formula appropriately.
- 😀 The format X ± ΔX ensures that measurements are clearly communicated with their associated uncertainty, providing transparency in precision.
Q & A
What are the two types of measurement uncertainty discussed in the script?
-The two types of measurement uncertainty discussed are 'Single Measurement' and 'Repeated Measurement'.
How is uncertainty in a single measurement calculated?
-Uncertainty in a single measurement is calculated using the formula: ΔX = 1/2 × smallest scale value.
What is the symbol used to represent measurement uncertainty?
-The symbol used to represent measurement uncertainty is ΔX.
What is the formula for calculating uncertainty for a single measurement?
-The formula for calculating uncertainty in a single measurement is ΔX = 1/2 × smallest scale value.
In the example with Budi using a Vernier Caliper, what is the smallest scale value and the calculated uncertainty?
-The smallest scale value is 0.1 mm, and the calculated uncertainty (ΔX) is 0.05 mm.
How do you express the result of a measurement with uncertainty?
-The result of a measurement with uncertainty is expressed as X ± ΔX, where X is the measured value and ΔX is the uncertainty.
In the second example, what is the smallest scale value of the ruler used by Jessica?
-The smallest scale value of the ruler used by Jessica is 0.1 cm.
How is the uncertainty (ΔX) calculated for a measurement using a ruler with a smallest scale of 0.1 cm?
-The uncertainty (ΔX) is calculated as 1/2 × 0.1 cm = 0.05 cm.
What is the smallest scale value for the micrometer screw gauge used in the script?
-The smallest scale value for the micrometer screw gauge is 0.01 mm.
How do you calculate the uncertainty (ΔX) for a micrometer screw gauge measurement?
-The uncertainty (ΔX) is calculated as 1/2 × 0.01 mm = 0.005 mm.
Outlines

هذا القسم متوفر فقط للمشتركين. يرجى الترقية للوصول إلى هذه الميزة.
قم بالترقية الآنMindmap

هذا القسم متوفر فقط للمشتركين. يرجى الترقية للوصول إلى هذه الميزة.
قم بالترقية الآنKeywords

هذا القسم متوفر فقط للمشتركين. يرجى الترقية للوصول إلى هذه الميزة.
قم بالترقية الآنHighlights

هذا القسم متوفر فقط للمشتركين. يرجى الترقية للوصول إلى هذه الميزة.
قم بالترقية الآنTranscripts

هذا القسم متوفر فقط للمشتركين. يرجى الترقية للوصول إلى هذه الميزة.
قم بالترقية الآنتصفح المزيد من مقاطع الفيديو ذات الصلة

fisika sma x #2 Pengukuran

FISIKA KELAS X | KETIDAKPASTIAN PENGUKURAN TUNGGAL. PART 2

Cara Membaca Jangka Sorong dan Mikrometer Sekrup

Besaran, Satuan, Dimensi, dan Pengukuran • Part 7: Ketidakpastian dan Ketelitian Pengukuran

BAB 1 : PENGUKURAN DALAM KEGIATAN KERJA ILMIAH | IPA SMA Kelas 10 Kurikulum Merdeka

PERSIAPAN OSN IPA SMP 2022 MATERI KETIDAKPASTIAN HASIL PENGUKURAN
5.0 / 5 (0 votes)
