Make your own LED Battery Level Indicator

GreatScott!
8 Jul 201808:25

Summary

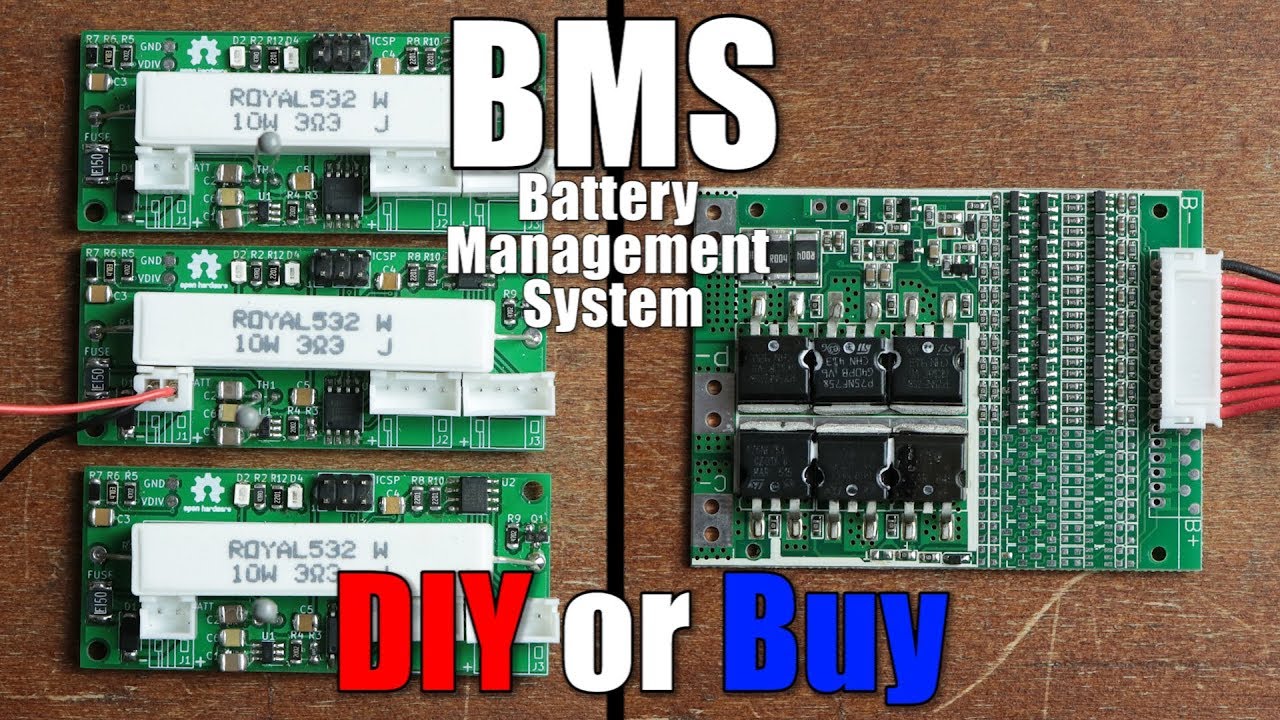
TLDRIn this video, the creator constructs a lithium-ion battery pack enhanced with a Battery Management System (BMS) for safety. To visually monitor battery levels, they explore using an LM3914 IC, which drives LEDs based on voltage levels, providing a basic battery level indicator. However, finding the standard approach lacking in precision, they design a custom LED battery level indicator circuit. This new design uses six LEDs with adjustable trigger voltages for more accurate battery level representation, tailored to the specific discharge curve of their battery pack.

Takeaways

  • 🔋 The video discusses creating a lithium-ion battery pack with a BMS (Battery Management System) to prevent overcurrent and easily charge the battery.
  • 🔌 The creator is missing a battery level indicator and considers using a lipo battery voltage tester from eBay, but finds it inadequate for displaying energy percentage.
  • 🚀 The LM3914 IC is introduced as a potential solution for driving LED indicators to show battery level, as it senses analog voltage levels and drives 10 LEDs accordingly.
  • 🔍 The LM3914's datasheet is recommended for understanding the specific pin connections and settings for the IC to function properly.
  • 🔗 The video explains the need to connect the IC's pins to either ground or supply voltage, and the use of a resistor to set the current for the LEDs.
  • 📊 The LM3914 uses a resistor ladder to create different voltage potentials for the comparators, which light up LEDs based on the battery voltage.
  • 🔄 The creator builds a circuit to demonstrate the IC's functionality, showing LEDs turning off sequentially as the battery voltage decreases.
  • 🤔 The creator identifies a problem with the linear voltage decrease of the LM3914 not accurately representing the battery's discharge curve.
  • 🛠️ A custom LED battery level indicator schematic is proposed, using six LEDs and manual adjustment of comparator trigger voltages via trimmers.
  • 🔧 The custom circuit is assembled and fine-tuned with a boost converter module and trimmers to match the battery's discharge curve more accurately.
  • 🔬 The importance of adjusting the trigger voltages based on the specific battery type's discharge curve is highlighted for accurate battery level indication.

Q & A

  • What is the primary purpose of creating a new lithium-ion battery pack in the video?

    -The primary purpose is to build a battery pack for upcoming projects and to prevent over current events by attaching a suitable BMS (Battery Management System) circuit.

  • What is the missing feature in the battery pack that the video aims to address?

    -The missing feature is a battery level indicator, which is essential for easily determining the remaining energy in the battery.

  • What device does the video suggest using to measure the voltage of each cell in the battery pack?

    -The video suggests using a lipo battery voltage tester purchased from eBay to measure the voltage of each cell.

  • Why is the presenter not satisfied with the lipo battery voltage tester?

    -The presenter is not satisfied because the tester does not easily convey the remaining energy in percentage form, which is crucial for understanding the battery's state.

  • What solution does the video propose for creating a more precise battery level indicator?

    -The video proposes using an LED bar display, specifically by using the LM3914 IC, which can drive LED bars based on the battery voltage.

  • What is the function of the LM3914 IC mentioned in the video?

    -The LM3914 is an LED driver circuit that senses analog voltage levels and drives 10 LEDs accordingly, providing a visual representation of the battery's energy level.

  • How does the LM3914 IC determine which LEDs to light up based on the battery voltage?

    -The IC uses comparators that compare the battery voltage (sensed by the signal pin) with a set voltage window (set by the RHI and RLO pins), lighting up LEDs as the voltage decreases.

  • What is the issue with the linear voltage decrease provided by the LM3914 IC's resistor ladder?

    -The linear voltage decrease does not accurately follow the actual discharge curve of the battery, leading to an inaccurate representation of the battery's energy level.

  • What modifications does the presenter make to the LM3914 IC's design to improve accuracy?

    -The presenter creates a custom LED battery level indicator schematic that uses six LEDs, manual trigger voltage adjustment through trimmers, and sinking instead of sourcing current for better accuracy.

  • How does the presenter fine-tune the trigger voltages for the custom LED battery level indicator?

    -The presenter sets the lowest capacity limit to 2.2 amp hours and the highest to 0 amp hours, calculates linear capacity steps, and adjusts the trimmers to output the required voltage to the comparators' inverting inputs.

  • What advice does the video give for using a different battery type with the custom LED battery level indicator?

    -The video advises to look at the discharge curve of the different battery type to set the correct voltage values for accurate battery level indication.

Outlines

00:00

🔋 Building a Battery Pack with an LED Battery Level Indicator

The speaker is in the process of creating a lithium-ion battery pack for upcoming projects, discussing the need for a battery management system (BMS) to prevent overcurrent events. The video explores the limitations of a basic LiPo battery voltage tester from eBay, particularly its inability to display the remaining energy percentage in the batteries. The speaker introduces the LM3914 IC as a solution, which is designed to drive LED bar displays. They plan to create a more precise LED battery level indicator circuit, starting by assembling a test circuit based on the LM3914's datasheet.

05:04

🔧 Optimizing the LED Battery Level Indicator Circuit

The speaker tests the initial circuit with a constant voltage source and discusses its limitations, including the misconception that each LED represents 10% of battery energy. The linear voltage decrease caused by the LM3914's resistor ladder does not match the battery's actual discharge curve. The speaker proposes reducing the voltage window to focus on the linear section of the discharge curve and setting the last LED to indicate 12% energy. However, they decide to design a custom LED battery level indicator, using six LEDs, adjustable comparators, and a trimmer to manually set trigger voltage potentials. The project is completed after fine-tuning the circuit, demonstrating its effectiveness in accurately displaying battery levels.

Mindmap

Keywords

💡Lithium-ion battery pack

A lithium-ion battery pack is a rechargeable battery composed of multiple lithium-ion cells. It is known for its high energy density and low self-discharge rate. In the video, the creator is assembling a new lithium-ion battery pack for future projects, emphasizing its importance for energy storage and the need for a suitable BMS (Battery Management System) to prevent overcharging and overcurrent events.

💡BMS (Battery Management System)

BMS refers to the electronic system that controls the charging and discharging of a battery pack, ensuring the safety and longevity of the battery. In the script, the BMS is mentioned as a crucial component to attach to the battery pack to prevent overcurrent events and to manage the charging process effectively.

💡Battery level indicator

A battery level indicator is a device or system that provides information about the remaining charge in a battery. In the video, the creator discusses the need for a battery level indicator and considers using an LED display to visually represent the battery's energy percentage.

💡LIPO battery voltage tester

A LIPO battery voltage tester is a tool used to measure the voltage of each cell in a lithium-ion polymer (LIPO) battery. The script mentions using such a tester from eBay, which correctly measures cell voltage but does not provide a clear percentage of remaining energy.

💡LM3914

The LM3914 is an integrated circuit (IC) designed to drive LED bar graphs based on input voltage levels. It is used in the video to create a more precise LED battery level indicator. The IC has a 10-LED output and is configured to light up LEDs as the battery voltage decreases, indicating the remaining energy.

💡IC (Integrated Circuit)

An integrated circuit is a compact arrangement of electronic components on a small substrate, designed to perform a specific function. In the context of the video, the LM3914 IC is used to create a visual battery level indicator by driving LEDs based on the battery's voltage.

💡Constant current output

Constant current output refers to a feature of a device that maintains a steady current flow, regardless of the load. The LM3914 IC mentioned in the script has constant current outputs for the LEDs, which means it can drive the LEDs without requiring additional current-limiting resistors.

💡Resistor ladder

A resistor ladder is a series of resistors connected in such a way that they divide voltages into multiple levels. In the video, the resistor ladder is used in conjunction with the LM3914 to create different voltage potential levels at the comparator inputs, which determine when each LED will light up.

💡Comparator

A comparator is a device that compares two voltages and outputs a signal indicating which is higher. In the script, comparators within the LM3914 IC are used to compare the battery voltage with preset voltage levels, triggering the lighting of LEDs in the battery level indicator.

💡Discharge curve

A discharge curve is a graphical representation of the voltage of a battery as it is discharged. It is used in the video to determine the voltage range over which the battery operates and to set the voltage levels for the LED battery level indicator accurately.

💡Custom LED battery level indicator

The custom LED battery level indicator is a unique circuit designed by the video creator to provide a more accurate representation of battery charge levels. It uses six LEDs and trimmers to manually set the trigger voltages for each comparator stage, allowing for a more precise indication of the battery's energy level.

Highlights

Creating a new lithium-ion battery pack for upcoming projects.

Attaching a suitable BMS (Battery Management System) to prevent over current events and charge topics.

Using an eBay-purchased lipo battery voltage tester to measure each cell's voltage.

Desire for a battery level indicator beyond simple voltage readings.

Introduction of the LM3914 IC for driving LED battery level indicators.

LM3914's functionality to sense analog voltage levels and drive 10 LEDs accordingly.

Connecting LEDs to the LM3914 without current limiting resistors due to constant current outputs.

Setting the current for the LEDs with a 2 kilo ohm resistor.

Explanation of the LM3914's pin connections for voltage, mode, and bar graph activation.

Understanding the block diagram of the IC for comparator inputs and voltage potential connections.

Demonstration of the LM3914 circuit with a constant voltage source and geometric progression as signal inputs.

Observation that the linear voltage decrease does not accurately represent the battery's energy discharge curve.

Adjusting the voltage window to align with the linear section of the battery's discharge curve.

Designing a custom LED battery level indicator schematic with six LEDs and manual trigger voltage adjustment.

Building the custom circuit on perfboard with a boost converter module for trigger voltages.

Fine-tuning the custom circuit to match the battery's discharge curve for accurate level indication.

Testing the custom LED battery level indicator with a lab bench power supply.

Recommendation to review the battery's discharge curve for accurate voltage settings when using different battery types.

Encouragement to like, share, and subscribe for more creative and educational content.

Transcripts

play00:00

as you can see here I'm currently

play00:02

creating a new lithium-ion battery pack

play00:05

for upcoming projects and by attaching a

play00:08

suitable BMS circuits to the pack we

play00:11

cannot only prevent over current events

play00:13

but also charged topic easily the only

play00:17

feature that is missing for me here is

play00:18

battery level indicator for which we

play00:21

could use this lipo battery voltage

play00:23

tester that I got a for cheap from eBay

play00:26

and while it certainly measures the

play00:28

voltage of each cell correctly I'm not

play00:31

thrilled about this play since you

play00:33

cannot easily tell how much energy in

play00:35

percentage is left in the batteries a

play00:38

possible and awesome solution for that

play00:40

would be an LED but display so in this

play00:44

video let's talk about the classic LM

play00:46

391 5c whose job is coincidentally to

play00:51

drive led bothers place and furthermore

play00:54

let's also create our own more precise

play00:56

led battery level indicator circuits

play00:59

let's get started

play01:03

[Music]

play01:13

this video is sponsored by jl CPC be one

play01:17

factor bottom jlc PCB focuses on rapid

play01:21

prototypes of one to six layer PCBs and

play01:24

all of them are shipped directly from

play01:26

the factories after being produced a

play01:29

blow Dro Gerber files to test the fast

play01:32

speed of prototype production and

play01:34

delivery

play01:36

according to the datasheet of the LM

play01:39

three nine one four it is an ICU that

play01:42

senses analog voltage levels and drives

play01:45

10 LEDs accordingly which is basically

play01:48

just what we needs since the voltage of

play01:50

a battery can tell us how much energy it

play01:53

got left

play01:54

so I positioned a DI C on a breadboard

play01:57

and had a closer look at its typical

play01:59

application circuits given by the data

play02:02

sheets the 10 LEDs need to get connected

play02:05

with the cathodes to the pins 1 10 11 12

play02:10

up to 18 and no they do not require a

play02:13

current limiting resistor since the ICEA

play02:16

features constant current outputs this

play02:19

current can be set by connecting a

play02:21

resistor between the ref out pin and

play02:23

grounds I went with a 2 kilo ohm

play02:27

resistor which gives us a current of

play02:29

around six point two five milliamps per

play02:31

LED next we have to connect v- to ground

play02:36

v+ to the supply voltage

play02:38

ruffridge us to ground and mode to the

play02:41

supply voltage to activate the bar graph

play02:44

modes and if you want to learn why

play02:47

exactly I connected those pins to either

play02:49

ground or the supply voltage then I

play02:51

would highly recommend checking out the

play02:53

datasheet since it is very well written

play02:57

anyway what is left to connect are the

play02:59

RL o seek and our H I pins which

play03:04

determine to which voltage and voltage

play03:06

range the LEDs will react to learn more

play03:10

about it let's look at the block diagram

play03:12

of the IC in a nutshell we cut n

play03:16

comparators to whose inverting inputs is

play03:19

the sake aka signal pin connected the

play03:23

non-inverting inputs of the upper

play03:25

comparator is connected to the RHI pin

play03:28

while the following one's are all

play03:30

connected to the previous non-inverting

play03:33

inputs through 1 kilo ohm resistor and

play03:35

the last resistor is connected to the RL

play03:38

open now the signal pin usually connects

play03:42

to the changing analog voltage so the

play03:45

battery voltage while the RHI and our

play03:49

elope

play03:49

are connected to the voltage potential

play03:52

window we want to cover for example if

play03:56

we have a look at the discharge curve of

play03:58

the utilized inr 18 650 - 25 our

play04:02

lithium-ion batteries then we can see

play04:05

that our voltage range starts at four

play04:07

point one volts and goes down to around

play04:09

two point nine volts multiply that by

play04:12

four since I got a 4s 4p battery pack

play04:16

and we got a voltage window of sixteen

play04:18

point four to 11 point 6 volts so we

play04:22

connect a 16 point formal potential to

play04:25

our hie and an 11 point 6 volt potential

play04:28

to our ello due to the resistor ladder

play04:31

which acts like a voltage divider we now

play04:34

got 10 different voltage potentials at

play04:36

the comparator inputs and since we know

play04:39

that if the inverting input has a higher

play04:41

voltage than a non-inverting inputs the

play04:44

outputs will be pulled down to grounds

play04:46

meaning the LED on the output will light

play04:48

up it all starts to make sense as the

play04:52

battery voltage decreases it reaches the

play04:55

10 different resistor ladder voltage

play04:57

potentials turns the output higher and

play04:59

thus turns the LED off for demonstration

play05:03

purposes I built up the described

play05:05

circuits with a constant voltage source

play05:07

and upon a geometer as a signal inputs

play05:10

and as you can see when the battery

play05:13

voltage drops the LEDs turn off one

play05:16

after the other

play05:17

awesome you might think I will use that

play05:20

for my new battery pack well if you want

play05:23

a crude battery level indicator then go

play05:25

for it but for me there's still a

play05:27

problem since we got 10 LEDs you would

play05:31

think that each one represents 10% of

play05:34

energy in the battery pack but that is

play05:37

not true

play05:38

due to the resistor ladder of the ICEA

play05:40

with only 1 kilo ohm resistors we get a

play05:44

linear voltage decrease but if we would

play05:46

mark those points in the discharge curve

play05:48

of the battery then we can see here that

play05:51

it does not follow the actual line very

play05:53

well one solution for that is to

play05:56

decrease the voltage window so that we

play05:59

look at the mostly linear section of the

play06:02

discharge curve

play06:03

and while we edit we should also set the

play06:06

last LED to 12% energy which the

play06:09

capacity of 2.2 amp hours represents but

play06:14

for me even those changes are not enough

play06:16

so I came up with my own LED battery

play06:20

level indicator schematic it basically

play06:23

works the same way as the LM 391 for

play06:26

whippits comparators but I only use six

play06:29

LEDs no constant current methods source

play06:32

current instead of sinking it and can

play06:34

set the trigger voltage potential of

play06:36

each comparator stage manually through a

play06:38

trimmer and after I did a small

play06:41

proof-of-concept test on the breadboard

play06:43

I went ahead and sold out all the

play06:45

required components to piece of perf

play06:47

wards and connected them to one another

play06:50

according to the schematic to create the

play06:54

constant 20 volts for the power and the

play06:56

trigger voltages

play06:57

I also utilized a small boost converter

play07:00

module which I directly sold outs to the

play07:03

per port and after fine-tuning that it

play07:06

was time to adjust the trigger voltages

play07:09

for that I set my lowest capacity limits

play07:12

to 2.2 amp hours and the highest one to

play07:15

obviously zero and hours then I

play07:19

calculated for linear capacity steps

play07:21

between those two values and marked them

play07:24

in the discharge curve according to the

play07:27

point of intersection I took the reading

play07:29

for the different voltage levels and

play07:31

simply multiplied them by 4 to get the

play07:34

right trigger voltage for the six

play07:36

different binary states afterwards I

play07:39

simply tuned the trimmers to outputs the

play07:42

required voltage to the comparators

play07:44

inverting inputs and just like that this

play07:47

project was complete and as you can see

play07:50

by doing a test with my lab bench power

play07:52

supply it seems like everything works

play07:54

like anticipators of course if we use a

play07:58

different battery type you should also

play08:00

have a look at the discharge curve to

play08:02

set the correct voltage values in order

play08:05

to get a pretty accurate battery level

play08:07

indicator and with that being said I

play08:10

hope you enjoyed this video and learned

play08:13

something new along the way if so don't

play08:16

forget

play08:17

like share and subscribe stay creative

play08:20

and I will see you next time

Rate This

5.0 / 5 (0 votes)

الوسوم ذات الصلة
Battery PackLM3914LED IndicatorDIY ProjectBMS CircuitsVoltage TesterBattery ManagementLithium-ionResistor LadderCircuit DesignEnergy Gauge
هل تحتاج إلى تلخيص باللغة الإنجليزية؟