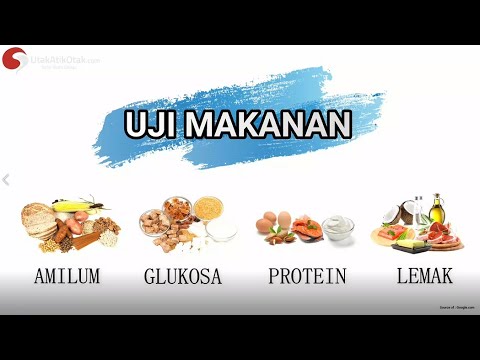
Uji Glukosa - uji menggunakan Fehling A dan Fehling B
Summary
TLDRIn this educational video, the host demonstrates a glucose test to determine the sugar content in everyday foods. Using ingredients like carrot juice, lemon, and tomato juice, along with sugar and milk, the process involves mixing these into solutions and applying a glucose indicator solution. After heating the mixtures, the presence of glucose is indicated by a red precipitate at the bottom of the reaction tubes. The experiment concludes with a comparison of the results, revealing which foods contain glucose and which do not, providing viewers with a hands-on method to explore the sugar content in their diets.
Takeaways
- 🔍 The video is about a glucose test to determine the sugar content in everyday foods.
- 📝 The required materials for the glucose test include carrots, lemons, tomatoes, sugar, and milk.
- 🔬 The materials are prepared as solutions: carrot, lemon, and tomato juices, sugar dissolved in water, and milk.
- 🧪 The equipment used includes a burner, a tripod, a reaction tube with a rack, a glass beaker, a dropper, and a wooden clamp.
- 🏷 The first step is to label the reaction tubes and place the prepared solutions into them.
- 🔴 The initial color of each solution is noted before the test, ranging from orange for carrot juice to red for tomato juice.
- 💧 The test involves heating water to a certain temperature and adding 10 ml of each solution to be tested.
- 📝 The Fehling solution A and B are used as indicators, with three drops of each added to the solutions.
- 🔑 After mixing the indicators, the solutions are shaken and the initial color changes are observed.
- 🔥 The solutions are then heated in a glass beaker with hot water for about 5 minutes to observe any color changes indicating the presence of glucose.
- 📊 The presence of glucose is confirmed by the formation of a red precipitate at the bottom of the reaction tube.
- 🍎 Among the tested substances, carrot juice, milk, sugar solution, and tomato juice showed the presence of glucose, while lemon water did not.
- 👨🏫 The video encourages viewers to try the test at home or in the laboratory when they return to school.
Q & A
What is the main purpose of the glucose test described in the script?
-The main purpose of the glucose test is to determine the glucose content in everyday foods.
What are the materials used in the glucose test according to the script?
-The materials used in the glucose test include carrot juice, lemon juice, tomato juice, sugar, and pure milk.
What are the tools required for the glucose test as mentioned in the script?
-The tools required for the glucose test include a burner, a tripod, a reaction tube with a rack, a glass beaker, a dropper for the indicator solution, and a wooden clamp.
How many types of indicator solutions are mentioned in the script for the glucose test?
-Three types of indicator solutions are mentioned: Fehling A, Fehling B, and Benedict solution.
What is the initial color of the carrot juice mentioned in the script?
-The initial color of the carrot juice is orange.
What is the initial color of the milk in the glucose test?
-The initial color of the milk is white.
What is the expected final color change for the glucose test if glucose is present?
-If glucose is present, the expected final color change is a red precipitate at the bottom of the reaction tube.
How long should the reaction tubes be heated in the glucose test?
-The reaction tubes should be heated for approximately 5 minutes.
What does the absence of a precipitate in the lemon water indicate in the glucose test?
-The absence of a precipitate in the lemon water indicates that it does not contain glucose.
Based on the script, which of the tested samples contain glucose?
-Based on the script, the samples that contain glucose are carrot juice, milk, sugar water, and tomato juice.
What is the conclusion of the glucose test as per the script?
-The conclusion of the glucose test is that carrot juice, milk, sugar water, and tomato juice contain glucose, while lemon water does not.
Outlines
🔬 Introduction and Materials for Glucose Test
The video begins with an introduction to the channel and the objective of the video, which is to test for glucose in everyday food items. The materials needed for the test include carrots, lemons, tomatoes, sugar, and fresh milk, which will be converted into solutions. Various laboratory equipment such as a spirit burner, test tubes, pipettes, and a beaker are also listed. The procedure starts by labeling the test tubes and preparing the solutions for testing.
🧪 Conducting the Glucose Test
The process of adding the prepared solutions to the test tubes is described, with an initial observation of their colors. Fehling's solution A and B are used as indicators, added to each sample in specific amounts. The samples are mixed and initial color changes are noted. The video emphasizes careful handling of the materials and highlights the importance of observing any color changes as an indication of glucose presence.
🔥 Heating the Samples and Observing Results
The samples are heated in a beaker with hot water for about five minutes to observe further reactions. After heating, each sample is examined for the presence of a reddish-brown precipitate at the bottom of the test tube, which indicates the presence of glucose. The video details the results for each sample, concluding that carrot juice, milk, sugar solution, and tomato juice contain glucose, while lemon juice does not. The video ends with an encouragement to viewers to try the test themselves at home or in their school labs.
Mindmap
Keywords
💡Glucose Test
💡Fehling's Solution
💡Indicator
💡Food Samples
💡Spirit Burner
💡Color Change
💡Precipitate
💡Heating Process
💡Reducing Sugars
💡Laboratory Equipment
Highlights
Introduction to the glucose test to determine the glucose content in everyday foods.
List of materials used in the glucose test including carrots, lemons, tomatoes, sugar, and milk.
Preparation of the materials in liquid form for the test.
Use of a spirit burner, tripod, and other laboratory equipment for the glucose test.
Labeling of the reaction tubes and placing the liquid materials inside.
Initial observation of the color of each liquid material before the test.
Use of Fehling's solution as an indicator for the presence of glucose.
Adding three drops of Fehling A solution to each sample.
Subsequent addition of three drops of Fehling B solution to each sample.
Observation of color changes in the samples after the addition of Fehling's solution.
Comparison of the initial and post-addition color of the samples.
Heating the samples in a glass beaker with hot water to observe glucose presence.
Expectation of a red precipitate indicating the presence of glucose.
Five-minute heating process to allow for glucose detection.
Analysis of the results after heating, identifying the presence of glucose in certain samples.
Conclusion that carrot juice, milk, sugar water, and tomato juice contain glucose, while lemon water does not.
Encouragement for viewers to try the glucose test themselves or in a school laboratory.
Transcripts
[Musik]
nyentuh
tertutup
Halo biologi er ketemu lagi di channel
biologi Asyik kali ini kita akan mencoba
untuk uji glukosa
tujuannya mengetahui kandungan Glukosa
yang ada dalam makanan kita sehari-hari
mari kita lihat alat dan bahan apa yang
diperlukan
bahan-bahan yang digunakan dalam uji
glukosa adalah
wortel jeruk lemon tomat gula dan susu
murni
masing-masing bahan ini akan dibuat
dalam bentuk larutan maka wortel jeruk
lemon dan tomat akan diambil Sarinya
sedangkan gula akan dilarutkan dalam air
Kalian juga bisa mencoba bahan-bahan
lain yang mungkin dan temukan di rumahmu
dan menjadi persediaan bahan makanan di
rumahmu
alat alat yang kita gunakan dalam uji
glukosa ini antara lain pembakar
Spiritus lengkap dengan Spiritus nya
kemudian Kaki Tiga dan cassa
Lalu ada tabung reaksi beserta raknya
kemudian kita akan menggunakan satu buah
beker gelas lalu pipet tetes untuk
mengambil larutan indikator dan penjepit
kayu untuk nanti kita mengambil tabung
reaksi dari pemanasan
Iya setelah kita tahu alat dan bahannya
Dan ini juga didepan saya sudah ada alat
dan bahan yang akan kita gunakan untuk
uji glukosa kita akan yang pertama
memberi label pada tabung reaksi nya
lalu meletakkan bahan-bahan yang sudah
kita larutkan ini kedalam tabung reaksi
warga kita mulai
ya sekarang kita sudah meletakkan bahan
makanan yang sudah dalam bentuk larutan
seperti yang ada di depan saya ini kita
sudah punya 5 yaitu Sari wortel kemudian
susu lalu air lemon air gula dengan Sari
tomat kita akan mulai uji dengan larutan
indikatornya
sebelumnya kita sudah Panaskan dulu air
disini saya meletakkan 100 ml air dan
kita Panaskan dengan pembakar Spiritus
untuk tahap berikutnya Ya baik kita
kembali ke tabung reaksi disini saya
sudah meletakkan masing-masing 10 mili
larutan dari bahan yang akan kita uji
dan kita akan catat dulu warna awalnya
Sari wortel berwarna orange kemudian
susu berwarna putih lalu
air lemon berwarna keruh ya cream keruh
begitu kemudian air gula bening lalu
yang terakhir adalah Sari tomat berwarna
merah nah disini saya sengaja
menggunakan dua set untuk sebagai
pembanding warna awalnya baik sekarang
kita akan meneteskan larutan indikator
kita akan menggunakan feeling
Advertising B selain fehling a dan
fehling b Ade larutan Benedict yang juga
bisa digunakan sebagai larutan indikator
masing-masing bahannya akan kita tetesi
sebanyak tiga tetes Jadi yang pertama
kita akan tetesi feeling A3 tetes untuk
setiap bahan
23
kemudian susu
kita tetesi juga
lalu di sini ada air lemon
Hai
kemudian air gula
dan yang terakhir adalah Sari tomat
tersebut
Oh ya
Setelah itu kita tambahkan
larutan fehling B sebanyak tiga tetes
juga
[Musik]
123
begitu juga untuk sampel bahan makanan
yang lain
223
yang terakhir adalah Sari tomat tersebut
hai
oke
jelas isikan kemudian kita bisa
goyang-goyangkan sebentar Nah di sini
ada perubahan warna tapi ini bukan
perubahan warna akhir yang akan kita
catat kita bisa bandingkan ya di sini
adalah Warna sari wortel sebelum dan
sesudah ditetesi dengan fehling begitu
juga dengan susu
nah tampak di sini ada
warna yang berbeda kita goyang-goyangkan
sebentar Nah agar tercampur tampak
bedanya ya lalu ini Adella air lemon di
sebelah kanan ini adalah Air lemon yang
sudah dicampur dengan feeling a dan b
yang sebelah kiri sebelumnya kemudian
disini adalah air gula nah air gulanya
tampak biru ya karena sudah diberi
feeling a dan b dan yang terakhir adalah
Sari tomat Hai Sari tomat ini yang sudah
diberi saling add n b dan ini yang belum
yang sebelah kiri oke kita catat dulu
warnanya
eh sesuai dengan yang kita lihat Sari
wortel
hijau orange kehijauan begitu ya
kemudian susu ada timbul sedikit warna
ungu putih keunguan ini tosca ya bisa
kita bilang hijau tosca air lemon
kemudian air gula menjadi warna biru
lalu Sari
tomat ini menjadi agak kehitaman Ya baik
setelah ini akan kita Panaskan di beker
glass yang sudah ada air mendidih air
panas lebih tepatnya ya bukan air
mendidih
kita akan masukkan di sini ya satu
persatu gunakan dengan penjepit kayu
dipilih kayu supaya tidak menghantarkan
panas ya karena kayu adalah isolator
masukkan perlahan
hati-hati karena di sini air panas ya
Anda bisa menjepit hanya di bagian
mulutnya saja mulut dari
tabung reaksi
oke
nah usahakan semua terendam
begitu
agar bisa dipanaskan
[Musik]
seperti ini
kita akan Panaskan kurang lebih 5menit
ya kita akan Panaskan kurang lebih lima
menit lalu nanti kita akan lihat
perubahannya ada atau tidaknya glukosa
ditandai dengan ada atau tidaknya
endapan yang berwarna merah bata di
bawah atau di dasar tabung reaksi
kita tunggu 5 menit kali
pemanasan sudah kita lakukan dan Sudah
lima menit berlalu mari kita lihat
hasilnya kita
ambil
satu per satu untuk kita pindahkan dulu
ini tadi adalah Sari wortel ya kita
Letakkan di sini kemudian
susu kita Letakkan dulu di tabung reaksi
lalu yang ketiga kita ambil adalah air
lemon
transplant
[Musik]
Oke kemudian di sini ada air gula
berikutnya
[Musik]
yang akan kita ambil disini
Hai
[Musik]
dan terakhir Adella Sari tomat tersebut
[Musik]
cepetan
Jangan lupa matikan pembakar Spiritus
nya
Hai Nah kita bisa geser keluar dan kita
tutup untuk airnya kita diamkan saja
dulu nanti sampai tinggal lebih dingin
baik sekarang kita akan Bandingkan kita
akan Bandingkan
kita lihat apakah di situ ada andapan
merah bata di dasarnya jika ada maka dia
mengandung glukosa kita lihat ini adalah
Sari wortel ya Sari wortel ada sedikit
di hadapan ya Nah disini terlihat adanya
endapan merah bata begitu ya Berarti dia
mengandung glukosa berikutnya kita lihat
susu-susu
pelan-pelan kita akan lihat tabung
reaksi nya Nah disini
ini ada endapan ya dan warnanya seperti
ini kecoklatan begini ya merah bata
berarti dia juga ada
glukosanya
berikutnya yang kita lihat adalah
eh air lemod ke ini adalah Air lemon Hai
er lemon disini 3D endapan sama sekali
berarti dia tidak mengandung glukosa
lalu yang berikutnya adalah air gula
Oke air gula di sini ada endapannya ya
Nah endapan ini kurang merah bata begitu
nah bisa jadi ada glukosanya namun tidak
banyak he dan yang terakhir kita lihat
adalah is Sari tomat
kita lihat Ops nah Sari tomat di sini
ada sedikit dapat kelihatannya di sini
ya Oke ini ada endapan jadi disini dia
juga mengandung glukosa maka dari kelima
bahan yang Kita uji yaitu
Sari wortel susu air lemon air gula dan
Sari tomat kita simpulkan yang
mengandung glukosa adalah
Sari wortel susu Hai air gula dan air
tomat sedangkan air lemon tidak
mengandung glukosa begitu caranya kita
bisa mengetahui ada tidaknya kandungan
glukosa dalam bahan makanan kita
sehari-hari
Kalian juga bisa mencoba sendiri atau
nanti ketika kembali ke sekolah bisa
mencoba di laboratorium kita di
laboratorium masing-masing demikian
video kita hari ini sampai ketemu di
video-video berikut ya
[Musik]
浏览更多相关视频
Fruit Juice: DEBUNKED! Stop Being Hypnotized | Episode 12 of 18
COFFEE & its Consequences: 3 science tips you need to know | Episode 7 of 18
Reality of Fruit Juices | Court Case Against Me | Dhruv Rathee
What exactly is in Red Bull?
Contagem de Carboidratos - SBD
Sugar CRAVINGS: 3 reasons you have them and the proven science to destroy them | Episode 1 of 18
5.0 / 5 (0 votes)