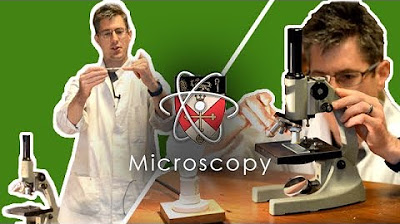
How to Use a Microscope | STEM
Summary
TLDRProfessor Murry Gans introduces viewers to the non-majors biology lab at Eastfield College, focusing on the proper use of a light microscope. The tutorial covers microscope parts, including eyepieces and objective lenses, and their magnification capabilities. It demonstrates how to prepare a wet mount slide, adjust lighting, and focus the microscope, emphasizing the importance of starting with low power and gradually increasing magnification for clarity. The video also highlights the need for proper microscope care and preparation for lab classes.
Takeaways
- 🔬 Professor Murry Gans introduces a non-majors biology lab at Eastfield College, focusing on the use of a light microscope.
- 📚 The lab aims to familiarize students with microscope operation before attending the lab in person.
- 🔍 Microscopes use a series of lenses to magnify objects, with the potential to magnify up to 400 times using multiple lenses.
- 👀 The microscope has eyepieces (oculars) that magnify 10x and objective lenses with varying magnification powers: 4x, 10x, and 40x.
- 💡 The microscope has three light adjustments: a power switch, a diaphragm to control light intensity, and a dimmer switch.
- 📌 The mechanical stage on the microscope stage holds the slide and allows for movement to position the specimen.
- 🔭 To use the microscope, start with the low power objective for a larger field of view, then proceed to medium and high power as needed.
- 🔧 There are two focusing knobs: the coarse focus for larger adjustments and the fine focus for precise focusing.
- 🧼 Before using the microscope, clean the lenses with lens paper to ensure clear viewing.
- 🌡️ For wet mount slides, place the specimen on a slide, add a drop of water, and carefully place a cover slip to minimize air bubbles.
- 📈 When adjusting the microscope, center the specimen at each magnification level before increasing to a higher power.
- 🧼 After use, properly clean and store the microscope, including removing and disposing of the cover slip and returning the slide to its box.
Q & A
Where is the non-majors biology lab located?
-The non-majors biology lab is located at Eastfield College in Mesquite, Texas.
What is the primary focus of the video?
-The primary focus of the video is to demonstrate how to use a light microscope for lab purposes.
How should you carry a microscope to your table?
-You should grab the microscope by the handle on the arm and support it with your other hand under the base, holding it close to your body as you carry it to your table.
What is the magnification power of the eyepieces or oculars?
-The eyepieces or oculars magnify the specimen 10 times.
What are the different magnification powers of the objective lenses?
-The objective lenses have different magnification powers: the short one is 4x, the next one is 10x, and the next one is 40x.
How can you control the amount of light that reaches the specimen?
-You can control the amount of light that reaches the specimen by adjusting the diaphragm, which is a ring mounted under the microscope.
What is the purpose of the mechanical stage on the microscope?
-The mechanical stage is used to hold the slide and allows you to move it around for better observation.
How do you properly clean the lenses of the microscope?
-You should use lens paper to clean each of the eyepieces and objective lenses by tearing a sheet from the booklet, wadding it up, and wiping the lenses.
What is a wet mount slide and how is it made?
-A wet mount slide is a technique used in biology to mount specimens in water. It is made by placing a specimen on a slide, adding a drop of water, and then carefully placing a cover slip over it to avoid air bubbles.
What is the correct order of magnification when using the microscope?
-The correct order of magnification when using the microscope is to start with low power, then move to medium power, and finally to high power.
How should you store the microscope after use?
-After use, you should remove the slide, clean the slide if necessary, turn off and unplug the microscope, wrap the cord, cover it with the microscope cover, and carry it back to the cabinet by the arm and supporting the base.
Outlines
🔬 Introduction to Using a Light Microscope
Professor Murry Gans introduces a non-majors biology lab at Eastfield College, focusing on the use of a light microscope. He demonstrates how to retrieve a microscope from storage and carry it properly. The video explains the purpose of the microscope's lenses and their magnification capabilities, highlighting the eyepieces (10x magnification) and objective lenses (4x, 10x, and 40x). The professor also covers the microscope's lighting adjustments, including the power switch, diaphragm for light intensity control, and a dimmer switch. The mechanical stage for holding and moving slides is introduced, along with the process of preparing a wet mount slide. The video emphasizes the importance of starting with low power for initial viewing and adjusting the light and focus for optimal image clarity.
📚 Advanced Microscope Usage and Lab Preparation
This segment continues with the use of a high-power objective lens, noting the short focal length and the need for careful alignment to avoid contact with the slide. The professor advises on the importance of centering the specimen before increasing magnification and demonstrates the fine focus adjustments needed at high power. The video also touches on the importance of proper microscope storage and care, including removing and disposing of slides correctly, turning off and unplugging the microscope, and safely returning it to storage. The summary concludes with advice on college success, emphasizing the value of preparation through reading and understanding lab procedures before attending lab sessions.
Mindmap
Keywords
💡Microscope
💡Magnification
💡Eyepieces (Oculars)
💡Objective Lenses
💡Revolving Nosepiece
💡Diaphragm
💡Mechanical Stage
💡Coarse Focus Knob
💡Fine Focus Knob
💡Wet Mount Slide
💡Field of View
Highlights
Introduction to using a light microscope in a non-majors biology lab at Eastfield College.
Proper handling and transportation of a microscope from the storage cabinet to the lab table.
Explanation of the microscope's function to magnify objects using a series of lenses.
Description of the eyepieces (oculars) that magnify the specimen by 10 times.
Identification of the objective lenses: 4x, 10x, and 40x, and their roles in magnification.
Demonstration of how to adjust the light on the microscope using the power switch, diaphragm, and dimmer switch.
Instructions on how to place a slide onto the mechanical stage of the microscope.
Technique for moving the slide using the mechanical stage's knobs for precise positioning.
Focusing the image using the coarse and fine focus knobs for initial and detailed focus.
Adjustment of eyepieces to ensure a single, clear image is formed.
Cleaning the microscope lenses with lens paper to maintain optimal performance.
Preparation of a wet mount slide using a microscope slide, forceps, water, and a cover slip.
Method to avoid air bubbles when creating a wet mount slide.
Starting with low power to find the specimen before moving to medium and high power.
Technique for adjusting the light and focusing at each magnification level.
Importance of centering the specimen before increasing magnification to ensure visibility.
Proper storage and handling of the microscope after use, including cleaning and covering.
Review of the key learnings from the video, including microscope parts, setup, and usage.
Advice on being prepared for college classes by reading chapters and lab procedures beforehand.
Transcripts
Hello I'm Professor Murry Gans and I would like to welcome you to the non majors
biology lab here at Eastfield College in Mesquite, Texas
What we're going to do today is show you how to use the light microscope.
That way you'll know exactly what to do before you come to lab.
So what do you say? Let's get Started.
When you need a microscope for a lab they're stored in this cabinet.
Grab the microscope with the handle on the arm. Support it with your other hand
under the base. Hold it close to your body and take it to your table.
Before we talk about the parts of the microscope
let's talk about what the microscope is going to do.
The microscope uses a series of lenses that magnify an object.
Now this hands lens will magnify up to 20 to 30 times.
We want the microscope to magnify up to 400 times for us.
To do that it's going to use a more than one lens. A series of lenses. Let's take a look.
At the top of the microscope are the eyepieces or Oculars.
These magnify our specimen 10 times.
The second set of lenses are down here. These are the objective lenses.
The short one is the 4x lens.
The next one is the 10x lens, or medium power.
And the next one is the 40x lens or high power.
They're mounted on the revolving nosepiece which let's you change them easily.
There are 3 different adjustments for the light on this microscope.
You have the power switch here. Which turns the light on.
We also have a ring mounted under here which is called the Diaghragm.
By moving the ring of the diaphragm, I can control the amount of light that reaches the specimen.
I can control it all the way from very bright to very dim.
The third light adjustment is right here. Just a regular dimmer switch.
This part of the microscope is called the Stage.
and on it is a mechanical stage. This is what's going to hold the slide
and let us move it around.
To put a slide on the microscope, simply pull this arm back.
Slide the slide into the angle and let go of the arm.
We're going to move the slide around by moving these 2 knobs.
This knob moves the slide up and down.
This knob moves the slide left and right.
To focus the image in our microscope, there are 2 focusing knobs.
The one on the outside is called the coarse focus knob.
The one on the inside is called the fine focus knob.
You'll notice that when I use the coarse focus knob, the stage moves a lot.
When I turn the fine focus knob, it moves in very small increments.
The eyepieces are adjustable.
So when you look through the microscope you want to adjust them so that they
only form a single image.
Before you use your microscope, you want to clean all the lenses.
So we're going to use a little bit of lens paper.
So just take one sheet of this. Tear it out of the booklet.
You're going to wad it up. You're going to use that sheet to clean each of the eyepieces.
And you also want to clean each of the objective lenses.
Just wipe them down a little bit.
I also like to go ahead and clean the top of the diaphragm.
In biology we often mount things in water.
We use a technique called a wet mount slide.
So here's my microscope slide.
And for a specimen, we've cut a piece of paper out
with the printed word slide on it. So I'm going to use my forceps and put that on my slide.
We're going to use a little bit of water.
We're going to add a drop of water to our specimen. Whatever it is.
Then I'm going to use some cover slips.
You want to only use one cover slip. They're very very thin. Here's your cover slip.
Now the trick to make a good slide is to not have air bubbles.
So if you'll take your cover slip and move it toward the water, then when the water spreads
out like that, just drop the cover slip.
And that way you get a very nice slide with very few air bubbles.
When getting ready to focus the image on the microscope
we're going to start off with low power.
We start with the lower power objective because it has the largest field of view.
What that means is we're going to see more so you can find what you're looking for.
It's really important especially if it's a really small specimen.
First thing we're going to do with this on low power
is bring the stage all the way up. It will stop.
Then I'm going to look through the eyepieces and I'm going to turn the coarse adjustment
knob away from me.
Until I get my image into focus.
Then I'm going to use the fine adjustment knob to really get that sharp focus.
Now it's a good point now to use the diaphragm to adjust the light.
Sometimes turning the light down just a little bit will let you see a lot more details.
At this point, what we want to do is center the specimen.
and then go to medium power.
To go to medium power I'm simply going to click the medium power lens into place.
So with medium power, I'm going to look through the eyepiece.
I'm going to use my coarse adjustment
a little bit. Fine focus again and don't forget use your diaphragm.
to get those good details.
And now I'm going to use the mechanical stage and I'm going to center again.
At this point, I'm ready to go to high power.
Now the focal length, the distance between the lens and the slide
is very short with high power. In fact, you're going to think you're going to hit the slide
so you're going to watch from the side and it should click into place.
If you focus on low power and medium power, the high power
objective should actually clear the slide just fine.
Here I'm going to probably just use my fine focus
to get a nice image. I'm going to look around a little bit. And don't forget, adjust your light.
Play with the dimmer. Play with the diaghragm to get the image that you want to see.
You'll notice that I keep saying focus and center
It's important that you center the specimen before you increase the magnification.
Imagine that I'm the specimen. On low power you might see this much of me
but on high power you might see the area the size of my shirt button.
And if I'm like this and we're a little bit off center when you go into high power you might
be focusing right there. In which case you'll see absolutely nothing.
When you're through with your microscope, you want to put it away properly.
First of all, don't forget to take off your slide. The cover slip is disposable.
your instructor will tell you where to put that. The slide should be washed and returned to the
slide box. Turn the light off on the scope.
Unplug the scope. Now you're going to wrap the cord up. Unplug the scope
and wrap it up.
Cover your scope again with the microscope cover.
And you're going to carry it back to the cabinet.
Remember, grab by the arm and support by the base.
Be aware that if the light's been on, the base might be a little warm
so you can cup your hands so you don't get burned.
Let's review what you should've learned from this video. You should know the parts
of the microscope. You should know how to carry the microscope. How to set it up.
How to make a wet mount slide and how to get that image in focus.
Remember you always want to go from low power to medium power to high power.
You should also know the magnification of all the lenses, the eye piece and all 3 objectives.
The nice thing about videos like this, is if you miss something just watch it again.
The nice thing about videos like this is if you miss something, just watch it again.
To be successful in college, it is important to come to class prepared.
Be sure to read the chapter before coming to lecture.
And definitely read the lab procedure before you come to lab.
It will make all the difference in how much you get out of your classes.
For now this is Murry Gans at Eastfield College in the biology lab. See you next time.
浏览更多相关视频
5.0 / 5 (0 votes)