Glazing Possibilities- 28 Different Approaches to Glazing Pottery!
Summary
TLDRThis instructional video from a ceramics studio at Mason High School in Ohio offers an in-depth look at 28 diverse glazing techniques for pottery. The host demonstrates methods like dip glazing, brush application, wax resist, and texture application, catering to students preparing to glaze their pieces. The video also includes preparation tips, glaze selection guidance, and a follow-up showcasing fired pieces, providing a comprehensive resource for ceramic artists of all levels.
Takeaways
- π¨ The video demonstrates 28 different pottery glazing techniques for wheel-thrown pots.
- π« It is intended for the instructor's ceramics students at Mason High School in Ohio, who will be glazing their pieces soon.
- π The video description contains a link to a Google Slide document showing fired pieces and a follow-up video for the final results.
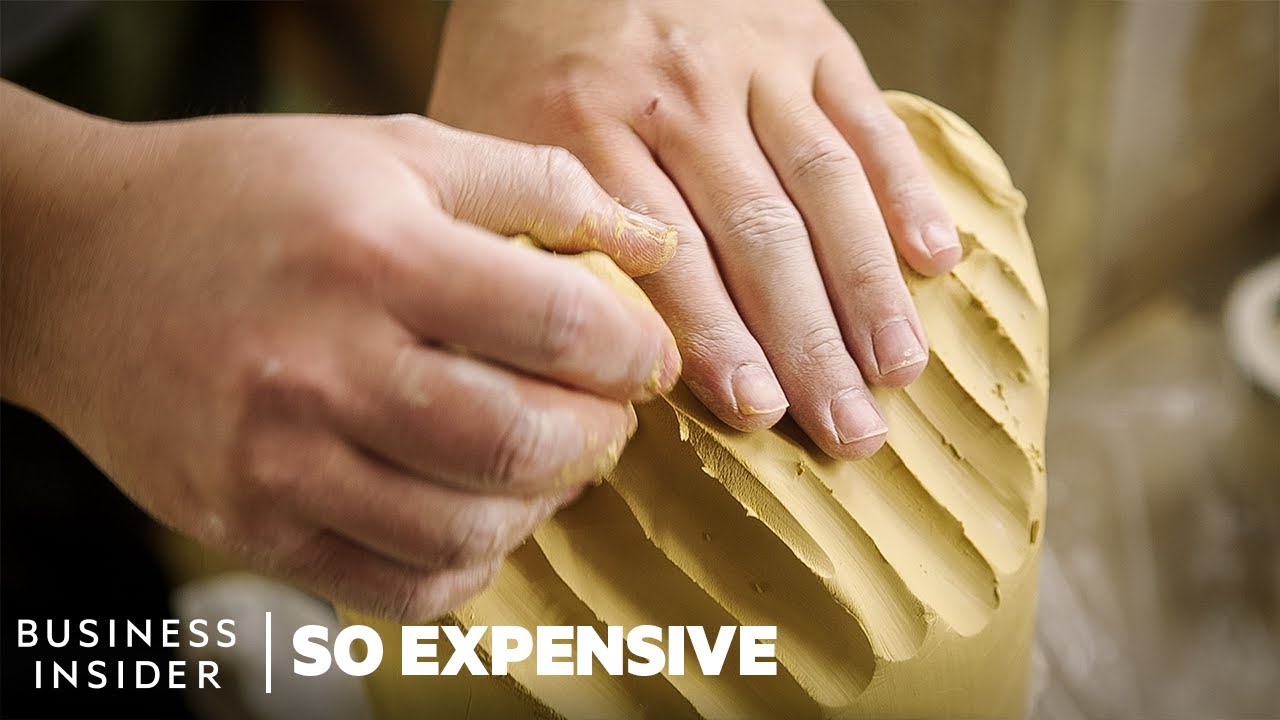
- π οΈ The process begins with surface preparation, including filing off sharp edges and cleaning with abrasive stones.
- π§ Rinsing the pieces under running water is crucial to remove dust and fingerprints before glazing.
- π A pencil line is used to mark the foot of the pot for even wax application, which prevents wax transfer between stacked pots.
- π¨ Glaze selection is important, with labels indicating compatibility and application instructions.
- π₯ Tools such as a whisk, measuring cup, and plastic tray are necessary for mixing and applying glazes.
- π½οΈ Glazing methods include dipping, brushing, pouring, wax resist, tape resist, and using texture to create effects.
- ποΈ Detail painting with glazes is showcased, as well as the use of underglaze and carving for intricate designs.
- π Special techniques like Shino, celadon, luster, mishima, and graffito are explained for unique glaze effects.
- π A kiln ticket is filled out to record glaze details, ensuring proper firing and identification of the student's work.
Q & A
What is the main purpose of the video?
-The main purpose of the video is to demonstrate a comprehensive approach to glazing pottery, showcasing 28 different techniques for students to learn and consider for their own projects.
Why is it important to file off sharp edges before glazing?
-It is important to file off sharp edges before glazing because any sharpness will be intensified after glazing, which could lead to injury or damage.
What is the significance of the pencil line on the pottery during the waxing process?
-The pencil line on the pottery serves as a guide for waxing, ensuring that the wax is applied consistently about an eighth of an inch up from the base on both the inside and outside of the pot.
How does one prevent wax transfer when stacking glazed pots?
-To prevent wax transfer when stacking glazed pots, one should place a piece of paper towel between each pot to avoid inadvertently transferring a wax ring to the pot underneath.
What does the shelf tag indicate in the context of selecting glazes?
-The shelf tag indicates the cart location where the glazes can be found and also matches the color on the lid to help identify the correct glaze.
Why is it crucial not to get clay debris into the glazes?
-It is crucial not to get clay debris into the glazes because it can affect the glaze's consistency and final appearance on the pottery.
What is the first method demonstrated for applying glaze using solid color?
-The first method demonstrated for applying solid color glaze is dipping the pot using tongs, grasping it firmly on the inside and outside, then dipping it into the glaze, turning it upside down, and shaking off the excess vigorously.
How many coats of glaze are recommended when brushing on the inside and outside of a pot?
-It is recommended to apply three coats of glaze with a fluffy brush on both the inside and outside of the pot for even coverage.
What is the purpose of using a sponge when pouring glaze on the exterior of a pot?
-The purpose of using a sponge when pouring glaze on the exterior of a pot is to tidy up any uneven areas where the glaze might have pooled or dripped.
How does the wax resist technique affect the glaze on the pottery?
-The wax resist technique causes the glaze to bead up where the wax is applied, creating a unique texture and pattern once the wax is removed after the glaze has dried.
What is the Texas Two-Step glazing technique mentioned in the script?
-The Texas Two-Step is a glazing technique that involves applying an undercoat followed by an overcoat. The undercoat consists of multiple layers, and the overcoat is applied in a similar manner, creating a distinctive spotted or textured appearance.
Outlines
π¨ Introduction to Pottery Glazing Techniques
The video script introduces a comprehensive guide on pottery glazing techniques, featuring 28 different examples. The instructor, based at Mason High School in Ohio, presents various methods such as dip pore, brush, scruffito, and mishima. The video is tailored for students in the ceramics class who will be glazing their pieces soon. The instructor emphasizes the importance of surface preparation, including filing sharp edges and cleaning with an abrasive stone. A Google Slide document and a follow-up video showcasing fired pieces are mentioned for further reference.
ποΈ Glazing Preparation and Application Basics
This section details the initial steps of glazing, including rinsing pottery pieces to remove dust and fingerprints, allowing them to dry, and preparing them for waxing. The use of a pencil line as a guide for wax application is highlighted, along with the importance of not stacking glazed pieces directly on top of each other to avoid wax transfer. The process of selecting glazes based on shelf tags and labels is discussed, as well as the tools needed for glazing, such as a plastic tray, whisk, measuring cup, and towel. The script also covers the preparation of glazes using a whisk or electric mixer and the method of dipping pottery in glaze using tongs.
π οΈ Advanced Glazing Techniques and Clean-up
The script moves on to advanced glazing techniques, including solid color application by holding the edge of the pottery, brushing methods with a focus on using a fluffy brush for even coverage, and pouring glaze inside and outside the pottery. The importance of stirring glaze between dips and cleaning the jars properly is emphasized. The video also demonstrates overlapping glaze application, wax resist over glaze, and tape resist methods. The clean-up process after each technique is described, including the use of a needle tool for removing tape and the handling of dry glaze during the process.
πΊ Specialized Glazing Methods and Textures
This part of the script explores specialized glazing methods such as dipping in low buckets, double dipping rims with specific glaze series, and blending layers to create overlapping effects. The use of texture in glazing is introduced, with techniques like applying glaze to textured pottery and using underglaze with carving. The script also covers the use of a bulb syringe for detailed glazing, the process of cleaning the syringe, and the application of glaze over carved designs with underglaze and transparent glaze effects.
π Color Layering and Shino Glaze Family
The script describes the process of layering full colors of glaze, such as violet and sapphire, to create depth and visual interest. It also covers the use of texture glazes like root beer and celadon, emphasizing the need for fewer coats on textured surfaces. The Shino family of glazes is introduced, highlighting the effects of using black as a base layer and then applying a Shino glaze over it. The script also touches on the use of slip trailing with underglaze on bisque-fired pottery to accent existing designs.
π·ββοΈ Safety and Technique in Luster Glazing and Mishima
The script discusses safety precautions and techniques for applying luster glaze, including wearing gloves and ensuring good ventilation. It then explains the Mishima technique, which involves carving into leather-hard clay and filling the carvings with black slip. After the slip dries, it is scraped off to leave an even surface. The script also covers the use of transparent glazes like sapphire over the Mishima work to maintain the visibility of the design.
π¨ Detail Painting and Graffito Technique
This section focuses on detail painting with glaze on both satin and glossy pottery, comparing the effects of using underglaze on different surfaces. The script then introduces the graffito technique, which involves applying multiple layers of underglaze to greenware and carving designs into it once dry. The process of bisque-firing the pottery and then dipping it in clear glaze is described, along with a unique approach of applying additional glaze to the inside of a piece post-firing.
π΅οΈ Final Glaze Application and Pottery Preparation for Firing
The final part of the script details the process of applying the final coats of glaze, including the Texas Two Steps technique, which requires multiple coats of both undercoat and overcoat. The importance of allowing each coat to dry thoroughly is emphasized, suggesting the use of a hairdryer to speed up the process. The script concludes with instructions for cleaning the pottery base, preparing a kiln ticket with all necessary glaze information, and placing the pottery on a patty for firing. The need for thin, tortilla-like patties that dry quickly is highlighted, along with the reminder to check for advice and view the next video showing the fired pieces.
Mindmap
Keywords
π‘Glazing
π‘Dip Poring
π‘Brush Scruffito
π‘Mishima
π‘Wax Resist
π‘Tape Resist
π‘Texture
π‘Underglaze
π‘Luster Glazing
π‘Graffito
π‘Texas Two-Step
Highlights
Introduction to a comprehensive approach to glazing techniques with 28 examples.
Use of various techniques like dip pore, brush, scruffito, and mishama in pottery.
Preparation of pottery surface for glazing by filing and cleaning to avoid sharp edges post-glazing.
Rinsing pottery to remove dust and fingerprints before drying for glazing.
Technique of waxing the pottery foot to prevent glaze transfer during stacking.
Importance of selecting the right glaze and understanding the labels for successful pottery glazing.
Instructions on preparing glaze with a whisk for a smooth application.
Demonstration of dipping pottery in glaze using tongs for a solid color effect.
Technique of holding the pottery edge for a full coverage glaze, excluding the area touched by fingers.
Brushing glaze onto pottery with a focus on using a fluffy brush for even application.
Pouring glaze technique for both interior and exterior of pottery with attention to drip control.
Glazing with wax resist to create unique designs on pottery.
Using tape resist over bare clay before dipping in glaze for a distinct pattern.
Dipping pottery in low buckets by tilting for access to deeper glaze.
Double dipping rims with specific glaze series for a particular aesthetic effect.
Creating blended layers with overlapping colors for a gradient effect on pottery.
Organic pouring technique to mimic natural landscapes on pottery surfaces.
Layering full colors on pottery with attention to sponge wiping the bottom to prevent running.
Dipping pottery with texture and using contrast glazes for emphasis.
Combining solid glaze with underglaze and carving for a detailed pottery design.
Using a bulb syringe for detailed glazing and the importance of cleaning it properly.
Outlining and painting pottery with glaze for detailed areas after using the bulb syringe.
Shino family glazes with black as a base for unique effects when combined with chinos.
Slip trailing on bisque-fired pottery to accent existing designs with underglaze.
Luster glazing as an overglaze technique with safety precautions like wearing gloves.
Mishima technique involving carving and filling with black slip followed by transparent glaze application.
Detail painting on pottery with glaze for a refined look.
Graffito technique applied during the greenware stage with multiple layers of glaze and carving.
Texas two-step glazing process involving undercoats and overcoats for a distinctive finish.
Final cleaning of pottery foot and ensuring glaze is wiped an eighth of an inch from the bottom.
Preparing kiln tickets with detailed information about the glazing process for future reference.
Instruction on making a tortilla-thin patty for pottery and its importance for successful firing.
Placing pottery on a patty and wear board before putting it in the drying cabinet.
Anticipatory guidance to check the next video for fired pottery outcomes.
Transcripts
[Music]
[Music]
[Music]
hi everyone welcome to my classroom
studio here
at mason high school in mason ohio this
video is going to be
a video that i'm trying to show a bunch
of different techniques
a comprehensive kind of approach to
different ways that you can glaze a pot
in fact i'm going to show 28 different
examples
in this video i have 28 wheel thrown
pots and i'm trying to show
a wide variety of techniques things that
cover things like
dip pore brush scruffito mishama
all sorts of things overlapping just
experimenting with some
different techniques that some of my
students might want to use
i've made this video actually for my
ceramics three kids
who will be glazing their pieces later
this week and next week
we have a remote learning day on
wednesday of this week so they're going
to be watching this at home
so they have a better idea of what to do
when they return to school later in the
week
so also check in the video description i
will be having a link
to a google slide document which will
show
uh the fire finished fired pieces
also i will have a follow-up video that
shows the finished fired pieces
so do check that out and i'll have links
to timestamps of the different
techniques in the video description as
well so
good luck shoot me any comments below
that you might have and don't
forget to subscribe if you want to learn
more about clay
so we always start off by prepping the
surface by filing off anything that
might be
sharp and just cleaning it off with one
of the abrasive steel stones that i keep
up front your signature or if you've
carved it's very important if you maybe
you slip trailed
you can just get anything sharp off
before you glaze because
if it's sharp now it will be way sharper
after you have glazed it so file that
down
first then you're going to rinse your
pieces
under running water you want to make
sure that it's rinsed really well to get
any of the dust off
if you've had dirty fingerprints you
want to get that off and you can set it
aside to dry for a couple hours or even
a day
next you're going to prep it for
possible waxing
remember to lay a pencil flat on the
table and rotate the pot
and that will give you a line an eighth
of an inch up away from the table
you will want to do that inside and
outside and then you can
wax now you want to condition or
moisten your wax brush before you use it
that'll make sure it's clean and it'll
allow the wax to flow off of it a little
bit more easily
if you've made the pencil line you can
use that reference
as a guide for when you wax remember it
should be up
an eighth of an inch on the inside and
the outside
of the foot now don't stack them
together instead of direct stacking them
make sure that you
put a piece of paper towel in between
them so you don't transfer
a wax ring inadvertently to the one
that's underneath
selecting a glaze is very important
remember that
the shelf tags indicate the cart and it
also says on the label where you would
find
those glazes and they also are color
coordinated on the lid to match that
shelf tag if you see something that has
like the dashed lines
like these four are part of the archie's
base series
pay attention to the stop signs it's
telling you important information
such as don't put it all over the
outside of a pot or it will run like
crazy
you will see indicators if things are
good with texture
or maybe in the case of the texas two
coats
and i also have some other glazes as
well besides the coyotes
now when your glazing you will often
need a plastic tray
a whisk which is in the wisk drawer near
where the trays are
you will also probably need to get a
measuring cup and a towel so if you're
going to work at the buckets you will
need all these things now when you take
the lid off the buckets there's
sometimes debris on there so be very
careful not to dump that
clay dust into the glazes or you could
say
take your orange towel and wipe that off
just don't get the clay debris in the
glazes
now you're going to take your whisk and
very vigorously whisk
up that glaze it takes a good deal of
effort when the glazes have been sitting
for a while to get it nice and smooth
you might also need tongs for what i'm
going to show you here
this first method of dipping in a solid
color is going to be using the tongs
grasping it firmly on the inside and the
outside
you dip it turn it upside down and
shake it off vigorously you can even
kind of like tap it against the side of
the bucket
you keep shaking upside down until it
stops dripping
it might take you a minute or two the
next method
is also a solid color but this time i'm
holding the edge
so if you hold the edge you can dip it
until you're covering
almost the whole thing except for the
part where your fingers are located
and then when that dries i will
take it and i can turn it and i can get
the other part
again that might take a few minutes
because i have to allow it to dry
you also would want to stir it between
dips to make sure it's mixed next we're
going to do
a brushing of the inside and the outside
first of all condition or moisten your
brush
you want to make sure it's number one
it's clean and
again it helps the glaze to flow a
little bit better now when you get a jar
of glaze out you can mix it with brushes
you can mix it with a little spatula
a whisk or even you could use the hand
mixer with one blade
or beater just cover the top when you do
that
here i mixed it with the whisk and now
i'm applying my glaze
when you brush use the biggest fattest
brush that you can and you want to do
three coats on each uh
each color so three coats with a
fluffy brush inside three coats with a
fluffy brush outside
you always want to use a fluffy brush to
make sure it is
going on evenly wipe the rings of the
jar off
before you put the lid back on next one
i'm going to pour the inside
so whenever you're pouring pour the
interior before you do the exterior
and then again hold it upside down so
you're encouraging all the drips to come
off the top you don't want it to run to
the inside or you'll get a big puddle
then i'm just tidying up with a sponge
on the outside where maybe it was
a little bit uneven now i'm going to
pour
the exterior it's a little trickier to
pour the exterior though
oh here i'm using my electric mixer if
you get a super thick glaze like in the
case of this one
i use the electric mixer now in the case
of this
i'm going to take my watch off because i
know i would be getting it all over my
watch
if i didn't so i'm holding it upside
down and
i'm just trying to pour over the whole
thing
and and shake it off this
cactus green is unfortunately fairly
thick
so it's not shaking off as easily as
maybe a thinner glaze would
next method is an overlap it's a
two-thirds dip and a two-thirds dip
so i dip two-thirds and the darker of
the two colors that i'm going to be
using and when that's dry i'll come back
and dip two thirds on the other side in
a different color
so in the middle it has an entire third
that's overlapped
next is the wax resist over glaze so
here i already have a glazed form
and i'm just doing some wax design i
believe that steel gray chino is my
base glaze on this and after i do my wax
design
i'm going to be dipping it into
i think this is desert sage that i'm
using
here and um you can see that the wax
is starting to feed and make the glaze
bead up
and then after that's dry i'm going to
come back in here with a sponge
and then just take a little bit more off
of the waxy area
so just a slightly dampened sponge will
get
the rest of it off the wax so that's two
layers
with wax now i'm going to wax over just
bare clay
so this is an unglazed pot i'm doing a
wax design
and as i dip it you'll be able to see
how the wax will allow the glaze to just
kind of
bead up on this so you can see it's
starting to separate already
and again when that is dry same as
before i'm going to take my sponge
and just kind of lightly sponge off the
areas you'll be able to see
where the wax is it's it's somewhat
obvious
because it tends to pull a little bit
there next we're going to do some tape
resist
now this first one i'm going to do tape
resist over
bare clay so there's no glaze there and
as you put that on there i'm just trying
to make my
edges or the ends kind of meet up i'm
holding it with tongs and then i'm going
to dip it in and this is
desert sage as well that i'm using for
this one
and when it's fully dry
i will be removing the tape you could
use say an exacto knife if you need to
i'm just using a needle tool
i had a couple little round stickers
that were like those little
reinforcements that you might use on a
three ring binder paper
and again i probably should have had an
x-acto knife but i was just using my
needle tool
now as you pull this off it makes a mess
dry glaze goes everywhere so make sure
you can clean that up
next is the same thing except i'm
putting it on a glazed pot
so this is a pot that has steel gray
chino on it
and after i get the tape on there it
doesn't stick
quite as well as it does on the bare
clay but it it'll still work
and then i'm going to dip this into
chino
so steel gray shadow with chino over it
this does create quite a bit of bubbling
but i will buff that with my hands to
get all
some of the bubbles worked out a little
bit on that now you can see
the steel graciano underneath that okay
next is how do you dip in a low bucket
so when the bucket is low enough that
you can't really
physically fit it all the way down in
there you can always
tilt the bucket so it's at an angle so
you have more of a
corner that you're working with that'll
allow you to get deeper
next is i'm going to double dip a rim in
one of the
archie's base series now these glazes
are very particular
you can use them on the inside you can
use them on the rims but
don't use them all over they will shiver
off sometimes
okay so i'm dipping the rim
about an inch never go more than a third
of the height of the piece
and here i just did it at about a half
an inch so not
quite as deep as it was the first time
now as you flip it over
try not to allow it to drip if it does
drip you want to kind of solve that
so they don't drip because it'll run
like crazy
next i'm doing blended layers that are
overlapping
and kind of making a blended effect um
so i'm blending cobalt red and then
violet will be my three colors so
um the little bit of a blending comes
toward the end of the layers when you're
taking a wet brush and kind of blending
them together
next is pouring organically so on this
one i'm going for kind of a mountain
scene and i'm doing
desert sage which is a light green uh
in kind of an organic band around the
middle
i should have done the interior before i
did the outside but here i did the
interior
with the desert sage now i'm doing blue
chino which is a darker blue on the
bottom and i'm kind of overlapping a
little bit
on the desert sage and then after
that dries then i'm going to come in
here and i'm doing
light chino for the upper part so i'm
trying to create
sort of a mountainy kind of an effect
okay and just making sure i don't have
any bare clay that's visible there
and then i'm just touching up a little
bit on the inside where apparently i
missed it
okay next is now i'm just going to layer
full
on colors so here i'm just doing violet
first i'm not using the tongs because
again this bucket was kind of low
so i had to turn it on the corner so i'm
just doing um
where i'm getting most of it with my
hand now i'm going to get the last
corner
okay and as i do dip you can see i keep
a sponge in my hand so i periodically
i'm just wiping off the bottom as i go
okay after the violet is dry now i have
sapphire which is um that real pretty
celadon
blue i'm just dipping it in one coat
real kind of quickly like when i
do this i'm probably holding it in there
for about one second
and then taking it out upside down and
just tapping it to get all of the drips
off the runnier the glaze is
you know it might take a little bit
longer for it to
fully drip next one is dipping
with texture so i'm also doing uh
a contrast glaze on the inside so i'm
putting black on the inside
first so i'm gonna have two layers of
color on the interior
um that it's better to have two on the
inside than two on the outside because
two on the outside of course can run
now i'm plunging the whole thing into i
believe that's desert sage
because any of the chinos are going to
be excellent on texture
number 15 is now i'm just going to
again on texture i'm going to use some
of the celadon so here i'm using root
beer on the inside
and sapphire on the outside now when
you're brushing texture
you only need to brush two coats on
texture
but three coats on smooth so here on the
smooth parts
i'm doing three coats but on the texture
i only
am doing two coats and then on the
interior i also brush
three next is using a solid on
with underglaze and carving so this pot
had carving on it i'm putting under
glaze in it first
now i'm going to take my sponge i'm just
sponging off
the extra under glaze so it's just
leaving the design
in the carving and then i'm using
sapphire on the inside
i'm doing some rainy day for the
mountains
some peacock i
meant to do key lime i think somehow i
forgot keylime and then sapphire for the
sky
so these should have a transparent
effect
i'm doing three layers of those next is
i'm using under glaze again and some
carved lines
and uh in the case of this though i am
glazing the the areas separately and for
this
i'm going to use the bulb syringe i'll
go ahead and i'll paint the three layers
on the inside
now if you want to use the bulb syringe
i do have them in the rubbermaid tub
just make sure that you see me when you
check it out and when you check it back
in i need to check it
the bulb syringe is designed to hold
glaze and squeeze it through the little
metal tip
take the tip out make sure you don't
have water in it and that it is clean
squeeze the bulb insert the tip of it
down
into the glaze okay now i'm going to
turn it over and shake that glaze down
to the bottom of it squeeze out more air
and then when you put it back in release
it and it'll suck up more glaze
you can put the tip back in and then you
can wipe off the
excess glaze that you might have on
there so you don't get it all over you
and then once you have it full of glaze
then you're ready to go ahead
and glaze now you want to do this almost
like you're just drawing with it
you squeeze and then kind of pull the
glaze around
as you squeeze you're pulling around as
you go the whole time though you should
be squeezing
to get enough glaze that's coming out
squirt the glaze back
in the jar when you're done and then to
wash it out get like a water dish and
you're going to run water through the
wall
multiple times and when that's clean run
a whole thing of clear water through the
bulb
and then to check to see if it's
actually clean i squirt the back of my
hand
if you see any clay residue you know you
need to do it again
so here i'm just doing another color now
i did note right here that you can
wax over a glazed design
and then you could dip if you would want
to so here i'm just cleaning again i'm
done with the red at this point
running the water through it again
and once you run an entire clear thing
of water through it you should be good
now the last bit that i'm going to do
here is i'm
outlining with the outside color
then i'm going to paint it in with a
paint brush to get three layers
you only need one coat if you use the
bulb syringe but
if you paint with a paint brush you use
three
so the advantage is it goes a little bit
faster when you have detail area
okay and then lastly i know it's a lot
of cleaning out that's the hardest thing
about the gold syringe is making sure
it's
really super clean and again i'm just
cleaning off the bottom of my pots as i
go
now lastly i am going to clean out the
grooves
where perhaps i got some glaze
inadvertently into the little black
under glaze lines that helps to clean it
out
and then i just kind of gently dust it
with a soft
brush and whatever you do don't try to
refill
under glaze on the lines next is the
shino family
with black underneath it black is such a
great base if you want to do chinos over
the top you get some really cool effects
you can use chinos by themselves but if
you dip black first and then a shino
over the top you can get some really
pretty pretty effects
it's kind of nice and this is
a light chino over black next is
celadon's the character of the celadon
glazes
are that they are transparent and they
show texture gorgeously so if you have a
good texture on a pot you might try a
solid on
now slip trailing is something that can
be done of course
in the green wear stage when you slip a
slip trail actually
liquid slip onto it when it's leather
hard here though
it's been bisque fired so i'm just
putting some under glaze on and i'm just
trying to kind of
accent the design a little bit that's on
there so
we've done things similar to this before
i'm just leaving almost like a little
black outline
and now i'm dipping this into the salad
on dusty rose
because i'd like for it to be somewhat
transparent and i want to be able to see
the under glaze
and usually those celadons will allow
you to see that
okay so next is the luster glazing
now here i have a bowl that's dipped in
half
matte white which is alabaster satin
white and then half glossy white
it has been fired and now after it's
been fired now i'm
doing the overglaze the luster glaze
so this has already been fired to cone
six and
notice that i'm wearing gloves you
should normally be doing this
out on the patio where you have
excellent ventilation
the only reason i'm not out on the patio
now is that the patio is all covered
with snow
and then clean your luster brush off
when you are done
you again you want to wear the gloves so
you're not touching the luster
next one is mishima mishma is a
technique that's done with
green wear so i'm carving into it while
the pot is leather hard
and then after i clean my carving i'm
now going
to take black slip so it's just slip
where i've added a stain to it
and i'm filling it in with i have a
ziplock bag and i'm just squeezing it
through so
it's sort of like um icing maybe i'm
i'm icing cookies or something once it's
dry then i'm going to scrape
off the black slip and i'm left with
an even surface where it just has
the black slip that's showing um
so it's works best to be honest on a
non-grogged clay
this was grogged but it'll still work
now it's been bisque fired
so the slip has been misfired and
everything
i am dipping it into sapphire which is
again a celadon so it's going to have a
transparent look
and i should be able to see it so you
don't necessarily have to use clear but
you want to use a transparent
next is i'm going to use some glaze
for detail painting now this blue pot
is a satin pot and i also did it on a
glossy i just forgot to film it
this one is the same sort of thing but
i'm using a blue
under glaze on a white gloss so i have a
white gloss
with normal cobalt glaze a blue satin
with normal cobalt and now i have
a white gloss with under glaze so we'll
do a comparison and see what they look
like
next is graffito graffito
is a glaze technique that's done in the
greenware stage
you apply three to six
layers of your glaze
and i do have cone six under glazes
these are coyote under glazes that i
happen to be using
and then i'm just tidying up the edge so
once your
under glaze is dry
dry enough that you can handle then you
can carve now
as i carve this you can think about more
than just
lines think about carving away full
areas you know you can carve away the
background it makes it much more
interesting than if you just have skinny
old lines in there
okay and i i'm just going to take a few
minutes
and make sure that i'm cleaning up
any rough edges with this it's a little
bit harder to clean
this when it's graffito but then bisque
fire it gets bisquired
now i'm dipping it and clear now
after i did this i realized ah nuts
i meant to glaze the inside with really
red
so i tried something that i've never
done before here after
the clear dried i went ahead and i put a
couple of coats of really red on the
inside
i wasn't too sure what would be
happening with this
but um it does seem to work it just gets
a little clear near the top
and then we have two more things we have
the last we have the texas two steps
now the texas two steps have an
undercoat
so i have two undercoats i have licorice
and coffee bean
and they also have an overcoat
so the undercoat that i just did there
that's coffee bean
and then i'm dipping this is my second
coat that i'm dipping in the blue moon
so you need to have a generous amount of
coats
so i have two coats of blue moon over it
now that's one coat of white marshmallow
and then when that dries again i'm going
to do one more
little section of white marshmallow
it really has to be dry between those
coats it might take you a couple days
to get it all glazed or you could also
use a hair dryer
you can also conversely just brush
texas two steps but be generous with
your numbers of coats
so when you do the undercoat the base
coat
again you have to have a minimum of
three coats so
that's equivalent to a dip and here i
just poured the inside
with the marshmallow and now i'm just
going to do some
stripes now when you do this though
keep in mind it might take a while for
it to dry
so again you could wait a day or dry it
with a hair dryer
here i'm doing a second coat on the
interior
and then another coat on the rim
and i'm notice i'm using the turntable
and i'm just rotating the turntable
holding the base part of the turntable
that makes it a little bit easier
i'm getting multiple coats on there it's
probably like four
at least four coats of the
uh overcoats there so i've got both
marshmallow
and blue moon it's at again at least
four coats of each of those
the heavier the coats get the more
pronounced your
um kind of your spotted
look is that you get next i'm doing the
final cleaning of the foot
you always want to sponge not only the
bottom but
up an eighth of an inch this is so
important
kids i'm not going to be doing it for
you if you glaze down too far
it's going to get fused so remember you
can take the pencil
rotate the pot up against the pencil and
that is going to make a line
an eighth of an inch up if you
are unsure where to glaze please do the
pencil line
okay you want to make sure it's inside
and outside of the foot
if you have a thick amount of glaze
maybe you have to scrape it
you can always put something flat
against the bottom to see how deep your
foot is as to whether or not you should
do that next i'm going to make a patty
take a golf ball size hunk
and i'm just flattening it out and
i'm stretching it so i'm hitting the
side closest to me
first as i do this set your pot on the
patty and cut it three quarters of an
inch bigger than the base of the pot
then go over to the light switch into
the little silver basket and grab
yourself a kiln ticket
you will be riding down oh and grab a
wear board
from the wear board rack you're going to
be filling out the kiln ticket
to tell me everything that i need to
know about the glaze so set your patty
on the wear board
oops and i almost picked that up with 30
fingers set your
pot on the patty complete your kiln
ticket
okay so notice again it's three quarters
of an inch bigger than the base
of the pot all the way around complete
your kiln ticket you're going to have
your name your bell the date
the clay body which is stoneware in that
case
the glaze names or numbers uh
the cone of the glaze check whether or
not it's dinnerware safe
have you wiped the bottom and the
corners
up an eighth of an inch free of glaze
and then
also have you made a tortilla thin patty
just make sure those patties are
thin like a tortilla if they are too
thick
it will blow up it has to be thin
because it needs to dry out
in like an hour then put the whole board
with your kiln ticket and your patty
into the drying cabinet and remember to
check those signs for advice
and check the next video that i have
which i will show
these fired pieces so you can see just
what they look like
when they come out of the kiln
you
Browse More Related Video
Smaltatura ceramica ad immersione, come smaltare la terracotta e la ceramica
5 Consigli per smaltare correttamente la ceramica
Rifinitura a Secco - Scuola Ceramica Online
Barbottina: che cos'Γ¨ e come si realizza?
How TILES are Made
La Ceramica per Principianti in meno di 10 MINUTI. Video Tutorial sulla Ceramica - SUPER FACILE!!!
5.0 / 5 (0 votes)