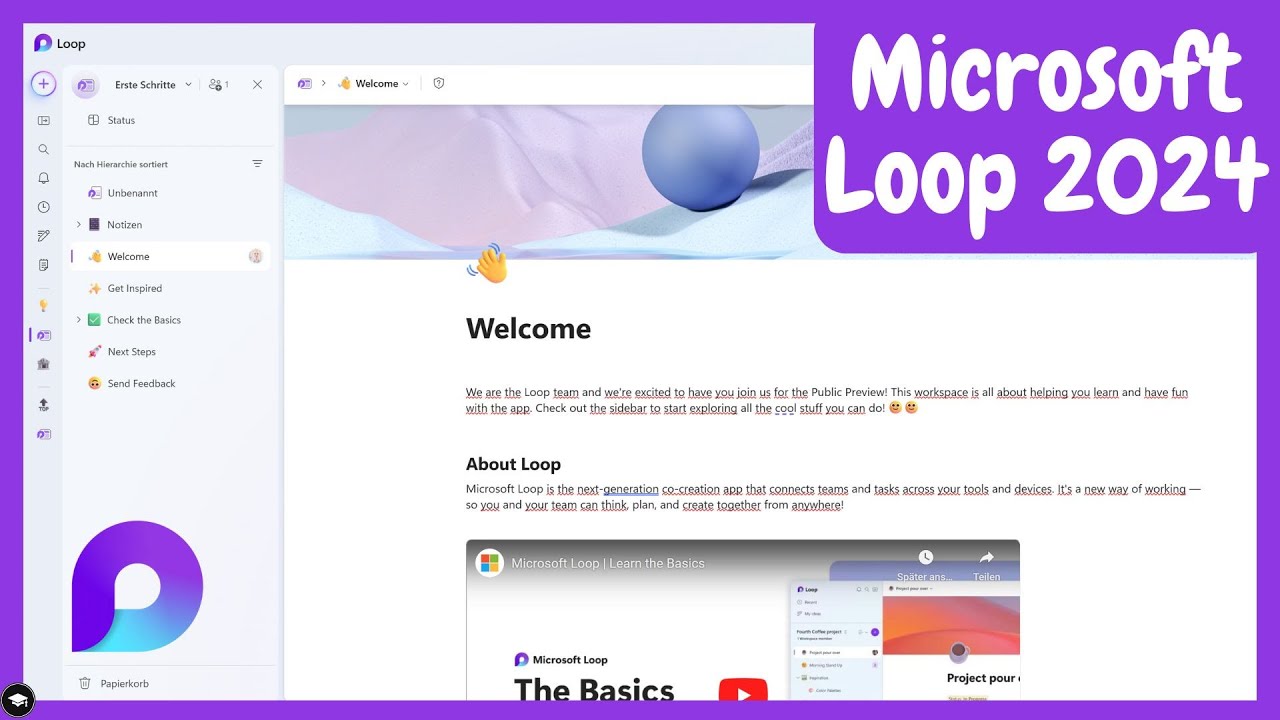
How to Use Loop as your Digital Notebook!

Scott Brant
29 Jul 202415:31

Summary

TLDRDieses Video zeigt, wie man mit Microsoft Loop effektiver Notizen fasst. Es veranschaulicht, wie man einen Arbeitsbereich erstellt, Unterseiten für eine bessere Organisation nutzt und Inhalte mit anderen teilt. Es demonstriert die Verwendung von Loop zur Zusammenarbeit, die Erstellung von Tabellen mit Benachrichtigungen, das Einbinden von Planner-Aufgaben und die Synchronisation von Meeting-Notizen. Zusätzlich werden Funktionen zur Dateifreigabe, Druck- und PDF-Exportmöglichkeiten sowie die Möglichkeit, Inhalte intern und extern zu teilen, vorgestellt.

Takeaways

  • 🖥️ Microsoft Loop bietet eine neue Möglichkeit, Notizen zu erstellen und zu organisieren, die über die traditionellen Methoden hinausgeht.
  • 🔗 Sie können Microsoft Loop über die Website loop.microsoft.com oder die Loop App auf Ihrem Computer zugreifen.
  • 📝 Loop ermöglicht es, Arbeitsbereiche zu erstellen, um Notizen für bestimmte Zwecke zu speichern und zu strukturieren.
  • 📑 Die Verwendung von Unterseiten in Loop hilft, die Notizen besser zu organisieren und logische Gruppen zu erstellen.
  • 💡 Loop bietet eine Vielzahl von Inhaltstypen, einschließlich Checklisten, numerierte Listen, Tabellen und mehr, um Notizen zu erstellen.
  • 🔑 Es ist möglich, Regeln in Loop-Tabellen zu erstellen, um Benachrichtigungen zu erhalten, wenn bestimmte Bedingungen erfüllt sind.
  • 📋 Loop integriert sich mit Microsoft Teams, sodass man Meeting-Notizen direkt in Loop einfügen und synchronisieren kann.
  • 📈 Loop kann mit Microsoft Planner verbunden werden, um Aufgaben zu verwalten und sie mit der Planner-App zu synchronisieren.
  • 📎 Loop erlaubt es, Links zu Dateien wie Excel-Tabellen in den Notizen zu speichern und direkt darauf zuzugreifen.
  • 🖨️ Es ist jetzt einfacher, Seiten in Loop zu drucken oder in PDF zu exportieren, was zuvor nicht möglich war.
  • 🔒 Loop ermöglicht es, Inhalte mit anderen innerhalb und außerhalb der Organisation zu teilen, indem man einen Link teilt.

Q & A

  • Wie kann ich mit Microsoft Loop beginnen?

    -Um mit Microsoft Loop zu beginnen, gehe zu loop.microsoft.com oder loop.cloud.microsoft.com und erstelle einen Arbeitsbereich für deine Notizen.

  • Was sind Unterseiten in Microsoft Loop und wie können sie verwendet werden?

    -Unterseiten in Microsoft Loop sind eine neue Funktion, die es ermöglicht, deine Notizen besser zu organisieren. Sie können als Abschnitte innerhalb einer bestimmten Kategorie oder als eigenständige Seiten verwendet werden.

  • Wie füge ich Inhalte zu einer Seite in Microsoft Loop hinzu?

    -Inhalte können durch Einfügen von Text, das Kopieren von Tabellen oder das Hinzufügen von Checklisten, nummerierten Listen und anderen Formaten hinzugefügt werden, indem man die Pfeiltaste verwendet und die gewünschten Elemente auswählt.

  • Was sind Regeln in Microsoft Loop und wie werden sie verwendet?

    -Regeln in Microsoft Loop ermöglichen es, Benachrichtigungen zu erhalten, wenn bestimmte Bedingungen in einer Tabelle erfüllt sind, z.B. wenn ein Budget überschritten wird.

  • Kann ich Microsoft Loop verwenden, um Besprechungsnotizen zu verwalten?

    -Ja, Microsoft Loop verfügt über eine Funktion, die es ermöglicht, Besprechungsnotizen direkt aus Microsoft Teams zu kopieren und in Loop zu synchronisieren.

  • Wie kann ich Aufgaben in Microsoft Loop verwalten?

    -Aufgaben können durch das Hinzufügen einer Aufgabenliste auf einer Seite in Microsoft Loop verwaltet werden. Diese Aufgaben werden dann mit Microsoft Planner synchronisiert.

  • Was sind Loop-Komponenten und wie werden sie geteilt?

    -Loop-Komponenten sind Teile des Inhalts in Microsoft Loop, die kopiert und in andere Apps wie Microsoft Teams oder Outlook eingefügt werden können, um den Inhalt zu teilen.

  • Kann ich Seiten in Microsoft Loop drucken oder in PDF exportieren?

    -Ja, in Microsoft Loop kannst du Seiten drucken oder in PDF exportieren, indem du das Menü 'Drucken und PDF-Export' nutzt.

  • Wie teile ich eine ganze Seite in Microsoft Loop mit externen Personen?

    -Du kannst eine ganze Seite in Microsoft Loop mit externen Personen teilen, indem du den Link der Seite kopierst und die Zugriffsrechte so einstellst, dass externe Personen den Inhalt ansehen können.

  • Gibt es Einschränkungen bei der Verwendung von Microsoft Loop?

    -Ja, Microsoft Loop ist keine Offline-App, was bedeutet, dass du online sein musst, um sie zu verwenden. Außerdem bietet sie nicht alle Funktionen, die in anderen Apps wie OneNote vorhanden sind.

Outlines

00:00

😀 Einführung in Microsoft Loop

Dieses Video gibt einen Einblick in Microsoft Loop, eine Alternative zum Notizverwalten mit OneNote oder Papier. Es zeigt, wie man mit Loop beginnt, ein neues Notizbuch erstellt und strukturiert, um den Inhalt besser zu verwalten. Es erklärt, wie man Inhalte mit anderen teilt und die Testmanagementfunktionen nutzt. Das Video ermutigt, die Tools besser zu nutzen, indem es die Vorteile von Loop hervorhebt und die Möglichkeit bietet, die Arbeitsweise zu verbessern.

05:00

📚 Erstellen und Strukturieren von Arbeitsbereichen in Loop

Der zweite Abschnitt des Skripts konzentriert sich auf die Erstellung von Arbeitsbereichen in Microsoft Loop. Es wird gezeigt, wie man einen Arbeitsbereich erstellt, ihn benennt und mit einem Symbol versehen kann. Es erklärt, wie man andere Personen hinzufügt und die Möglichkeit hat, den Arbeitsbereich als privat einzustufen. Es wird auch gezeigt, wie man Seiten und Unterseiten erstellt, um Projekte, wie z.B. 'Projektumfang' oder 'Budgetinformationen', logisch zu organisieren und zu strukturieren.

10:02

📋 Hinzufügen von Inhalten und Nutzung von Tabellen in Loop

In diesem Abschnitt wird die Einrichtung und Verwendung von Inhalten in Loop erläutert. Es wird gezeigt, wie man Inhalte einfügen kann, indem man sie aus anderen Quellen kopiert oder mit Hilfe von verschiedenen integrierten Funktionen erstellt, wie z.B. Checklisten, nummerierte Listen und Tabellen. Es wird auch beschrieben, wie man Tabellen in Loop erweitert, indem man Regeln für Benachrichtigungen erstellt, wenn bestimmte Werte, wie z.B. 'Überschreitung des Budgets', aktualisiert werden.

15:03

🔄 Integration von Microsoft Planner und Synchronisation von Aufgaben

Dieser Abschnitt behandelt die Integration von Microsoft Planner in Loop und die Synchronisation von Aufgaben. Es wird gezeigt, wie man Aufgaben in Loop erstellt und sie mit Planner synchronisiert, sodass sie automatisch im Planner-App der Teams erscheinen. Es wird auch gezeigt, wie man bestehende Planner-Pläne in Loop einbindet und wie man Änderungen in Loop durchführt, die in Planner widergespiegelt werden.

📎 Verknüpfung von Dateien und Freigabe von Inhalten in Loop

In diesem Teil des Skripts wird die Möglichkeit gezeigt, Dateien aus SharePoint, OneDrive und Teams in Loop zu integrieren, indem man Links zu diesen Dateien hinzufügt. Es wird erklärt, wie man Links kopiert und in Loop einfügt, um auf wichtige Dokumente, wie z.B. Excel-Dateien, direkt zuzugreifen. Darüber hinaus wird die Möglichkeit gezeigt, Seiten in Loop zu drucken oder in PDF zu exportieren, was früher nicht möglich war.

🤝 Teilen von Loop-Inhalten mit internen und externen Benutzern

Der letzte Abschnitt des Skripts konzentriert sich auf das Teilen von Loop-Inhalten. Es wird gezeigt, wie man Inhalte innerhalb von Teams teilt, indem man Loop-Komponenten in Posts oder Nachrichten verwendet. Es wird auch beschrieben, wie man ganze Seiten mit externen Personen teilt, die nicht Teil der Organisation sind, indem man ihnen Links zur Seite zur Verfügung stellt, die sie mit begrenzten Zugriffsrechten ansehen können.

👋 Fazit und Nächste Schritte mit Microsoft Loop

Das Video schließt mit einem Fazit und einer Aufforderung an die Zuschauer, das Video zu liken und sich zu abonnieren, um weitere hilfreiche Inhalte zu erhalten. Es werden auch die Einschränkungen von Loop diskutiert, wie das Fehlen einer Offline-Funktionalität, und es wird betont, dass Loop einige Funktionen bietet, die in OneNote nicht vorhanden sind. Das Video endet mit einer Einladung zum nächsten Video.

Mindmap

Keywords

💡Microsoft 365

Microsoft 365 ist ein Paket von Produktivitätsanwendungen, das von Microsoft entwickelt wird und unter anderem E-Mail, Kalender, Dateispeicherung und Zusammenarbeitsdienste umfasst. Im Video wird Microsoft 365 als Plattform für die Nutzung von Microsoft Loop vorgestellt, einem neuen Notiz- und Zusammenarbeitswerkzeug, das in das bestehende Ökosystem von Microsoft integriert ist.

💡Microsoft Loop

Microsoft Loop ist ein Notizwerkzeug, das in Microsoft 365 integriert ist und die Zusammenarbeit und Organisation von Inhalten erleichtert. Im Video wird gezeigt, wie man mit Microsoft Loop beginnt, indem man ein neues Notizbuch erstellt und strukturiert, um den Inhalt besser zu verwalten und mit anderen zu teilen.

💡Arbeitsbereich

Ein Arbeitsbereich in Microsoft Loop ist ein Bereich, in dem alle Notizen für einen bestimmten Zweck gespeichert werden können. Im Video wird erläutert, wie man einen Arbeitsbereich erstellt, um die Notizen zu organisieren und zu speichern, und wie man ihn für die interne oder private Nutzung konfiguriert.

💡Sub Pages

Sub Pages sind eine Funktion in Microsoft Loop, die es ermöglicht, Seiten in einer Hierarchie zu organisieren. Im Video wird gezeigt, wie man Sub Pages erstellt, um Projektinformationen wie Budget und Projektumfang in logische Abschnitte zu unterteilen und somit die Organisation der Notizen zu verbessern.

💡Inhaltsverknüpfung

Inhaltsverknüpfung bezieht sich auf die Möglichkeit, Inhalte aus verschiedenen Quellen in Microsoft Loop zu integrieren. Im Video wird gezeigt, wie man Inhalte wie Tabellen, Checklisten und andere Elemente hinzufügt und wie man sie in die Notizen einbindet, um die Produktivität zu steigern.

💡Regeln (Rules)

Regeln in Microsoft Loop sind eine Funktion, die es ermöglicht, automatisierte Aktionen auszulösen, wenn bestimmte Bedingungen erfüllt sind. Im Video wird ein Beispiel gegeben, wie man eine Regel erstellt, um eine Benachrichtigung zu senden, wenn ein Budgetüberschreitung erkannt wird.

💡Microsoft Planner

Microsoft Planner ist ein Aufgabenmanagement-Tool, das Teil von Microsoft 365 ist. Im Video wird gezeigt, wie man Aufgaben in Microsoft Loop erstellt und wie diese automatisch mit Microsoft Planner synchronisiert werden, um die Aufgabenverwaltung zu erleichtern.

💡Kopieren und Einfügen

Im Kontext von Microsoft Loop bedeutet Kopieren und Einfügen das Übertragen von Inhalten von einer Quelle in eine Loop-Seite. Im Video wird gezeigt, wie man Inhalte aus anderen Anwendungen kopiert und in Loop einfügt, um die Notiznahme zu vereinfachen.

💡Dateifreigabe

Dateifreigabe bezieht sich auf die Möglichkeit, Dateien aus verschiedenen Quellen in Microsoft Loop zu integrieren und über Links zu greifen. Im Video wird erläutert, wie man einen Link zu einer Excel-Datei in Loop hinzufügt, um schnellen Zugriff auf wichtige Dokumente zu ermöglichen.

💡Drucken und PDF-Export

Im Video wird gezeigt, wie man Seiten in Microsoft Loop druckt oder in PDF exportiert, um Inhalte für Meetings oder zur Weitergabe an andere zu verwenden. Diese Funktionen sind nützlich, um digitale Notizen in physische Dokumente umzuwandeln.

💡Inhaltsfreigabe

Inhaltsfreigabe bedeutet, dass man Teile des Inhalts, den man in Microsoft Loop erstellt hat, mit anderen teilen kann. Im Video wird erklärt, wie man Inhalte intern innerhalb von Teams oder extern mit Dritten teilt, indem man Links erstellt und Zugriffsrechte verwaltet.

Highlights

Microsoft Loop bietet eine neue Möglichkeit, Notizen zu erstellen und zu organisieren.

Loop integriert sich in Microsoft 365 und erweitert die Notiz- und Aufgabenverwaltung.

Einführung in die Erstellung eines neuen Notizbuchs in Microsoft Loop.

Strukturierung von Notizen mit Subpages für eine bessere Organisation.

Verwendung von Loop für Projektabwicklung, einschließlich Budget- und Meetings.

Festlegung von Regeln in Loop-Tabellen für Benachrichtigungen bei Änderungen.

Integration von Microsoft Planner für Aufgabenverwaltung innerhalb von Loop.

Synchronisation von Notizen aus Microsoft Teams mit Loop.

Erstellen von Projektbereichen und Strukturen mit Loop für bessere Planung.

Einfache Freigabe von Dateilinken aus SharePoint und OneDrive in Loop.

Loop unterstützt das Drucken von Seiten und das Exportieren von PDFs.

Teilen von Loop-Inhalten intern und extern durch Verwendung von Loop-Komponenten.

Loop hat Einschränkungen, wie die Abhängigkeit vom Internet für den Zugriff.

Loop bietet jedoch Funktionen, die in OneNote nicht vorhanden sind.

Empfehlung, ob Loop die Notizwege verändern könnte.

Ruf nach Feedback durch Like-Button und Abonnement für weitere ähnliche Inhalte.

Transcripts

play00:00

if you're taking your notes in good

play00:02

oldfashioned one note or even pen and

play00:04

paper then how about we consider a

play00:06

different way because if you want to

play00:08

take notes using Microsoft 365 I believe

play00:11

that you can now use Microsoft Loop for

play00:13

a great capability to do exactly that so

play00:16

in this video I'm going to be showing

play00:18

you how to get started and create a new

play00:20

notebook and also structure it to make

play00:23

more sense to you share content with

play00:25

others both internally and externally

play00:28

and also get the most from it by

play00:30

checking out some of the test management

play00:31

capabilities as well now of course if

play00:34

this video helps you hit that like

play00:35

button but also hit that subscribe

play00:37

button to find more great content like

play00:39

this that will help you use the tools

play00:41

you already have on your computer in

play00:43

much better ways so other than that

play00:45

let's dive into Loop and improve the way

play00:47

that you take notes so all we need to do

play00:50

is access Microsoft Loop head to loop.

play00:53

microsoft.com or loop. cloud. Microsoft

play00:56

and you'll be able to access Loop you

play00:57

can even do this on the loop app on your

play00:59

computer

play01:00

when you're here all we need to do is

play01:02

create a workspace to hold all of our

play01:03

notes for a particular purpose so let's

play01:06

get started and create a workspace to

play01:08

put all of our notes in let's go to the

play01:10

right and click on the plus icon and I

play01:12

can give it new name and also an icon as

play01:14

well with that done we could add others

play01:16

here under the section that says share

play01:18

your space but I want to make it private

play01:21

only to me let's go ahead and select

play01:23

continue and we'll now see and also find

play01:26

files with this name that I could add

play01:27

easily into our workspace straight away

play01:30

but let's start with a blank workspace

play01:32

let's go ahead and select create

play01:34

workspace here and now we can begin to

play01:36

structure all of our content and now

play01:38

we've got a place to store our notes

play01:40

let's look at organizing all of that

play01:42

content in better ways to make it feel

play01:44

more traditional in the way that we work

play01:46

of our notes so we can now use sub Pages

play01:49

a new feature in Loop to better organize

play01:51

all of your Loop Pages you may remember

play01:53

in the p in Loop that when we created

play01:55

these Pages while they all appeared on

play01:57

the left hand side if I add a new page

play02:00

here you'll see that all treated equally

play02:02

there wasn't really a way to group them

play02:04

and create these hierarchies or

play02:06

groupings or not anymore let's use this

play02:09

concept to create a section in our

play02:11

notepad this is all around project

play02:13

scoping so let's give the page here a

play02:16

name of project scoping where it shows

play02:18

is currently Untitled as you can see

play02:21

I've now added that in and also a cover

play02:23

image and an icon as well I've also

play02:25

added a piece of text just to mention an

play02:27

area to store information regarding

play02:29

project scoping but don't worry it all

play02:31

soon become clear because now what we

play02:34

can now do is click on the free dot menu

play02:36

next to project scoping and we can now

play02:38

create a sub page this again can act as

play02:40

a section in this particular area or a

play02:43

page in its own right once again let's

play02:46

give it a title and also a bit of

play02:48

content so understand how we can use

play02:50

this page further and there we have it

play02:52

we now have a page dedicated to budget

play02:54

information we could add content in here

play02:56

really easy but of course let's consider

play02:58

what we've done on the left hand side

play03:00

we've now created a project scoping

play03:02

section and we have budget information

play03:04

within there we can also go further

play03:06

again clicking the free. menu adding

play03:08

another sub page so they can also be

play03:11

stored under project scoping and you can

play03:13

now see once again inside of our Loop

play03:15

workspace or notebook we've now got the

play03:18

content scoping information and budget

play03:20

information we can even left click and

play03:22

drag to reorganize this content on the

play03:24

left so we can use these sub pages to

play03:26

provide that ability to organize your

play03:29

pages and a way that fits your needs and

play03:31

create that logical grouping so now we

play03:33

got our basic structure let's go and see

play03:35

how we can add content inside of Loop

play03:38

and adding content in Loop is really

play03:40

simple here in our budget information

play03:42

page what we can do is easily paste

play03:44

content if you've copied it from

play03:45

somewhere else but by clicking the

play03:47

forward slash key here you'll see a

play03:49

range of different content you can add

play03:51

into your Loop page checklists budet

play03:53

list numbered list tables and more

play03:55

there's all types of content you can add

play03:57

into your Loop page much like you did in

play03:59

other note taking apps there's probably

play04:01

even more options here but I've created

play04:03

some content just using good old plain

play04:06

word what I can now do is go ahead and I

play04:09

can paste this content straight into our

play04:11

loot page as you can see it's not really

play04:13

carried over any formatting once again

play04:16

just like in other note taking apps what

play04:18

we can do is highlight the content and

play04:20

we can change whether it's a H1 header

play04:22

two or three or click the free dot menu

play04:25

and see more options to also update the

play04:27

font size and more let's change this to

play04:29

H2 heading and beneath that we can also

play04:32

do the same by making these H3 headings

play04:35

you can see how we can make this really

play04:37

easy inside of our Loop page you might

play04:39

equally be saying though this content's

play04:42

great but you want it in a table surely

play04:44

there's better ways not it just as a

play04:46

bunch of text and it absolutely is let's

play04:48

go to the bottom of this page and again

play04:51

click on the forward slash key now

play04:52

select table we can create a dynamic

play04:55

table so whole budget information as

play04:57

well we can easily click into each

play04:58

column heading and add the different

play05:00

Columns of data as we'll do now now I've

play05:03

created a basic loop table here with

play05:05

information on our budget as well as a

play05:07

label in this particular column but the

play05:09

great news is Loop tables go further

play05:11

than you imagine you can also build

play05:13

rules that you couldn't see in another a

play05:15

note taking apps for example maybe this

play05:17

gets overs spent and someone updates it

play05:19

and I want to be notified well that's

play05:22

very easy for us to do let's go to the

play05:24

free dot menu select rules and now we

play05:27

can choose a particular column we'll

play05:29

select overspend and then also equals

play05:32

and we'll mark it as yes but then when

play05:35

it becomes overspent I need to do

play05:37

something I could notify someone in loop

play05:40

I could send a message on teams or group

play05:42

chat as well as even sending an email as

play05:44

well that workflow will now be

play05:46

configured it shows me what accounts

play05:48

will be used in the process and now we

play05:51

can specify the email who it goes to to

play05:54

notify let's go ahead and add in my

play05:56

account name here and we'll note the

play05:58

subject is an overspend on project

play06:01

greenspace and with that just go ahead

play06:03

and select create flow and that will

play06:05

create the power automate workflow and

play06:07

email will be automatically sent as soon

play06:10

as anyone changes the overspend to yes

play06:13

that email notification will be sent

play06:15

straight out so much like Loop if you

play06:17

want to improve the way that you work

play06:19

why not have a look at our website at

play06:21

your 365 coach you'll find great new

play06:24

ways to work with us as well as underand

play06:26

learning courses to take your skills to

play06:29

the next level whether you're using Loop

play06:31

teams or even some of the new co-pilot

play06:34

capabilities you can find out more at

play06:36

the link below and even download a free

play06:39

Microsoft 365 ebook that can transform

play06:42

the way that you work in Microsoft 365

play06:45

so other than that let's dive back into

play06:47

Loop and continue to see how it can

play06:48

transform the way that you take notes

play06:51

not forgetting that we've probably got a

play06:53

lot of meeting notes that we need to

play06:54

bring in inside of Microsoft Loop and

play06:57

just like other apps like one note

play06:58

there's an easy way to do it inside of

play07:01

project Green Space I'm going to go

play07:02

ahead and once again add a new page this

play07:05

time I'm going to call it meetting notes

play07:07

as we can use his capability to store

play07:09

all of our meeting notes in once again

play07:11

we can give it an icon and a cover but

play07:13

let's go ahead here and click the free.

play07:16

menu and select new sub page and I can

play07:18

now give this page a time and date of

play07:20

where a particular meeting was from we

play07:22

have monthly meetings I'm going to go

play07:24

ahead and add the June meeting notes but

play07:26

of course we need to add our notes in

play07:29

but as per other videos that we've

play07:30

shared on our Channel you can use

play07:32

meeting notes in Loop capability inside

play07:35

of teams just by clicking on the meeting

play07:37

but we've also covered this in past

play07:39

videos on the channel you can use Loop

play07:41

meeting notes in your team's meetings

play07:43

you can also get them straight after the

play07:45

meeting so let's head into teams and

play07:48

inside of teams I've accessed the

play07:49

meeting that I was in and I can now see

play07:52

all of my loot meeting notes you can

play07:54

easily do here is click on copy

play07:56

component head straight back into

play07:58

Microsoft Loop and here all we need to

play08:00

do is paste in that link and our meeting

play08:03

notes are now synced inside of this page

play08:06

yes if I go ahead and add a further

play08:08

comment here for an additional item that

play08:10

was agreed what we'll also see is that

play08:13

will sync straight back into Microsoft

play08:15

teams and also meeting notes here so a

play08:18

simple way to take your meeting notes

play08:20

you've captured in teams and bring them

play08:22

into Microsoft Loop and give them the

play08:24

sections and a particular area that you

play08:26

need what about planning you can either

play08:28

have a dedicated page or you could also

play08:30

create a section in one of your existing

play08:32

Pages let's go ahead and check them both

play08:34

out so what we're going to do is I'm

play08:36

going to add a new sub page into here to

play08:38

deal with scoping and planning so this

play08:41

is all going to relate to the project

play08:43

scoping activities now in here all we

play08:45

then need to do is click the forward

play08:47

slash key and we can scroll down and we

play08:49

can find a task list here now this is

play08:52

all sync to Microsoft planner so let's

play08:54

go ahead and add a few tasks into this

play08:56

task list one is allocated to me and

play08:59

another to my colleague Megan and the

play09:01

benefit is that as soon as I allocate

play09:02

tasks in this way they are synced into

play09:04

Microsoft planner and Todo yes here in

play09:07

the Microsoft teams planner app will

play09:09

also see the same task obtain budget

play09:11

approval scoping and planning so as you

play09:14

allocate tasks to people inside of loop

play09:16

they'll also appear on their task list

play09:18

inside of the team's planner app

play09:20

ensuring they keep on top of all of

play09:21

their tasks but what about additional

play09:24

planning capabilities one if you have a

play09:26

Microsoft planner you'd like to insert

play09:28

well all we need to do is Click forward

play09:30

slash again in one of your Loop Pages

play09:32

this time type in the word planner

play09:34

inside of your Loop page here you can

play09:37

select the Microsoft app and now you'll

play09:39

get a list of all of the different plans

play09:40

you have access to here's project

play09:42

greenspace scoping by selecting insert

play09:45

not only do we have the task list I've

play09:48

individually allocated but I also see

play09:50

all of the tasks inside the Microsoft

play09:52

planner using the board view now to left

play09:54

clicking tasks and so forth make edits

play09:57

and updates and keep it all in sync

play09:59

everything I change here will be kept in

play10:01

sync in Microsoft planner so by doing

play10:03

this you'll be able to keep all of your

play10:05

tasks in Microsoft planner in sync and

play10:07

keep them visible inside of loop so

play10:09

you've seen two simple ways you can

play10:11

manage tasks in Loop that we couldn't do

play10:13

in other note taking apps what about

play10:15

your files surely you need quick access

play10:17

to all of your important documents well

play10:20

that's also possible here's an Excel

play10:22

file that we use with some financial

play10:24

data I'd like to make sure that I can

play10:26

access it very quickly from Microsoft

play10:28

Loop in my own not area well let's go

play10:31

ahead and click the share button and I'm

play10:32

going to select copy link now here you

play10:35

can make a decision on the right type of

play10:37

Link here it's set with anyone where the

play10:39

link can edit I'd rather not have that

play10:41

so I'm going to go ahead and select

play10:42

people with existing access only so with

play10:44

our link now copied let's go and click

play10:46

on the plus button and select New Link

play10:49

here paste in that sharing link into the

play10:51

address bar and now you'll see it even

play10:53

identifies it's an Excel file called

play10:55

financial data V2 by clicking add in

play10:58

here on now see it appears inside of a

play11:01

link called financial data V2 we can

play11:04

left click and open it straight from our

play11:06

Microsoft Loop notes how cool is that

play11:10

let's go back into this area here and we

play11:12

can even left click and drag and move

play11:14

under the relevant area for example it's

play11:16

all relating to budget so I'm going to

play11:18

put it right here that's a quick way to

play11:20

bring your files from SharePoint one

play11:22

drive and teams into your Loop notes

play11:25

really easily but as you've all note

play11:26

taking apps you may want to print one of

play11:28

your pages or even export it to PDF well

play11:32

it's pretty easy to do so it's really

play11:33

simple to go ahead and print or save

play11:36

this page to a PDF maybe this content

play11:39

here needs to be shared with someone

play11:40

else or just printed for a meeting all

play11:42

we now need to do is click on the free

play11:44

dot menu select print and PDF export and

play11:47

you'll be able to do exactly that yes

play11:49

Loop but previously was not able to

play11:51

print or easily export to PDF but now it

play11:54

really is here we can go ahead and see a

play11:57

print preview you can also change to

play11:59

your your printer or set it to print a

play12:01

PDF on the left hand side or save as PDF

play12:04

to take a PDF copy and then share it

play12:06

with others to taking Loop content in

play12:08

your pages Printing and exporting to PDF

play12:11

is now really easy inside of Loop and

play12:14

finally what about sharing the content

play12:16

with others yes we can share all of the

play12:18

content we've created internally and

play12:20

externally let's go and check that out

play12:22

well here's an example here maybe in

play12:24

this scenario I want to share some

play12:26

budget information with some particular

play12:28

individuals in the company and I want to

play12:30

share it outside of loop you absolutely

play12:32

can and then on the left I can select

play12:34

this button here I can now go ahead and

play12:37

create a no Loop component you'll now

play12:39

see it changes the theme of the overall

play12:42

content meaning I can now select copy

play12:45

and I can take this into another app of

play12:47

my choice yes teams Outlook as well are

play12:50

fully supported with that link copied

play12:52

let's head into teams and go into one of

play12:55

my Microsoft teams I'd like to share it

play12:57

inside of our team project greenspace so

play13:00

very easily we can start a post and then

play13:03

literally paste in our Loop component as

play13:06

if by Magic that component is now

play13:08

available to be edited and we'll all be

play13:11

synced back into Microsoft Loop go ahead

play13:13

and click on post and that that that's

play13:15

available to your colleagues as well so

play13:18

it's very easily to take content and

play13:20

share it internally using Loop

play13:22

components but there's also capability

play13:24

to share your content externally so in

play13:26

this scenario let's head back into Loop

play13:29

we can now see some information that

play13:30

we'd also like to share with third

play13:32

parties that don't sit in our

play13:34

organization I'm going to add more

play13:36

scoping information later what I'd like

play13:38

to do is share this whole page with a

play13:39

third party who's helping us with our

play13:42

scope in for project greenspace all we

play13:44

now need to do is click on share select

play13:46

page link and then go ahead and open the

play13:49

settings button now here select people

play13:51

you choose and you can now add an

play13:53

external person's email address like an

play13:55

Outlook Gmail or even a thirdparty

play13:58

Microsoft 365 accounts we can see that

play14:01

Here and Now sharing this content with

play14:03

my Outlook account I can left click and

play14:06

I can also change the access rights to

play14:08

can view and even set it this link will

play14:11

expire next Friday by clicking apply I

play14:14

can now take this link pop it into an

play14:16

email and the third party can access

play14:18

this content without having access to

play14:20

the wider workspace and your notes and

play14:23

just access this single page all done in

play14:26

a couple of clicks so what do you think

play14:29

will Loop change the way that you take

play14:30

notes and of course there are some

play14:32

limitations right for example Loop is

play14:35

not an offline app that means you'll

play14:37

need to be online to use Microsoft Loop

play14:39

but let's face it most of us online all

play14:42

day every day yes internet connections

play14:44

in cafes or just connecting to your

play14:46

mobile there's lots of ways they get

play14:48

online alongside that it doesn't offer

play14:51

all of the capabilities that you've seen

play14:53

in other apps like OneNote but what it

play14:55

does offer is more capabilities that we

play14:57

haven't seen in OneNote as well as well

play14:59

so with that in mind there are different

play15:01

considerations how you may want to use

play15:03

Loop for your own note taking but

play15:05

hopefully this video has helped and I

play15:06

would love it hit that like button to

play15:08

let me know that this has helped you as

play15:09

well as hitting that all important

play15:11

subscribe button to find more great

play15:13

content like this that helps you use the

play15:14

tools you already have in much better

play15:16

ways other than that well I'll be seeing

play15:19

you in the next one

play15:22

[Music]

Rate This

5.0 / 5 (0 votes)

Related Tags
Microsoft LoopNotizenArbeitsbereichInhaltsverknüpfungKollaborationProjektmanagementTabellenRegelnWorkflowPlannerDateifreigaben
Do you need a summary in English?