12 NEED to Know Logic Pro Tips to Improve Your Workflow w/ SEIDS

Splice
21 Jan 202312:16

Summary

TLDRIn this Logic Pro tutorial, Sides shares essential tips and tricks for music production. He demonstrates the 'Strip Silence' feature to eliminate gaps in audio, and the quick pitch change method using keyboard shortcuts. Sides also explains how to detect tempo, move audio regions efficiently, and customize the workflow with tools and preferences. He concludes with a guide on using the fade tool to smooth out audio transitions and the importance of MIDI settings for better playback.

Takeaways

  • 🔍 'Strip Silence' is a feature in Logic Pro that acts like a Noise Gate, cutting out long gaps in audio without affecting the main signal.
  • ✂️ You can easily adjust the sensitivity of the 'Strip Silence' feature and recover cut audio by dragging it back if needed.
  • 🎵 A quick way to transpose audio or MIDI by a semitone or octave using keyboard shortcuts like Option + Arrow keys.
  • 📊 Logic Pro can detect the tempo of an audio region with the Command + Option + T shortcut, providing valuable information for producers.
  • 🔄 Shifting regions between tracks is simplified with the Shift + Ctrl + T shortcut, making project management more efficient.
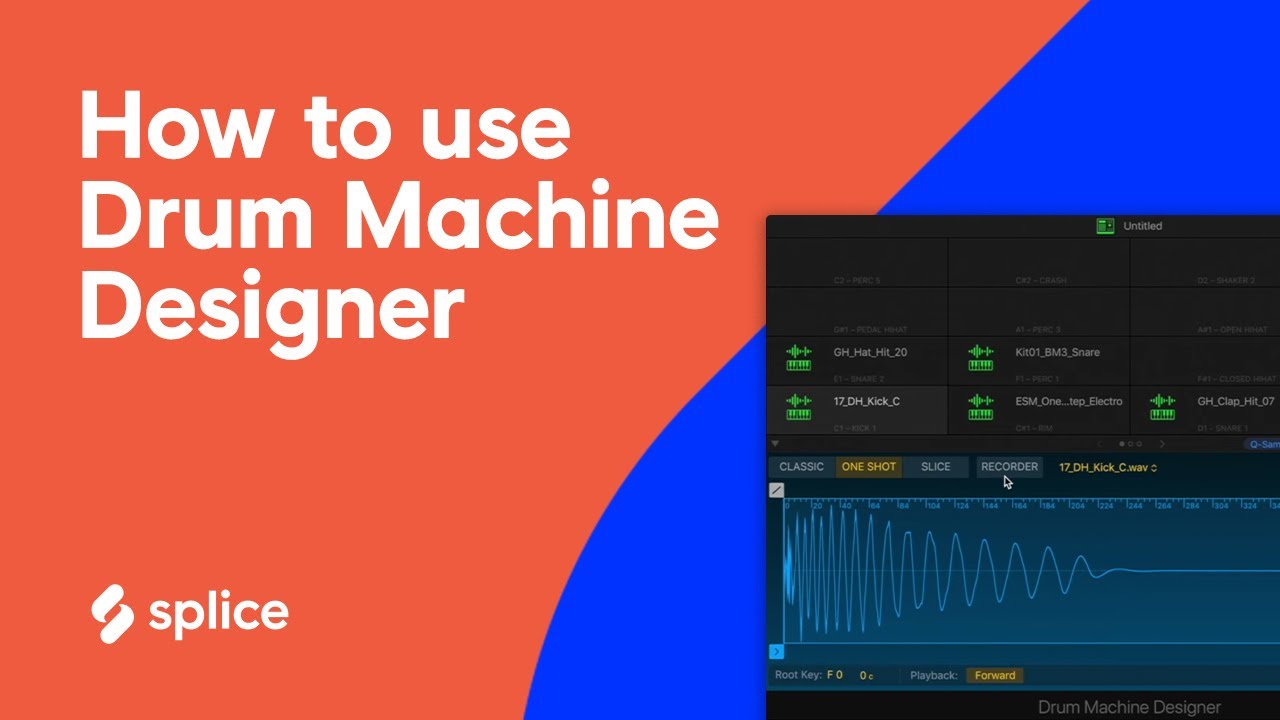
  • 🥁 The Drum Machine Designer can place each transient of a drum loop on a separate MIDI note, enhancing creative possibilities.
  • 🔌 Accessing VSTs quickly in Logic Pro is made easy with Command + Double Click, speeding up the workflow.
  • 🛠️ Customizing tool settings in Logic Pro, such as assigning the third mouse click to the Scissor tool, can streamline editing processes.
  • 📉 The Fade tool can be used to create smooth transitions at the start or end of audio clips, avoiding clicks or abrupt stops.
  • 🖌️ Color coding tracks and regions in Logic Pro helps in visual organization and quick identification during mixing or composing.
  • 🎹 The MIDI 'Chase' setting, when turned off, allows for playback of MIDI notes when pressed in the middle of a chord, improving the user experience.

Q & A

  • What is the 'strip silence' feature in Logic Pro and how does it work?

    -The 'strip silence' feature in Logic Pro is a tool that functions like a noise gate. It analyzes audio and cuts out long gaps of silence without affecting the main signal. It's useful for removing unwanted quiet spaces in audio tracks, such as between vocal lines or in drum loops.

  • How can you adjust the sensitivity of the 'strip silence' feature?

    -You can adjust the sensitivity of the 'strip silence' feature by modifying the threshold setting. This allows you to make the feature more or less sensitive to quiet spaces in the audio.

  • What happens if Logic Pro cuts too much audio with the 'strip silence' feature?

    -If Logic Pro cuts too much audio, you can simply drag the cut section back into place. The information is still there and can be restored without any loss.

  • How can you change the pitch of an audio or MIDI track in Logic Pro?

    -You can change the pitch of an audio or MIDI track by highlighting it and using the keyboard shortcut 'Option + Arrow key up' to transpose it up a semitone. You can continue pressing the arrow key to change the pitch to the desired level.

  • What is the keyboard shortcut to quickly raise the pitch of an audio or MIDI track by an octave?

    -The keyboard shortcut to quickly raise the pitch by an octave is 'Shift + Option + Arrow key up'.

  • How can you detect the tempo of an audio region in Logic Pro?

    -You can detect the tempo of an audio region by selecting the audio track and pressing 'Command + Option + T'. Logic Pro will analyze the region and provide you with the tempo information.

  • What is the keyboard shortcut to move a region to another track in Logic Pro?

    -The keyboard shortcut to move a region to another track is 'Shift + Control + T'. You need to highlight the region and the track you want to move it to before pressing this shortcut.

  • How can you put each transient of a drum loop on a separate note in the MIDI keyboard using Logic Pro?

    -You can do this by dragging the drum loop into the Drum Machine Designer in Logic Pro, which will automatically map each transient to a separate note on the MIDI keyboard.

  • What is a quick way to access a VST in Logic Pro?

    -A quick way to access a VST in Logic Pro is by using the keyboard shortcut 'Command + double-click' on the desired instrument track. This will instantly open the VST.

  • How can you customize the editing tools in Logic Pro?

    -You can customize the editing tools by going to 'Logic Pro > Preferences > General > Editing' and assigning different tools to the right mouse button under the 'Right Mouse Button' section.

  • What is the 'fade click' tool in Logic Pro and how can you use it?

    -The 'fade click' tool in Logic Pro allows you to add a fade-in or fade-out to the beginning or end of an audio region. You can use it by hovering over the top right or top left corner of the region and dragging the fade icon that appears.

  • How can you set the track color in Logic Pro to help with visualization?

    -You can set the track color by going to 'Logic Pro > Preferences > Display > Tracks' and choosing 'Auto Assign 96 Colors'. You can also set the region color to match the track color for easier visualization.

  • What is the 'MIDI Chase' setting in Logic Pro and why is it important?

    -The 'MIDI Chase' setting in Logic Pro determines whether MIDI notes play when you click in the middle of a chord. Turning it off allows the notes to play, which is useful for avoiding silent gaps in the middle of chords.

Outlines

00:00

🎛️ Logic Pro's Strip Silence Feature

This paragraph introduces a feature in Logic Pro called 'strip silence' which functions like a noise gate. It analyzes audio to detect and cut out long gaps without affecting the main signal. The script demonstrates how to use this feature on a drum loop with the Ctrl+X command, allowing for adjustments to the sensitivity threshold. It also explains how to restore cut audio if needed, and how this tool can be useful for editing vocals or drum progressions by separating audio and allowing for easy adjustments.

05:00

🎼 Quick Pitch Transposition in Logic Pro

The second paragraph discusses a method for quickly changing the pitch of audio or MIDI in Logic Pro. By highlighting the MIDI or audio and using the Option + Arrow keys, one can transpose the pitch up or down by semitones or octaves. The script includes a demonstration of how to raise or lower the pitch of a MIDI file and an audio track, and mentions that the same technique can be applied within the piano roll for precise pitch adjustments.

10:01

📊 Detecting Tempo with Logic Pro

This section covers how to determine the tempo of an unknown audio sample in Logic Pro. By using the Command + Option + T shortcut on an audio track, the software can detect and display the tempo of the audio region. The script provides an example of how this feature can be utilized to gain valuable information about the tempo, which is particularly useful for producers working with samples or tracks with unknown tempos.

🔄 Efficient Track Management in Logic Pro

The fourth paragraph focuses on efficient track management within Logic Pro. It explains how to move regions between tracks using the Shift + Ctrl + T shortcut after highlighting the region and the target track. This feature is highlighted as particularly useful for rearranging elements in large projects quickly and efficiently.

🥁 Utilizing Drum Machine Designer and VST Shortcuts

This paragraph demonstrates how to use Logic Pro's Drum Machine Designer to place each transient of a downloaded drum loop on separate MIDI notes, allowing for playful and creative manipulation. It also introduces a shortcut for quickly accessing VST instruments by using Command + double-click, streamlining the process of loading and using instruments within the software.

⚙️ Customizing Tools and Preferences in Logic Pro

The final paragraph covers customization options in Logic Pro, such as setting up additional tools and preferences for a more personalized workflow. It explains how to assign a third tool to the right mouse button for quick cutting, and how to use the Marquee tool for various editing tasks. The script also touches on the fade tool for smoothing out audio transitions and how to set track colors for better organization and navigation within projects.

Mindmap

Keywords

💡Logic Pro

Logic Pro is a digital audio workstation (DAW) used for music production. It is the central theme of the video as the host, Sides, provides tips and tricks specifically for this software. The script demonstrates various features of Logic Pro, such as 'strip silence' and pitch transposition, to enhance the user's music production experience.

💡Strip Silence

Strip Silence is a feature in Logic Pro that acts like a noise gate, analyzing and cutting out long gaps in the audio without affecting the main signal. It is used in the script to demonstrate how to clean up a drum loop by removing quiet spaces, showcasing its utility in post-production editing.

💡Threshold

In the context of audio processing, the threshold is the level at which a gate effect, like the 'strip silence' feature, starts to act. The script explains how users can adjust the threshold to make the feature more or less sensitive, which is crucial for fine-tuning the audio editing process.

💡Pitch Transposition

Pitch Transposition is the process of changing the pitch of an audio or MIDI note without altering its duration. The video script illustrates how to quickly transpose a MIDI region or an audio sample up or down by semitones or octaves using keyboard shortcuts, which is essential for melody and harmony adjustments in music production.

💡Tempo Detection

Tempo Detection is the ability of a DAW to analyze and determine the tempo (BPM) of an audio region. In the script, Sides uses this feature to identify the tempo of an audio sample, which is vital for synchronization and matching the project's tempo with external audio sources.

💡Region

A region in Logic Pro refers to a specific section of audio or MIDI data. The script mentions moving regions between tracks using a keyboard shortcut, which is a common task in music production for organizing and arranging different elements of a track.

💡Drum Machine Designer

Drum Machine Designer is a feature within Logic Pro that allows users to create drum patterns by placing individual transients on separate MIDI notes. The script demonstrates how to use this tool to convert a drum loop into a MIDI pattern, providing a creative way to program drums.

💡VST

VST stands for Virtual Studio Technology and refers to a type of software music instrument or effect that can be used within a DAW like Logic Pro. The script provides a shortcut for quickly accessing VSTs, which streamlines the process of adding and using different instruments and effects in a project.

💡Preferences

Preferences in Logic Pro are user-defined settings that affect the behavior of the software. The script discusses adjusting preferences for a more personalized workflow, such as enabling advanced editing features, which is important for tailoring the DAW to individual producer's needs.

💡Marquee Tool

The Marquee Tool in Logic Pro is used for making selections in the workspace, often for cutting, copying, or moving sections of audio or MIDI. The script explains how to assign this tool to a mouse button for quick access, which is useful for efficient editing.

💡Fade Tool

The Fade Tool is used to create smooth transitions in and out of audio regions to avoid clicks or abrupt endings. The script describes using this tool to add fades to the beginning or end of an audio clip, which is an essential technique for polishing the sound of a mix.

💡MIDI Chase

MIDI Chase is a setting in Logic Pro that determines whether MIDI notes should play through even if the MIDI region is not currently visible in the timeline. The script shows turning off this setting to allow for playback of MIDI notes in the middle of a chord, which is useful for recording and monitoring MIDI performances.

Highlights

Introduction to Logic Pro tips and tricks for music production.

Explanation of the 'Strip Silence' feature simulating a Noise Gate to cut long gaps in audio.

Demonstration of adjusting the threshold sensitivity in 'Strip Silence'.

How to restore cut audio segments without losing information.

Using 'Strip Silence' for vocals and jump progressions to separate audio.

Quick pitch change technique for MIDI and audio using keyboard shortcuts.

Method to transpose audio or MIDI by an octave using specific key commands.

Detecting the tempo of an audio region with Command Option Plus T.

Efficiently moving audio regions between tracks using Shift Control T.

Importing and mapping drum loops to MIDI using Drum Machine Designer.

Quick access to VST instruments with Command Double Click shortcut.

Customizing Logic Pro settings for a better workflow.

Enabling advanced editing features in Logic Pro preferences.

Adding a third tool to the toolbox for quick editing tasks.

Using the Fade tool for smoothing out sound transitions.

Tip on setting track colors for easier navigation in projects.

Using project settings to ensure MIDI chords play in the middle of notes.

Final thoughts and sign-off from the presenter, Sides.

Transcripts

play00:00

hi my name is sides and in this spice  skills lesson we're going to be going  

play00:04

over logic pro tips and tricks let's get started

play00:12

logic pro has this really cool feature called  strip silence which basically works as a  

play00:17

simulation of a Noise Gate so it will analyze  the audio and when it sees long gaps it will  

play00:22

actually cut them without affecting the overall  main signal so let's take this drum loop I have  

play00:28

here and I'm going to press Ctrl X this window  pops up and you can see logic is going to cut  

play00:34

all the quiet spaces so they're individually on  their own you can adjust the threshold if you  

play00:40

want to make it more sensitive or less sensitive  as it sounds but where it was was pretty good now  

play00:46

I'm just going to press OK and Bam it cut it all  for you so if we zoom in you don't have to worry  

play00:53

about logic pro like deleting information like  let's say it cut too much this side you could  

play00:57

just drag him and the information is still there  so it's a really cool way when you're working with  

play01:03

vocals and you're singing and maybe there's some  some click that happened in between your lines you  

play01:08

can just quickly cut them out or if you're using  a jump progression and it has maybe a kick hitting  

play01:13

and a snare hitting it'll separate the audio for  you so you can adjust it as you want so let's say  

play01:18

I want to add another kick here I can just hold  down option and then just move it there it's so  

play01:23

much you can do with it so really cool one control  X strip silence tip number two this is a really  

play01:28

great way to quickly change the pitch of an audio  or a midi so let's listen to this MIDI foreign

play01:37

quickly transpose it up a semitone  all you have to do is highlight it  

play01:44

press option Arrow key up  and it is up one semitone

play01:51

and you can just keep moving it  to whatever pitch you need it at  

play01:55

and you could do the same thing with audio  it's the same way so let me just show you  

play02:00

here's an audio track option Arrow key up and  it's changing the pitch so you can just hear it

play02:10

so as I raise it up you can see it's raising the  pitch of even the job sample so let's say I want  

play02:16

to quickly raise it an octave all you have to do  is press shift option Arrow key up let's listen

play02:26

let's say I want to bring it down an octave  you do shift option Arrow key down and let's  

play02:31

go down one more octave shift option Arrow  key down let's hear what it sounds like

play02:36

so this is super useful and you can also use  this key command right in the piano roll so  

play02:45

let's say I'm going shift option Arrow key  up there's an octave shift option Arrow key  

play02:50

down it's back or just option Arrow key  up or down to raise it by the semitone  

play02:57

tip number three so this one is really cool  let's say you get a sample or an audio from  

play03:05

someone and you don't know what tempo it's  at you have no idea all you have to do is  

play03:10

take the audio track and press command option  plus T and it'll actually detect the tempo of  

play03:17

the audio region and it gives you all this  information here so you can see that it's at  

play03:23

128 half time really useful information I love  this tip tip number four so let's say I want  

play03:30

to move this region to this track all you have  to do is highlight the region you want to move  

play03:37

highlight the track you want to move it to make  sure it's highlighted and then press shift Ctrl  

play03:43

T and then bam it just moves it for you this is  super useful when you're working with big projects  

play03:48

and you want to quickly shift things around tip  number five let me find a drum loop from splice

play04:00

perfect so I'm just going to  download this really quickly  

play04:04

so now what I'm going to do is  I'm going to drag it over here

play04:09

and I'm going to select drum machine designer  

play04:12

and look it put each transient on a separate note  on the midi keyboard so if I was to play it out

play04:27

pretty cool right okay and for the last  tip so let's say you want to access your  

play04:33

VST really quickly instead of having to  go over here clicking on here going to  

play04:38

your instrument and loading it so all  you have to do is press command double  

play04:43

click and it just pops right up this is a  shortcut that's right in logic so let's say  

play04:48

I want to open up the sampler I just do  command double click and Bam here it is

play04:55

so this is what logic looks like when you  first open it up and I'm going to change  

play05:00

some of the settings that I think work a little  bit better you can go over to the top here where  

play05:04

it says logic pro go down to preferences and  then they're all here or one of my favorite  

play05:08

shortcuts is command comma and then preferences  just pops up it's really important to click this  

play05:15

Advanced Tab and make sure all of these are  checked off I'm pretty sure when you first  

play05:19

download logic they're not going to be and we  need these so make sure they're checked off  

play05:24

over here there's two tools what I want to do  is I want to add a third tool so I'm going to  

play05:29

go over to General then I'm going to go over  to editing and then right here it says right  

play05:34

Mouse button I'm going to go down and say is  assignable to Tool so now you can see there  

play05:40

are three toolboxes so basically the first click  with your mouse is going to be whatever tool you  

play05:45

set it to which is this pointer tool the second  one you can access by holding down command and  

play05:49

that's set on the Marquee tool and now the third  tool is the scissors which is the right click tool  

play05:55

this is super useful because let me drag in an  audio or midi track so I drag it in here and now  

play06:03

let's say I want to cut right there all I have to  do is hover and you can just press a right click  

play06:07

and then it just cuts it for you this is super  useful when it comes to editing so you can put  

play06:11

it on any third tool you want and you can just  see all the different options here but really  

play06:15

I just use it for the scissor tool for the second  tool just hold down command and then you can see  

play06:20

the Marquee tools here and there's a bunch of  things you could do with the Marquee tool like  

play06:23

if I just grab that option and then I just drag  that part over and it just Clips it over for me  

play06:28

and now we're going to open up preferences again  so command comma open up preferences we're already  

play06:33

here on General and editing and now I want to  do Fade tool click zones so click that and now  

play06:41

you can hover over just the top right corner and  you can just add in a fade or you can hover over  

play06:48

the top left corner and just add in a fade  so I'm going to find something in splice a  

play06:52

little bit more melodic so you can hear how this  feature Works let's take a listen here quickly  

play06:59

perfect so I'm just going to drag in these low-fi  melodic chops and a quick bonus tip is that if you  

play07:08

hover on the bottom right corner and press option  that little icon appears and you can just drag it  

play07:14

right on the grid so it just puts it right on the  grid for you so now going back to our original  

play07:18

tip the fade click so basically all you have to  do is hover over the top right corner and then  

play07:23

you see that icon appears and you can just drag  it so here's what it sounds like with that on

play07:33

foreign so it fades to silence right and  this is what it sounds like without it

play07:41

oh and this is also really useful because  you hear how when we didn't add it it just  

play07:49

clicks at the end so the fade tool is  really useful even if you do just slightly

play07:55

no click so let's listen to the beginning  you can also do the same thing without it

play08:02

so if you just hover over the top left  corner there's the icon drag and let's listen

play08:13

so this is a really cool tool to smooth out  some sounds another cool thing you can do with  

play08:19

this if you press Ctrl click you can select  speed up so let's listen to how that sounds

play08:25

pretty cool right we can also do  it at the end so I'm just going to  

play08:33

hover again drag it over then do control  click and slow down let's listen to it

play08:42

okay now let's open up preferences one more time  now we're going to go over to display we're going  

play08:48

to go over to tracks and here are some settings  that I'd like to change every producer has their  

play08:55

favorite way and their favorite tools to produce  so if you're using a track pad or a Magic Mouse  

play09:01

this button is really useful let me show you using  this Magic Mouse so I'm going to click it off

play09:08

and then if you just hold two fingers you can  see the bar as you're going at where we're at  

play09:13

so that's pretty useful for editing and producing  okay let's go back to preferences press command  

play09:20

comma open up preferences we're in display we're  in tracks and now I want to set the track color  

play09:26

that when I open up different audio tracks or  software tracks it's gonna color code it for me  

play09:32

so you can go over here track color push down  and then you can decide if you want to do auto  

play09:37

assign 24 colors or Auto assign 96 Colors Let's  go with 96 colors and then I also like to select  

play09:44

region color to be as track color I'll show you  what this does basically when you open up the  

play09:50

mixer you'll see that there's a color here if  you do them individually you have to set them  

play09:55

both but I want them to both be the same so it's  just easier to visualize okay so I'm gonna X Out  

play10:01

of Here and Now if we go up to this button  and say add new tracks just for this example  

play10:08

let's add 10 tracks it doesn't matter if it's  software or audio click create just for the  

play10:15

purposes of this I'm going to copy and paste it so  you can see the different colors and it did it for  

play10:20

us in rainbow colors so super useful and just  so you can see what I mean with the mixer you  

play10:26

can just press Command 2 to open up the mixer  and it auto did the colors for us so let's say  

play10:30

you want all of these tracks to be pink because  these are all the background vocals so what you  

play10:35

can do is press shift click option C and then  let's select this pink and there you have it  

play10:42

they're all pink so this is useful just to group  instrument vocals drums just so you can easily  

play10:49

navigate through your project when mixing or  composing for this one I'm actually going to  

play10:54

record in a piano part so let me just record  in some chords really quickly nothing fancy

play11:02

foreign

play11:10

okay so if we play in the middle of the chord

play11:16

nothing happens no sound comes out which is  really annoying right so what you can do now  

play11:22

is we want to open up project settings so  this is different than preferences so you  

play11:26

can go over to file and then go over  to project settings or you can press  

play11:32

option p and it opens up logic settings  so now we're going to go over to MIDI  

play11:39

Chase and make sure this button is clicked off  notes now let's listen and hear what happens

play11:48

did you guys catch that if you play in the  middle of a midi chord it actually plays

play11:58

so this is a super useful setting  I hope you found my logic pro tips  

play12:03

useful again my name is sides and  I'll see you next time stay creative

Rate This

5.0 / 5 (0 votes)

Related Tags
Logic ProAudio EditingMusic ProductionStrip SilencePitch TransposeTempo DetectionTrack ManagementShortcut KeysTool CustomizationMIDI SettingsCreative Tips