How To Make REALISTIC A.I. T-Shirt Mockups In Minutes

Kerry Egeler
27 Dec 202311:21

Summary

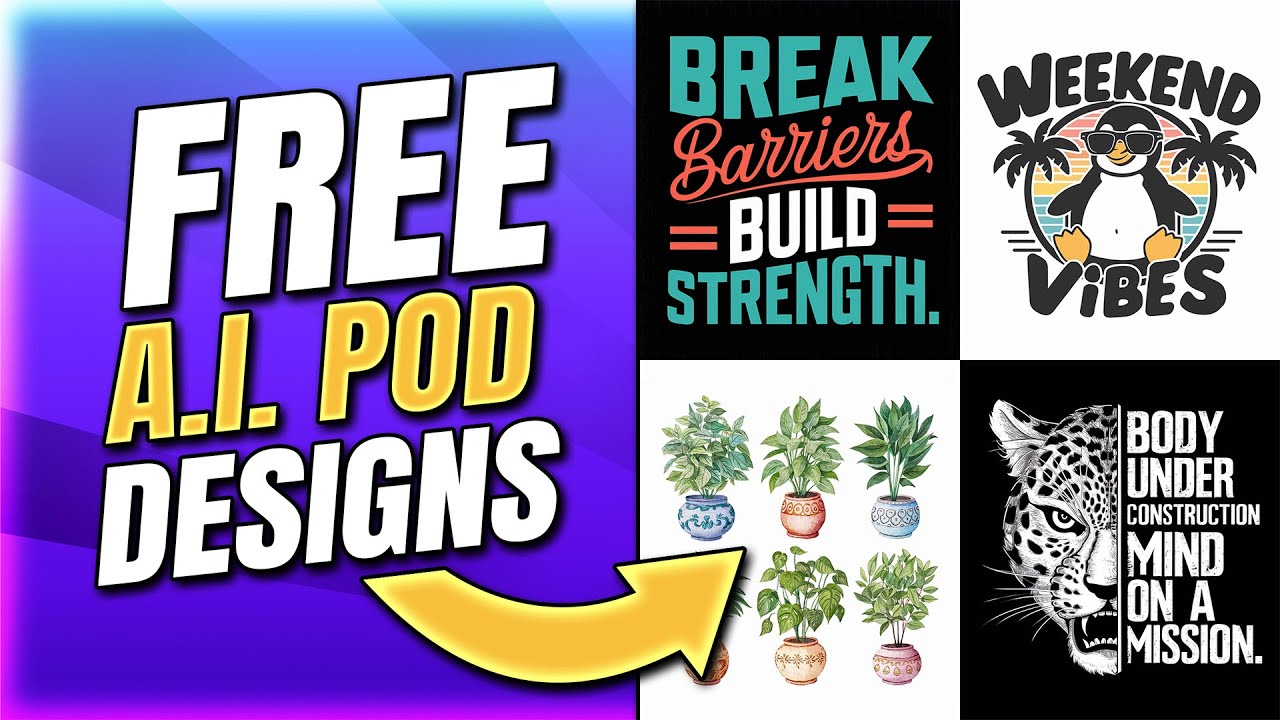
TLDRThis video script demonstrates how to use AI, specifically Mid Journey, to create realistic mockups for t-shirt apparel and print-on-demand businesses. It showcases the process of generating a personalized image of an ideal customer wearing a blank t-shirt, then adding a design to make it look professionally printed. The tutorial includes tips on using the zoom out feature for better image generation, and concludes with a step-by-step guide on enhancing the mockup's realism in Photoshop, emphasizing the power of AI in simplifying the design process for businesses.

Takeaways

  • 🧑‍🎨 AI can be utilized to create highly realistic mockups for apparel businesses, making the process easier than traditional methods.
  • 🎨 Midjourney is highlighted as an effective tool for generating realistic images that are difficult to distinguish from real-life photos.
  • 👕 The script emphasizes the importance of creating mockups that display the ideal customer for a brand, enhancing the appeal of products.
  • 📸 There's no need for hiring photographers, models, or ordering products for photoshoots when using AI-generated mockups.
  • 🖼️ The speaker demonstrates using Midjourney to create a mockup of an African-American man wearing a blank black T-shirt, showcasing the tool's capabilities.
  • 🔍 The 'zoom out' feature in Midjourney allows users to expand the generated image, providing more of the scene if needed.
  • 🛠️ Photoshop or its free alternative, Photopea, can be used to add designs to the AI-generated mockups, making them look professional.
  • 📐 A smart object in Photoshop can be used to easily update the design on the mockup without having to recreate the entire image.
  • 🌈 Adjustments such as changing the blend mode to 'Hard Light' and tweaking the curves can make the design on the mockup look more realistic.
  • ✨ Reducing the opacity of the design layer can help the mockup look more natural and less overly imposed.
  • 📈 The final result is a realistic mockup that can be used across various marketing channels, potentially increasing business effectiveness.

Q & A

  • What is the main purpose of using AI to create mockups for T-shirt apparel or print on demand business?

    -The main purpose is to generate realistic images of customers wearing the apparel, which can be used in marketing materials like websites, ads, and social media, without the need for hiring photographers, models, or ordering products.

  • What is Mid Journey and how does it help in creating mockups?

    -Mid Journey is a tool that can create very realistic images that are hard to distinguish from real photos. It helps in generating mockups by allowing users to input prompts to create images of specific types of customers wearing blank T-shirts in various settings.

  • Why is it beneficial to create your own mockups instead of using other tools like Placeit?

    -Creating your own mockups allows you to display the exact type of customer you want to sell to, making the mockups more personalized and potentially more appealing to your target audience.

  • How does using Mid Journey help in representing the ideal customer for a brand?

    -By inputting specific details about the customer's appearance and environment in the prompt, Mid Journey can generate images that represent the brand's ideal customer, enhancing the brand's image and marketing efforts.

  • What is the 'zoom out' feature in Mid Journey and how can it be used?

    -The 'zoom out' feature in Mid Journey allows users to generate more of the image if the initial generation does not show the entire desired area, such as when part of the T-shirt is cut off in the generated image.

  • What is the purpose of upscaling an image in Mid Journey?

    -Upscaling an image in Mid Journey enhances the resolution and detail of the image, making it more suitable for use in high-quality marketing materials.

  • Why is it recommended to use a clipping mask when adding a design to the T-shirt mockup in Photoshop?

    -Using a clipping mask ensures that the design only appears within the designated print area on the T-shirt, allowing for precise placement and avoiding any unwanted visibility outside the intended area.

  • What blending mode is suggested to make the design on the T-shirt look more realistic after applying a clipping mask?

    -The hard light blending mode is suggested as it allows the underlying texture of the T-shirt, such as wrinkles, to show through the design, making it look more realistic.

  • How can the design's appearance on the T-shirt be adjusted to look more realistic in Photoshop?

    -Adjustments can be made using the curves tool in Photoshop to match the design's brightness and darkness to what would be expected on an actual T-shirt, and reducing the opacity slightly to allow the T-shirt texture to blend with the design.

  • What is the significance of using the free AI style guide provided by the speaker?

    -The AI style guide provides 171 different words that can be used in AI prompts to generate better and more tailored designs for T-shirt apparel, print on demand, and creative e-commerce brands.

  • Can the process demonstrated in the script be replicated using a free alternative to Photoshop?

    -Yes, the process can be replicated using Photopea, a free Photoshop clone, which offers similar functionalities for editing and creating mockups.

Outlines

00:00

🎨 Creating Realistic AI Mockups for Apparel

This paragraph introduces the concept of using AI to create hyper-realistic mockups for T-shirt designs in a print-on-demand business. The speaker demonstrates how to use 'mid journey' to generate images that are almost indistinguishable from real photos. The process involves creating an ideal customer avatar to showcase the brand's products, which is more effective than traditional methods involving photographers and models. The speaker also mentions a free AI style guide available for download to enhance AI-generated designs for T-shirt apparel and e-commerce brands.

05:00

🖼️ Editing AI-Generated Mockups in Photoshop

The second paragraph details the process of refining an AI-generated mockup using Photoshop. The speaker explains how to import the mockup into Photoshop, create a new layer for the design area, and convert it into a Smart Object to easily update the design. They then demonstrate adding a design to the mockup, adjusting its position, and using a clipping mask with a 'Hard Light' blend mode to make the design look more realistic on the T-shirt. The paragraph concludes with adjusting the curves to match the T-shirt color and slightly reducing the opacity of the design for a more natural look.

10:01

🚀 Finalizing and Utilizing AI Mockups

The final paragraph emphasizes the effectiveness of using AI to create realistic mockups that can be used across various marketing channels, such as websites and social media. The speaker highlights the power of AI in generating mockups that align with the ideal customer avatar, which can significantly boost the appeal of the brand. They encourage viewers to apply this technique to their business to enhance their marketing efforts, concluding with a motivational note to 'crush it' in their business endeavors.

Mindmap

Keywords

💡AI

AI, or Artificial Intelligence, refers to the simulation of human intelligence in machines that are programmed to think and act like humans. In the context of the video, AI is used to create realistic mockups for T-shirt designs, showcasing its ability to generate images indistinguishable from real ones. The script mentions using AI to create 'very realistic images' for apparel businesses.

💡Mid Journey

Mid Journey appears to be a tool or software used in the video for generating realistic images. It is highlighted as being 'great for creating very realistic images' and is central to the video's demonstration of how to create AI-generated mockups without the need for physical photography or models.

💡Mockups

In the video, mockups refer to the visual representations of how a T-shirt design would look when worn by a person. The script emphasizes the advantage of using AI to create 'the exact ideal customer' for these mockups, which can then be used in marketing materials to appeal to the brand's target audience.

💡Print on Demand

Print on Demand is a business model where products, such as T-shirts, are only produced when a customer orders them. The video script mentions this term in relation to using AI-generated mockups for marketing these types of products, emphasizing the efficiency and cost-effectiveness of this approach.

💡Prompt

A prompt, in the context of AI image generation, is a text input that guides the AI to create a specific image. The script provides examples of prompts, such as 'African-American man 25 years old wearing a completely blank black T-shirt,' which the AI uses to generate a realistic mockup.

💡Upscale

Upscaling in the video refers to the process of enhancing the resolution or quality of an AI-generated image. The script mentions 'upscaled' images to show how one can improve the detail and clarity of the mockups, making them more realistic and suitable for use in marketing.

💡Photoshop

Photoshop is a widely used software for image editing. In the script, it is mentioned as the tool for editing the AI-generated mockups to add the T-shirt design. The video demonstrates a simple process of using Photoshop to create a realistic representation of a T-shirt print.

💡Smart Object

In Photoshop, a Smart Object is a layer that allows non-destructive editing, meaning the original content can be replaced or edited without affecting the appearance of the image. The script describes using a Smart Object to 'drop in our design' and update it easily within the mockup.

💡Clipping Mask

A clipping mask in Photoshop is used to restrict the visibility of the content of a layer to the shape of another layer below it. The video script describes creating a clipping mask to apply the design to the T-shirt mockup in a realistic way, showing the 'crinkles' and 'wrinkles' of the shirt.

💡Blend Mode

Blend modes in Photoshop determine how layers interact with each other to create various visual effects. The script mentions changing the blend mode to 'Hard Light' to make the AI-generated design look more realistic on the T-shirt mockup by allowing the shirt's texture to show through.

💡Curves

Curves in Photoshop is an adjustment tool used to modify the tonal range and contrast of an image. The script describes using the Curves adjustment to make the design on the T-shirt look more realistic by adjusting its brightness and darkness to match the appearance of a printed T-shirt.

💡Opacity

Opacity in Photoshop refers to the transparency level of a layer. The video script suggests reducing the opacity of the design layer to make it blend more naturally with the T-shirt mockup, enhancing the realism of the final image.

Highlights

AI can create super realistic mockups for T-shirt apparel or print on demand businesses.

Mid-journey is used for creating very realistic images that are hard to distinguish from real ones.

Creating custom mockups allows displaying the ideal customer for a brand.

No need to hire a photographer or models with AI-generated mockups.

AI mockups can be used on websites, in ads, and on social media for a professional look.

A basic prompt in Mid-Journey can generate a realistic image of a person wearing a blank T-shirt.

AI-generated images can sometimes have inconsistencies, requiring selection of the most realistic option.

The zoom out feature in Mid-Journey allows for generating more of the image if needed.

Upscaling AI-generated images can improve their realism and usability for mockups.

A free AI style guide is available for improving AI prompts for t-shirt apparel and print on demand.

Photoshop or its free clone, Photopea, can be used to add designs to AI-generated mockups.

Smart objects in Photoshop allow for easy updating of designs in mockups.

Adjusting the opacity of the design layer can make the mockup look more realistic.

Using the curves adjustment in Photoshop can enhance the realism of the design on the T-shirt mockup.

AI-generated mockups can represent the exact type of customer a business wants to sell to, which is powerful for marketing.

The process of creating AI mockups is simple and can be done in just a few steps.

AI mockups can significantly enhance the professional appearance of a brand's online presence.

Transcripts

play00:00

did you know that you can use AI to

play00:02

create super realistic mockups for your

play00:04

T-shirt apparel or print on demand

play00:06

business today I want to show you how

play00:08

you can do it in just a few steps and it

play00:11

might even be simpler than you think so

play00:13

we're going to start by using mid

play00:14

journey and mid journe is really great

play00:16

for creating very realistic images that

play00:19

are actually even hard to tell the

play00:20

difference from you know what is real

play00:22

and what is actually AI generated and

play00:25

the cool part about creating your own

play00:27

mockups is you get to create the exact

play00:30

ideal customer that you want to display

play00:33

on your in your brand that you want to

play00:35

sell to and this makes your mockups look

play00:38

so much better than using something like

play00:40

place it or maybe another tool out there

play00:43

and you don't have to go you know hire a

play00:45

photographer and get models and order

play00:47

your products and all that kind of stuff

play00:48

you can make these look really really

play00:50

good and then you can use these on your

play00:52

website in your ads on social media and

play00:55

they look super professional and again

play00:57

the biggest thing is that you can

play00:59

display the exact type of customer that

play01:02

you want to sell to and that can be

play01:03

really really powerful so inside mid

play01:06

Journey I've put in a very basic prompt

play01:09

I put in an African-American man 25

play01:11

years old wearing a completely blank

play01:14

black T-shirt standing outside in the

play01:17

city facing the camera smiling and this

play01:20

is what it gave me and this is it's

play01:22

pretty awesome right all of these are

play01:24

actually really really good sometimes

play01:26

you get one or two that are that are

play01:28

okay sometimes you get you know all four

play01:30

like this that look really really good

play01:31

I'm going to scroll up in my feed and I

play01:33

want to show you one more that I did

play01:35

which is uh right here I put in a

play01:37

45-year-old Woman white Caucasian with

play01:40

BL blonde hair long hair smiling at the

play01:42

camera wearing a white T-shirt

play01:43

completely blank outside with palm trees

play01:45

in the background and this is what it

play01:47

gave me now I think like this one down

play01:50

here and the third one uh looks a little

play01:52

more fake it looks a little more AI

play01:53

generated but this one was the one that

play01:56

caught my eye the second one because it

play01:57

looked very realistic and so after you

play02:01

put in that initial prompt and you get

play02:03

kind of a really good looking blank

play02:05

mockup that looks pretty real there's a

play02:08

couple other things you can do that I

play02:09

want to show you now I'm actually going

play02:11

to scroll down to the bottom here cuz

play02:12

I'm going to show you with this this

play02:14

most current prompt that I put in so you

play02:16

can see these are the first four that I

play02:18

got and the idea here is just that we

play02:21

generate a person wearing a blank

play02:24

t-shirt in The Next Step we're going to

play02:26

be adding on our own design and making

play02:28

it look really real but right here we've

play02:30

got these four generations and we want

play02:32

to choose the one that we'd like to

play02:34

upscale now I've gone ahead and upscaled

play02:36

a few of these because I want to show

play02:38

you something really cool so I upscaled

play02:40

three of these this is actually the one

play02:42

that I'm going to go with this is the

play02:43

one I like the most I like that it's got

play02:46

a lot of crinkles in the shirt you know

play02:48

a lot of kind of wrinkles in there which

play02:49

make it which is going to make it look a

play02:51

little more real a little more lifelike

play02:53

once we add our design and I like that

play02:55

the entire shirt is actually in the

play02:58

photo now sometimes what you'll get is

play03:00

you'll get one like this where the

play03:02

entire kind of shirt isn't in the photo

play03:05

and there's a really cool feature here

play03:07

in mid Journey which is the by the way I

play03:10

just put together a free AI style guide

play03:13

over at ker.com

play03:15

prompts and you can download this

play03:17

completely free and it's 171 different

play03:20

words you can use in your AI prompts to

play03:23

get better designs that are specifically

play03:25

tailored to t-shirt apparel print on

play03:28

demand and creative e-commerce Brands so

play03:30

just go over to ker.com promps and

play03:33

download that completely free and

play03:35

there's a really cool feature here in

play03:37

mid Journey which is this zoom out

play03:39

feature so we've got zoom out 1.5x and

play03:42

zoom out 2x now if we click on zoom out

play03:46

1.5x what it's going to do is it's

play03:48

actually going to generate more of the

play03:51

image for us uh if we were to need more

play03:54

you know more of the photo in the in the

play03:56

actual the actual generation here so the

play03:59

fact that that t-shirt is cut off we can

play04:02

actually use this zoom out function to

play04:05

get the rest of the image right that's

play04:07

really really cool so sometimes you know

play04:09

you get something out of mid journey and

play04:11

you can use this for a lot of different

play04:12

things but you get an image out of mid

play04:14

Journey that you're like this is what I

play04:15

want I just can't see all of the

play04:17

elements that I need I can't see the

play04:19

whole image so you can use that zoom out

play04:21

function to actually get the rest of

play04:23

what you need generated so here's what

play04:25

it gave me after I zoomed out it

play04:27

actually gave me four generations and

play04:29

these are very very similar and you can

play04:31

see that the middle image here of the of

play04:33

the the man is the exact same image that

play04:36

I had before but now I can mainly what

play04:38

I'm looking for is I can see his arms

play04:40

tucked into his pockets and now I can

play04:43

pick which one that I like the most now

play04:45

these are very similar so there's

play04:47

there's not a lot to go through here but

play04:48

one thing I do notice is that he's

play04:49

wearing a watch in this one and it looks

play04:51

almost a little fake or AI generated but

play04:54

I do like this one where he's actually

play04:56

wearing some some like uh you know

play04:58

bracelets so I'm going to use that one

play05:00

so I'm going to go ahead and upscale

play05:01

number two now even though the original

play05:04

generation was not exactly what I wanted

play05:06

I was able to use the zoom out function

play05:08

to get the entire t-shirt in the photo

play05:11

and now this is a more usable mockup so

play05:14

after I've downloaded that image from

play05:15

mid Journey I'm going to drop that into

play05:18

a Photoshop file so I'm just going to

play05:20

open up Photoshop and open this image

play05:23

right here now just for reference you

play05:25

can do the exact same thing in photo P

play05:28

which is a free Photoshop clone so you

play05:31

don't need a full version of Photoshop

play05:33

you can do pretty much the exact same

play05:35

thing in photo pea

play05:39

photo.com that's a just a free clone you

play05:42

can kind of do the same thing in there

play05:43

so if you don't have Photoshop you can

play05:45

follow along in photo but what I want to

play05:47

do here in Photoshop and I'm going to

play05:48

show you I think the simplest way to do

play05:51

this there are other things you can do

play05:53

in here to make it look even more

play05:55

realistic but I want to show you just a

play05:57

very basic step so that this isn't too

play05:59

too difficult to understand so the first

play06:01

thing that I'm going to do is I'm going

play06:02

to drop down here and just create a new

play06:05

layer click on this little plus button

play06:07

create a new layer the next thing I'm

play06:08

going to do is I'm going to grab my

play06:10

rectangle tool over here and I'm just

play06:12

going to create a box where I want the

play06:14

print area to be kind of similar to what

play06:17

you would see in maybe a print on Demand

play06:19

app I'm going to kind of create a box

play06:21

here that's going to represent my print

play06:23

area and I can move that around if I

play06:25

want so probably about right there is

play06:27

going to be kind of what I would think

play06:29

would be the print area on this t-shirt

play06:31

the next thing I'm going to do is over

play06:33

here in the layer box I'm going to right

play06:34

click and I'm going to select convert to

play06:37

Smart object so I'm going to convert to

play06:40

Smart object that's going to make it to

play06:42

where we can actually drop in our design

play06:44

and we can just update the design and it

play06:46

will automatically load that into our

play06:48

image the next thing I'm going to do is

play06:50

just open up this layer with my

play06:52

rectangle that will open up the smart

play06:54

object and this is where I can actually

play06:56

drop in my design to the print area next

play06:59

I'm going to drop in one of my own

play07:01

designs in here to the to this Photoshop

play07:04

file I'm going to hit enter and that now

play07:07

I have my Oklahoma City design dropped

play07:09

in here after that I can go ahead and

play07:12

delete the red layer underneath that so

play07:15

I can just press the delete button and

play07:16

now you can see it's only my Oklahoma

play07:19

City designed right in here now I can

play07:21

place this just by moving my mouse

play07:23

around I can place it kind of wherever I

play07:24

want and then I'm going to hit on my

play07:27

keyboard I'm going to hit command s to

play07:28

save you can also just hit file save but

play07:31

I'm actually going to save this and what

play07:33

it should do is upload into my mockup

play07:37

right here so you can see it on the

play07:38

shirt now looking at that that's a

play07:40

little bit low to me so I'm going to go

play07:42

back to my uh to my smart object and I'm

play07:45

just going to drag this up a little bit

play07:48

and I'm going to hit save again so

play07:50

either command s on a Mac or you can hit

play07:51

file save now if I go back over now it's

play07:54

looking like it's in the right place on

play07:57

my mockup now we're not done yet we need

play08:00

to make a few adjustments here to

play08:02

actually make this look a little more

play08:03

realistic what I'm going to do next is

play08:05

I'm actually going to duplicate the

play08:07

mockup image so this layer zero down

play08:09

here I'm going to drag it to this little

play08:12

plus sign and it's going to create a

play08:14

duplicate of that I'm going to drag this

play08:17

up above my uh my um my little design

play08:21

there my OKC design and I'm going to

play08:23

right click on it and what I want to do

play08:25

is I want to create a clipping mask so

play08:27

I'm going to hit create clipping mask

play08:29

just like that the next thing I'm going

play08:31

to do is change my blend mode so right

play08:34

here instead of normal I'm going to

play08:35

click on that and I'm actually going to

play08:36

do hard light and you can instantly see

play08:40

that right there even though the

play08:43

Oklahoma City design is very dark it

play08:46

looks a lot more realistic because now

play08:48

we're actually seeing some of those

play08:49

crinkles come through and so that's kind

play08:52

of the biggest thing we need to do the

play08:53

next thing we need to do to make this

play08:55

look really realistic is with the layer

play08:58

selected the top layer this uh this kind

play09:01

of clipping mask that we have created

play09:02

we're going to open up uh image here at

play09:05

the top we're going to go to adjustments

play09:07

and we're going to open up curves you

play09:09

can also just press command M on your

play09:11

keyboard and that should pull it up and

play09:13

it's going to pull up a window that

play09:15

looks like this now depending on the

play09:17

color of your T-shirt this color is

play09:19

black if you're dealing with white it's

play09:20

going to be a little bit different

play09:21

you're going to want to drag either this

play09:24

side back or drag this side back if

play09:28

you're on a white t-shirt usually you'll

play09:30

be dragging this end but on a black

play09:32

T-shirt we're actually going to drag

play09:33

this end back and we're going to drag it

play09:36

back until we get it

play09:38

looking like it should on the T-shirt

play09:41

now we can kind of just we have to judge

play09:42

with our eye whether that looks too too

play09:45

bright or too dark I think somewhere

play09:47

around there is probably about right

play09:49

when it's printed on a t-shirt it will

play09:51

look a little bit darker you know then

play09:53

it then it will look on your screen so

play09:55

probably somewhere around there is a

play09:56

good is a good place to put it so so I'm

play09:59

going to put it right there and hit okay

play10:00

we just have to use our eyes for best

play10:02

judgment and already that's looking I

play10:04

mean that looks a lot better it looks

play10:06

pretty realistic because if we zoom in

play10:09

we can see uh you know the wrinkles in

play10:11

the T-shirt kind of shining through we

play10:13

can see even kind of some almost some

play10:15

some Dots here that make it look like

play10:18

you can see the Garment shining through

play10:20

and the last thing we want to do is very

play10:21

subtle but if we just click on layer one

play10:23

which is going to be the Oklahoma City

play10:25

design I like to take the opacity down

play10:27

just a little bit so if we take this

play10:28

down like 90 maybe even like 80 or 85

play10:32

you can see it starts to blend just a

play10:34

little bit more I'm going to go 85 with

play10:36

this one and so that just helps it look

play10:38

a little more realistic and just like

play10:40

that within a few minutes we've created

play10:42

a really realistic looking mockup that

play10:45

we can use on our website on social

play10:47

media in paid advertising and it should

play10:50

be our exact ideal customer that we were

play10:53

able to put in some of those features

play10:55

into the prompt get exactly what we're

play10:57

looking for this is a really powerful

play10:59

tool and I hope you take it back to your

play11:01

business and crush

play11:06

[Music]

play11:20

it

Rate This

5.0 / 5 (0 votes)

Related Tags
AI MockupsT-shirt DesignApparel BusinessMid JourneyPhotoshop TipsRealistic ImagesPrint on DemandMarketing ToolsE-commerce BrandingCreative Commerce