Autodesk Inventor #6 Cara Melakukan Explode View
Summary
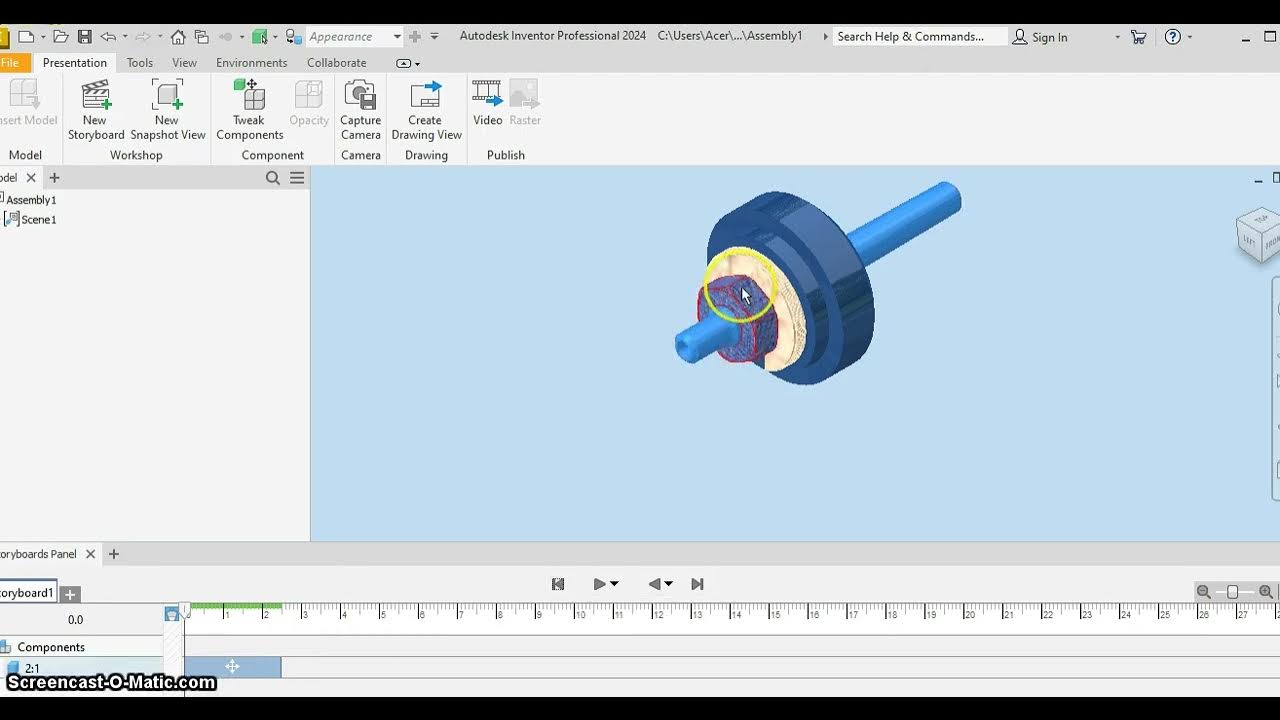
TLDRThis instructional video demonstrates how to create an ex-load view animation in a CAD program, specifically for showcasing the assembly and disassembly process of components in a 3D model. The video guides viewers through key steps like adjusting camera angles, setting animation durations, and tweaking components for smooth transitions. The end result is a detailed animation that helps clients visualize the manufacturing process. The tutorial emphasizes precise timing and effective camera work to produce a professional and clear animation for presentations and technical evaluations.
Takeaways
- 😀 The video explains how to create an ex-load view to clarify the assembly process of a model.
- 😀 The goal of the ex-load view animation is to provide potential clients with a clear understanding of the manufacturing process.
- 😀 The animation is created using Inventor's 'Standard Inventor Presentation' mode, which allows for clear visual explanations.
- 😀 The first step in creating the animation is to open the assembly file and adjust visibility to focus on the necessary components.
- 😀 The animation begins with rotating the entire assembly to understand its structure and to plan the subsequent steps.
- 😀 The process includes rotating and moving components incrementally, such as bolts, to simulate their removal from the assembly.
- 😀 For disassembly, the 'Tweak Component' and 'Move' tools are used to show how parts are separated, focusing on each piece of hardware like bolts.
- 😀 The use of the 'Rotate' tool helps simulate the turning of components like bolts and screws, showcasing their movement during the disassembly.
- 😀 Camera angles and timing are essential in creating a smooth animation, allowing viewers to follow each disassembly step clearly.
- 😀 After the assembly is fully disassembled, the animation concludes with a closing sequence, ensuring that the final result is visually clear and well-paced.
- 😀 Once satisfied with the animation, the final step is to render the video, selecting appropriate quality settings for export in formats like AVI or MP4.
Q & A
What is the purpose of creating an ex-load view as mentioned in the video?
-The purpose of creating an ex-load view is to clarify the assembly process of a model and to provide a clear overview of the manufacturing process to potential clients.
What software is being used in the tutorial to create the assembly animation?
-The software used in the tutorial is Autodesk Inventor, specifically utilizing the standard 'Inventor Presentation' feature.
What is the first step in creating the assembly animation?
-The first step is to open the assembly file that has already been created, ensuring it is the correct file for the animation.
What does the term 'visibility' refer to in this context?
-In this context, 'visibility' refers to hiding or showing certain components or features in the assembly view to focus on specific parts during the animation process.
How is the camera used to enhance the assembly animation?
-The camera is used to capture specific angles and perspectives during the animation process, allowing the viewer to follow the steps of the assembly or disassembly clearly. Different views are captured at various stages to ensure a smooth flow of the animation.
Why is 'tweaking components' important in this tutorial?
-'Tweaking components' allows the user to move, rotate, or adjust the components during the animation process, simulating actions like disassembling or assembling parts, which is crucial for creating a realistic animation.
What role does the 'move' command play in the assembly animation?
-The 'move' command is used to relocate components or parts in the animation, such as shifting bolts or parts during the disassembly process. It helps in demonstrating the sequence of actions clearly.
How does the rotation of parts contribute to the animation?
-The rotation of parts (e.g., rotating bolts) simulates the real-life actions of loosening or tightening components. This adds realism to the animation, showing the proper motion required for disassembly.
What is the purpose of setting specific time durations for each animation step?
-Setting specific time durations ensures that the animation runs at an appropriate speed, making it neither too fast to understand nor too slow to lose viewer engagement. It helps in controlling the flow and smoothness of the process.
What is the final step after creating the assembly animation?
-The final step is to render the animation and export it as a video file. This process involves selecting the desired video settings and output format, then checking the simulation before exporting it.
Outlines

This section is available to paid users only. Please upgrade to access this part.
Upgrade NowMindmap

This section is available to paid users only. Please upgrade to access this part.
Upgrade NowKeywords

This section is available to paid users only. Please upgrade to access this part.
Upgrade NowHighlights

This section is available to paid users only. Please upgrade to access this part.
Upgrade NowTranscripts

This section is available to paid users only. Please upgrade to access this part.
Upgrade NowBrowse More Related Video


5.0 / 5 (0 votes)