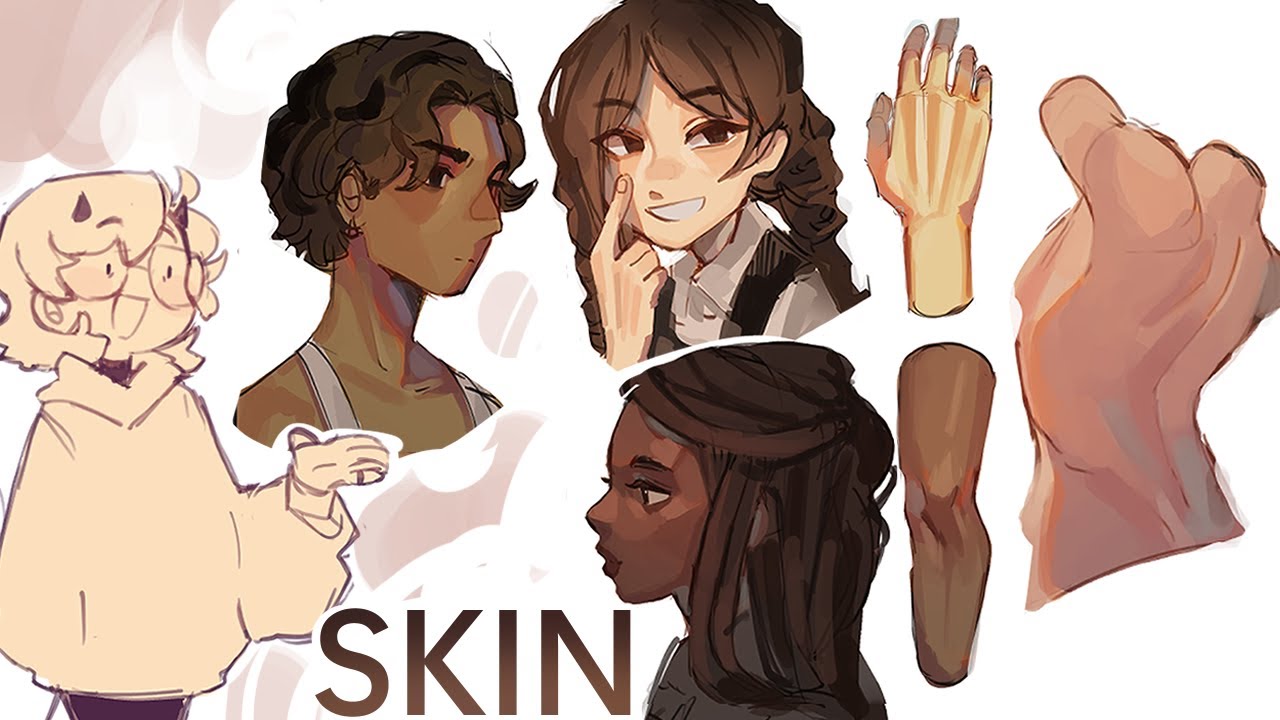
How To Shade and Render The Body - How To Draw

Excal's Art Tips
23 May 202418:30

Summary

TLDRIn this tutorial, the artist shares a step-by-step guide on digital shading techniques using Clip Studio Paint. They discuss the importance of understanding light, shadows, and color blending, and demonstrate how to use different brushes and tools for creating smooth gradients and realistic shading. The video covers the basics of light direction, reflected light, and occlusion shadows, emphasizing the need to avoid flat shadows for a more three-dimensional look. The artist also shares tips on using layer modes like 'multiply' for adding shadows and suggests practicing primitive forms to improve form painting. The tutorial concludes with a time-lapse of the shading process and a reminder of the artist's Patreon and Discord community.

Takeaways

  • 🎨 The artist uses three default brushes in Clip Studio Paint: a round brush with pressure opacity for hard edges, an airbrush for soft edges, and a blur tool for smoothing color transitions.
  • πŸ–ŒοΈ Pressure opacity is essential for blending colors effectively, allowing the artist to create gradients by adjusting the pressure applied while drawing.
  • 🌞 Understanding light is crucial for shading; objects reflect their base color and absorb all other colors from the light source.
  • πŸ”† Reflected light plays a significant role in visibility, especially in shadow areas, where it can create visible effects like glows on objects.
  • 🚫 Avoid using pure black for shading, as shadows still reflect light and retain color, except in cases of complete occlusion or the presence of materials like Vanta Black.
  • πŸ“ Light direction affects how objects appear in 3D space, with surfaces perpendicular to the light source being the brightest.
  • πŸ–ΌοΈ The artist demonstrates a shading process starting with mapping out shadows and highlights, choosing appropriate colors, and gradually building up layers of shading.
  • 🎭 The importance of value variation within shadows is emphasized to avoid flat, unrealistic shading and to reflect the constant change in light intensity on forms.
  • ⏱️ Rendering and shading are time-consuming processes that require patience and practice, even when the artist understands the principles.
  • πŸ”„ The artist recommends practicing color blending as a separate skill, similar to drawing lines, to improve at creating smooth gradients.
  • πŸ› οΈ Using layer modes like 'multiply' can be helpful for adding shadows, but consistency in shadow darkness across the artwork is necessary for a realistic look.
  • πŸ“ The workflow of starting with base colors, adding dark shadows, lighter shadows, and then refining within defined areas is recommended for time efficiency and maintaining light consistency.

Q & A

  • What is the main topic of the video tutorial?

    -The main topic of the video tutorial is shading techniques in digital art.

  • What are the three brushes mentioned in the tutorial?

    -The three brushes mentioned are a round brush with pressure opacity turned on, an airbrush with a soft edge, and the blur tool in Clip Studio Paint.

  • Why is blending important in rendering forms?

    -Blending is important in rendering forms to create smooth gradients between colors, which helps in accurately representing the way light interacts with different surfaces.

  • How does the round brush differ from the airbrush in terms of edge hardness?

    -The round brush has a hard edge, whereas the airbrush has a soft edge, allowing for smoother transitions between colors.

  • What is the purpose of the blur tool in Clip Studio Paint?

    -The blur tool is used to blur edges, creating a gradient between two colors and smoothing out transitions.

  • How does the video explain the concept of light and its interaction with objects?

    -The video explains that light interacts with objects by being absorbed except for the color that corresponds to the object's base color, which is reflected and perceived by the viewer.

  • What is the significance of reflected light in the visibility of shadow areas?

    -Reflected light is significant in shadow areas because it allows us to see details within the shadows, as it is the light reflected from other objects or the environment.

  • Why should shadows not be shaded with black according to the tutorial?

    -Shadows should not be shaded with black because they still reflect light and have color; using black would not accurately represent the natural interaction of light with surfaces.

  • What is the role of the base color in determining shadow color?

    -The base color determines the color of the shadows, as shadows are a darker version of the base color, influenced by the light source and reflected light.

  • How does the tutorial suggest using layer modes like multiply for shading?

    -The tutorial suggests using layer modes like multiply to add shadows by darkening the existing colors on the canvas, which is useful for creating cast shadows and maintaining consistency in shadow darkness.

  • What is the recommended workflow for shading as outlined in the tutorial?

    -The recommended workflow is to start with the base color, add dark shadows, then lighter shadows, and finally paint within the defined areas, ensuring organization and preventing misplacement of light and shadow values.

  • Why does the artist recommend painting on a single layer instead of multiple layers?

    -Painting on a single layer allows for easier adjustments and painting over certain areas, which is necessary for creating smooth transitions and correcting shadows or highlights.

  • What is the importance of practicing primitive forms for painting more complex subjects like the human body?

    -Practicing primitive forms helps in understanding the basic principles of light and shadow on simple shapes, which can then be applied to more complex subjects like the human body, as the body consists of these forms in a more intricate arrangement.

Outlines

00:00

🎨 Introduction to Shading Tutorial

The script begins with the artist addressing the audience, acknowledging requests for a shading tutorial. Despite not being an expert in shading, they decide to share their approach. The artist mentions the support options for the channel, including Patreon and YouTube memberships, and invites viewers to join their Discord server for community interaction. The tutorial will cover brush types, understanding light, and the shading process itself, with an option to skip to the shading section for those already familiar with preliminary concepts.

05:01

πŸ–ŒοΈ Shading Tools and Techniques

The artist discusses the brushes used for shading, focusing on three main types: a round brush with pressure opacity for hard edges, an airbrush for softer edges, and the blur tool for creating smooth gradients between colors. They explain the importance of blending colors for rendering forms and demonstrate how to create gradients between two colors using these brushes. The choice between hard and soft edges depends on the form being painted, with softer edges suitable for rounded objects like balls and harder edges for more angular forms like rocks.

10:02

🌞 Understanding Light and Shadow

This section delves into the principles of light and how it interacts with objects. The artist explains how objects absorb all colors of light except their base color, which is reflected and perceived by the viewer. They discuss the concept of reflected light, which affects the appearance of objects in shadow areas, and the importance of not using pure black for shading, as shadows still reflect light and retain color. The tutorial also touches on occlusion shadows, which occur when light cannot reach certain areas between closely positioned objects, and the role of light direction in determining the brightness of different surfaces on a 3D object.

15:02

🎭 Applying Shading Principles

The artist starts the shading process by mapping out the light and shadow areas on the subject, using a shadow color that is a darker version of the base color. They emphasize the importance of defining hard shadows and less visible shadow areas, adjusting the darkness of these areas to reflect the light source's direction. The tutorial covers the addition of reflected light within shadows and the use of layer modes like 'multiply' for adding cast shadows. The artist also discusses the use of grayscale to check the balance of light and shadow in the artwork, and the importance of maintaining consistency in shadow darkness across the scene.

🀝 Final Thoughts on Shading and Art Techniques

In the concluding part of the script, the artist reflects on the time-consuming nature of rendering and emphasizes the importance of color blending as a fundamental skill in art. They share tips for practicing blending, adjusting brush size for detail work, and avoiding flat shadows by incorporating value variation. The artist also discusses the use of layer modes and the importance of understanding their functions for effective shading. They suggest practicing with primitive forms to improve the ability to paint more complex subjects like the human body. The script ends with advice on maintaining an organized workflow and experimenting with different layering techniques for shading.

Mindmap

Keywords

πŸ’‘Shading Tutorial

A 'shading tutorial' is a type of educational content that teaches viewers how to add depth and dimension to their artwork through the use of shadows and highlights. In the video, the creator offers a step-by-step guide on how to achieve this, despite not considering themselves an expert in the field, showing a willingness to share knowledge and techniques for the benefit of their audience.

πŸ’‘Brushes

In digital art, 'brushes' are tools that simulate the effect of traditional painting brushes, with customizable attributes like size, shape, and opacity. The script mentions three specific brushes: a round brush with pressure opacity, an airbrush, and a blur tool. Each brush has a unique role in the shading process, such as blending colors or smoothing edges, and they are essential for creating different textures and effects in the artwork.

πŸ’‘Pressure Opacity

'Pressure opacity' is a feature in digital art programs that allows the darkness of a brush stroke to vary with the pressure applied by the artist. The script explains that this feature is used for blending colors and creating gradients, which is crucial for rendering forms in a realistic manner. The round brush and airbrush mentioned in the script both utilize pressure opacity to achieve different shading effects.

πŸ’‘Blending

Blending in the context of the video refers to the process of smoothly transitioning between two or more colors to create a gradient. It is an important technique in shading that helps to render forms realistically by simulating the way light interacts with objects. The script demonstrates how to blend colors using different brushes and the importance of this technique in creating a natural and realistic appearance in artwork.

πŸ’‘Light and Shadow

The concepts of 'light' and 'shadow' are fundamental to the video's theme, as they are the primary elements that define the appearance of objects in a three-dimensional space. The script explains how light interacts with objects, how shadows are formed, and the importance of understanding these concepts for creating realistic shading in artwork. The tutorial emphasizes that shadows are not simply black but are influenced by the color and intensity of the light source.

πŸ’‘Reflected Light

'Reflected light' is the light that bounces off one object and illuminates another, affecting the appearance of both. In the video, the creator discusses how reflected light can create glow effects on the edges of objects or contribute to the visibility of objects in shadow. This concept is crucial for understanding how to shade objects in a way that accurately represents their interaction with their environment.

πŸ’‘Occlusion Shadows

An 'occlusion shadow' occurs when an object blocks light from reaching another object, creating a dark area. The script mentions this as a common phenomenon that can make certain areas appear black, especially when two objects are very close together. Understanding occlusion shadows is important for artists to accurately depict the effects of light obstruction in their work.

πŸ’‘3D Space

'3D space' refers to the three-dimensional environment in which we live and perceive objects. The video script discusses how objects in 3D space are affected by light from different directions, which influences how they appear in terms of brightness and shading. The tutorial uses the concept of 3D space to explain the importance of considering light direction and the orientation of objects when creating shading.

πŸ’‘Primitive Forms

In the context of the video, 'primitive forms' such as spheres, cylinders, cubes, and pyramids are basic shapes used to understand and practice the fundamentals of shading and rendering in 3D. The script suggests that mastering these forms is essential for painting more complex subjects like the human body, as they are composed of these basic shapes in various orientations and combinations.

πŸ’‘Layer Modes

'Layer modes' are settings in digital art programs that determine how layers interact with each other, affecting the final appearance of the artwork. The script briefly mentions 'multiply' as an example of a layer mode often used to add shadows by darkening the colors. Understanding and utilizing different layer modes can enhance the shading process and achieve various visual effects in digital art.

πŸ’‘Clipping Mask

A 'clipping mask' is a feature in digital art programs that allows an artist to paint within the boundaries of a specific layer, ensuring that any changes are contained within those limits. The script mentions using a clipping mask layer for the shading process, which helps to keep the artwork organized and makes it easier to adjust and refine the shading without affecting the base layer.

Highlights

The video is a shading tutorial for digital art, focusing on the use of brushes and understanding of light.

The artist uses three default brushes in Clip Studio Paint: a round brush, an airbrush, and a blur tool.

Pressure opacity is essential for blending colors, which is crucial for rendering forms.

A gradient between colors can be created using blending with a round brush or airbrush.

Soft edges are preferable for rounded forms like balls, while hard edges are better for angular forms like rocks.

Light works by emitting color and being absorbed by objects, which then reflect their base color.

Reflected light is visible in shadow areas and contributes to the visibility of objects.

Shadows should not be shaded with black as they still reflect light and maintain color.

Occlusion shadows occur when light cannot reach certain areas between closely positioned objects.

Understanding 3D form and light direction is fundamental to realistic shading in art.

The artist demonstrates mapping out shadows and lights on a character, using a blue-toned shadow for outdoor lighting.

A grayscale layer can be used to check the balance of light and shadow in a painting.

Color blending is compared to drawing lines in importance, and practice is recommended for improvement.

The artist discusses the use of layer modes like 'multiply' for adding shadows and maintaining consistency.

Practicing primitive forms is suggested for better understanding of painting complex forms like the human body.

The artist emphasizes the importance of value variation within shadows for a realistic look.

A workflow is presented starting with base color, then shadows, and finally detailing for an organized approach.

The entire shading process is demonstrated on a single layer for ease of adjustments.

The finished drawing is showcased, and the artist encourages viewers to support the channel.

Transcripts

play00:00

all right how's it going so a lot of

play00:02

people have been asking me to make a

play00:03

shading tutorial and while I'm not the

play00:05

best when it comes to shading I uh

play00:07

figured it's worth a shot and as always

play00:10

if you'd like to support the channel we

play00:11

have a patreon as well as a YouTube

play00:12

memberships Link in the description and

play00:14

we also have a Discord server which you

play00:16

can join if you want to hang out with

play00:18

the rest of the community but uh with

play00:19

that out of the way let's get started

play00:21

before we can get to the shading we have

play00:23

to go over some of the other things like

play00:25

the brushes I use and the way light

play00:27

works so if you don't want to watch any

play00:28

of that you can just skip head to where

play00:31

the shading starts I use three different

play00:33

brushes although they're not that

play00:36

different so the first one is a round

play00:38

brush with pressure opacity turned on

play00:40

and a hard Edge basically the harder you

play00:43

press the darker the line gets next I

play00:47

use an airbrush which is essentially the

play00:49

same thing as the round brush it gets

play00:51

darker the harder you press but this one

play00:54

has a really soft Edge compared to the

play00:57

round uh brush's hard Edge and lastly I

play01:00

use the blur tool in clip Studio paint

play01:02

and the purpose of this is to blur edges

play01:05

so if we have a red and green color you

play01:07

can create a gradient between them by

play01:08

blurring that edge all three of these

play01:11

brushes are essentially default brushes

play01:13

in clip Studio paint and I'm pretty sure

play01:15

you can find these in every single

play01:17

drawing program now the reason why they

play01:19

all have pressure opacity turned on is

play01:21

for blending colors blending is really

play01:24

important when it comes to rendering

play01:26

your forms so let's put down two

play01:29

different colors with got a blue and an

play01:30

orange there's this hard Edge separating

play01:33

them now if we use our round brush all

play01:35

we have to do is color pick one of the

play01:38

colors then put it down in between them

play01:41

and you can see that the program

play01:42

automatically creates a blended version

play01:45

of blue and orange if we color pick this

play01:48

now and place it in between them it

play01:50

creates another Blended version and then

play01:52

all we have to do is rinse and repeat

play01:54

this until we get a gradient between

play01:57

these two different

play01:58

colors if if we use the airbrush it

play02:01

works in the exact same way except we

play02:03

can make the gradient appear even

play02:05

smoother because the edge of the uh

play02:08

airbrush is a lot

play02:10

softer and then the blur tool works the

play02:13

exact same way as the airbrush except

play02:15

it's a lot cleaner and a lot faster so

play02:18

when should you use the hard edges and

play02:20

when should you use the soft edges it

play02:22

mostly depends on the form you're trying

play02:24

to paint if you're trying to paint a

play02:26

ball you would have to use a lot more

play02:28

soft edges because you need to create

play02:29

create gradients from light to dark

play02:32

whereas if you're trying to create

play02:33

something like a rock you would use

play02:35

harder edges that's it for the tool so

play02:38

now let's take a look at how light works

play02:40

you're able to see because light is all

play02:43

around you the sun emits light of every

play02:46

color this light then hits an object and

play02:48

that object absorbs every color of light

play02:51

except for the color that corresponds to

play02:53

its base color so this red chair absorbs

play02:55

every color and it reflects red light

play02:58

this light then hits your ey and you

play03:00

interpret that as a red chair the light

play03:03

that the object is reflecting can also

play03:05

affect other objects around it the white

play03:08

from the surrounding areas hits the ball

play03:10

and creates this white glow on the edge

play03:12

of it but at the same time the ball

play03:15

emits red light and that light hits the

play03:18

White surface and it creates this red

play03:20

glow reflected light is usually only

play03:23

visible in the shadow areas because

play03:25

reflected light isn't very bright so in

play03:28

the light areas it gets it's overpowered

play03:30

by the main light source but in the

play03:32

shadow areas it's strong enough to be

play03:34

visible so we know that light and

play03:36

reflected light are the reasons why

play03:38

we're able to see things and from this

play03:40

we can infer that Shadows have to

play03:43

reflect light as well in this photo we

play03:45

can see that the light is coming from

play03:46

the right and everything on the left is

play03:48

in Shadow but somehow we can still see

play03:51

all the tiny details on the left side

play03:54

including the details on the shirt

play03:56

that's only possible because it reflects

play03:58

light but what if it didn't reflect

play04:01

light everything in Shadow would appear

play04:03

pitch black and that's why you shouldn't

play04:06

shade with black because Shadow still

play04:08

reflect light and they still have color

play04:10

the only time something will appear

play04:11

black is if it either doesn't reflect

play04:13

any light or there isn't enough light to

play04:16

illuminate the object as for something

play04:18

that doesn't reflect light there aren't

play04:20

many things like that but there is this

play04:22

material called vanta black which looks

play04:25

super weird the second way for something

play04:27

to appear black is if it doesn't have

play04:29

enough light to illuminate it and this

play04:31

is actually very common and we call this

play04:34

occlusion Shadows it usually happens

play04:36

when two objects are so close to each

play04:38

other that light can't reach them and

play04:40

the area appears black the only other

play04:43

thing we need to go over to understand

play04:45

shading is form we live in 3D space and

play04:49

objects in 3D space are affected by

play04:51

light in different ways for the most

play04:53

part this comes down to light Direction

play04:56

let's say we have a light source and a

play04:58

flat plane that's reing receiving light

play05:00

objects appear brighter when they're

play05:02

positioned perpendicularly to the

play05:04

direction that the light is coming from

play05:06

this plane is at its brightest now but

play05:08

if we rotate it down it's facing away

play05:11

from the light source so we have to draw

play05:14

it in Shadow with a curved plane it

play05:16

works the same way the side that's

play05:18

facing the light will be the brightest

play05:20

and as it turns away these surfaces

play05:23

become less and less bright until the

play05:26

surface is parallel to the light

play05:29

Direction so this would be where the

play05:32

shadow starts in 3D it would look like

play05:35

this the brightest part of the object

play05:37

would be here and then as it slowly

play05:40

turns away there's a gradual reduction

play05:43

in brightness so we have to create a

play05:45

gradient from light to dark with all of

play05:48

that out of the way we can finally start

play05:50

the actual shading now first I'm going

play05:52

to map out where the Shadows are and

play05:54

where the lights are and to do that I

play05:56

need a shadow color Shadows are a darker

play06:00

color of the base color so technically I

play06:03

could also shade it with this but the

play06:05

character standing outside so the

play06:07

Shadows are affected by light in this

play06:10

case reflected light is coming from the

play06:11

sky so Shadows are going to be kind of

play06:15

blue and I could shade it with this as

play06:18

well but I mean that's kind of uh it's

play06:20

kind of based on art style I don't want

play06:22

to do that so instead I'm first going to

play06:24

shade it with this darker color and now

play06:28

look what happens when I add some blue

play06:30

to

play06:34

this I'll color pick this and the color

play06:38

went over here it went from here to down

play06:42

there so if I want a proper Shadow color

play06:44

it needs to be somewhere in this range

play06:47

and uh I guess we'll go with uh

play06:51

[Music]

play06:58

this I roughly marked where all of the

play07:01

hard Shadows are basically where the

play07:03

planes turn away from the light source

play07:06

or they're parallel to the light

play07:07

Direction next I'll grab a colar that's

play07:09

kind of in between both of these to Mark

play07:11

the shadow areas that aren't as visible

play07:14

as the darker Shadows so for example the

play07:17

side of the stomach here I'm pretty sure

play07:19

you'd see some here as well this side of

play07:21

the arm the neck

play07:33

[Music]

play07:35

now we can still see some areas that

play07:38

have the same color like up here here

play07:42

and here these areas all have the same

play07:44

color but they're not all facing the

play07:47

light source the leg here as well as the

play07:51

entire area up here is facing the light

play07:54

source the light is coming from above

play07:56

but this leg as well as the stomach

play07:58

these are kind of facing away from the

play08:00

light so we have to make sure that

play08:02

they're darker than these areas and to

play08:06

do

play08:07

that I'm just going to uh brush in some

play08:11

darker color like that now I color

play08:13

picked this and I'm going to lighten up

play08:16

these areas a bit more then from here

play08:19

I'll choose a slightly lighter color and

play08:22

I'll paint the areas that are directly

play08:24

facing the light source which would be

play08:25

all of these areas now my original

play08:28

Shadows have kind of disappeared in

play08:30

areas like here and uh they've started

play08:32

to blend in so I'm going to bring these

play08:35

back and I'll make them a little darker

play08:38

as

play08:39

well to do that we just grab a color

play08:42

that's darker remember you can use black

play08:44

if you want in the uh occlusion areas

play08:48

like for

play08:49

example you'd probably find one like

play08:52

right there but occlusion is something

play08:54

that we usually add towards the end so I

play08:56

wouldn't

play08:57

really wouldn't really be too worried

play08:59

about it right now another thing that I

play09:01

actually forgot to mention are uh cast

play09:05

Shadows when one object is in front of

play09:09

another object it's casting a shadow so

play09:11

in this case we'd have to draw one under

play09:13

the chest and probably one under the

play09:15

neck as well or on the neck now I'll

play09:18

create another layer on top of the uh

play09:21

original one and I'll paint it

play09:23

completely

play09:24

black then I'll go to layer modes and

play09:27

I'll set that the color and that gives

play09:28

you a grayscale version of the uh

play09:32

painting I haven't gone over grayscale

play09:34

in this video but the benefits of using

play09:36

grayscale is that it shows you where the

play09:39

light areas are and it shows you where

play09:42

the shadow areas are so using this you

play09:44

can check to see if your lights and

play09:46

shadows are done properly in this case I

play09:49

think this area actually looks a little

play09:51

too flat because it's just a flat gray

play09:53

and then a flat light gray so I'll have

play09:56

to change that as we go along and I'll

play09:57

have to add some more colors there and

play10:00

now I'm going to time-lapse the rest of

play10:01

it and just do Post commentary for it

play10:03

because this did take quite a while to

play10:06

paint I think around 30 to 40 minutes

play10:08

and that's kind of the thing about

play10:09

rendering it's one of the most timec

play10:11

consuming things in art and even if you

play10:14

know what to do you can't really speed

play10:16

up the process it just takes a lot of

play10:18

time but right now I'm just trying to

play10:20

blend a lot of the colors that I put

play10:22

down previously using the blur tool as

play10:24

well as the round brush I'm pretty sure

play10:26

I'm not using the airbrush cuz I usually

play10:28

only use that when I'm trying to change

play10:31

the or change how light or how dark a

play10:34

color is or if I'm trying to add a

play10:36

different Hue to uh the colors color

play10:39

blending is a very important skill and I

play10:43

would equate it to drawing lines when

play10:46

you're drawing so this is something that

play10:48

you have to practice separately an easy

play10:51

way to do that would be to just have two

play10:54

colors two different colors basically

play10:55

what I showed at the start of the video

play10:57

just having two different colors and and

play10:59

then color picking placing the color

play11:02

over the other color and then just color

play11:04

picking trying to create a gradient I

play11:06

would suggest doing that with the round

play11:07

brush instead of a instead of an

play11:09

airbrush cuz the airbrush makes it a

play11:11

little easier I use the blur tool a lot

play11:13

as well when I'm trying to blend colors

play11:16

but the reason I'm doing that is because

play11:18

it creates a smoother gradient than what

play11:20

you can do with the round brush and it's

play11:22

also faster if I were to try to blend

play11:25

everything uh manually this would

play11:27

probably take me upwards of an hour

play11:29

instead of the 30 minutes it took me now

play11:32

by the way I'm using pressure opacity on

play11:34

my brushes so the harder I press the

play11:36

darker the brush gets and the lighter I

play11:39

press the lighter it gets I'm not using

play11:42

any uh pressure sensitivity for the size

play11:45

because that would conflict with the

play11:47

pressure opacity but then you may be

play11:48

wondering if your brush doesn't have any

play11:51

uh pressure sensitivity for the size how

play11:53

do you paint the smaller details or how

play11:56

do you make sure you paint an area

play11:58

without over painting on a different

play12:00

area and for that you would have to um

play12:03

set a shortcut that lets you quickly

play12:05

change the size of your brush in clip

play12:08

Studio paint you can hold control and

play12:09

ALT and then drag across the screen to

play12:11

change the size of the brush and that's

play12:14

a very useful shortcut so I would

play12:16

recommend getting used to that so what

play12:18

I'm doing right now is I'm adding some

play12:20

reflected light into the shadow area as

play12:23

well as making some parts of the Shadows

play12:26

darker and some parts of the Shadows

play12:28

lighter I I think a mistake that people

play12:31

very often make when they're shading is

play12:33

they keep their Shadows extremely flat

play12:36

and that could work for certain Styles

play12:38

like if you have more of a cell-shaded

play12:40

look then having that flat shading could

play12:42

make it look better but if you're trying

play12:44

to go for more of a realistic look forms

play12:47

are constantly twisting and turning and

play12:49

they're being hit by light from

play12:51

different directions they're being hit

play12:52

by light with different intensities so

play12:56

you're never going to have a color that

play12:58

looks the exact same for a very long

play13:01

period of time colors are constantly

play13:03

changing even within the shadow areas

play13:05

they're getting lighter and darker uh

play13:07

you can see the area near the armpit is

play13:09

a lot lighter than the area near the

play13:11

edge of the body and if you think your

play13:13

shadows look flat that's probably why

play13:15

they literally are flat they don't have

play13:18

any value variation or contrast within

play13:20

them right now I'm painting the neck and

play13:22

this actually reminds me of uh layer

play13:25

modes because there are a bunch of

play13:27

different layer modes you can use in

play13:29

digital programs stuff like multiply

play13:32

darken screen glow Dodge they all have

play13:36

different functions and uh I looked into

play13:38

those functions a bit they're actually

play13:40

they're extremely complicated it's

play13:43

really hard to explain and understand

play13:45

how they work and of course you can use

play13:48

them without really understanding what

play13:50

they do but it would help if you

play13:52

understood what they did before you

play13:53

tried to use them but the reason why I

play13:55

brought that up is because I wanted to

play13:57

talk about multiply people very often

play14:00

use multiply when they're trying to add

play14:02

shading to their drawings I'm pretty

play14:04

sure multiply takes the value of the

play14:06

color you uh you've currently got

play14:09

selected and it adds that value to the

play14:12

color that's already applied on your

play14:14

canvas so you always end up with a

play14:16

darker value which makes it so good for

play14:18

adding shadows and people very commonly

play14:21

use it to add cast Shadows like the one

play14:23

on the neck if you're going to do that

play14:25

make sure that the darkness of that

play14:28

shadow that you added with multiply

play14:30

stays consistent with the darkness of

play14:33

other shadows in your scene you can't

play14:35

for example have a super dark shadow

play14:37

under the neck and then all of the other

play14:39

Shadows are brighter than that that

play14:41

stands out and uh it's I'm pretty sure

play14:44

it's not physically possible so right

play14:46

now I'm just painting a lot of the extra

play14:49

forms as well as making some of the

play14:51

Shadows darker and uh if you want to get

play14:53

better at painting forms I would suggest

play14:57

practicing the Primitive forms stuff

play14:59

like spheres cylinders cubes pyramids

play15:02

the better you get at that the better

play15:03

you'll be at painting the body cuz the

play15:06

body is just those forms except they're

play15:09

all mixed together it's slightly more

play15:11

complicated but the uh General ideas

play15:14

still exist if you want to paint the

play15:15

collar bones for example you have to

play15:17

know how to paint cylinders you have to

play15:19

know where the Shadows are on cylinders

play15:21

you have to know where the highlights

play15:22

are and then once you can do that you

play15:24

can paint the collar bones properly

play15:26

right now I'm working on a lot of the

play15:28

smaller details and uh now you might

play15:31

actually notice that the difference in

play15:34

brightness between a lot of the colors

play15:35

that I'm using is a lot smaller than it

play15:38

was at the start like uh in the section

play15:41

that I'm painting right now for example

play15:43

a lot of the colors look very similar

play15:46

and that sort of stuff is necessary if

play15:49

you want to make things look

play15:50

three-dimensional because you have very

play15:52

gradual

play15:53

changes in value so when you're painting

play15:56

Shadows it isn't always about using two

play15:58

colors that are extremely different as

play16:00

long as the colors are different enough

play16:03

to the point where they can create

play16:04

visible contrast that's good enough for

play16:07

uh a lot of Shadows another thing that I

play16:10

want to go over is the workflow so in

play16:12

this case I started with the base color

play16:15

and then I added the really dark shadows

play16:18

then I added the lighter shadows and

play16:20

then from there I just started painting

play16:22

within those areas that I defined

play16:24

keeping everything organized like that

play16:26

is probably one of the most time

play16:27

efficient ways to work

play16:29

but I think more importantly it also

play16:32

prevents you from uh losing track of

play16:35

where the shadows and where the lights

play16:36

are cuz the way light works is areas

play16:39

that are in the light are always going

play16:41

to be brighter than areas that are in

play16:43

the shadows if you define where those

play16:45

light and Shadow areas are right at the

play16:47

start you'll never place the right or

play16:50

you'll never place the wrong values in

play16:53

the wrong areas I think when I first

play16:55

started I was just placing Shadows

play16:57

wherever and then you end up with the uh

play16:59

with those art pieces where you can't

play17:01

tell where the light is coming from and

play17:03

one more thing I want to go over this

play17:05

whole thing was painted on one layer or

play17:08

I had the base layer and then I made a

play17:11

clipping mask layer above it and

play17:13

everything was painted on that one

play17:14

clipping mask layer I know people like

play17:16

to make new layers for every single

play17:18

change they make and um there isn't

play17:21

really anything wrong with that but if

play17:24

you want to do a shading style like this

play17:26

there's a lot of painting over certain

play17:29

areas like sometimes your shadows are

play17:31

too dark so you have to make them look

play17:32

lighter sometimes they're too uh bright

play17:34

so you have to make them look darker and

play17:36

especially what I'm doing right now I'm

play17:38

painting over the Shadows that already

play17:40

exist it's really hard to paint over

play17:42

areas if every single area is painted on

play17:46

a different layer so if you're somebody

play17:48

who likes to paint with a lot of

play17:49

different layers try to paint with one

play17:51

layer next time just to uh experiment

play17:53

with it and see how it goes of course

play17:55

different uh items can be placed on

play17:57

different layers like the clothing can

play17:59

be put on a different

play18:00

[Music]

play18:08

[Music]

play18:13

layer and here's the finished drawing

play18:16

once again if you'd like to support the

play18:17

channel we have a patreon as well as a

play18:19

YouTube memberships Link in the

play18:20

description as well as the Discord link

play18:23

so uh be sure to check those out and uh

play18:25

hopefully this was helpful and I guess I

play18:27

will catch you on the next video

Rate This
β˜…
β˜…
β˜…
β˜…
β˜…

5.0 / 5 (0 votes)

Related Tags
Shading TutorialDigital ArtColor BlendingArt TechniquesLight TheoryClip Studio PaintPressure OpacityGradient Creation3D Form ShadingLayer Modes