alat peraga fisika generator pengubah energi gerak menjadi listrik
Summary
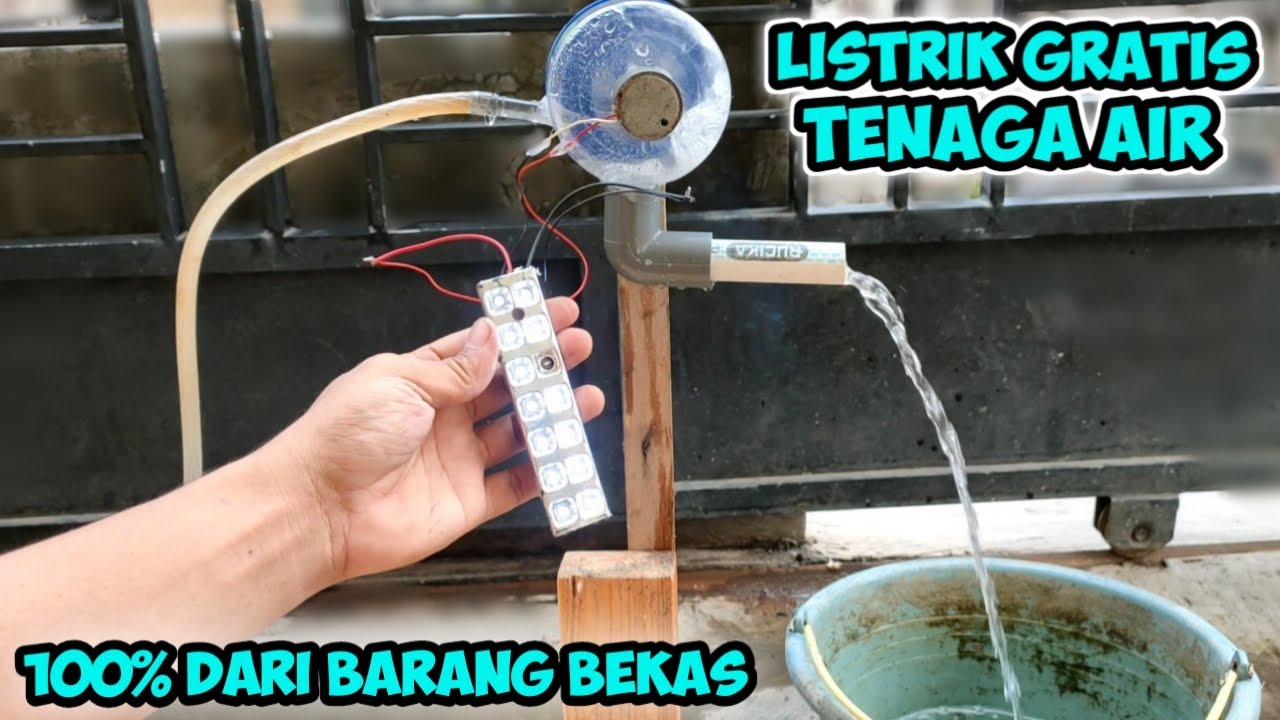
TLDRIn this video, Muhammad Puto, a 12th-grade student, demonstrates how to build a simple generator using everyday materials. He starts with a piece of plywood, a USB port, a dynamo, and several small components like screws, rubber bands, and small wooden pieces. Through step-by-step instructions, he assembles the parts, securing them with tools and ensuring stability to prevent any falls. After assembling, the generator is tested, and the process concludes with a practical demonstration of the setup in action, showcasing how the generator works and lights up.
Takeaways
- 😀 The speaker, Muhammad Puto, is making a generator using wood, a USB port, a dynamo, and other materials.
- 😀 The project involves cutting wood pieces, connecting components, and assembling the generator.
- 😀 The generator includes a USB port for power input and a dynamo for generating electricity.
- 😀 Muhammad uses long and short screws to assemble the generator parts securely.
- 😀 Tripleks (thin plywood) are used for structural support to keep the components in place.
- 😀 The dynamo is connected to the wooden frame with the help of screws and a secure assembly method.
- 😀 The components are arranged so that the generator doesn't wobble or fall apart during use.
- 😀 After assembling the wooden structure, a small plastic piece is used to stabilize parts of the generator.
- 😀 The generator's electrical parts, including the lamp, are connected and tested for functionality.
- 😀 The final setup is tested to ensure the generator works by turning it on and checking if the lamp lights up.
Q & A
What materials are required to build the generator model?
-The materials required include plywood or wood, a USB port, a dynamo, four long screws, a light bulb, rubber bands, small wooden pieces, and a small circular plastic piece for stability.
What is the purpose of the plywood or wood in the construction process?
-The plywood or wood serves as the base or foundation of the generator, providing stability and a structure to attach other components such as the dynamo and USB port.
How do you secure the dynamo to the base of the generator?
-The dynamo is secured by attaching two pieces of plywood between it to prevent it from wobbling or falling, ensuring it remains stable during use.
Why is the rubber band used in the assembly of the generator?
-The rubber band is used to secure the components in place, helping to hold the generator parts together and prevent them from shifting during assembly.
What is the function of the small circular plastic piece?
-The small circular plastic piece is used to stabilize the setup, preventing the parts from falling or becoming misaligned.
What step follows attaching the dynamo to the base?
-After attaching the dynamo, the next step is to insert the light bulb into the setup and secure it in place, ensuring it's ready for testing.
How do you ensure the stability of the generator during assembly?
-The generator is stabilized by attaching wooden pieces with screws to form a strong structure, preventing any wobbling. Additionally, the rubber bands help hold everything together securely.
Why is it important to test the generator after assembly?
-Testing the generator is important to ensure that it functions correctly, specifically checking if the light bulb turns on when the generator is powered.
What is the role of the screws in this assembly?
-The screws are used to connect and stabilize the wooden pieces, ensuring the structure of the generator remains intact and strong throughout the process.
What safety precautions should be taken when assembling the generator?
-When assembling the generator, it is important to handle electrical components with care, ensuring that connections are secure and that no exposed wires or components pose a safety risk.
Outlines

This section is available to paid users only. Please upgrade to access this part.
Upgrade NowMindmap

This section is available to paid users only. Please upgrade to access this part.
Upgrade NowKeywords

This section is available to paid users only. Please upgrade to access this part.
Upgrade NowHighlights

This section is available to paid users only. Please upgrade to access this part.
Upgrade NowTranscripts

This section is available to paid users only. Please upgrade to access this part.
Upgrade NowBrowse More Related Video

Making a simple Wind Turbine Model (membuat Pembangkit Listrik tenaga Angin Sederhana)
Cara buat MIKROHIDRO Listrik gratis tenaga air

membuat batik jumputan (batik celup ikat)

Como fazer MÁQUINA DE CHOQUES com forma de pizza

GERADOR EÓLICO CASEIRO: Muito fácil!

Penerapan Reaksi Redoks Dalam Kehidupan Sehari-hari
5.0 / 5 (0 votes)