NYOBAIN BERSIHIN LCD MASUK AIR HASILNYA DILUAR EKSPEKTASI
Summary
TLDRThe video demonstrates cleaning water damage inside an Android phone LCD screen. The technician disassembles the damaged screen layer by layer, carefully wiping away water residue. Despite meticulous cleaning, after reassembly the screen still displays visual artifacts. The video concludes that trying to clean an LCD with water damage is risky and usually unsuccessful. It's better to fully replace a water damaged LCD screen rather than attempting to fix it, which often makes the problem worse.
Takeaways
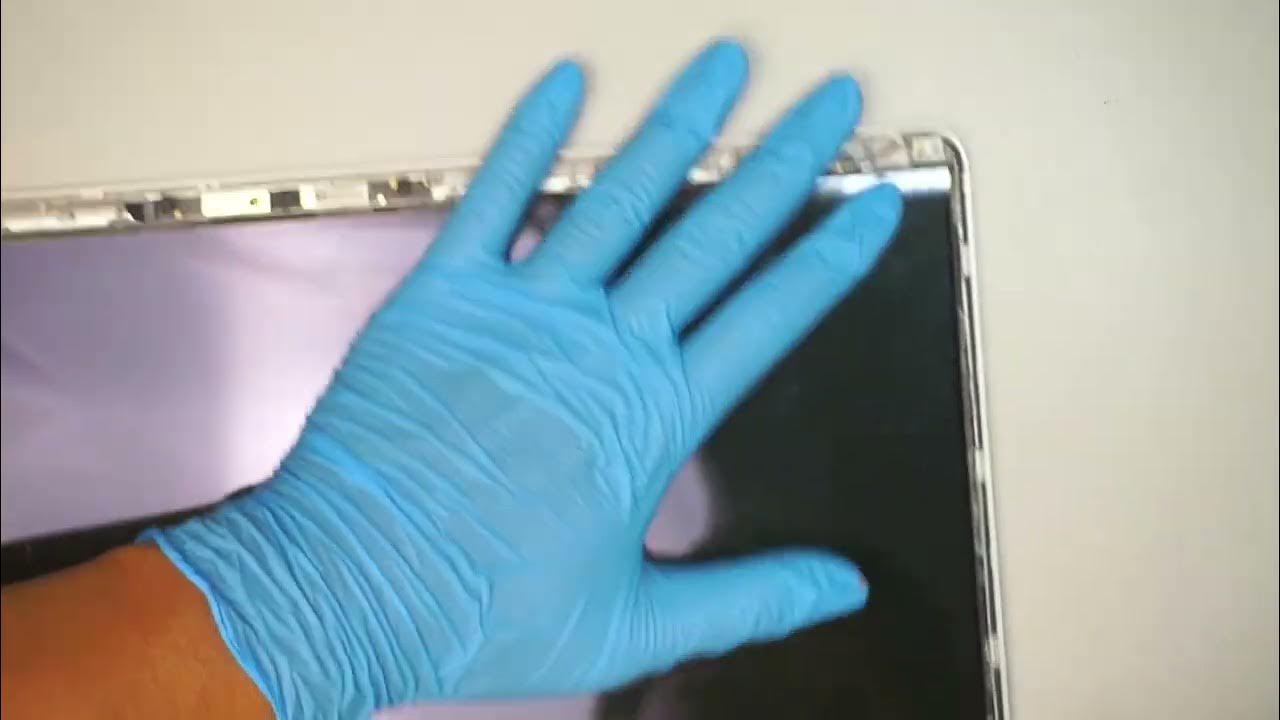
- 💻 The presenter discusses a water-damaged phone, specifically focusing on the LCD which has visible water marks when turned on.
- 📦 The LCD of the water-damaged phone is intended to be replaced, but the presenter explores if it's possible to clean the water inside the LCD first.
- 🔍 The process involves carefully dismantling the LCD to clean the water from its layers, a method that was more common with older Nokia phones.
- 🛠 The LCD contains multiple layers, including a polarizer and transparent sheets, which the presenter attempts to clean manually using tissue.
- 🚫 The presenter expresses skepticism about the effectiveness of cleaning water from modern smartphone LCDs, as this practice was more feasible with older models.
- 👍 After cleaning and reassembling the LCD, it is tested to see if the water marks have been removed and if the display's functionality is restored.
- 🙁 The results of the cleaning attempt do not meet expectations, indicating that water intrusion can permanently damage the LCD's display quality.
- 📝 The experiment serves as a cautionary tale against trying to clean water-damaged LCDs, suggesting that replacement is often the more reliable solution.
- 💡 The presenter concludes that, for modern smartphones, cleaning the LCD of water damage is not worth the effort due to the complex layering and potential for further damage.
- 🛡️ This video highlights the risks of attempting DIY repairs on water-damaged phone components and suggests seeking professional help or replacement parts.
Q & A
What kind of device was being repaired in the video?
-An Android smartphone that had water damage. Specifically, it was an HP X phone that had fallen into water.
What was the main issue caused by the water damage?
-Water had seeped into the LCD screen causing cloudy spots and stains when the phone was turned on.
What did the phone owner want to do about the water damaged LCD?
-The owner wanted to replace the LCD completely instead of trying to clean the water stains.
What did the repairer try to do with the damaged LCD?
-The repairer tried to disassemble the LCD and carefully clean out the water from between the different layers using tissue.
Was the repairer able to clean the water stains out successfully?
-No, even after carefully cleaning each layer, the water stains still remained and the LCD display did not look normal.
Why was the repair not successful?
-The layered construction of the LCD was likely disrupted when water seeped in, so just cleaning the water itself did not restore proper functioning.
What advice did the repairer give about water damaged phone LCDs?
-He advised that it is generally not worth trying to clean the water out of an LCD, and it is better to just replace the LCD completely.
Could this issue happen with slight water exposure like rain?
-No, the repairer thought it likely happened because the phone was fully submerged in water for some time.
Did Nokia phones have removable LCDs that could be cleaned?
-Yes, the repairer mentioned old Nokia phones had LCDs that could be opened up and cleaned successfully.
What was the final resolution for the phone owner?
-In the end, the repairer replaced the water damaged LCD with a brand new one to satisfy the owner.
Outlines

This section is available to paid users only. Please upgrade to access this part.
Upgrade NowMindmap

This section is available to paid users only. Please upgrade to access this part.
Upgrade NowKeywords

This section is available to paid users only. Please upgrade to access this part.
Upgrade NowHighlights

This section is available to paid users only. Please upgrade to access this part.
Upgrade NowTranscripts

This section is available to paid users only. Please upgrade to access this part.
Upgrade NowBrowse More Related Video

Cara bongkar casing oppo a5s
How to Replace HP 15 DY Laptop Screen

BERSIH BERSIH KAMERA DAN LENSA | VIEW INDONESIA

COMO CONECTAR TU CELULAR A CUALQUIER TELEVISOR SIN CABLES!

The Dual Boiler™ | A guide on how to perform a clean cycle on your espresso machine | Breville USA
cara membuat alat PENDETEKSI BANJIR, kalian bisa buat sendiri dirumah !!!
5.0 / 5 (0 votes)