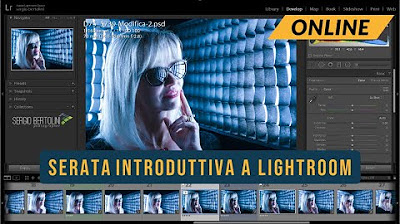
Serata Introduttiva a Ligthroom 2a parte

Sergio Bertolini Photographer
5 Apr 202020:00

Summary

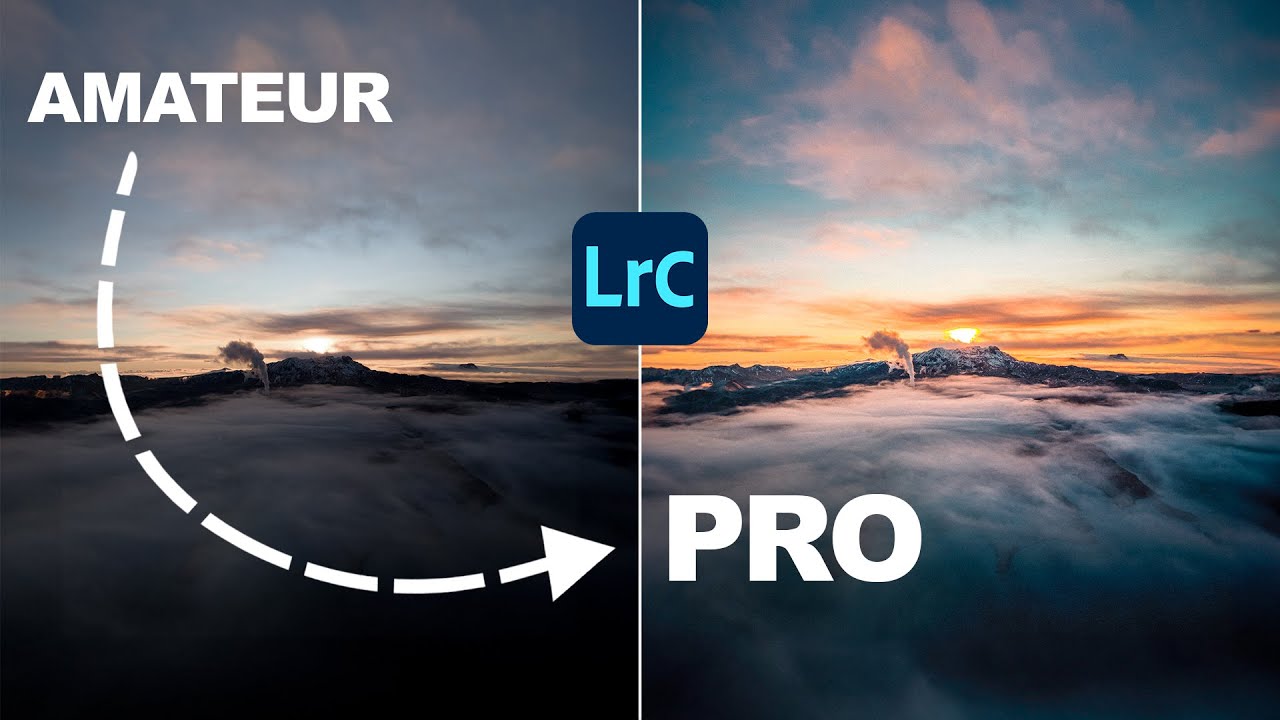
TLDRThe video script discusses the intricacies of photo editing and organization using Lightroom. It highlights the non-destructive editing process, allowing photographers to make adjustments without altering the original file. The use of metadata, such as EXIF data and GPS coordinates, is emphasized for efficient photo management and mapping. The script also touches on the application of color profiles and automatic adjustments to enhance photos, as well as the ability to apply changes to multiple images simultaneously for a consistent look. The importance of maintaining the original image while making edits is stressed, ensuring that photographers can always revert to the initial state.

Takeaways

  • 📸 The concept of 'massive service' in photography involves handling a large number of photos, such as 1,500 from a dance event, and selecting a manageable amount for the final product.
  • 🗺️ Metadata and EXIF data are crucial for organizing and locating photos, allowing photographers to view their images on a map and filter based on geographical location.
  • 🏷️ The use of keywords and tags in photo organization is emphasized, enabling photographers to quickly find and group images based on specific attributes or themes.
  • 🎨 The non-destructive editing process in software like Lightroom ensures that original image files are never altered, providing the flexibility to revert changes and adjust parameters at any time.
  • 🌈 The importance of color grading and the application of color profiles is discussed, highlighting how they can dramatically change the look and feel of a photo, adding depth and character.
  • 🔄 The ability to apply the same corrections and adjustments to multiple photos at once in Lightroom is highlighted as a significant time-saver and consistency tool.
  • 🖼️ The script mentions the use of automatic tone adjustments and the role of artificial intelligence in improving photo editing, especially in outdoor shots.
  • 👁️ The value of manual adjustments on individual photos is underscored, even after applying automatic settings, to fine-tune aspects like exposure, contrast, and tonal ranges.
  • 🎨 The creative aspect of post-production is discussed, with the speaker sharing personal preferences for certain types of processing, like black and white or high-contrast images.
  • 📊 The script also touches on the ability to crop and straighten images within Lightroom, which would otherwise require more complex manipulation in other software like Photoshop.
  • 🔄 The concept of copying and pasting settings from one image to another is presented as an efficient method for maintaining a uniform style across a collection of photos.

Q & A

  • What does the speaker mean by 'massive services' in the context of photography?

    -The speaker refers to 'massive services' as large-scale photography projects where they take a large number of photos, such as at a wedding, and then have to select and work on a much smaller subset, like 200-300 photos out of 1500.

  • How does the speaker utilize metadata and EXIF data in their workflow?

    -The speaker uses metadata and EXIF data to organize and filter their photos more efficiently. This includes using GPS data to locate where the photos were taken and visually represent them on a map, as well as using other metadata like the date and time to sort and select images for editing.

  • What is the significance of keywords in the speaker's photo management process?

    -Keywords are crucial for the speaker in managing and filtering their photos. They assign specific keywords to photos, which allows them to quickly search and group images based on themes, locations, or other relevant categories. This helps in speeding up the editing process and maintaining a systematic organization of their photo library.

  • How does the speaker describe the Lightroom development module?

    -The speaker describes the Lightroom development module as essentially the same as Adobe Camera Raw but with a more user-friendly and well-structured interface. It offers all the same functionalities and operates on a non-destructive editing logic, meaning that the original photo files are never altered, only the editing parameters are saved.

  • What is the advantage of using presets in Lightroom for the speaker's workflow?

    -Using presets in Lightroom allows the speaker to apply the same set of adjustments to multiple photos at once, ensuring a consistent style across their work. It significantly speeds up the post-processing and allows them to maintain a uniform look across their photo collections.

  • How does the speaker feel about the automatic tone correction feature in Lightroom?

    -The speaker finds the automatic tone correction feature to be an excellent starting point for editing, especially for outdoor photos. However, they note that it might not be suitable for studio shots where it could over-lighten the images and lose their charm. The speaker emphasizes the importance of using this feature as a base and making further adjustments as needed.

  • What is the significance of the 'History' panel in Lightroom for the speaker?

    -The 'History' panel in Lightroom is important to the speaker as it allows them to track all the edits made on a photo. It provides the ability to revert back to any previous stage in the editing process, ensuring flexibility and control over the creative direction of the images.

  • How does the speaker use the crop tool in Lightroom?

    -The speaker uses the crop tool in Lightroom to straighten and refine their images. They mention that this non-destructive edit allows them to adjust the composition without losing any part of the original photo, giving them the opportunity to refine their framing at any stage in the editing process.

  • What is the speaker's approach to color grading in Lightroom?

    -The speaker applies color grading by using profiles that simulate different types of film, such as Velvia for increased color saturation and vibrancy. They also work on individual color channels to enhance specific tones, like blues, reds, and greens, to achieve a more aesthetically pleasing and chromatic result.

  • How does the speaker ensure consistency in exposure and color across multiple photos?

    -The speaker ensures consistency by applying the same settings and adjustments to multiple photos at once. They can copy the settings from one photo and apply them to a selection of others, allowing for a uniform look and style across their photo collections.

  • What is the speaker's opinion on the use of artificial intelligence in photo editing?

    -The speaker acknowledges the recent advancements in artificial intelligence and its use in photo editing, particularly in automatic tone correction. However, they note that while AI can provide excellent results for outdoor shots, it may not always be suitable for studio or indoor photos where it could oversaturate and detract from the image's charm.

Outlines

00:00

📸 Comprehensive Wedding Photography Workflow

The speaker discusses their approach to handling large volumes of wedding photography, emphasizing the importance of managing and selecting from thousands of photos. They mention using metadata such as EXIF data and GPS coordinates to organize and map photos, as well as utilizing keywords for efficient searching and categorization. The speaker also highlights the value of having supportive tools in their workflow, allowing for better management and selection of photos for post-processing.

05:02

🎨 Non-Destructive Editing with Lightroom

The speaker explains the non-destructive editing process in Lightroom, similar to Photoshop's Camera Raw, where all adjustments are saved as edits rather than altering the original file. They discuss the benefits of this approach, such as the ability to revert changes and the preservation of original image data. The speaker also touches on the use of color profiles to simulate film stocks and the convenience of applying adjustments to multiple photos simultaneously.

10:05

🌈 Enhancing Photos with Lightroom's Features

The speaker demonstrates the use of Lightroom's automatic adjustments and color profiles to improve the appearance of photos. They show how applying a Vignella profile and automatic levels correction can significantly enhance a photo's colors and contrast. The speaker also mentions the ability to work on individual photos for more precise adjustments, such as exposure, contrast, and tonal adjustments, and how to apply these changes uniformly across multiple images for a consistent style.

15:08

🖼️ Fine-Tuning and Cropping in Lightroom

The speaker discusses further refinements in Lightroom, including detailed adjustments to exposure, contrast, highlights, shadows, and clarity. They also talk about working directly with histograms to modify tonal zones and the ability to fine-tune the saturation and vibrance of images. The speaker emphasizes the non-destructive nature of Lightroom's editing, allowing for constant refinement and the possibility to revert to earlier stages. They also mention the convenience of applying the same adjustments to multiple images and the option to crop and straighten photos without losing any image data.

Mindmap

Keywords

💡Service

In the context of the video, 'service' refers to the extensive work done on a large number of photos, such as those taken at a wedding. It implies a comprehensive coverage and post-processing of the images, where the photographer may have to sift through hundreds or even thousands of photos to select and edit the best ones for the client.

💡Metadata

Metadata in the video refers to the additional information attached to digital photos, such as EXIF data, which includes technical details about the image capture, like the camera settings, date, and time. The video also mentions GPS coordinates, which can be used to map the location where a photo was taken. This information is crucial for organizing and searching through a large photo collection efficiently.

💡Histogram

A histogram is a graphical representation of the tonal distribution in a photograph. It shows the number of pixels at each brightness level, from shadows to highlights. In photo editing software, histograms are essential tools that help photographers understand and adjust the tonal balance and contrast of their images.

💡Keywords

Keywords in this context are tags or labels assigned to photos to help in organizing and searching for specific images within a large collection. They can be based on the content of the photo, the location, or any other relevant attribute.

💡Non-destructive editing

Non-destructive editing refers to the process of modifying images without altering the original file. Instead, edits are stored as separate instructions or layers that can be applied or removed without affecting the original image data. This approach ensures that the original photo remains intact and allows for flexibility in the editing process.

💡Camera Raw

Camera Raw is a digital image processing software that comes with Adobe Photoshop and Lightroom. It allows photographers to develop and adjust raw images, which are unprocessed files directly from the camera. The software provides a range of tools for color correction, exposure adjustment, and other editing tasks, ensuring that the final image is optimized for quality and creative intent.

💡Color profiles

Color profiles are preset sets of color adjustments that simulate specific types of film or look, which can be applied to digital photos to achieve a particular aesthetic or mood. They are used to enhance or alter the color and tonal characteristics of an image, giving it a unique visual style.

💡Automatic tone correction

Automatic tone correction is a feature in photo editing software that uses algorithms to analyze and adjust the tonal range of an image automatically. This can provide a good starting point for further manual adjustments, especially for outdoor photos where the lighting conditions may be variable.

💡Batch processing

Batch processing is the ability to apply the same editing adjustments to multiple images at once, saving time and ensuring a consistent look across a series of photos. This feature is particularly useful for photographers who have to edit large numbers of images, as it streamlines the post-production workflow.

💡Cropping and straightening

Cropping and straightening are editing techniques used to adjust the composition and orientation of a photo. Cropping involves cutting out parts of the image to improve the visual balance or focus on the subject, while straightening corrects the alignment of the photo, ensuring that horizontal and vertical lines appear level and true to life.

💡History panel

The history panel in photo editing software provides a record of all the edits and adjustments made to an image. It allows users to track the changes, revert to previous versions, and understand the sequence of modifications that have been applied to the photo.

Highlights

The concept of 'massive services' in photography, where a large number of photos are taken and then narrowed down to a selection.

The example of a dance recital photography project that resulted in 1,500 photos, from which a selection was made, illustrating the process of culling a large volume of images.

The importance of metadata and EXIF data in organizing and filtering photos, allowing for efficient search and retrieval based on various parameters such as location, date, and camera settings.

The use of GPS data in photography to geotag images, enabling the visualization of photos on a map and aiding in the organization and storytelling aspect of photography.

The application of keywords to photos for easier categorization and retrieval, demonstrating the power of tagging in managing large photo libraries.

The ability to batch process keywords and apply them to multiple photos at once, streamlining the post-production workflow.

The mention of the Lightroom development module and its non-destructive editing approach, ensuring that the original files are never altered, only the edits are saved.

The comparison of Lightroom's development module to Photoshop's Camera Raw, highlighting the similarities in functionality and the user-friendly interface of Lightroom.

The use of film simulation profiles in Lightroom to mimic the look of different types of film stocks, adding a creative and aesthetic dimension to digital photography.

The practical demonstration of how a single photo can be transformed through the application of different settings and profiles in Lightroom, showcasing the software's capabilities.

The discussion on the automatic leveling and color correction features in Lightroom, and how they can serve as a solid starting point for further manual adjustments.

The mention of artificial intelligence and its role in improving the automatic tone and color adjustments in photo editing software, making the process more efficient and effective.

The ability to apply corrections simultaneously to multiple photos in Lightroom, saving time and ensuring a consistent look across a selection of images.

The non-destructive nature of edits in Lightroom, allowing photographers to revert changes and refine their work without losing any data or original image quality.

The practical example of correcting exposure and contrast on a single photo in Lightroom, demonstrating the software's tools for manual adjustments.

The discussion on the application of specific adjustments to multiple photos, achieving a uniform style across a collection of images.

The mention of the crop and straighten tools in Lightroom, allowing for the precise framing and alignment of photos without physically altering the original image.

The overview of the entire editing process from start to finish, highlighting the versatility and comprehensive nature of Lightroom's features.

Transcripts

play00:00

sì massini cosa intendo per servizio

play00:03

massivo servizi nei quali non fate la

play00:07

formula foto o due o se dietro la foto

play00:10

su 30 ma dovete lavorare 200 300 sotto

play00:15

il reportage di un matrimonio io a

play00:18

giugno ho fatto un con saggio di danza e

play00:25

c'erano 24 balletti c'erano 1.500 foto

play00:30

ce ne sono state scelte ma alla fine ne

play00:35

abbiamo ne abbiamo lasciate non mi

play00:37

ricordo di numero esatto se 500 1000

play00:39

foto da scegliere questo intendo per

play00:42

massimo allora quando lavorate su tante

play00:44

foto a tutto questa è una manna avere

play00:48

gli strumenti che mi supporta ci sono

play00:52

tante altre cose da dire sul pannello

play00:53

qui della libreria ma giusto per tutti i

play00:57

metadati exif ce li avete riportati qui

play01:00

così come tutti tutti i dati anche se

play01:03

avete scattato con gps relativi alla

play01:06

posizione che vi permetteranno anche poi

play01:08

di visualizzare quella foto sulla mappa

play01:10

in cui non li avevo scattati con la

play01:12

macchina attaccata al cellulare quindi

play01:14

con le coordinate gps attive ma se

play01:16

l'avessi fatto sulla mappa mi troverei

play01:19

il punto in cui sono state scattate

play01:21

quelle foto e quindi fare una ricerca

play01:24

direttamente sulla mappa

play01:28

abbiamo sempre presente l'istogramma

play01:30

quindi capire possiamo vedere come la

play01:33

distribuzione dei coni delle varie

play01:35

fotografie aop subito possiamo attaccare

play01:40

delle parole chiave o una foto 3 più cui

play01:44

questa la battezzò pantheon

play01:48

ed è una parola chiave che ho associato

play01:50

a questa foto la voglio associare anche

play01:54

questa mela trova usato le parole chiave

play01:57

tante ong voglio fare ancora prima

play02:01

tutte le foto che ho fatto parte ogni

play02:03

dono parola chiave bene vedete questo

play02:05

qui o la bomboletta spray che mi

play02:06

permette di applicare diverse cose che

play02:11

possono essere

play02:13

un'etichetta per esempio io vorrei

play02:16

colorare in azzurro questo è fotine qua

play02:18

fate in azzurro oppure potrei

play02:26

velocemente dire che la proroga con

play02:30

questo modo appiccicare la parola chiave

play02:32

pantheon a tutte le foto che vado a

play02:35

cercare questa questa questa questa ma

play02:40

anche tutte queste tele o faccia al

play02:42

pantheon possono andare di spray e tutte

play02:45

queste foto qua e tutte queste foto qua

play02:50

avranno pantheon come parola chiave

play02:56

oppure posso fare anche selezionare

play03:00

tutte queste che io so che sono del

play03:02

panther e appiccicare in blocco tutto in

play03:07

una volta la parola chiave partner

play03:10

perché mi sembra la parola chiave è un

play03:13

altro modo per ad esempio filtrare i

play03:16

miei dati quindi se io voglio vedere

play03:18

tutte le foto che ho targato pompanti

play03:20

apple e quattro sono le foto in cui

play03:23

appiccicato l'etichetta pantheon ma

play03:27

posso anche combinare le cose per cui

play03:29

dico bene a questa prospettiva il

play03:31

diamogli 4 questo e il pendolo di

play03:33

foucault bella questa il pendolo di

play03:36

foucault

play03:36

ok allora quali sono le foto le ho

play03:39

scelto il pantheon sono queste 40

play03:41

benissimo di queste 40 quali sono quelle

play03:44

che passino il 3 di valutazione queste

play03:46

quali sono quelle che sono uguali a 4

play03:50

questo quindi n modi per filtrare sempre

play03:57

di più le vostre foto e andare a

play03:59

lavorare su quelle un altro esempio

play04:01

pratico se avete visto tutte le mie foto

play04:04

che pubblicano un logo a volte lo psico

play04:08

sinistra all'auto a destra in alto i

play04:10

baffi in basso in basso sinistra in

play04:11

basso a destra

play04:13

io ho delle parole chiave che mi servono

play04:15

per ricordarmi doveva attaccare il logo

play04:19

ad esempio questo qui molto

play04:21

probabilmente lo terrò in basso a destra

play04:23

quindi bottom write

play04:27

questo lo pizzico in alto a sinistra e

play04:32

quando vado a e lo vedevano troppo a

play04:35

pubblicare le foto scegliendo filtrando

play04:38

le foto che hanno la parola chiave bl o

play04:41

tl gli aprì con l'elaborazione uniforme

play04:43

tutte queste ok questo sua libreria

play04:51

proprio andando a a volo a volo

play04:55

d'uccello

play04:56

passiamo ora a parte più interessante

play04:59

interessante già questo ci ha aiutato

play05:01

tantissimo perché non dobbiamo creare

play05:07

delle cartelle sul file system per fare

play05:10

le nostre aggregazioni le ricerche sono

play05:12

rapide la visualizzazione rapida il moto

play05:15

il modo di scegliere le foto diventa

play05:17

molto più molto più veloce ma se il tuo

play05:21

uscire dallo strumento adesso ma la

play05:23

libreria possiamo passare allo sviluppo

play05:25

il modulo di sviluppo di writeroom è

play05:29

fondamentalmente il camera raw che c'è

play05:32

dentro photoshop

play05:33

il motore è esattamente lo stesso è solo

play05:38

un interfaccia utente un po più bellina

play05:41

strutturato un po meglio ma tutte le

play05:43

funzionalità sono le stesse identiche e

play05:45

vi trovate in canada lo ed è il tutto

play05:48

fatto con una logica non distruttiva

play05:51

quindi qualsiasi modifica fate a una

play05:54

foto non è mai fatta sul file originale

play05:59

ma è solo un viene solamente conservate

play06:02

dell'elaborazione ma tema dei parametri

play06:04

che avete modificato per cui si può

play06:07

sempre tornare indietro allora una prima

play06:10

elaborazione da fare con lightroom se

play06:14

adesso andiamo a montmartre ci sono le

play06:17

proprie oggettivamente un po scuretti

play06:18

neanche qua e non troppo speciali sono

play06:23

uno smart

play06:27

partiamo dalla scatto di base così è

play06:30

come uscito dalla macchina in rosa l'aic

play06:34

studenti a dei profili che mi permettono

play06:37

di simulare delle pellicole fotografiche

play06:40

quei cieli al di le prime che in

play06:41

macchina quando produce dei gay per la a

play06:46

labro b

play06:47

lo riporta come profilo come profili

play06:51

disponibili di elaborazione della

play06:54

macchina della della della fuji ad

play06:56

esempio la simulazione di pellicola a

play06:58

stia

play06:59

ma quello che mi piace di più è la

play07:02

simulazione di pellicola verdi che al

play07:07

centro moltissimo e rossi e azzurri e i

play07:10

verdi rende le foto molto più sacro e

play07:14

cromaticamente vi faccio vedere questo

play07:19

era un fatto originale e questa è la

play07:22

foto con applicato il profilo colore

play07:25

bibbia come vedete io sto andando avanti

play07:29

e indietro nella storia questo pannello

play07:31

di storia mi fa mi permette di vedere

play07:34

tutte le operazioni che ho fatto su

play07:36

quella fotografia è di tornare indietro

play07:38

dove come voglio facciamo di più

play07:43

possiamo far fare a lui una correzione

play07:48

automatica dei livelli con ali nelle

play07:52

foto di esterno al 90 per cento ci

play07:54

prende molto bene o comunque è un'ottima

play07:56

base di partenza per migliorare le foto

play07:59

ragazzi siamo partiti da questa e

play08:02

abbiamo bloccato il profilo velvia e

play08:05

abbiamo fatto un impostazione automatica

play08:11

anche questa cosa qua

play08:16

andiamo ad applicare la stessa cosa

play08:18

andiamo applicare un bel mi ha molto più

play08:22

colorata andiamo applicare un tono

play08:24

automatico da così siamo passati e così

play08:29

possiamo anche avere un raffronto un

play08:32

prima e un dopo

play08:33

a sinistra a sinistra vediamo

play08:36

l'originale adesso vediamo lo stato

play08:39

attuale della post produzione

play08:41

stessa cosa per questo

play08:43

[Musica]

play08:48

quindi questo automatico per diciamo

play08:53

così è stato migliorato tantissimo nel

play08:56

corso del tempo e recentemente si è

play08:59

fatto largo uso di intelligenza

play09:01

artificiale di algoritmi intelligenza

play09:03

artificiale nella correzione nulla nella

play09:06

nella sistemazione automatica dei toni

play09:09

di una sorta a parte le foto in studio

play09:12

dove perché questo questo algoritmo

play09:14

tonde molto schiarire le ombre quindi a

play09:17

parte le foto in studio tipo questo che

play09:20

ho fatto ad ivana che vediamo qui se io

play09:28

applicassi i livelli automatici tutto

play09:30

quindi ero mi verrebbe schiarito

play09:32

incredibilmente perdere tutto il fascino

play09:35

per cui in situazioni dove fai le porte

play09:40

in studio con nero non si applica tanto

play09:42

ma se voi fotografati in esterna

play09:47

normalmente la correzione automatica

play09:48

degli ottimi risultati o quantomeno un

play09:51

ottimo punto di partenza dal quale

play09:55

elaborare le vostre foto

play10:05

ok allora faccio vedere questo secondo

play10:12

me è un genio questa è la prima foto che

play10:15

ho fatto mentre andavo su montmartre il

play10:18

quartiere degli artisti ovviamente e si

play10:21

capisce subito

play10:30

ok vedete ragazzi applicare i veglia

play10:36

come sa come è cambiata molto la i toni

play10:40

l'azzurro il rosso come facciamo

play10:47

l'automatico eccola qua quindi siamo

play10:49

passati da così a così prima e dopo

play10:57

ci sarà ancora più notevole perché è una

play10:59

foto con tanti colori abbastanza questa

play11:06

è una foto molto scura ora una una cosa

play11:18

molto bella di lightroom è la

play11:20

possibilità di applicare

play11:22

contemporaneamente la le correzioni su

play11:27

più foto quindi lavorare sulle foto

play11:30

contemporaneamente quindi prendiamo la

play11:33

nostra raccolta il primo giorno anzi

play11:35

andiamo alla c'eravamo già andiamo a

play11:38

montmartre 130 foto abbiamo visto ke

play11:42

cavolo

play11:43

applicare applicare un velvia prendiamo

play11:46

questa applicare già il profilo vernia e

play11:49

poi applicare un automatico

play11:51

beh insomma mi cambia di non di poco

play11:53

questa foto l'ho sbagliata io l'inizio è

play11:56

non dico di no e molto sotto esposta per

play11:58

carità sono i tre ci dovevo prendere la

play12:00

mano però abbiamo visto che notevole

play12:03

possibilità di recupero sarebbe bello

play12:04

cominciare a lavorare queste foto da una

play12:07

condizione di base di automatico su

play12:09

tutte bene facciamolo

play12:14

io posso la stessa se io mi seleziona

play12:21

tutte le foto contro la vuol dire sto

play12:24

lavorando su tutte le foto

play12:26

contemporaneamente e a tutte le foto

play12:30

io posso applicare il profilo e sono

play12:39

acceleratore contro lu le impostazioni

play12:42

automatiche

play12:43

io in una botta sola ho creato o

play12:50

assegnato una elaborazione a tutte le

play12:54

foto vediamo questa qua che prima non

play12:56

avevamo toccato c'erano google o quindi

play13:00

la foto originale era molto scure piatta

play13:05

questa era la foto originale

play13:07

gli abbiamo dato un profilo velia e le

play13:10

abbiamo

play13:11

l'attuale impostazione automatica e

play13:12

diventate così queste impostazioni che

play13:16

c'è un fatto comodo in un'unica boccale

play13:19

o applicate su 130 soci ed è un punto

play13:30

fondamentale di lightroom questo ha

play13:35

detto prendiamo queste due foto qua mi

play13:41

piacerebbe

play13:42

vediamo un po se riesco mai a letto un

play13:48

attimo

play13:58

arriva subito ragazzi

play14:21

un po troppe finestre qui che fanno

play14:24

conflitto l'attimo sono ok ok

play14:49

eccoci allora stavo dicendo

play14:56

prendiamo queste due foto qui sotto sono

play15:02

molto simili

play15:03

queste due quindi prendiamo queste

play15:08

ancora meglio queste qui allora noi

play15:15

adesso abbiamo fatto una non abbia

play15:18

toccato niente la mia fa abbia fatto

play15:19

fare tutto lui

play15:20

attualmente abbiamo fatto l'applicazione

play15:22

di un profilo di un profilo di macchina

play15:25

e livelli automatici felice non sono un

play15:29

buon punto di partenza

play15:30

io sulle singole foto però posso sempre

play15:34

lavorare con di esposizione di aumentare

play15:37

il contrasto lavorare solo sulla

play15:41

componente delle luci dei bianchi dei

play15:44

toni chiari o puramente sulle ombre e

play15:47

scurire solamente le ombre i neri le

play15:49

ombre rimettiamo in automatico

play15:52

posso anche lavorare direttamente sul

play15:53

istogrammi per modificare zone tonali

play15:59

della mia immagine posso lavorare su un

play16:03

impatto ad esempio esagero aumentare

play16:06

mousse mondanamente la chiarezza di

play16:08

questa foto

play16:09

sto esagerando proprio per perché si

play16:12

veda da remoto togliere la foschia

play16:14

quindi vedere se posso rendere le nuvole

play16:18

po più cattive aumentare

play16:22

messa con la saturazione la vividezza è

play16:27

una specialista aspirazione ma che

play16:28

comunque tiene conto dei toni

play16:31

dell'incarnato oppure fare un bianco e

play16:34

nero

play16:35

ok mettiamo che mi piaccia questo tipo

play16:39

di post elaborazione c'è un bianco e

play16:42

nero molto chiuso in nero molto

play16:44

contrastato molto dettagliato cattivo

play16:47

insomma vorrei applicare lo stesso tipo

play16:51

di lavorazione a questa altre foto

play16:53

ciao dante non ti ho visto ciao sono

play16:58

arrivata anch'io

play16:59

ok grande ciao allora voglio applicare

play17:04

questa elaborazione bene

play17:08

lightroom permette di vari modi

play17:13

precedente applico la stessa posta

play17:16

elaborazione della foto precedente tac

play17:19

in un colpo solo

play17:21

ho applicato le stesse modifiche che

play17:24

avevo fatto l'apporto precedente ma la

play17:27

voglio applicare anche a queste queste

play17:29

modifiche qua

play17:32

beh allora io posso copiare tutte le

play17:36

impostazioni le modifiche che ho fatto

play17:38

ma questa foto selezionare queste foto e

play17:44

incollarli queste impostazioni in una

play17:47

botta sola ha trattato le foto nello

play17:52

stesso mondo se io scelgo più foto

play17:58

inoltre posso applicare la stessa

play18:00

regolazione in parallelo alle varie foto

play18:04

ci mette un po di tempo di aggiornare i

play18:06

timeline e questa è una cosa

play18:10

estremamente notevole perché mi permette

play18:12

di applicare un uniformità di stile alle

play18:15

foto 27 faccio che tutte abbiano lo

play18:19

stesso look

play18:21

se io adesso voglio che anche questi che

play18:27

anche questi abbiano lo stesso lo stesso

play18:29

tipo di trattamento ecco che l'avevo

play18:32

copiato ed eccolo che non trovo qua

play18:40

l'altra cosa che posso fare al di là di

play18:43

queste operazioni tonali ovviamente è

play18:47

fare una regolazione della mia immagine

play18:50

del taglio delle mie immagini

play18:53

questi qui non solo non essere sul re

play18:55

sporco daniele sono gli uccellini in

play18:57

volo fuori forma

play19:00

ho raddrizzato questa foto se l'avessi

play19:03

fatta ma dovete aiuto se l'avessi fatta

play19:07

questa modifica in laghi in photoshop e

play19:10

mi sarei perso tutto quello che c'era

play19:13

attorno come vi ho detto in lightroom

play19:16

ogni modifica non è distruttiva per cui

play19:18

si può sempre tornare indietro e quindi

play19:22

io posso ritornare a raffinare la mia

play19:24

lamy il mio taglio vedete che la foto

play19:27

dietro c'è ancora tocca nun o tagliata

play19:29

fisica ma perché non sta lavorando su

play19:31

una foto su un file fisico sto

play19:34

applicando delle operazioni mi vengono

play19:36

registrate in riprodotte una dopo

play19:40

l'altra le operazioni che ho fatto ma

play19:41

non c'è non sto lavorando sul file

play19:44

fisico tanto è vero che qui nella storia

play19:46

sinistra possiamo vedere cosa abbiamo

play19:49

fatto fin dall'inizio abbiamo importata

play19:52

gli abbiamo messo un profilo velvia gli

play19:55

abbiamo dato delle regolazioni

play19:56

automatiche

play19:57

abbiamo incollato le importazioni del

play19:58

bianco e nero

Rate This

5.0 / 5 (0 votes)

Related Tags
Photo EditingLightroom TutorialBatch ProcessingMetadata ManagementNon-Destructive WorkflowStyle ConsistencyWedding PhotographyDance PhotographyGPS TaggingColor Grading