How to Diagnose and Replace Universal Joints (ULTIMATE Guide)
Summary
TLDRIn this video, ChrisFix teaches viewers how to inspect and replace universal joints, or U-joints, on their vehicles to avoid costly mechanic fees. He demonstrates two methods for replacement: using a press or a hammer, and covers different driveshaft types. The video also explains how to diagnose U-joint issues through symptoms like clunking or vibrations and emphasizes the importance of U-joints for driveshaft flexibility. Additionally, it guides on selecting the right U-joint for the vehicle, considering factors like greaseability and strength.
Please replace the link and try again.
Q & A
What are universal joints and why are they important?
-Universal joints, also known as U-joints, are crucial automotive components that allow the driveshaft to operate at angles and move up and down with the suspension. They are typically found in rear-wheel drive, all-wheel drive, and four-wheel drive vehicles.
What are the signs that indicate a U-joint might be going bad?
-Signs of a failing U-joint include a clunk when shifting between drive and reverse, rhythmic clicking, squeaking, or grinding noises that increase with speed, and vibrations felt under the seat.
How can you visually inspect U-joints to determine if they need replacement?
-Visual inspection involves checking for retaining clips in place, ensuring the U-joint isn't pushed in or out, and examining the rubber boots for damage. Also, check for play or movement in the driveshaft when attempting to move it side to side and up and down.
What tools are necessary for replacing U-joints at home?
-You'll need common hand tools, including a press or hammer for removing and installing U-joints, pliers, a file, sandpaper, a grease gun, and a torque wrench for tightening bolts.
What are the two methods shown in the script for replacing U-joints?
-The two methods shown are the press method and the hammer method. The press method uses a press tool to remove and install U-joints, while the hammer method uses a socket and hammer.
Why is it important to use a press or hammer to install U-joints correctly?
-Using a press or hammer ensures that the U-joint is properly seated and aligned, preventing excessive wear and potential failure. It also ensures the retaining clips can be installed correctly.
What is the purpose of cleaning and deburring the edges of the driveshaft before installing new U-joints?
-Cleaning and deburring the edges of the driveshaft prevents damage to the new U-joints during installation. It ensures a smooth and proper fit for the U-joints.
Why is it necessary to grease U-joints after installation?
-Greasing U-joints after installation lubricates the needle bearings, which reduces friction and extends the life of the U-joints.
What is the significance of the plastic-injected U-joints mentioned in the script?
-Plastic-injected U-joints require the plastic to be melted and removed before pressing out the U-joints. This is a specific step necessary for certain General Motors vehicles.
How do you ensure the driveshaft is reinstalled correctly after replacing U-joints?
-After replacing U-joints, you should clean the mating surfaces, align the driveshaft with the marks made before removal, tighten the bolts in a crisscross pattern, and use threadlocker to prevent loosening.
Outlines

This section is available to paid users only. Please upgrade to access this part.
Upgrade NowMindmap

This section is available to paid users only. Please upgrade to access this part.
Upgrade NowKeywords

This section is available to paid users only. Please upgrade to access this part.
Upgrade NowHighlights

This section is available to paid users only. Please upgrade to access this part.
Upgrade NowTranscripts

This section is available to paid users only. Please upgrade to access this part.
Upgrade NowBrowse More Related Video
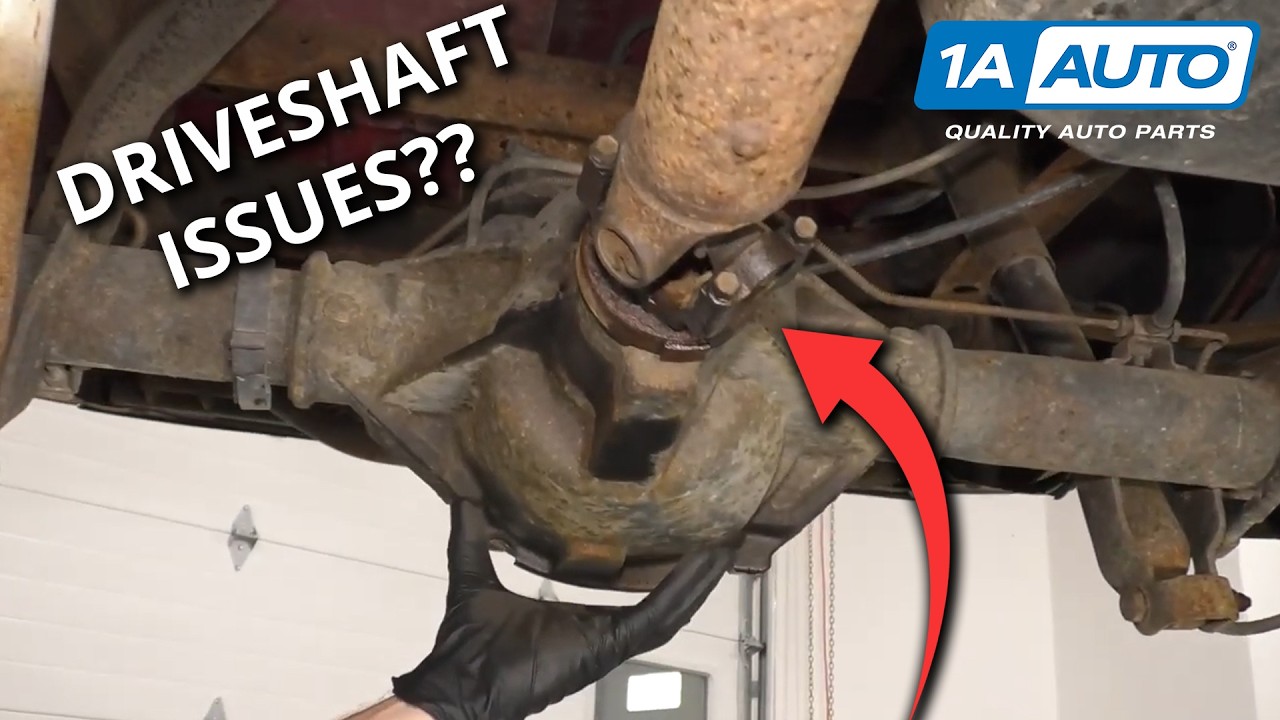
How to Diagnose Truck Drive Shaft Problems - Vibrations and Noise

The Incredible Mechanics of Driveshafts

How does a driveshaft work? What is a CV joint? Automotive systems explained!
Repointing historic masonry the right way - Part 1 - Clearing Mortar Joints
How to Test an Alternator

Artikulasi (Persendian)
5.0 / 5 (0 votes)