menanam cabe rawit di galon_berbuah lebat

Tanam Menanam
21 Dec 202309:59

Summary

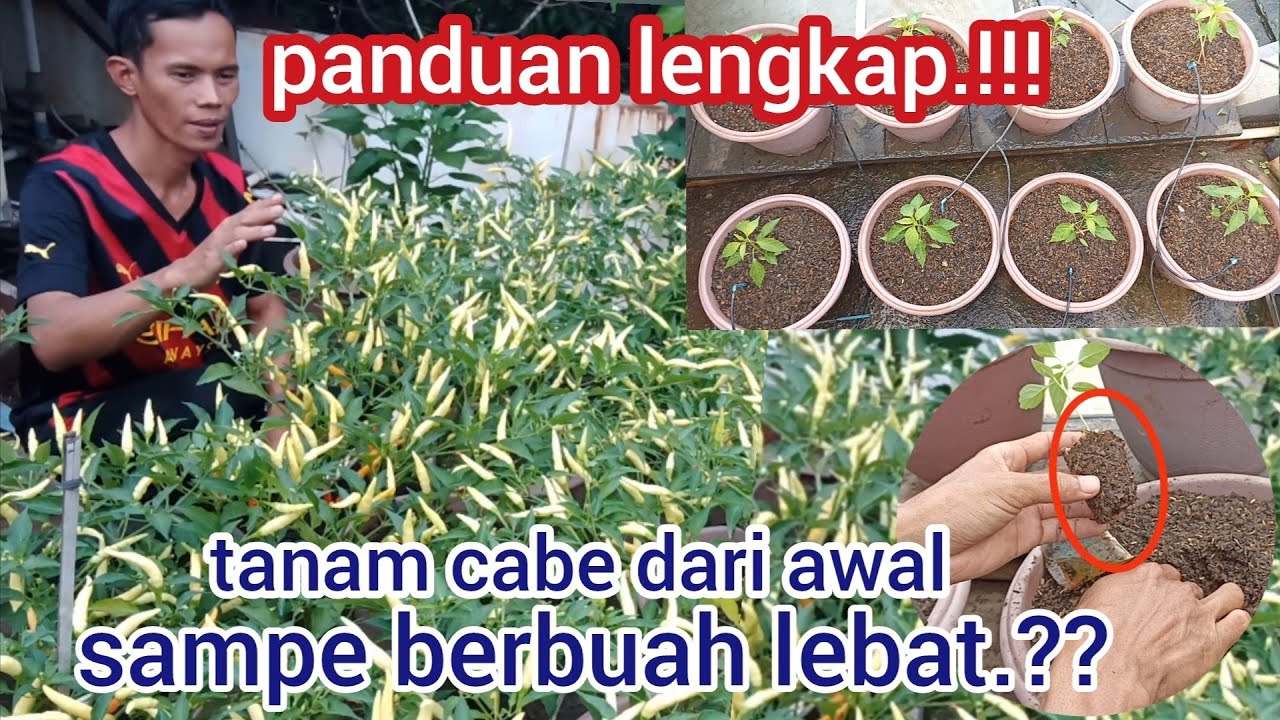
TLDRThis instructional video offers a comprehensive guide to planting chili peppers using recycled water bottles as pots. It demonstrates how to cut the bottles, create drainage holes, and paint them for aesthetics and sun protection. The video then details the preparation of a custom soil mix with compost, raw manure, and charcoal, and optionally dolomite lime. It covers the planting process, including sowing, watering, and fertilizing with NPK 16-6-11 and additional supplements like Karate Plus and boron for enhanced growth. The guide also includes tips for weeding, pruning, and pest control using pesticides and fungicides. The video concludes with harvesting advice, showcasing the transformation from seed to a bountiful crop over 80 days.

Takeaways

  • 🌱 The video demonstrates planting chili peppers using a DIY pot made from a reused mineral water bottle.
  • βœ‚οΈ The bottle is cut in half following the natural lines to create the pot, with drainage holes added for water flow.
  • 🎨 To enhance appearance and protect the roots from sunlight, the outer part of the bottle is painted.
  • 🌾 A homemade planting medium is prepared, consisting of a mixture of compost, raw humus, and charcoal in a 2:1:1 ratio, with optional dolomitic lime.
  • 🌱 The planting medium is thoroughly mixed before being filled into the prepared pots.
  • 🌞 The pots are placed in a sunny location, and the medium is moistened before planting.
  • 🌱 Chili pepper seeds are planted in the center of the pot, covered with soil, and watered lightly.
  • 🌱 After planting, the plants are watered sparingly, and weeds are removed to prevent competition with the chili plants.
  • 🌱 To encourage bushy growth, the plants are pruned, and a balanced NPK fertilizer is applied at a rate of 1 teaspoon per 3 liters of water.
  • 🌱 For additional nutrients, a solution of Karate Plus and boron is used, with the same application rate as the NPK fertilizer.
  • 🌱 Foliar feeding is also done using a Sil B solution, applied in the morning or late afternoon when the leaves are most receptive.
  • 🌱 The plants are protected from pests and diseases with regular applications of fungicides and pesticides, applied weekly.
  • πŸƒ As the plants grow, they are supported with stakes to prevent damage from wind or rain.
  • 🌢️ The video concludes with the harvest of ripe chili peppers, with a focus on picking them when they are red and mature.

Q & A

  • What is the main activity described in the script?

    -The main activity described in the script is planting chili peppers using a DIY pot made from a recycled mineral water bottle.

  • How is the mineral water bottle repurposed for planting?

    -The mineral water bottle is cut into two parts following the existing lines to create a pot, and holes are made at the bottom for drainage.

  • What materials are suggested for creating the planting medium?

    -The suggested materials for the planting medium are a mixture of compost, raw soil, and charcoal in a 2:1:1 ratio, with the option to add dolomitic lime if available.

  • What is the recommended size for the planting bags if not using a DIY pot?

    -The recommended size for the planting bags is 35 or 40 liters.

  • How should the chili pepper seeds be planted in the pot?

    -The seeds should be planted in the center of the pot to a depth covering the seed leaves, and then covered back with soil.

  • What is the watering technique after planting the chili seeds?

    -After planting, the soil should be watered lightly to avoid displacing the seeds.

  • How often should the plants be fertilized and what type of fertilizer is recommended?

    -The plants should be fertilized once a week with an NPK 16-6-11 fertilizer, diluted in water at a rate of one spoonful per 3 liters of water.

  • What additional nutrients are suggested for the plants after 25 days of planting?

    -After 25 days, in addition to NPK 16-6-11, the plants should also receive Karate Plus with boron, both at a rate of one spoonful each, dissolved in 3 liters of water.

  • How should the plants be protected from pests and diseases?

    -The plants should be protected from pests and diseases by spraying a mixture of fungicide (torbinol at 1cc per liter of water) and pesticide (rogen at 1cc per liter of water) once a week.

  • At what stage of growth should the chili plants be harvested?

    -The chili plants can be harvested when the fruits start to turn red, but it is suggested to wait a few more days for more fruits to ripen.

  • What is the significance of the calcium mentioned in the script?

    -Calcium is important for the growth points of the plants, such as new shoots and root tips, and is provided through the use of Karate Plus boron which contains calcium.

Outlines

00:00

🌱 Planting Chili Peppers in Recycled Water Bottles

This paragraph details the process of planting chili peppers using a recycled water bottle as a pot. The bottle is cut in half and holes are made for drainage. The outer part is painted to protect the roots from sunlight. The planting medium consists of a mixture of raw compost soil, coco coir, and charcoal in a 2:1:1 ratio, with an optional addition of dolomitic lime. After mixing the medium, it's filled into the prepared pots and seeds are planted. The pots are then placed in a sunny location and watered. After 10 days, weeds are removed, and the plants are fertilized with a 16-6-11 NPK fertilizer mixed in water. The fertilization is repeated weekly.

05:01

🌢️ Chili Pepper Growth and Harvest

This paragraph continues the narrative of chili pepper cultivation, focusing on the growth and harvest stages. At 25 days post-planting, the plants are lush and new shoots are emerging. A stronger fertilizer mix including NPK 16-6-11 and Karate Plus Boron is applied to promote growth. At 45 days, the plants are robust, and preventative measures against pests and diseases are taken by spraying pesticides and fungicides weekly. By 60 days, the plants are bearing fruit, and by 75 days, some fruits are ripening. The first harvest is conducted at 80 days, with the plants showing a rich growth and many ripening fruits. The video concludes with a demonstration of harvesting the chili peppers.

Mindmap

Keywords

πŸ’‘Cabai

Cabai, or chili pepper, is a key element in the video as it is the plant being cultivated. Chili peppers are the fruits of plants from the Capsicum genus and are used in various cuisines around the world for their spicy flavor. In the script, the process of planting and nurturing chili peppers is described, indicating the importance of this plant to the video's theme of gardening and cultivation.

πŸ’‘Galon

Galon, which translates to 'jerrycan' or 'water drum,' is used as a container for planting in the video. It is mentioned as being cut into two parts to create a makeshift plant pot. This demonstrates a creative and sustainable approach to gardening, reusing materials that might otherwise be discarded.

πŸ’‘Lubang Brinase

Lubang Brinase, or drainage holes, are essential for plant pots to prevent waterlogging. The script describes creating these holes to ensure proper drainage, which is vital for the health of the chili pepper plants. This step illustrates the importance of understanding plant care requirements for successful cultivation.

πŸ’‘Media Tanam

Media Tanam, or planting medium, refers to the soil mix used to grow plants. The video describes a specific mix of raw compost, coco coir, and charcoal, which provides the necessary nutrients and aeration for the chili pepper plants. This keyword highlights the importance of using the right medium for optimal plant growth.

πŸ’‘Pupuk

Pupuk, meaning 'fertilizer,' is discussed in the context of providing nutrients to the chili pepper plants. The script mentions using NPK 16-6-11 and other supplements like Karate Plus and Boron, which are essential for the plants' growth and development. This keyword emphasizes the role of fertilization in enhancing plant health and productivity.

πŸ’‘Pemupukan

Pemupukan, or 'fertilization,' is a process described in the video where the chili pepper plants are provided with essential nutrients. The script details the preparation and application of a fertilizer solution, illustrating the importance of regular nourishment for plant growth.

πŸ’‘Penyemprotan

Penyemprotan, or 'spraying,' is a method of applying fertilizers or pesticides to plants. The video script describes the use of a spray to apply solutions to the plants, ensuring even distribution and absorption. This keyword is important as it relates to the practical application of plant care techniques.

πŸ’‘Pestisida

Pestisida, or 'pesticide,' is used in the video to refer to substances that protect plants from pests. The script mentions using a pesticide called 'Rigen' to prevent damage from insects, which is crucial for maintaining the health and yield of the chili pepper plants.

πŸ’‘Fungisida

Fungisida, or 'fungicide,' is a chemical used to prevent or treat fungal diseases in plants. The video script includes a step where a fungicide named 'Torbinol' is applied to the chili pepper plants, demonstrating the measures taken to protect the plants from diseases.

πŸ’‘Panen

Panen, or 'harvesting,' is the process of collecting the mature fruits of the chili pepper plants. The script describes the anticipation and timing of harvesting, which is a critical step in the cultivation process as it marks the culmination of the gardening efforts and the beginning of the fruits' use.

πŸ’‘Ajir

Ajir, which can be translated as 'stake' or 'support,' is used in the video to describe the use of a structure to support the chili pepper plants. The script mentions installing stakes to prevent the plants from falling over due to wind or rain, highlighting the importance of physical support in plant growth and protection.

Highlights

Planting chili and rawit using a mineral water bottle as a pot.

Cutting the mineral water bottle in half to create the pot.

Creating drainage holes in the bottle to prevent waterlogging.

Using a heated iron or solder to make drainage holes.

Painting the outside of the bottle to protect the roots from sunlight.

Preparing a planting medium with a 2:1:1 ratio of soil, raw compost, and charcoal.

Adding dolomitic lime if available to the planting medium.

Mixing all the components of the planting medium thoroughly.

Filling the prepared bottle with the planting medium.

Using a size 35 or 40 pot bag for planting.

Moistening the planting medium before planting.

Planting the chili seedlings at an appropriate depth.

Watering the plants lightly after planting.

Removing weeds after 10 days to avoid competition with the plants.

Pruning the plants to encourage new growth and bushiness.

Using an NPK 16-6-11 fertilizer with a dosage of 1 teaspoon per 3 liters of water.

Applying the fertilizer solution to the plants once a week.

Adding Karate Plus and boron to the fertilizer after 25 days for enhanced growth.

Diluting the Karate Plus and boron in water and applying it to the plants.

Using a spray bottle with a solution of Sil B to spray the leaves for additional feeding.

Applying the leaf spray in the morning or late afternoon when the leaves are open.

After 45 days, the plants are lush, and fruit buds are beginning to appear.

Setting up a support for the plants to prevent them from falling over.

Applying a fungicide and pesticide weekly to prevent diseases and pests.

Mixing the fungicide and pesticide in a single application for convenience.

After 60 days, the fruits are more abundant, and the plants continue to bloom.

Harvesting the chili peppers after 80 days when they start to turn red.

The plants are very bushy, and more fruits are ripening after 75 days.

Conducting the first harvest of ripe chili peppers.

Transcripts

play00:00

[Musik]

play00:01

Assalamualaikum warahmatullahi

play00:03

wabarakatuh kali ini kita menanam cabai

play00:05

rawit dengan menggunakan por dari bekas

play00:08

galon air mineral terlihat sangat cantik

play00:10

dan berikut adalah

play00:14

langkah-langkahnya pertama kita potong

play00:16

galon menjadi dua bagian dengan

play00:18

Mengikuti alur garis yang ada di galon

play00:20

seperti

play00:22

ini kemudian kita buat lubang brinase

play00:25

agar aliran air lancar dan tidak

play00:27

menggenang di dalam pot untuk membuat

play00:29

lubang teman-teman bisa menggunakan bor

play00:32

atau

play00:33

solder jika tidak ada teman-teman bisa

play00:36

menggunakan besi yang

play00:38

dipanaskan dan untuk mempercantik

play00:41

sekaligus melindungi akar dari sinar

play00:43

matahari kita bisa

play00:45

mengecatnya kita cat bagian luar

play00:49

saja Lalu kita jemur sampai

play00:54

kering selanjutnya kita buat media tanam

play00:58

media tanam sendiri berupa campuran dari

play01:00

tanah kompos sekam mentah arang sekam

play01:04

dengan perbandingan

play01:06

211 dan jika ada kapur dolomit

play01:09

teman-teman bisa menambahkannya satu

play01:11

genggam atau satu

play01:13

[Musik]

play01:17

gelas kemudian kita aduk sampai semua

play01:20

bahan tadi

play01:23

tercampur Setelah semua bahan tercampur

play01:26

kita bisa isikan ke dalam pot yang sudah

play01:28

kering

play01:30

Jika ingin menggunakan pobag teman-teman

play01:33

bisa menggunakan poag berukuran 35 atau

play01:36

[Musik]

play01:37

40 Setelah semua Poter isi kita letakkan

play01:41

di tempat yang terkena sinar

play01:47

matahari sebelum melakukan pindah tanam

play01:50

kita basahi dahulu media

play01:52

[Musik]

play01:58

tanamnya

play02:02

kita ambil bibit cabainya Setelah itu

play02:05

kita buat lubang tanam pada bagian

play02:07

tengah-tengah pot lalu kita masukkan

play02:10

bibit cabai kita ke dalam lubang

play02:12

tanam untuk kedalaman sendiri sebatas

play02:15

daun lembaga kemudian kita timbun

play02:20

[Musik]

play02:23

kembali setelah semua tertanam kita bisa

play02:26

siram sedikit-sedikit

play02:28

saja

play02:30

[Musik]

play02:36

10 hari setelah

play02:38

[Musik]

play02:41

tanam Jika ada tumbuh gulma kita bisa

play02:44

membersihkannya agar tidak mengganggu

play02:46

tanaman

play02:49

kita dan jika ingin melakukan potong

play02:52

pucuk kita bisa melakukannya agar

play02:55

tunas-tunas segera tumbuh sehingga

play02:57

membuat tanaman menjadi rimbun

play03:02

untuk pupuk kita bisa menggunakan NPK

play03:05

1611 dengan dosis atau takaran 1 sendok

play03:09

pupuk kita larutkan ke dalam 3 Lit air

play03:13

kemudian kita siramkan ke dalam pot satu

play03:16

pot kita beri satu gelas larutan pupuk

play03:20

NTK kita lakukan sat minggu

play03:25

[Musik]

play03:28

sekali

play03:30

[Musik]

play03:34

25 hari setelah tanam tampak lebih

play03:38

rimbun dan tunas-tunas pun banyak yang

play03:44

bermunculan juga sudah muncul bakal

play03:47

[Musik]

play03:51

bunganya jika sudah seperti ini untuk

play03:54

pemumpukan kita bisa gunakan NPK

play03:57

161 dan kita tambahkan pupuk karate plus

play04:01

boroni untuk dosis sama ya 1 sendok

play04:04

pupuk NPK dan 1 sendok pupuk karate plus

play04:07

boroni kita larutkan ke 3 Lit air dan

play04:11

kita gunakan untuk menyiram satu pot

play04:13

satu

play04:14

gelas karate plus boroni mengandung

play04:17

kalsium larut air kalsium sangat penting

play04:20

untuk titik-titik tumbuh tanaman seperti

play04:23

pucuk baru dan ujung-ujung

play04:28

akar

play04:31

[Musik]

play04:35

dan kita juga bantu pemupukan melalui

play04:37

daun menggunakan gandas Sil

play04:41

B dengan takaran 1 sendok teh kita

play04:44

larutkan ke 3 Lit air dan kita gunakan

play04:48

untuk menyemprot tanaman

play04:50

kita usahakan saat menyemprot kita

play04:53

lakukan pada pagi hari sekitar jam

play04:56

sampai 10 atau sore hari jam t sampai l

play05:00

karenaata daun sedang membuka

play05:05

[Musik]

play05:28

sempurna

play05:31

45 hari setelah

play05:34

[Musik]

play05:38

tanam tampak sangat

play05:41

[Musik]

play05:43

rimbun dan calon-calon buah sudah mulai

play05:48

bermunculan kita bisa pasang Ajir supaya

play05:51

tanaman kita tidak mudah rebah jika

play05:53

terkena angin atau

play05:58

hujan

play06:13

untuk antisipasi hama kita lakukan

play06:15

penyemprotan pestisida dan fungisida

play06:18

kita lakukan 1 minggu

play06:21

sekali untuk fungisida saya gunakan

play06:24

torbinol dengan dosis 1 cc kita larutkan

play06:28

ke dalam 1 l

play06:30

[Musik]

play06:42

A dan untuk pestisida saya gunakan rigen

play06:47

dengan dosis 1 cc kita larutkan ke dalam

play06:50

1 liter air

play06:52

[Musik]

play06:53

juga kita bisa campur jadi

play06:58

satu

play07:01

[Musik]

play07:14

Setelah itu kita semprotkan ke daun dan

play07:17

batang tanaman kita usahakan juga saat

play07:20

penyemprotan kita lakukan pagi atau sore

play07:24

hari dan Kalau bisa pada bagian bawah

play07:27

daun

play07:28

juga

play07:32

[Musik]

play07:48

60 hari setelah

play07:50

tanam buah terlihat lumayan banyak dan

play07:54

bunga-bunga juga masih

play07:56

[Musik]

play07:58

bermunculan

play08:03

[Musik]

play08:14

75 hari setelah tanam Wah terlihat

play08:18

semakin

play08:20

[Musik]

play08:28

lebat

play08:33

[Musik]

play08:46

buah juga ada yang sudah mulai memerah

play08:49

jika teman-teman ingin memanennya sudah

play08:51

bisa ya tapi saya akan panen beberapa

play08:54

hari lagi agar lebih banyak lagi yang

play08:58

merah

play09:01

80 hari setelah

play09:03

tanam terlihat rimbun sekali

play09:08

ya dan semakin banyak yang mulai

play09:13

[Musik]

play09:17

merah Saya akan melakukan panen

play09:21

[Musik]

play09:28

pertama

play09:30

[Musik]

play09:42

kita petik bersama tangkai

play09:45

buahnya Sekian dari saya Jika ada salah

play09:48

kata saya mohon maaf Wassalamualaikum

play09:50

warahmatullahi wabarakatuh dan sampai

play09:53

jumpa

play09:57

lagi

Rate This
β˜…
β˜…
β˜…
β˜…
β˜…

5.0 / 5 (0 votes)

Related Tags
Chili PlantingRecycled GardeningDIY PlantersOrganic FertilizerHome GardeningPlant CareCompostingGreen ThumbGarden TipsHarvesting