HOW TO GET A BLURRY BACKGROUND IN-CAMERA! Depth of field explained.
Summary
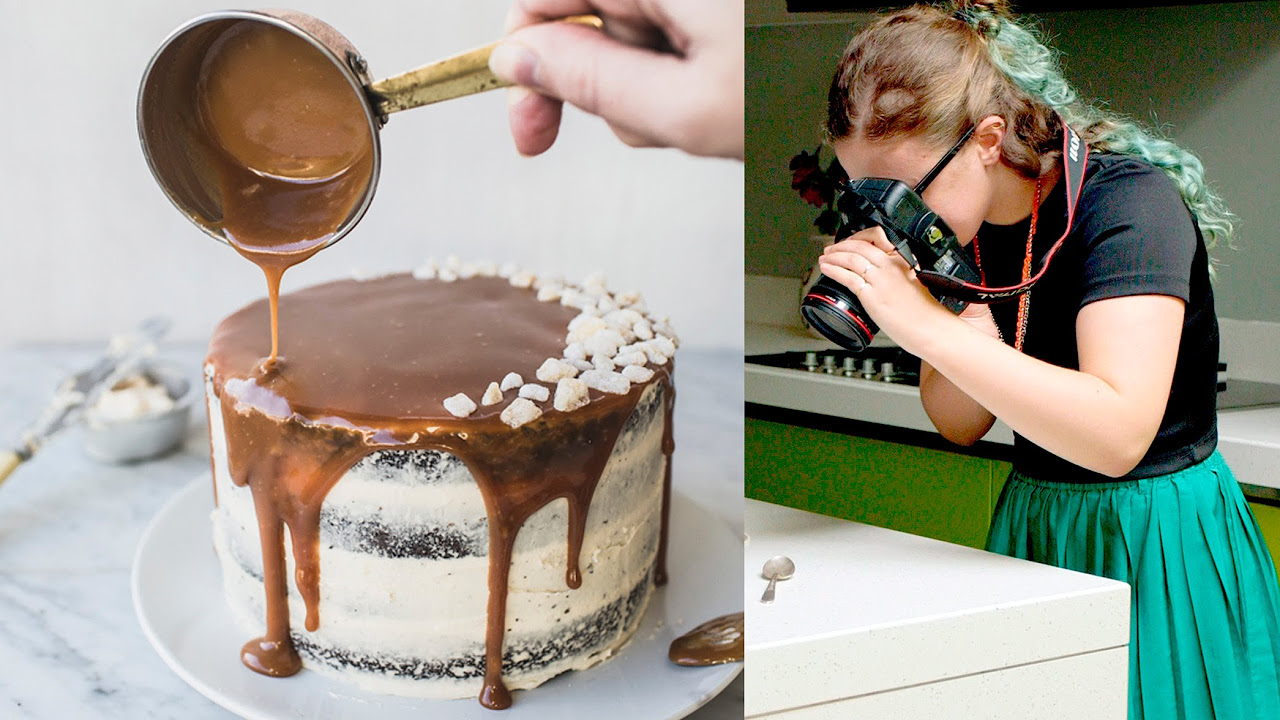
TLDRIn this informative video, professional photographer Simone shares four key techniques to achieve blurrier backgrounds in photography, often referred to as 'bokeh.' She explains the concept of depth of field and how wider apertures, longer focal lengths, closer subject distances, and further background distances can create the desired effect. Simone also debunks the myth that larger sensors inherently produce blurrier backgrounds, clarifying that it's the combination of equipment settings and creative choices that truly make the difference.
Takeaways
- 🌟 Squarespace is the sponsor of the video and offers an all-in-one solution for websites and domains.
- 📸 The video aims to teach how to achieve blurry backgrounds in photography, often desired in portraiture and wildlife photography.
- 🌌 'Bokeh' is a Japanese term that describes the aesthetic quality of the blur in the background of a photo.
- 🔍 The blurriness of the background is primarily due to being out of focus, with a thinner depth of field leading to a blurrier background.
- 📐 Depth of field is the distance between the closest and farthest parts of a photo that are acceptably sharp.
- 🔑 Using a wider aperture (smaller f-number) on a lens can create a thinner depth of field and thus a blurrier background.
- 🔭 Prime lenses often have larger maximum apertures than zoom lenses, allowing for more pronounced background blur.
- 📷 Longer focal lengths naturally create a thinner depth of field and blurrier backgrounds when shot at similar distances.
- 👀 Increasing the magnification by using longer focal lengths or zooming in makes the background appear blurrier due to seeing a smaller slice of it.
- 🚶♂️ Getting physically closer to the subject can create a blurrier background by narrowing the depth of field.
- 🏞️ Placing the background further away from the subject, or changing the vantage point to increase the distance between them, results in a more blurred background.
- 📐 Contrary to a common myth, sensor size does not directly affect the blurriness of the background; it's the combination of lens aperture and distance to the subject that matters.
Q & A
What is the main focus of the video?
-The main focus of the video is to teach viewers how to achieve blurry backgrounds in their photographs using various techniques and equipment settings.
What does the term 'bokeh' refer to in photography?
-In photography, 'bokeh' refers to the aesthetic quality of the blur in the out-of-focus areas of an image, specifically the background.
Why are blurry backgrounds often prized in certain photography genres?
-Blurry backgrounds are often prized in genres like portraiture or wildlife photography because they help to make the subject stand out by creating a smooth and soft-looking background, which contrasts with the sharp subject.
What is the 'depth of field' and why is it important for achieving a blurry background?
-The 'depth of field' is the distance between the closest and farthest parts of a photo that are acceptably sharp. It is important for achieving a blurry background because a thinner depth of field means a smaller area in focus, resulting in more out-of-focus and thus blurrier backgrounds.
How does using a wider aperture setting on a lens affect the background blur?
-Using a wider aperture setting (smaller F number) on a lens creates a thinner plane of acceptable focus, resulting in a shallower depth of field and thus a blurrier background.
What is the relationship between the maximum aperture of a lens and the ability to achieve a blurry background?
-A lens with a larger maximum aperture can open wider, allowing more light and creating a thinner depth of field, which in turn makes it easier to achieve a blurrier background.
Why might prime lenses be preferred over zoom lenses for achieving a blurry background?
-Prime lenses, which have a fixed focal length, are often offered with faster apertures than zoom lenses, allowing for a larger maximum aperture and thus the ability to create smoother, blurrier backgrounds.
How does the choice of focal length affect the depth of field and background blur?
-Longer focal lengths create a thinner depth of field, resulting in a blurrier background. Additionally, the magnification effect of longer focal lengths makes the background appear blurrier even if the depth of field remains the same.
What is the effect of getting closer to the subject on the background blur?
-Getting closer to the subject causes the light rays to converge more steeply, creating a thinner depth of field and a blurrier background.
How can the distance between the subject and the background impact the background blur?
-The farther the background is from the subject, the more out-of-focus and blurrier it will appear, due to the gradual transition from in-focus to out-of-focus areas in an image.
What myth does the video aim to dispel about sensor sizes and background blur?
-The video aims to dispel the myth that larger sensors inherently create blurrier backgrounds. It explains that it is not the sensor size but the field of view and the photographer's choice to get closer to the subject that contributes to a blurrier background.
How can a photographer implement the techniques discussed in the video to achieve a blurrier background?
-A photographer can implement these techniques by using a lens with a large maximum aperture set to its widest, choosing a longer focal length, getting closer to the subject, and positioning the subject with a farther background.
Outlines
📷 Understanding Bokeh and Depth of Field
This paragraph introduces the video, sponsored by Squarespace, and sets the stage for a tutorial on achieving blurry backgrounds in photography, also known as bokeh. The speaker, Simone, a professional photographer, promises to debunk myths about sensor sizes and explain the actual factors that contribute to background blurriness. The summary of techniques to create a shallow depth of field is introduced, which is essential for background blur. The concept of depth of field is explained as the area in focus, with a visual aid to understand how light rays converge on the sensor to create focus, and how a thinner depth of field results in a blurrier background.
🔍 Techniques for Achieving Blurry Backgrounds
The paragraph delves into the specifics of creating blurry backgrounds through various photographic techniques. It emphasizes the use of a wider aperture to achieve a thinner depth of field, with examples given to illustrate how smaller F-numbers correlate with blurrier backgrounds. The importance of lens selection is highlighted, with prime lenses often offering faster apertures than zoom lenses, which is beneficial for bokeh. The paragraph also touches on the impact of focal length, explaining how longer focal lengths naturally produce a shallower depth of field and the illusion of increased background blur when the subject size is constant. Practical advice is given on using the longest end of a zoom lens and leveraging the magnification effect of long focal lengths for maximum background blur.
🌟 Proximity and Background Distance for Enhanced Bokeh
This paragraph discusses additional methods for enhancing background blur, such as getting physically closer to the subject, which naturally results in a shallower depth of field. The minimum focus distance of lenses is mentioned as a limiting factor. Moreover, the technique of increasing the distance between the subject and the background is explored, which, despite not altering the depth of field, creates a more pronounced background blur due to the gradual change in focus from the subject to the background. The paragraph concludes with a practical tip on adjusting the photographer's position to maximize background blur by increasing the background's distance from the subject.
📚 Sensor Size Myth and Final Thoughts
In the final paragraph, a common misconception about sensor size and its impact on background blur is addressed. The speaker clarifies that while larger sensor cameras may appear to produce blurrier backgrounds, it is not due to the sensor size itself but rather the wider field of view that often necessitates getting closer to the subject, thus increasing background blur. The distinction is made that the image circle and the resulting background blur remain consistent regardless of sensor size. The video concludes with an encouragement to apply the shared knowledge to create unique and impressive photographs and a prompt for viewers to like the video for increased visibility.
Mindmap
Keywords
💡Bokeh
💡Depth of Field
💡Aperture
💡Focal Length
💡Prime Lens
💡Zoom Lens
💡Sensor Size
💡Focus
💡Blurrier Backgrounds
💡Squarespace
Highlights
The video discusses techniques to achieve blurry backgrounds in photography, also known as bokeh.
Blurry backgrounds are prized for their ability to make subjects pop by contrasting with smooth, soft-looking backgrounds.
The concept of depth of field is introduced, explaining its impact on background blurriness.
A thinner depth of field results in a blurrier background, which can be achieved by using a wider aperture.
Lenses with larger maximum apertures allow for more light and can create smoother blurry backgrounds.
Prime lenses often have faster apertures than zoom lenses, which can affect background blurriness.
Focal length choice impacts depth of field; longer focal lengths create thinner depths of field and blurrier backgrounds.
Increasing focal length while keeping the subject size constant can create an illusion of a blurrier background due to magnification.
Getting closer to the subject can create a thinner depth of field and a blurrier background.
The minimum focus distance of a lens determines the closest you can get to a subject and still achieve focus.
Positioning the background farther away from the subject can enhance background blurriness.
The video dispels the myth that larger sensors create blurrier backgrounds, attributing the effect to other factors.
The full-frame camera's wider field of view can lead to closer subject framing, which may create a blurrier background.
The video provides practical tips for photographers to achieve desired background blur effects in their work.
Simone, a professional photographer, shares insights from her experience in nature and wildlife photography.
The video is sponsored by Squarespace, which is used by the host for her own website creation.
A bonus tip is offered at the end of the video, addressing common misconceptions about sensor sizes and depth of field.
Transcripts
this video is brought to you by
Squarespace if you need a website or
domain check out squarespace.com for an
all-in-one solution hey everyone and
welcome back to a new video have you
looked at someone else's photography and
thought to yourself how the heck did
they get that nice blurry background why
don't my photos look like that in this
video I'm going to show you the
equipment settings and creative choices
that you can make that will make the
backgrounds to your photos blurry in
camera don't forget to stay for my bonus
tip where I dispel the myth that larger
sensors create blurrier backgrounds and
I'll show you what actually happens my
name is Simone and I'm a professional
nature and wildlife photographer living
in Eastern Canada I make weekly videos
giving you photo tips or taking you
behind the scenes for wildlife and
nature photography subscribe if you want
to see more
shut your mouth
[Music]
so in this video I'm going to show you
four techniques to get blurry
backgrounds sometimes called a bokeh
which more specifically actually
describes the aesthetic quality of the
blur it's actually a Japanese word
pronounced bouquet but in many parts of
the world it's pronounced Boca both are
okay blurry backgrounds are often prized
for their ability to make highlights and
shapes in the background smooth and soft
looking and by contrast make the subject
in front of them pop I use this in my
Wildlife photography to tame distracting
elements in the background like branches
or grasses while allowing my subject to
really stand out even telephone poles
now not all photography genres want or
need this effect but in some like
portraiture or Wildlife it's often
prized so let's start off with what
makes the backgrounds blurry in the
first place so what I tell you later
makes a lot more sense most of what
causes a blurry background comes from
being out of focus the more out of focus
the blurrier if I take a photo of this
lineup of batteries for example notice
how the farther the battery is back from
the one in the focus the blurrier it is
now this is the opposite of what's in
Focus what's within What's called the
depth of field that's the part of the
image within acceptable Focus to get a
blurrier background we need more out of
focusness if you'll pardon me for
inventing a word I use this visual for
understanding depth of field and its
impact on backgrounds light travels from
our subject to the lens Elements which
in turn bend them to come to a focus on
the sensor of your camera the place
where the light rays converge at our
subject and are very close together are
in perfect Focus but there's also a
space before and after where the focus
may not be perfect but is good enough to
be in focus to our eyes this area is
called the depth of field that is the
distance between the closest and
farthest part of the photo that are
acceptably Sharp things that are before
or after this depth of field where the
light beams are too far apart are out of
focus and the farther they are away from
the InFocus area the more out of focus
and blurry they are so to get blurry
backgrounds we usually need what's
called a thinner depth of field that is
a thin plane in Focus so that things in
the background look even blurrier but
I'm also going to show you how to get a
blurrier background with the same depth
of field so there are four ways that we
can achieve blurrier backgrounds in our
photography let's look at number one the
first way to get a thinner depth of
field and hence a blurrier background is
to use a wider aperture on your lens by
wider I mean setting your lens aperture
to be as open as it can be represented
on your camera as the smallest F number
so F4 is larger than F 5.6 F 2.8 is
larger again in the example we used
earlier if we open up the aperture of
the lens we see that the light range
represented by the lines here converge
at a steeper angle this creates a
thinner plane of acceptable focus a
dollar depth of field this also makes
the light rays even farther from focus
in the background rendering the
background softer and less distracting
to your subject so to implement this in
the field you want to be able to control
the aperture on your lens you can either
shoot in manual where you set the
aperture shutter speed and ISO or you
can shoot an aperture priority AV on
most cameras that's where you set the
aperture and the camera picks the
shutter speed needed to balance the
exposure set the aperture on your lens
to a small F number like 2.8 or even
lower if your lens allows now when it
comes to aperture there's also an
equipment Choice variable here how wide
you can open up your aperture and get a
blurry background from it will depend on
the maximum aperture of your lens most
lenses have variable apertures that can
be adjusted but they all have one thing
in common a maximum aperture to which
they can be set this is usually written
right on the lens this is often a prized
attribute of a lens as on top of
gathering more light it can blur the
background even more and in some genres
This is highly valued now while not
always the case prime lenses that is
lenses with a fixed focal length like
this fixed 50 millimeter lens and this
fixed 500 millimeter lens are often
offered with faster apertures than zoom
lenses so this 500 millimeter lens is an
F4 which would make for blurrier
backgrounds than a similar 500
millimeter zoom lens that would often
have the largest aperture at 5.6 or 6.3
this 50 millimeter lens has a maximum
aperture of f 1.4 this allows for very
blurry backgrounds compared to a similar
focal length shot at F4 for example like
in these two photos so in short use
lenses with large maximum apertures for
smooth blurry backgrounds and set them
at their maximum or widest aperture for
the maximum effect
the next choice you can make to make a
blurrier background is your choice of
focal length there are two things that
play here with long focal lengths and
blurry backgrounds one is real and one
is a trick the first which is real is
that longer focal length lenses when
shot at similar distances make for a
thinner depth of field and blurier
backgrounds behind the subject if we
look at our visual here the longer focal
lengths magnification in effect brings
the subject in closer and makes steeper
light rays which in turn makes for
shallower depths of field and blurier
backgrounds I use this effect all the
time in my Wildlife photography where I
use long lenses to blur out the
background and make the subject pop from
the frame I'd like to thank the sponsor
of this video Squarespace I use
Squarespace to make my very own website
and it was easy they have lots of
templates to choose from or you can
customize pages with easy drag and drop
sections for photos videos clickable
buttons texts or links when I recently
added tours to Botswana to my offerings
it was easy to add a new page to to my
website with photos videos and give some
profile on my website with links right
to my home page you can even get people
to subscribe to your newsletter and
offer them a free download in return if
you wish like I've done head to
squarespace.com for a free trial and
when you're ready to launch go to
squarespace.com forward slash Simon to
save 10 off your first purchase of a
website or domain now the second issue
at play here is actually an illusion if
you try different focal length lenses
but move to keep the subject the same
size in the frame the depth of field is
actually the same but yet the background
looks blurrier you may be thinking what
kind of magic is this this is because as
you increase the focal length you're
zooming in on the background as well
this increasing magnification of the
background makes it look bigger and
blurrier because you're seeing a smaller
slice of it here's a sample of what this
looks like using a great website called
dofsimulator.net where you can calculate
the depth of field using different
parameters note that if the size of the
subject remains constant as I use longer
focal lengths the depth of field shown
here doesn't change yet the background
gets blurrier I know that looks weird
but that's the way it works so to
implement this in the field use longer
focal lengths or if you have a zoom lens
use the longest end of the zoom lens to
get the maximum effective blur so on a
70 to 200 millimeter lens the 200
millimeter setting will give you a
blurrier background than 70. the third
way of getting a blurrier background is
to get closer to your subject that's
because as you get closer the light rays
converge more steeply again creating a
thinner depth of field and by corollary
a blurrier background now depending on
your genre this may or may not be an
option in Wildlife like I shoot
sometimes we can get closer using good
feel techniques or camouflage but
sometimes it's not an option if it is an
option for you the good news is it's
easy to implement no setting changes
needed just get closer to your subject
and have a closer Focus point so if you
have the choice between standing at one
spot thought and cropping your image a
bit or getting closer and not cropping
closer will give you a blurrier and
smoother background note that you can't
do this indefinitely for a blurrier
background lenses all have minimum Focus
distances that is the closest you can
get and still get the lens to focus on
wide-angle lenses this may only be
inches or centimeters but on my big 500
millimeter lens the closest I can get to
my subject and still focus is about 10
feet or 3 meters now there's another
trick you can use to get a blurry
background that actually doesn't involve
getting a thinner depth of field and
that is getting the background farther
away behind your subject this is because
there's a direct relationship between
the distance from the subject and
blurriness the areas of focus in an
image don't go from way out of focus to
perfect Focus to way out of focus again
they go from way out of focus gradually
into more focus and smoothly again to
more out of focus the farther behind
your subject you can place the
background the blurrier it will be I use
this technique all the time in Wildlife
photography where I'll move sideways
around the subject to get an angle with
a background can be further and more out
of focus for example while photographing
bee eaters in Botswana by positioning
the boat such that the background was
put way into the distance we could get a
photo that went from this with grasses
right behind the subject to this where
the background is several hundred meters
away the one with the cleaner background
just makes the subject pop from the
frame and is now clearly the star of the
show rather than having to compete with
a busy background so the technique here
is either to move your subject away from
the background or position yourself to
have the background farther away from
your subject by choosing a different
vantage point for example if you're
photographing someone in front of a wall
rather than standing 90 degrees to it
right directly in front of it move to
the side and get some distance between
your subject and the background and I
promised you a bonus tip and that's to
dispel a myth about sensor sizes and
depth of field while photos coming from
cameras with larger sensors seem to have
blurrier backgrounds it's not actually
the sensor size that's affecting the
quality of the background the image
Circle projected into the camera by the
same lens when using a full frame and a
crop sensor camera is exactly the same
the only difference is that the full
frame camera is capturing a larger field
of view than the crop sensor the
background blur in the two images is the
same ah but here's the rub the larger
sensor because it's capturing a wider
field of view often makes you get closer
to the subject to fill the frame as we
learned earlier getting closer will
indeed make the background blurrier so
it's the getting closer that makes the
background blurrier not the sensor size
there's nothing in the physics of a
large sensor that blurs the background
as the quality of the background
transmitted through the lens is the same
regardless of what sensor size captures
it after that if you want to learn more
about sensor sizes the differences it
makes for your photography and the pros
and cons of each I have a whole video on
that subject which you can check out
right here if you found this video
deserving give it a like and YouTube
will show it to even more people helping
others in their photography journey I
hope you can use this information to go
out there and get your own unique and
amazing photos I know you can do it
Посмотреть больше похожих видео
5.0 / 5 (0 votes)