TAHAP MANIPULASI DENTAL AMALGAM
Summary
TLDRThis script provides a detailed step-by-step process for preparing and applying dental amalgam for cavity restorations. It covers the tools and materials required, including the amalgamator, dental amalgam components, and specific techniques for mixing and condensing the amalgam. The process involves preparing the dental amalgam, ensuring its consistency, and carefully placing it in the cavity. The procedure also includes the steps for carving and burnishing the amalgam to ensure a precise and durable restoration with good marginal adaptation and anatomical shape.
Takeaways
- 😀 Basic tools needed include dental amalgam, amalgamator, and lapras.
- 😀 The amalgamator has an on/off switch, a start button for the sirturasi process, and a timer set to 40-50 seconds.
- 😀 Dental amalgam consists of HG capsules and alloy tablets, mixed in a 1:1 ratio.
- 😀 Ensure that the amalgam capsule is tightly closed and placed securely in the amalgamator holder.
- 😀 Press the Start button and allow the sirturasi process to complete before removing the capsule.
- 😀 After completion, open the capsule and check the amalgam for a uniform, shiny appearance without moisture.
- 😀 Place the amalgam on lapras and condense it using an amalgam condenser or amalgam carrier in the prepared cavity.
- 😀 Continue condensing the amalgam until the level reaches the preparation margin, ensuring a slight overfill for proper finishing.
- 😀 After approximately 3 minutes of condensation, proceed with carving and burnishing the restoration for a smooth margin.
- 😀 The restoration's anatomy should be restored to its original shape using an amalgam carver and burnisher.
- 😀 The amalgam restoration's final adaptation should be checked, ensuring good marginal adaptation and proper anatomy, with any excess amalgam disposed of.
Q & A
What tools and materials are needed for dental amalgam restoration?
-The required tools include basic dental instruments, an amalgamator, and a lapras. The materials include dental amalgam, a capsule of HG, and alloy tablets.
How is the dental amalgam prepared for use?
-The amalgam is prepared by placing the alloy tablet and HG powder in the capsule in a 1:1 ratio. After sealing the capsule, it is placed in the amalgamator holder and the process is initiated by pressing the Start button. The amalgamator is set to run for 40-50 seconds.
What is the role of the amalgamator in the preparation process?
-The amalgamator mixes the HG powder and alloy tablet by rapidly triturating them for a specified time (40-50 seconds), ensuring a homogeneous mixture of the dental amalgam.
What should be checked after the amalgam is triturated?
-After triturating, the amalgam should be examined for homogeneity, with a shiny appearance and no excess moisture, confirming that the mixture is properly prepared.
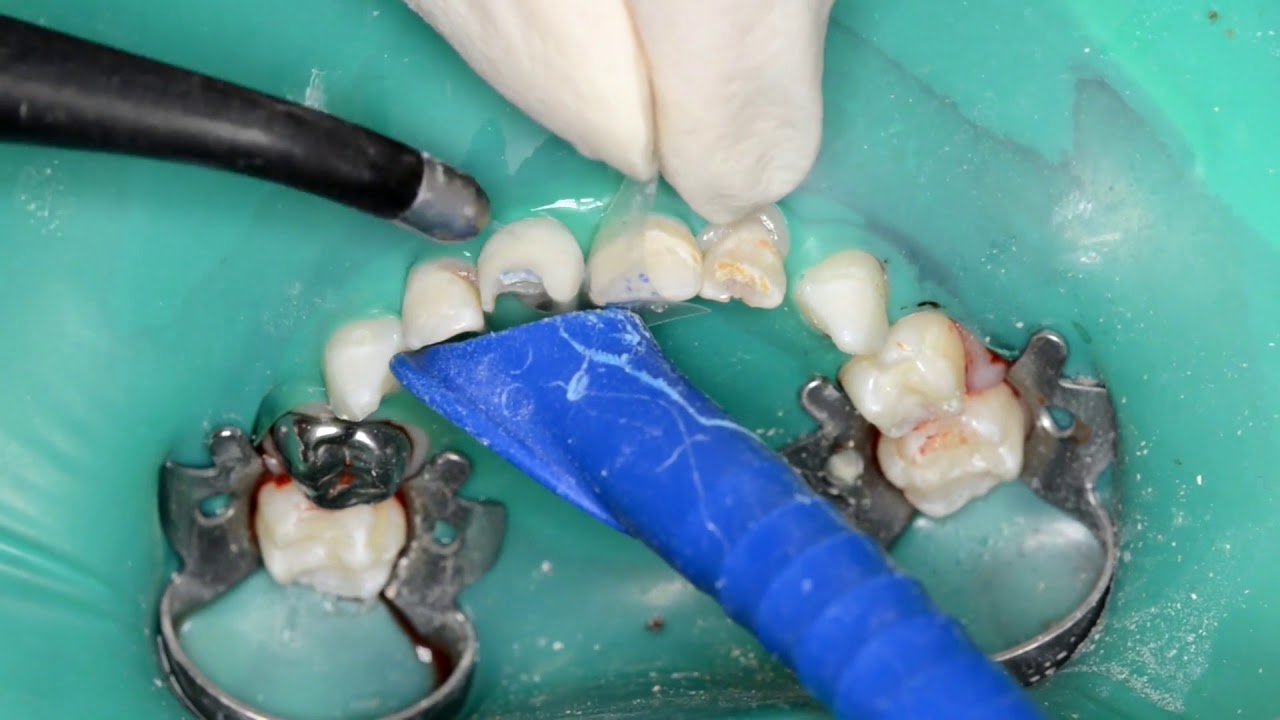
How is the amalgam applied to the cavity?
-A small portion of the amalgam is taken using an amalgam carrier or condenser and inserted into the prepared cavity. The amalgam is then condensed using a flat condenser or amalgam stopper until it reaches the margin of the cavity.
What should be done to ensure proper filling of the cavity with amalgam?
-The amalgam should be added in small portions and condensed repeatedly until the cavity is completely filled, ensuring a slight overfill for optimal finishing.
What is the ideal time frame for the condensation process after trituration?
-The condensation of the amalgam should be completed within approximately 3 minutes after trituration to ensure proper adaptation and a good marginal seal.
How is the final shaping of the restoration done?
-The restoration is shaped using a carver and burnisher to refine the anatomical contours, particularly at the margin, to ensure a smooth and functional restoration.
How is the marginal adaptation of the restoration ensured?
-The amalgam's marginal adaptation is ensured by burnishing the surface with gentle pressure, making sure it blends seamlessly with the tooth structure and creating a good seal.
What is the next step after the amalgam restoration is shaped?
-Once the restoration is shaped and the margins are adapted, the matrix and excess amalgam are removed. The final restoration should show good marginal adaptation and anatomical form, with any excess amalgam discarded into a container with water.
Outlines

Этот раздел доступен только подписчикам платных тарифов. Пожалуйста, перейдите на платный тариф для доступа.
Перейти на платный тарифMindmap

Этот раздел доступен только подписчикам платных тарифов. Пожалуйста, перейдите на платный тариф для доступа.
Перейти на платный тарифKeywords

Этот раздел доступен только подписчикам платных тарифов. Пожалуйста, перейдите на платный тариф для доступа.
Перейти на платный тарифHighlights

Этот раздел доступен только подписчикам платных тарифов. Пожалуйста, перейдите на платный тариф для доступа.
Перейти на платный тарифTranscripts

Этот раздел доступен только подписчикам платных тарифов. Пожалуйста, перейдите на платный тариф для доступа.
Перейти на платный тарифПосмотреть больше похожих видео
Complex Amalgam Restoration | Part 2
Rebuilding an upper primary ante. tooth using a SC, voiceover US

Waldent Fiber Post and Drill System

Encerado gnatológico Técnica PKT

Inference Using Full Joint Distribution in AI || #aiplaylist
Textbook Analysis File B.Ed | Content Analysis | Project file D.el.ed | NCERT
5.0 / 5 (0 votes)
