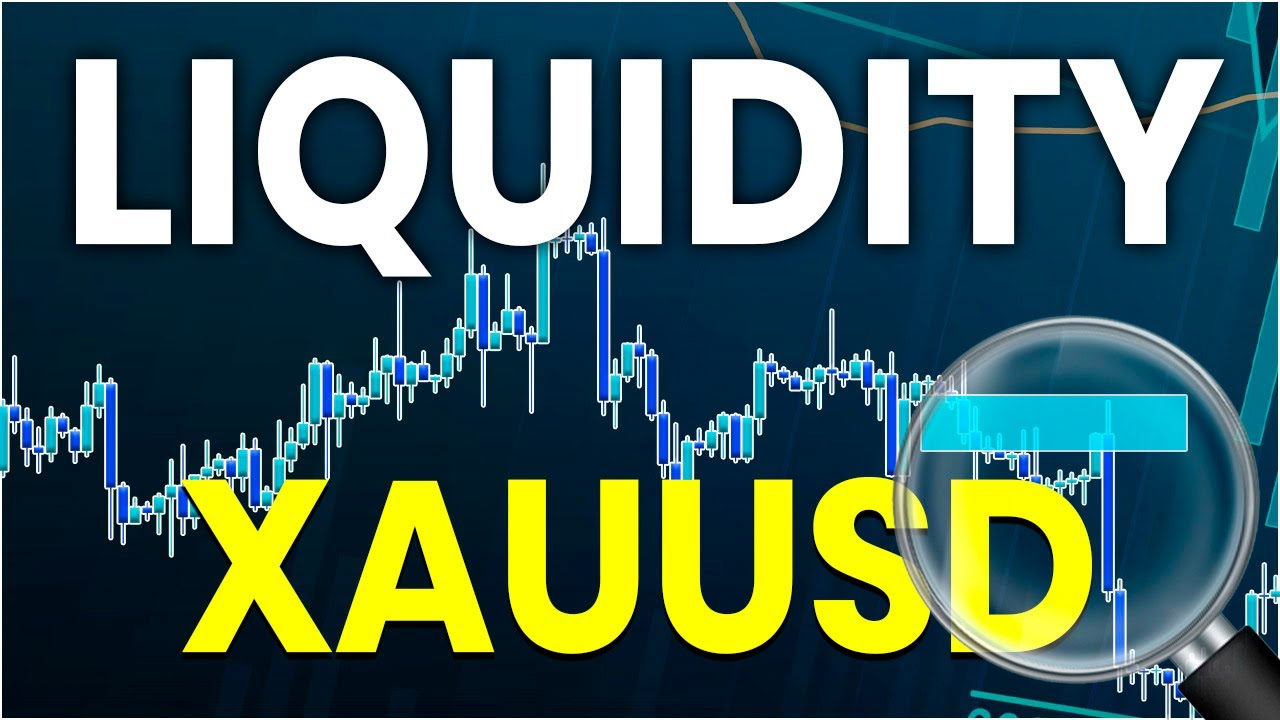
3-S&D Zone Creation Walkthrough

kapı eşiği
23 Jun 202426:09

Summary

TLDRThis lesson focuses on identifying and drawing supply and demand zones on charts to predict price movements. The instructor emphasizes starting with basic zones and refining them over time. They discuss the importance of recognizing shifts in price action and understanding market liquidity. The video also touches on the concept of fractal zones and the need for a solid market structure framework to avoid confusion. The instructor reassures viewers that they will learn filters to identify high-probability zones in future lessons.

Takeaways

  • 📈 Start by drawing basic supply and demand zones on charts to understand price movements.
  • 🔍 In initial lessons, focus on identifying the foundational concept of supply and demand zones.
  • 🚀 Recognize that price can often ignore these zones, but they become important when price returns.
  • 📉 Learn to filter out less significant zones to concentrate on those with a higher probability of affecting price.
  • 🔄 Look for pivots and shifts in price action as indicators of supply and demand imbalances.
  • ➡️ Identify areas where the market pauses, indicating a temporary agreement on fair value.
  • 🔄 Watch for sharp movements indicating an imbalance and potential shifts from supply to demand or vice versa.
  • 📊 Use opacity settings when drawing zones to ensure they're visible but don't obstruct price action.
  • 🛠️ Refine zones to pivot points within a range for more precise trading decisions.
  • ⏲️ Be aware of the time frame; draw zones relevant to the chart you're analyzing to avoid clutter.
  • 📝 Keep it simple at first, then add complexity with more filters and techniques as you progress.

Q & A

  • What is the main focus of the lesson in the transcript?

    -The main focus of the lesson is to teach the basic concept of identifying and drawing supply and demand zones on a chart, which are pivotal points in price action that can indicate potential reversals or continuations of trends.

  • Why might price ignore supply and demand zones?

    -Price might ignore supply and demand zones because the market dynamics can change, or there could be an imbalance of power between buyers and sellers that surpasses the significance of the previously established zones.

  • What does the instructor mean by 'filtering out' supply and demand zones?

    -The instructor refers to the process of applying additional analysis to eliminate less significant supply and demand zones, focusing on those with a higher probability of influencing price action effectively.

  • Why should supply and demand zones be drawn with low opacity?

    -Supply and demand zones should be drawn with low opacity to ensure they do not obstruct the view of price action on the chart, allowing traders to see the price movements clearly through the zones.

  • What is meant by 'reading between the lines' when drawing supply and demand zones?

    -It implies using discretion and interpretation when identifying potential zones, especially when the market does not strictly meet the mechanical criteria for defining supply and demand zones.

  • How does the instructor suggest refining a supply and demand zone?

    -The instructor suggests refining a supply and demand zone by focusing on the pivot points within the range, such as using the high or low of a significant candlestick as the boundaries of the zone.

  • What is the significance of a candle closing above the high or below the low of a supply and demand zone?

    -A candle closing above the high of a supply zone or below the low of a demand zone indicates a potential shift in market sentiment and could signal a continuation of the trend or a reversal.

  • Why is it important to consider the timeframe when drawing supply and demand zones?

    -Considering the timeframe is important because it helps to ensure that the zones are relevant to the current market context and that they align with the trader's strategy based on their chosen timeframe for analysis.

  • What is a 'fractal zone' as mentioned in the transcript?

    -A 'fractal zone' refers to a pattern that can be identified across different timeframes, where a supply or demand zone on a larger timeframe corresponds to a similar pattern on a smaller timeframe.

  • How does the concept of 'unmitigated extreme pivot zone' come into play?

    -The 'unmitigated extreme pivot zone' refers to a fresh supply or demand zone that has not yet been tested by price action, which is expected to have a strong impact when price eventually interacts with it.

  • What role does market structure play in identifying supply and demand zones?

    -Market structure provides a foundational framework that helps traders to identify key levels of support and resistance, which can then be used to overlay and contextualize supply and demand zones more effectively.

Outlines

00:00

📊 Introduction to Drawing Supply and Demand Zones

The speaker begins by emphasizing the simplicity of the task at hand: drawing basic supply and demand zones on a chart. They reassure that despite the initial appearance of chaos, this is an intentional part of the learning process. The focus is on identifying pivotal points where price action shifts, such as sharp movements followed by corrections. These shifts indicate a change in market sentiment, reflecting an imbalance between supply and demand. The speaker introduces the concept of 'fair value,' where the market consensus on price stability is temporarily reached during sideways movements. They also highlight the importance of observing where 'big money' steps in, causing significant price pivots, and suggest that these areas are likely to be revisited by price with similar interest, potentially leading to tradable opportunities.

05:01

🔍 Refining Supply and Demand Zones for Trading

In this section, the speaker delves into the practical aspects of refining supply and demand zones to improve trading decisions. They discuss setting opacity levels for zones to avoid obstructing price action view and suggest saving different templates for various timeframes. The speaker illustrates how to identify valid demand zones by looking for areas where selling pressure precedes buying pressure, leading to a breakout. They also touch on the concept of entering trades at the edge of a zone for consistency, despite the potential for an unfavorable risk-reward ratio. The refinement process involves focusing on pivot points within a larger range to pinpoint more precise entry points. The speaker also addresses the nuances of valid demand recognition, such as the need for a candlestick to close above a certain point to confirm demand, and the flexibility in interpreting these signals.

10:02

📉 Understanding the Dynamics of Supply and Demand Zones

The speaker continues the discussion on supply and demand zones, focusing on their validity and the market dynamics they represent. They explain how certain zones can be valid despite not showing a clear pullback on the current timeframe, as they may represent a consolidation of smaller timeframe movements. The speaker also introduces the concept of 'fractal zones,' where supply and demand can be inferred from the patterns of wicks on candlesticks. They emphasize the importance of looking at both the structure and the wicks to understand the market's supply and demand dynamics fully. The speaker also discusses the concept of 'mitigated' zones, where the market has already filled some orders, potentially reducing the zone's future impact, and how to approach these areas with caution.

15:03

🛠️ Refining and Utilizing Supply and Demand Zones

This paragraph focuses on the practical application of refining supply and demand zones to enhance trading strategies. The speaker explains how to refine a demand zone by looking for the apex of a move and identifying where subsequent candles close above the previous high. They also discuss the concept of 'unmitigated' zones, which are fresh and have not been previously interacted with by price, and are thus considered more potent. The speaker emphasizes the importance of understanding the context of a zone within the broader market structure and being aware of the entire supply or demand range, even if focusing on a refined entry point. They also touch on the idea of using lower timeframes to confirm signals seen on higher timeframes.

20:03

🌐 Fractal Zones and Their Impact on Trading

The speaker introduces the concept of fractal zones, which are essentially supply and demand zones that can be identified on different timeframes. They demonstrate how a pattern of buy-to-sell wicks on a higher timeframe can indicate a supply zone on a lower timeframe. The speaker suggests that understanding these fractal relationships can help anticipate potential pivot points in the market. They also emphasize the importance of using filters to identify high-probability zones and the role of confluence in determining which zones are most likely to result in significant price movements. The speaker concludes by reinforcing the need for a structured approach to analyzing supply and demand zones to avoid confusion and to make more informed trading decisions.

25:04

🔬 Advanced Analysis of Supply and Demand Zones

In this final paragraph, the speaker provides an in-depth analysis of how to interpret and utilize supply and demand zones effectively. They discuss the difference between mitigated and non-mitigated zones, explaining that non-mitigated zones are typically more powerful and have a higher probability of leading to significant price movements. The speaker also addresses the potential confusion that can arise from multiple overlapping zones and pivots, emphasizing the importance of starting with a solid understanding of market structure before overlaying supply and demand zones. They also briefly mention the concept of 'fractal zones' and the intention to cover filters for identifying high-probability zones in future lessons.

Mindmap

Keywords

💡Supply and Demand Zones

Supply and Demand Zones refer to areas on a price chart where the balance of buying and selling pressure is believed to influence future price movements. In the video, the speaker explains that these zones are identified by observing pivot points and shifts in price action, such as a sharp movement followed by a correction. The speaker emphasizes that while these zones are initially messy and numerous, they will be filtered to focus on those with the highest probability of influencing price.

💡Pivots

Pivots are points on a chart where the price reverses direction. They are significant as they indicate a change in the control between buyers and sellers. The script describes how the speaker looks for pivots to identify potential supply and demand zones, such as when there's a 'sharp sort of movement away' followed by a correction.

💡Price Action

Price Action is the movement of an asset's price over time, reflecting the cumulative effect of all market participants. The video script discusses how to interpret price action to identify key areas of supply and demand, with the speaker looking for 'sharp movements' and 'pauses' in the market as indicators of these zones.

💡Filters

Filters in the context of the video refer to methods used to refine the numerous supply and demand zones to focus on those most likely to impact price. The speaker mentions that they will teach how to apply filters to reduce the 'noise' and concentrate on high-probability zones where price is more likely to respect the supply and demand levels.

💡Imbalance

Imbalance refers to a situation where the quantity of buyers or sellers is significantly greater than the other, leading to a rapid price movement. The script mentions 'overwhelming imbalance' as a moment when either supply or demand steps into the market and pushes the price out of a range.

💡Mitigation

Mitigation in the script refers to the process where the price returns to a previously established supply or demand zone to 'fill up some of the orders', effectively reducing the pressure at that level. The speaker explains that once a zone is mitigated, it loses its power to influence future price movements.

💡Consolidation

Consolidation is a period of price action where the market moves sideways, indicating a temporary balance between supply and demand. The speaker describes consolidation as a time when 'everyone's pretty much in agreement' on the fair value of the asset.

💡Refinement

Refinement is the process of narrowing down broad supply and demand zones to more precise levels. The video script uses the term to describe how the speaker reduces large ranges to specific pivot points or single candles, making the zones more manageable and focused.

💡Fractal Zones

Fractal Zones are smaller-scale supply and demand zones that can be identified within larger ones. The speaker discusses how observing patterns like 'buy to sell wicks' on a higher timeframe can indicate the presence of a supply zone on a lower timeframe.

💡Confluence

Confluence refers to the simultaneous occurrence of multiple technical indicators or patterns that support the same market outlook. The script mentions that as the course progresses, the speaker will introduce more confluence to help identify high-probability supply and demand zones.

💡Structure

Structure in the context of the video refers to the underlying framework or pattern of the market that helps in identifying key levels of support and resistance. The speaker mentions that understanding market structure is essential before overlaying supply and demand zones.

Highlights

Introduction to drawing supply and demand zones on charts.

Clarification that the lesson focuses on basic supply and demand zone identification.

Mentoring on not being disheartened by the overwhelming presence of supply and demand zones.

Explanation of how to filter out less significant supply and demand zones.

Importance of identifying pivots and shifts in price action.

Concept of price ignoring supply and demand zones and the necessity of filtering.

Description of how to use opacity settings for better visibility of supply and demand zones.

Guidance on drawing supply and demand zones with rectangles and setting visibility.

Discussion on refining large supply and demand ranges to more manageable pivots.

Explanation of how to identify valid demand zones with bullish candles.

Advice on not being too mechanical when identifying supply and demand zones.

The significance of a candle closing above the previous high to validate demand.

Use of fractal zones to identify potential supply and demand on lower timeframes.

Strategy for reading between the lines when a thrust candle doesn't close as expected.

Differentiating between valid and mitigated supply and demand zones.

The concept of 'unmitigated extreme pivot zones' and their significance.

Importance of considering the entire supply and demand range, not just refined pivots.

Discussion on how to handle a messy chart with overlapping supply and demand zones.

Introduction to the concept of fractal zones and their application.

Emphasis on the need for market structure as a foundation before overlaying supply and demand zones.

Preview of upcoming lessons focusing on filters for high-probability supply and demand zones.

Transcripts

play00:00

So let's start drawing these zones on our charts.

play00:03

Now, before I do this, I just want to make it super clear

play00:06

that in this lesson, all we're literally going to be doing

play00:09

is looking at what makes, well, what we spoke about before,

play00:12

what makes the bare, bare bones basic starting level

play00:16

of what is a supply and demand zone

play00:18

and essentially how you can draw that on your chart.

play00:21

But what you will very, very, very quickly see

play00:23

is they are everywhere.

play00:24

Price can just ignore them and disrespect them a lot

play00:29

when price returns to it.

play00:31

And obviously in the following lessons,

play00:32

that's what I'm going to actually learn how to filter out

play00:35

a ton of them so that we only concentrate on the ones

play00:39

in which we think will have the highest probability

play00:41

of actually being respected and causing that move

play00:44

that we then want to trade from, okay?

play00:45

So don't be disheartened if you start drawing these on

play00:48

and it just seems like an absolute mess

play00:49

because it's supposed to be that way,

play00:50

but this is step one,

play00:52

and then we're going to add more and more filters

play00:53

to obviously reduce the noise, okay?

play00:55

So just on the four hour chart here on your dollar,

play00:59

you can literally just do any chart you want.

play01:01

It replies that the same principles all apply.

play01:04

So again, if I could keep things very, very simple for you,

play01:07

especially if you're new to supply and demand,

play01:09

what we are really kind of looking for

play01:10

and what your eyes will slowly start to be trained to see

play01:14

and will gravitate towards is we're looking for like,

play01:17

where do those sort of pivots and those shifts

play01:19

in price action occur?

play01:20

So whenever I look at a chart

play01:22

and I'm starting to think about supply and demand,

play01:23

the areas I see is like those sharp sort of movements away,

play01:27

so you get a bit of a correction

play01:28

and then demand steps in, right?

play01:30

Bit of a pullback and then demand steps in.

play01:32

Bit of a pullback, demand steps in.

play01:34

We move up and then we shift down to the downside.

play01:36

So that's where supply has stepped in, right?

play01:38

So you see these like pause in the markets

play01:41

because that's where we were talking about how,

play01:43

let's say the market deems price action

play01:45

to be at fair value, right?

play01:47

When this time period is going on

play01:51

where price is just moving sideways,

play01:54

everyone's pretty much in agreement

play01:55

that roughly price is fair around that level,

play01:57

but at some point there's an overwhelming imbalance

play01:59

between supply and demand, right?

play02:01

And this is where supply clearly steps into the market

play02:03

to push price out of that range.

play02:05

Likewise, price is down here, right?

play02:07

Supplies in control, supplies in control.

play02:09

It's looking for that liquidity.

play02:11

It's looking for where is the demand in the market

play02:13

at what price level that can now contain price

play02:16

to stop price falling,

play02:17

to start to apply some upwards pressure to it.

play02:19

So then when that happens at this moment, right?

play02:21

Buyers and sellers are in agreement

play02:23

for however many hours that is.

play02:26

Roughly we agree price should be around,

play02:27

but then at some point what happens?

play02:29

More demands and supply steps into the market.

play02:32

There's an overwhelming imbalance again,

play02:33

and then price pivots to the upside, okay?

play02:36

It searches for that liquidity.

play02:37

It searches for where everyone who's buying in here,

play02:40

buying, buying, buying, buying pressure

play02:42

until there's an equal amount of sellers

play02:45

to then stop price moving any higher,

play02:47

and then we're in fair value again.

play02:48

And then what happens?

play02:49

We get another shift to the downside

play02:50

where there's an overwhelming imbalance

play02:52

between supply and demand,

play02:53

supply steps into the market.

play02:54

So that's kind of what I was saying.

play02:55

If you try and keep things simple

play02:57

of what we're trying to do here,

play02:58

is we're trying to look for

play02:59

where are those shifts in price action?

play03:00

Where is kind of momentum stepping into the market

play03:03

after there's been a pause or a consolidation?

play03:06

Because in its most simple form, like here,

play03:09

that indicates to me that, you know,

play03:10

there's been an overwhelming imbalance

play03:13

where if you keep it even more simple,

play03:15

let's just say, I like to say,

play03:16

because it's a much simplified way of viewing the market,

play03:18

but just saying big money stepped in here, right?

play03:20

Big money stepped in.

play03:21

So on the balance of probability,

play03:23

potentially when price revisits this level,

play03:25

there may be similar interest, right?

play03:27

There may be resting orders,

play03:28

whatever theory you'd like to use

play03:30

that we may see continued strength from here.

play03:32

But as I said at the start, right,

play03:34

this is where we're just drawing them on.

play03:35

We're not using all of the filters that we will use.

play03:37

So a lot of the times you will see these disrespected.

play03:38

But hopefully you kind of get the general theme

play03:40

of what I'm looking for, right?

play03:41

I'm just looking for, whoops,

play03:43

where are those shifts in price action, right?

play03:45

Kind of those turning points,

play03:46

those pivots in price action.

play03:48

And generally that's where like

play03:50

the supply and demand is going to be.

play03:53

So again, this is going to be messy,

play03:55

but just kind of just draw on things

play03:56

and you'll see what I mean.

play03:57

So we have price moving to the downside, right?

play04:00

We pull back and then we move to the downside.

play04:02

And then you see how we get that shift

play04:03

to the upside from here, right?

play04:04

So we have the sell before the buy, right?

play04:07

The sell to buy, okay?

play04:09

So if we take from, I'm just going to use a box here.

play04:13

So if you go over to the left,

play04:15

you can use a rectangle.

play04:16

That's what I use to draw supply and demand zones, okay?

play04:19

Now, if you draw it from the top of the range

play04:22

all the way down to the bottom of the range, okay?

play04:25

Now, if I just open this up, the settings,

play04:27

I use gray for the four hour chart and the key,

play04:31

whoops, it's on style.

play04:32

The background, the key with the supply and demand zones

play04:34

is you want the opacity to literally be near

play04:36

as close to zero as you can sort of take,

play04:39

because otherwise if you have it up here,

play04:40

you see how it just, you know, it blocks your price action.

play04:43

So you want it to be nice and opaque.

play04:45

I have about 4%.

play04:46

And then what I do is I personally,

play04:49

I have the visibility settings

play04:51

so that when I draw my supply and demand zones,

play04:53

it shows on the current timeframe I'm on and lower, okay?

play04:57

So if I'm drawing a four hour supply or demand zone

play04:59

because I'm on the four hour chart,

play05:00

I only want it to show on this timeframe and lower, okay?

play05:04

So it shows on the hourly timeframe,

play05:05

all the hours, all the minutes and the seconds.

play05:07

I don't want it appearing on the daily chart

play05:09

because if you start drawing all of your lower timeframe zones

play05:11

and then you go up to the daily chart,

play05:13

it's just going to look like a mess, okay?

play05:14

So I personally prefer to do this, do it that way, right?

play05:17

Same timeframe and lower,

play05:18

and then you want the opacity to be really low

play05:21

and then once you're happy with that,

play05:22

go to your template and go save as

play05:25

and then you can call it wherever you want.

play05:26

And I basically have one for each main timeframe

play05:29

that I use pretty much, okay?

play05:31

So what this essentially is doing at this moment

play05:33

is we've just drawn on a four hour range created demand, okay?

play05:38

A four hour demand range

play05:39

where essentially you have the sell before the buy, right?

play05:42

That's where pricing comes up

play05:43

and essentially breaks out of that range.

play05:45

Pricing initiates out of the range.

play05:47

Then what we get, we get the mitigation back into that range,

play05:50

back into where that demand came into the market

play05:52

and then we get a continuation of that movement.

play05:54

Now, obviously that's a very, very large range.

play05:56

So for us to trade that directly,

play05:59

let's just, again, there's loads of ways we can enter,

play06:01

but let's keep things simple

play06:02

and let's always enter on the edge of the zone,

play06:05

just to keep it consistent for now, right?

play06:07

Your risk reward is going to be terrible

play06:09

because you're going to enter at the top

play06:10

and you're going to have to stop this here below

play06:11

and then how far are you going to target?

play06:12

Obviously in this instance, it goes quite far,

play06:14

but generally that's not going to be amazing training.

play06:16

So what I prefer to do,

play06:17

especially when it's a large range like that,

play06:19

is we're going to refine it to the pivots

play06:21

within the range, right?

play06:22

Now, from the bottom of the leg,

play06:24

it's pretty much just one straight movement.

play06:25

So the only real zone or pivot zone that we have

play06:28

is right at the bottom, right?

play06:29

Right at the bottom of that pivot.

play06:30

Now, if you're super, super, let's say mechanical,

play06:35

a lot of people will only draw demand zones

play06:38

on a bearish candle, right?

play06:40

Like this, the cell candle,

play06:41

where then the next candle needs to close above it.

play06:43

Now, obviously in this instance, we zoom right in.

play06:47

The next candle fails to close above it, right?

play06:49

This candle here, this should be the thrust candle.

play06:52

It fails to close above the previous candle's high.

play06:55

So for me personally, I don't view that as valid demand.

play06:59

I need the next candle to close above it.

play07:01

So this is where you can then evolve it

play07:02

to the next candle, okay?

play07:03

But then we have the same problem.

play07:04

See this candle, this should be the thrust candle, right?

play07:07

It fails to close above the previous candle's high.

play07:10

So this is where I wouldn't say it's valid demand

play07:12

and I would evolve it to here, right?

play07:14

And now we have the candle closes above it

play07:16

and that's really where that true demand

play07:18

stepped into the market.

play07:19

And that would be how I would refine that whole range, okay?

play07:22

So we probably set the whole cell to buy range

play07:24

down towards that pivot.

play07:26

So that's how I would draw a single candle pivot zone, okay?

play07:30

Strong women to come into the market,

play07:31

that's where there's demand, okay?

play07:33

So we move to the upside and then we pull back.

play07:35

We know that we've basically mitigated some of the orders,

play07:38

right?

play07:38

We're not always gonna pull back down to our zone,

play07:40

but we'll talk about this a lot more in future lessons.

play07:42

And then we continue to the upside

play07:43

until we get that next shift, okay?

play07:47

Now with that shift, again, you can take the whole range.

play07:50

So from the top of the range to the bottom of the range,

play07:52

and that is your range created demand.

play07:54

And as we can see, price initiates out of the range.

play07:56

It pulls back to mitigate the range,

play07:58

to mitigate those remaining resting orders,

play08:00

to pick up more demand.

play08:01

And then we get the continuation of the range, right?

play08:04

But again, I would have been more than happy

play08:05

to refine that down to the single candle pivot.

play08:08

And this is a really nice one

play08:09

because it's right at the extreme of the move.

play08:12

The next candle just about closes above the high,

play08:14

so it is valid demand, okay?

play08:16

And then there we go.

play08:17

Now, what I will say, and this is where sometimes

play08:19

you have to read between the lines a little bit,

play08:21

is let's say I was looking at this in the live market

play08:23

and it looked basically exactly the same as this,

play08:25

but let's just imagine that the thrust candle

play08:27

didn't quite close above the high and it closed down here.

play08:30

Technically, that wouldn't be valid demand

play08:32

in that instance, okay?

play08:34

But it's like, well, where else am I gonna draw it?

play08:35

Because otherwise, if I don't draw it here,

play08:37

am I gonna take that candle and draw it all the way up here?

play08:39

Well, okay, you could do that,

play08:41

and that could be very mechanical

play08:42

because the next candle does close above the high,

play08:44

but at that point, it's massive.

play08:46

You're basically taking the whole range.

play08:47

So that's where I prefer to just read a little bit

play08:49

between the lines, and I would just draw it to here.

play08:52

And this is where basically you can go through,

play08:55

if you wanna be super, super mechanical

play08:56

and you wanna find the exact candle

play08:58

that the next candle closes above it,

play08:59

you could cycle through the timeframes

play09:01

and you could go to say like,

play09:02

let me just bar replace, I'm gonna lose where we are.

play09:05

But you could go to like, we're looking at this zone here

play09:07

and you could go to the three hour chart, okay?

play09:10

And then this is where you go, right?

play09:12

Like that's the candle that was then,

play09:13

you know, the next candle closed above its high,

play09:14

or you could even take, you know,

play09:16

both candles in that instance.

play09:18

But I find that to be really unnecessary,

play09:21

and this is why I prefer to just stick on the timeframe

play09:23

I'm looking at, and look,

play09:24

if it doesn't quite close above it,

play09:26

but it's clearly, you know, we've had the movement,

play09:28

we've come down, that's where the demand stepped in,

play09:30

I'm happy to draw it in that instance, okay?

play09:33

So, but yeah, hopefully that's not too confusing,

play09:37

but we'll go through it as we get there.

play09:39

So, yeah, and then even, right,

play09:42

we're moving to the upside,

play09:43

and we know as that's happening,

play09:44

what's gonna be going on to the left,

play09:45

there's gonna be supply zones as well.

play09:47

Now this is another one,

play09:48

which we can have a few questions around understandably.

play09:52

So this is where we have a buy, right, to sell.

play09:57

So you can see that price was coming down,

play09:58

and then we get a bullish candle.

play09:59

So we clearly know that on the lower timeframe,

play10:01

there was a pullback, and then price comes down, okay?

play10:04

So for me, that is a valid supply zone.

play10:07

The thing that probably some of you are maybe asking is,

play10:09

well, if you look at it from a structure perspective,

play10:11

the fractal structure,

play10:12

you see how all of these candles

play10:14

broke the previous candles low?

play10:15

So if we look at it from a structure perspective,

play10:17

there wasn't actually a pullback there on this timeframe,

play10:19

because, you know, from a fractal structure perspective,

play10:21

that's all one down move, right?

play10:23

And you are correct.

play10:24

So this is where when I see a zone like this in the market,

play10:30

you know, they are valid,

play10:33

because as you can see, they create moves,

play10:34

but the ones that are better,

play10:36

and we're gonna get into this in the next lessons,

play10:38

are the ones that actually have kind of that true pullback,

play10:40

and then they lead to that breaker structure, okay?

play10:42

But again, we'll talk about this in the future lessons

play10:43

of getting a bit ahead of myself a little bit,

play10:46

but that is just something I want to point out.

play10:47

But you know, you can clearly see on a lower timeframe,

play10:49

that was that buy before the sell,

play10:50

and then we go where we have that bullish candle.

play10:52

So price comes in, fills up some of that supply,

play10:54

we then move to the downside,

play10:56

then we fill up some of the demand in that whole range,

play10:58

right?

play10:59

And then we move to the upside.

play11:00

And again, there's gonna be more supply zones over here.

play11:02

This is where we have those inside bar levels.

play11:07

Now, as you can see here, this zone,

play11:09

this inside bar wasn't completely fresh,

play11:11

because it was created back here.

play11:13

So when we have this inside bar,

play11:14

and then when this next candle here moves to the downside,

play11:17

and it closes below that low,

play11:19

this then becomes a valid supply zone.

play11:21

But then what happens after this candle is printed,

play11:23

price then pulls back into the zone, right?

play11:25

And it fills up some of the orders,

play11:27

and then we move to the downside.

play11:29

So for me, that means that that zone has been mitigated,

play11:31

right?

play11:32

Prices filled up some of the orders and continued.

play11:35

So if I was in the market and I see price coming up,

play11:37

I would see this as a valid zone,

play11:38

but I would just be a little bit cautious that,

play11:40

well, some of the orders have already been filled, okay?

play11:43

But as you can see, it pushes deeper into the zone,

play11:45

it fills up some more of the remaining orders,

play11:46

and we get a bit of selling pressure,

play11:48

but then ultimately price pushes up a little bit higher.

play11:51

And then what do we do?

play11:52

We mitigate the zone above what we just missed actually.

play11:55

Yeah, just missed it there.

play11:57

But this is again, where sometimes the market

play11:59

is not perfect, and what you'll have to recognize

play12:02

is that let's say we're in the live market

play12:05

and price is coming up into this instance,

play12:07

and we go, okay, we have this pivot zone here,

play12:08

and we have this pivot zone here,

play12:10

price is now traded up through this one.

play12:12

So the bit I'm talking about is when price is here,

play12:15

we go, okay, we traded through here,

play12:16

we could be waiting for price to tap into here,

play12:18

but it doesn't quite tap in and then we move away.

play12:21

We can understand that we can look left and go,

play12:23

well, we know that this whole area is supply, right?

play12:25

This whole level here, it's range created supply, okay?

play12:29

Because we can see what happened.

play12:30

Price came down, it pulled back,

play12:32

and then we got that injection of supply, right?

play12:33

The buy to sell.

play12:35

So that whole area we know is valid supply.

play12:38

So look, it's quite large,

play12:39

and that's why we tried to then refine it

play12:40

to the pivots within it, right?

play12:41

We've got price coming down, the buy to sell, right?

play12:45

That pivot, we could take the range like that

play12:47

with this refine zone within,

play12:49

we could refine it even more to a single kernel pivot,

play12:51

and then the other pivots from within there.

play12:52

But we know that the whole time,

play12:54

once price reaches in to this supply range,

play12:58

we know at any point that selling pressure

play12:59

could be coming in, okay?

play13:01

So, you know, what I will do in the market,

play13:04

and again, we'll keep going over and over this

play13:06

in the coming lessons,

play13:07

if you're getting a little bit confused, don't worry,

play13:09

is I will have the refined pivot zones like this.

play13:11

I'm aware of them.

play13:12

But say like, you know, I don't have this drawn on,

play13:13

and price just misses it.

play13:15

Like, I know in the back of my mind

play13:17

that we're in this entire supply range.

play13:18

I just don't always draw on because I know where we are.

play13:20

Like, I'm looking left

play13:21

and I can see there's a clear supply range here,

play13:22

and I'm expecting selling pressure to come in, okay?

play13:24

Sometimes you just have to read between the lines

play13:26

a little bit that this whole area supply, okay?

play13:29

Hopefully that makes sense.

play13:31

Then we have a bit of choppy price action,

play13:33

and then we push up higher, right?

play13:34

So, and again, you can be looking left

play13:36

and drawing on all of these zones, right?

play13:37

There's all valid supply there.

play13:39

It's kind of want to stick to a few more obvious ones now.

play13:42

So let me just pay a price for a little bit,

play13:43

and then we'll talk about some more obvious ones

play13:44

just to speed up a bit.

play13:47

So we have that movement upright.

play13:50

We have that sell to buy range.

play13:52

So what do we know?

play13:53

We know that this whole area

play13:54

is a valid demand range, right?

play13:56

That whole level.

play13:57

As we can see, price taps into the range,

play13:59

but what we can do is we can refine

play14:02

demand levels within there.

play14:06

And I know this is messy,

play14:07

but I promise you it would be

play14:08

because this is not where we're adding our refinements,

play14:10

and we're literally just looking for the ranges

play14:12

and the pivots from in it.

play14:13

So we know we have this demand range.

play14:14

I'm just going to delete it for a minute.

play14:16

Now, let's say price was, let's bring it back a bit.

play14:21

Here, right?

play14:22

I mean, we're looking for demand,

play14:24

potentially we're expecting that

play14:25

after that demand range was created,

play14:27

that price would come back into here

play14:28

and potentially continue so we could look for entries.

play14:30

Well, I already showed you how we could take

play14:32

the entire range, but that's quite large, right?

play14:34

So maybe we would want to refine it a little bit.

play14:35

So we look at the apex of the move

play14:37

and we start from the bottom.

play14:39

None of these candles close above the candles high, right?

play14:41

It doesn't make sense to draw any demand from within here.

play14:44

Potentially you could take that level,

play14:46

but this is where I would then refine it

play14:47

to where is the next candle,

play14:49

where the next candle actually closes above it, right?

play14:51

Does it do it here?

play14:52

No.

play14:53

Does it do it here?

play14:55

No.

play14:56

Does it do it here?

play14:57

Yes, okay?

play14:58

So there's a potential level in which you could then draw

play15:00

or refine that whole range down to a single candle pivot,

play15:02

okay?

play15:03

So you see how technically that is not a bearish candle,

play15:06

right?

play15:07

It's not a bearish candle.

play15:08

That's then the next candle closes above it.

play15:10

This is where you can have a bullish candle

play15:11

and then a bullish candle.

play15:12

So that's what I'm saying.

play15:13

I'm not 100% mechanical with that.

play15:14

Some people need to, or they will only draw demand

play15:17

on a bearish candle,

play15:19

where then the next candle closes above it,

play15:20

like this one here, right?

play15:22

I'm not that fussy because what you could do

play15:24

is you could go through the timeframes again, like I said,

play15:26

and you could look, there we go, right?

play15:27

There would be your bearish candle

play15:28

where the next candle closes above it.

play15:30

I'm not bothered to do that.

play15:31

I prefer to keep it simple.

play15:32

And I'm simply just looking for

play15:34

where did that demand step into the market?

play15:36

And ideally I want to see

play15:37

the next candle close above it, right?

play15:38

And that would be a level.

play15:39

Now I'm not saying this is a good demand level on its own.

play15:41

Again, we're gonna bring in more filters.

play15:43

I'm just kind of show you the basics

play15:44

of how I would refine ranges

play15:46

down to sort of single candle pivot zones, right?

play15:48

And then we go over and get a bit of a reaction.

play15:50

Okay.

play15:52

And then, right, moves to downside.

play15:54

So now what do we have?

play15:55

You see how we have that supply, right?

play15:56

Movement, pivot, supply stepped into the market.

play15:59

So what do we have?

play15:59

We have the supply range from the low

play16:01

to the high, that's your supply range.

play16:04

Bigs range, what can we do?

play16:05

We can refine it to the pivot from within it, okay?

play16:07

And there you go.

play16:07

You can refine it to the inside bar.

play16:10

No, sometimes inside bars are a bit over-refined.

play16:12

It's a bit small.

play16:13

So you could take the buy before the sell, right?

play16:15

Like that.

play16:16

That's what some people prefer to do, okay?

play16:17

So there is a little bit of an art

play16:20

to drawing supply and demand in that sense,

play16:23

depending on how super, super mechanical you want to be.

play16:26

Do you always want to draw it to that single candle?

play16:29

Like, this is the questions you want to ask yourself

play16:31

as you're going through the course

play16:32

and as you start to find the way that you want to trade.

play16:37

Do you want to be the person

play16:38

who always uses the single candle

play16:39

and you want to be quite refined?

play16:41

And you will always draw on the single candle

play16:42

where the next candle closes below its low, if it's supply,

play16:45

and on closes above its high, if it's demand.

play16:48

That can keep things relatively simple.

play16:50

But what you have to,

play16:51

and that's kind of pretty much how I trade at the moment.

play16:53

I'm like that 95% of the time, okay?

play16:56

But what I do is let's say I've refined my zone to here,

play16:59

and that's going to be nice.

play16:59

I wanted to look to say short from within here.

play17:01

I know that if I start putting it back into here,

play17:04

and let's say it's around here at this moment,

play17:06

I just know in the back of my mind without drawing it on

play17:08

that we're within the entire supply range.

play17:10

And I know at any moment, we don't have to pull up here

play17:13

because at some point, whilst we're within this range,

play17:16

there could be, it could fill up enough orders

play17:18

where then supply does overpower demand,

play17:21

and then we continue.

play17:22

So ideally, I want price to hit here, let's say,

play17:25

but I'm aware that, let's say,

play17:26

I'm on the M15 looking for my entry,

play17:28

ideally I want it to hit here.

play17:29

But if we start to really shift, let's say on the M15,

play17:32

and we get like a true bearish structure shift on the M15,

play17:35

and then we have a nice M15 supply zone,

play17:37

I'm going to understand where we are, right?

play17:39

We're in the supply zone on the four hour chart,

play17:41

so maybe I'm keen to now get involved

play17:43

from within here and go,

play17:44

because I understand that price doesn't have

play17:46

to hit my refine level, okay?

play17:48

So, yeah, that's kind of basically the way I approach it,

play17:53

is like, I like to be refined,

play17:54

I want it to ideally hit the top of that pullback

play17:58

where we have our refined single candle pivot zone,

play18:00

but I'm aware that we are within that clean supply range,

play18:02

okay?

play18:03

And that's basically how I tend to approach things

play18:07

the majority of the time, okay?

play18:09

I'm coming to some odd levels, right?

play18:10

We start to see some of those orders being filled,

play18:12

but then likewise, right, you can see,

play18:14

there's a shift here, there's a supply zone there,

play18:16

they're literally everywhere,

play18:17

and then we go chop around, we create some demand,

play18:21

we start to fill that demand, and then we push through it,

play18:24

sometimes you need to chop your price action,

play18:25

this is what I mean, right?

play18:26

And then you've got the sell before the buy,

play18:28

so now you have some demand here,

play18:32

let's draw this on, see how you have this candle here,

play18:35

it's not great because it's, to be fair,

play18:37

already had a mitigation, but this is where,

play18:39

again, I haven't talked about fractal zones just yet,

play18:40

you have the wick, right?

play18:41

We know there'll be, on a lower timeframe,

play18:43

there'll be some supply from within there,

play18:45

like if we go and investigate,

play18:47

let's maybe look at, say, the 15-minute,

play18:49

what was in that four-hour wick,

play18:53

there's gonna be some M15 supplies from within there,

play18:55

it's not the cleanest because they were kind of mitigated,

play18:57

but essentially that's what you're doing,

play18:58

is you're reading the lower timeframes

play19:00

on the higher timeframes, okay,

play19:02

where you can refine it to unmitigated wick,

play19:04

but there's not gonna be as many orders from within there

play19:07

as a full unmitigated candle like we have here, right?

play19:10

Because when we had the full-bodied candle here,

play19:15

just bring it back and borrow a replay

play19:16

so I can show you what I mean,

play19:18

that's when that zone is created, right?

play19:20

We had the buy before the sell, the candle closes below,

play19:22

so we have a buy to supply, what happens next?

play19:24

Price moves into the zone

play19:25

and it fills up some of those orders,

play19:27

a lot of the orders actually because it's traded

play19:28

pretty much into almost the EQ of that zone

play19:31

and it moves down, so for me, when I see a zone like that,

play19:34

I pretty much count that zone as done,

play19:35

that zone is done, right?

play19:37

The majority of the orders have been filled,

play19:39

so if price was to return to that area,

play19:41

I'm not really gonna be expecting a massive move away

play19:44

because it's already, like I said,

play19:46

its power has been absorbed,

play19:48

the supply has been absorbed, right?

play19:50

So when we come back to here and then price moves up,

play19:54

and then let's say you get a bit of a pullback like that,

play19:57

I look left and go, what are we reacting to?

play19:59

Well, this zone, it was pretty much mitigated,

play20:01

but I understand that there's still some orders

play20:03

from within here and we've moved back,

play20:05

but I'm not expecting on average

play20:09

that when it's just mitigating a wick,

play20:11

when the edge, when this had already been filled,

play20:13

I'm not expecting that to be a big move,

play20:15

there's just gonna be a small amount of orders

play20:17

to potentially generate a bit of a pullback,

play20:19

now when you've got a big full bodied,

play20:21

what I call a non-mitigated zone here,

play20:23

like a completely fresh zone that hasn't been tapped into,

play20:26

what do you think is gonna have more power?

play20:27

Just this wick, how many orders are gonna be in there

play20:30

compared to how many orders are gonna be in here

play20:32

when price first taps into it?

play20:33

On the balance of probabilities,

play20:34

ignoring all other confluence,

play20:36

ignoring market structure, blah, blah, blah,

play20:38

a full single candle, unmitigated, fresh zone,

play20:42

whatever you wanna call it,

play20:44

to me is gonna have a lot more power

play20:46

to then move to the upside

play20:47

rather than just trying to trade against that wick, right?

play20:50

Does that, hopefully that makes sense.

play20:51

So when price is coming into here,

play20:53

that gives us an edge, right?

play20:54

We can expect that it's more likely

play20:55

to have a power demand to the upside.

play20:59

So we're gonna talk about this in a lot more depth as we go,

play21:02

but that's essentially what I'm doing right.

play21:03

Again, we're up here.

play21:04

I could be waiting for price to come up into this refined zone,

play21:07

but I'm aware, where are we?

play21:08

We're within that whole level there.

play21:10

And that's the first time we've tapped into this range now

play21:11

and we're starting to see that movement to the downside.

play21:13

But where are we coming into?

play21:15

We're coming into this level here.

play21:16

You see, that's the demand.

play21:19

And this is why I can get really messy

play21:20

because you have this whole sell to buy range, right?

play21:23

Following on.

play21:25

So I'll just draw it on for you.

play21:27

All right, we come up,

play21:28

we pull back into that demand level here, right?

play21:30

This demand range, that single candle, pivot zone.

play21:33

We then pivot to the upside.

play21:34

So from the top of the pullback

play21:35

to the bottom of the pullback,

play21:36

that's your range created demand.

play21:38

Within that, we can refine it,

play21:40

just on this timeframe, okay?

play21:41

And that's your demand zone, right?

play21:43

And I'll kind of show you why

play21:44

just in case someone might be running.

play21:45

You could start from the bottom if that helps, right?

play21:47

Start from the apex, but you see,

play21:49

that's already been mitigated, right?

play21:51

Price pushed out, it came back in,

play21:52

filled the orders and continued, right?

play21:54

So again, this is all,

play21:56

you know, this candle above here doesn't close above it.

play21:58

You move it to that one, right?

play22:00

The thrust candle closes above it.

play22:02

It's completely unmitigated.

play22:04

So that's what I would call

play22:05

the unmitigated extreme pivot zone, right?

play22:08

So it's the extreme of this pullback to the upside.

play22:14

It's completely unmitigated.

play22:15

So you see, once it was created here,

play22:16

where the next candle closes above it,

play22:18

since it's been created,

play22:19

nothing has tapped into it until we're coming back here.

play22:22

So that's why, if you ever hear me say

play22:23

the unmitigated extreme, this is what I'm talking about.

play22:27

Because if this whole demand range here is gonna continue,

play22:30

this is like the level

play22:31

in which it's most likely gonna continue from, okay?

play22:34

Now, sometimes what will happen, and you'll see this,

play22:36

is price will trade a little bit lower

play22:38

and then it might fill up, you know,

play22:39

it might tap into something within this wick.

play22:41

It never violates the demand range

play22:43

and then we get that movement, okay?

play22:44

That can happen, right?

play22:46

Essentially we get sweeps liquidity and blah, blah, blah.

play22:47

We'll talk about this later,

play22:49

but just for you to know that.

play22:50

So, and if that does happen, I don't panic.

play22:52

Like if price comes down and we push a little bit lower,

play22:55

if you know I get my lower timeframe confirmations,

play22:56

again, say on the M15, we get that shift in structure,

play22:59

we get fresh demands on the M15.

play23:00

I still understand that this low is held.

play23:02

We're still within demand range.

play23:03

Okay, cool, let's trade high, okay?

play23:05

But you know, it's nice and clean

play23:06

and ideally when this single candle pivot zone holds itself

play23:10

and there we go, I don't know, let's see.

play23:13

You know, we create another zone here,

play23:14

but it gets a bit messy.

play23:15

And then, okay, in this instance,

play23:16

we actually sweep this low and then we push up

play23:18

and then we get another pivot, all right, and here we go.

play23:20

So I don't want to drag this lesson on too much longer,

play23:26

but I kind of just wanted to do some basic drawing.

play23:27

But you see when it's like this,

play23:28

this is all a bit of a mess and it's all a bit like,

play23:31

but you can understand, this is where the pivots are,

play23:32

this is where the supply, here's a cell to buy pivots,

play23:34

so we know there's demand from within here,

play23:36

but then you get pivots within pivots

play23:37

and it all gets very confusing.

play23:38

And that's why we start with market structure

play23:41

because you need that skeleton,

play23:43

you need that solid bone framework

play23:45

for us to lay out first and map

play23:47

and then we overlay these zones within that

play23:49

because otherwise this is what happens

play23:51

and it can get very, very messy

play23:53

and very, very confusing understandably quite quickly.

play23:56

Now, what I did want to talk about actually,

play23:57

which I haven't, is a bit just quickly

play23:59

to point out some fractal zones.

play24:01

So let me just delete this

play24:03

before we kind of go into the next stuff.

play24:06

And then let me just quickly look for some nice examples

play24:10

of, let's look for some wick zones.

play24:16

Okay, here's one.

play24:17

So when we come back here,

play24:22

price is moving to the downside.

play24:25

Now, if we look at these,

play24:27

I can't even talk,

play24:28

see how all of these break the previous candles low

play24:31

until here and then we get that fractal pullback, okay?

play24:34

So what do you think is happening?

play24:36

If you think about how those candles are formed,

play24:38

what do you think is happening on a lower timeframe?

play24:39

So we have a down movement

play24:41

and on a lower timeframe, what would you see now?

play24:43

You would see a bit of a pullback, right?

play24:44

Then you would see a down movement

play24:46

and then you would see a break

play24:47

to the upside on a lower timeframe

play24:48

and then you would see a down movement, right?

play24:50

Pullback, down movement, pullback, down movement,

play24:52

up movement, up movement, down movement.

play24:55

That's essentially what you're seeing, okay?

play24:57

So the point I'm gonna point out

play24:58

is when you see sort of big buy to sell wicks

play25:00

on the down movement, so you get something like that

play25:01

and then you can see that sharp movement to the upside

play25:04

and then the down movement, all right?

play25:05

What is that gonna be if I just drag this across?

play25:07

That hasn't done it very well.

play25:09

Essentially, what it's gonna be on the lower timeframe

play25:11

if you take from the buy to sell wicks,

play25:13

you know, we've gone through this in theory lesson,

play25:14

that's gonna be your supply, right?

play25:15

So if I look down on the lower timeframe,

play25:17

hopefully this works, you can see that now.

play25:19

So that was just buy to sell wicks on the four hour chart,

play25:21

but what is it?

play25:22

It's a supply range on the M15, okay?

play25:25

So without even looking at the lower timeframe,

play25:28

that's how you can read that there may be a supply range

play25:30

or a pivot supply on the lower timeframe

play25:33

and that's when price taps into it

play25:34

and then continues to the downside decay

play25:36

and obviously you could refine that to the wick as well.

play25:39

But yeah, that's pretty much fractal zones in a nutshell,

play25:41

but what I wanna do now is in the next lessons,

play25:43

we're gonna start to show you the two main filters

play25:45

that we use to, well, to filter them, right?

play25:48

To try and look for more high probability zones,

play25:51

but as we go throughout the course

play25:53

and we add more and more confluence,

play25:54

you will, you know, we do our best to try and spot

play25:57

which ones are likely to hold the most volume within them

play26:00

and cause that next high probability move.

play26:03

So yeah.

Rate This

5.0 / 5 (0 votes)

Связанные теги
Trading StrategiesSupply and DemandPrice ActionChart AnalysisTechnical AnalysisMarket ImbalancesPivot PointsTrading ZonesLiquidity ZonesCandlestick Patterns
Вам нужно краткое изложение на английском?