Object Detection using OpenCV Python in 15 Minutes! Coding Tutorial #python #beginners

SalteeKiller
27 Feb 202217:49

Summary

TLDRThis tutorial introduces viewers to object detection using OpenCV and Python. The presenter demonstrates how to install necessary libraries, access a camera feed, and identify various objects in real-time. The video also covers how to use the gtts and play sound libraries to make the computer vocalize the detected objects, creating an interactive and informative experience for the audience.

Takeaways

  • 😀 The tutorial focuses on object detection using OpenCV, a popular computer vision library.
  • 🛠️ The presenter guides through the installation of necessary libraries, including `opencv-contrib-python`, `cvlib`, `gtts`, and `play-sound`.
  • 🔎 `opencv-contrib-python` is preferred over `opencv-python` for its additional libraries that enhance functionality.
  • 📱 The script demonstrates real-time object detection using the computer's webcam, identifying various objects like an apple, orange, and cell phone.
  • 🎯 The `cvlib` library is utilized for its pre-trained models to recognize common objects within the video frames.
  • 🗣️ The tutorial includes a feature to convert detected objects into spoken words using Google Text-to-Speech (gtts).
  • 🔊 The `play-sound` library is integrated to efficiently play the synthesized speech.
  • 📝 The script maintains a list of unique detected objects to avoid repetition in the output.
  • 📑 The tutorial concludes with a function that converts the list of detected objects into a natural-sounding sentence and plays it aloud.
  • 🎉 The presenter encourages user interaction through comments, likes, and subscriptions for further tutorials.

Q & A

  • What is the main focus of the tutorial?

    -The main focus of the tutorial is to demonstrate how to use OpenCV for object detection, allowing the computer to identify and announce different objects seen through a camera feed.

  • Why is OpenCV-contrib-python used instead of OpenCV-python?

    -OpenCV-contrib-python is used because it contains additional libraries beyond the basic modules of OpenCV-python, providing more functionality for advanced tasks such as object detection.

  • What libraries are installed for object detection in the tutorial?

    -The tutorial installs 'opencv-contrib-python', 'cvlib', 'gtts', and 'play-sound' libraries to handle object detection, text-to-speech conversion, and audio playback, respectively.

  • How does the tutorial handle real-time object detection?

    -The tutorial accesses the camera using 'cv2.VideoCapture' and processes each frame in a loop to detect objects in real-time, then draws boxes and labels around the detected objects.

  • What function is used to draw boxes around detected objects?

    -The 'draw_box' function from 'cvlib.object_detection' is used to draw boxes around the detected objects in the video frames.

  • How is the list of detected objects managed to avoid duplicates?

    -The tutorial uses a for loop to check if an item is already in the 'labels' list before appending it, ensuring each object is only announced once.

  • What is the purpose of the 'speech' function defined in the tutorial?

    -The 'speech' function is used to convert the list of detected objects into a natural-sounding sentence and then use the 'gtts' library to convert the text into speech.

  • How does the tutorial ensure a more natural pause in the spoken output?

    -The tutorial uses string interpolation to create a sentence with 'and' and commas, which are then joined into a single string to ensure natural pauses when the computer speaks the detected objects.

  • What is the significance of creating a 'sounds' directory in the project?

    -The 'sounds' directory is created to store the audio files generated by the 'gtts' library, which are then played using the 'play-sound' library.

  • How does the tutorial handle user interaction to stop the object detection process?

    -The tutorial uses a 'cv2.waitKey' function to check if the user presses the 'q' key, which, if pressed, breaks the loop and stops the object detection process.

Outlines

00:00

😀 Introduction to Object Detection with OpenCV

The video begins with an introduction to object detection using OpenCV. The presenter demonstrates holding up various objects such as an apple, an orange, and a cell phone, and explains the goal of getting the computer to verbally identify these objects within a video frame. The presenter then proceeds to explain the first step, which is to install the necessary dependencies. They guide the viewers through the installation of 'opencv-contrib-python' and 'cvlib' using pip, highlighting the additional libraries provided by 'opencv-contrib-python' over the standard 'opencv-python'. The presenter also addresses potential warnings about updating pip and suggests resolving them promptly.

05:01

🛠️ Setting Up Object Detection and Speech Synthesis

In this section, the presenter continues the setup process by installing additional libraries for speech synthesis and efficient sound playback. They use 'gtts' for text-to-speech conversion and 'play-sound' for playing the synthesized audio. The presenter then imports necessary modules from OpenCV, cvlib, and the other installed libraries. They explain the process of accessing the computer's camera to capture live video for real-time object detection. The script includes a loop to continuously read frames from the video capture and use cvlib to detect common objects, drawing boxes and labels around the detected objects.

10:02

🔍 Detecting and Storing Object Labels

The presenter explains how to process the detected object labels to avoid duplicates in the list. They create a list called 'labels' and use a for loop to append unique labels to this list. The script checks if an item is already in the 'labels' list before adding it, ensuring each object is only listed once. The presenter then demonstrates testing the list by printing its contents, which shows the successful detection of unique objects like a person and a tie.

15:04

🗣️ Implementing Speech Output for Detected Objects

The final part of the video focuses on converting the list of detected objects into spoken words. The presenter creates a function called 'speech' that takes text input, converts it to speech using gtts, saves the audio to a file, and plays it using the 'play-sound' library. They demonstrate how to construct a natural-sounding sentence from the list of labels and then use the 'speech' function to vocalize the findings. The video concludes with a live demonstration of the complete setup, where the computer successfully identifies objects in the video feed and verbally announces them, followed by a call to action for viewers to engage with the content and a wrap-up of the tutorial.

Mindmap

Keywords

💡OpenCV

OpenCV, which stands for Open Source Computer Vision Library, is an open-source computer vision and machine learning software library. It is used for various image and video analysis tasks, including object detection, as demonstrated in the video. The script mentions installing OpenCV with additional libraries to enhance its capabilities for object detection.

💡Object Detection

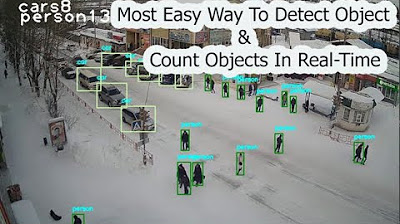
Object detection is a computer vision technique that involves identifying and locating multiple objects in an image or video. In the video, the presenter uses OpenCV to detect various objects like apples, oranges, and cell phones, and then uses text-to-speech to announce what the computer 'sees'.

💡cv2.VideoCapture

cv2.VideoCapture is a function in OpenCV used to capture video from a camera. In the script, it is used to access the computer's camera to provide a live feed for real-time object detection.

💡cv2.imread

cv2.imread is a function in OpenCV used to read images from a file. Although the script mentions initially using this function with a specific image, the focus shifts to using live video feed for object detection.

💡cv2.imshow

cv2.imshow is a function in OpenCV that is used to display an image in a window. The script uses this function to show the live video feed with detected objects and drawn boxes around them.

💡cv2.waitKey

cv2.waitKey is a function in OpenCV that waits for a key event from the user. In the script, it is used to allow the user to exit the video feed by pressing a specified key, such as 'q'.

💡gtts

gtts stands for Google Text-to-Speech, a Python library that converts text to speech. The script uses gtts to convert the detected object labels into spoken words, which are then played back to the user.

💡play sound

play sound is a Python library used to play audio files. In the context of the video, it is used in conjunction with gtts to play the audio output of the text-to-speech conversion.

💡cvlib

cvlib is a library for computer vision tasks, including object detection. The script mentions installing cvlib to use its pre-trained models for detecting common objects in the video feed.

💡String Interpolation

String interpolation is a method of embedding expressions within a string, which are evaluated and then replaced with their values. In the script, it is used to dynamically create sentences that describe the detected objects, which are then spoken by the computer.

💡List Comprehension

List comprehension is a concise way to create lists in Python. The script uses list comprehension to create a list of unique detected objects, ensuring that each object is only announced once.

Highlights

Introduction to object detection using OpenCV.

Installation of dependencies including OpenCV and cv-lib.

Explanation of the difference between OpenCV Python and OpenCV-contrib-python.

Installation of gtts and playsound libraries for text-to-speech functionality.

Importing necessary libraries for object detection and speech.

Accessing the camera for a live feed of object detection.

Loop to process each frame from the video capture for object detection.

Using cv-lib to detect common objects and draw boxes around them.

Displaying the detected objects with labels in real-time.

Creating a list to store unique labels of detected objects.

Explanation of avoiding duplicate entries in the labels list.

Printing the list of detected objects to verify the functionality.

Creating a more natural-sounding sentence from the list of detected objects.

Using string interpolation to format the detected objects into a coherent sentence.

Defining a function to convert text to speech using gtts and playsound.

Saving the generated speech as an MP3 file.

Playing the generated speech to confirm the object detection results.

Final demonstration of the object detection and speech synthesis working together.

Encouragement for viewers to ask questions and subscribe for more tutorials.

Transcripts

play00:02

[Music]

play00:08

i found a person and a tayachara apple a

play00:11

doughnut orange a cell phone hey guys

play00:14

welcome to another tutorial with opencv

play00:17

today we are going to look into object

play00:20

detection so i can just hold up an apple

play00:23

or an orange

play00:24

heck even my cell phone lots of

play00:26

different objects and i'm going to get

play00:28

my computer to tell me out loud using

play00:31

its voice what it saw inside of the

play00:33

frame that's enough introduction let's

play00:35

get right into

play00:36

[Music]

play00:42

it so the first thing that we need to do

play00:45

is install our dependencies so we are

play00:47

going to import a couple of libraries

play00:50

the first thing that we're going to

play00:52

import is opencv contribute python so

play00:56

we're going to say

play00:57

pip

play00:58

install open cv dash contrib dash python

play01:03

and some people ask me why i use this

play01:06

lately instead of just open cv python

play01:09

it's because opencv python does contain

play01:13

the main components that you need for

play01:15

the basic modules of opencv but with

play01:18

opencv can trip python it's going to

play01:21

contain some extra libraries so that we

play01:24

have a little bit extra to work with and

play01:27

so we're just going to hit enter and

play01:29

that's going to start installing okay

play01:31

and if you ever get a warning like i did

play01:34

where you need to update pip or anything

play01:36

you can go ahead and do that as well i'm

play01:38

just going to copy and paste that that

play01:40

should be just really quick

play01:42

and there we go perfect after we have

play01:45

that installed we are now going to go

play01:46

ahead and install c-lib

play01:49

so pip install

play01:52

cv lib okay and we're going to be using

play01:55

this for our object detection so there's

play01:58

a library that's already learned what

play02:00

certain objects are so we're just going

play02:02

to install that

play02:04

and depending on your internet

play02:05

connection that should be rather quick

play02:07

very good and then we're going to also

play02:11

allow our computer to

play02:13

say out loud what it saw so if it sees

play02:16

me it'll say i saw a person or i saw an

play02:18

apple an orange so on and so forth so we

play02:20

we're going to import just a couple more

play02:23

things we're going to say pip install

play02:27

gtts

play02:28

space

play02:30

play sound whoops

play02:32

play

play02:33

sound like that and then finally we are

play02:36

going to

play02:37

install

play02:38

pi object c which is going to help with

play02:41

that sound be a little bit more

play02:43

efficient so i'm going to say

play02:45

pip

play02:46

3

play02:48

install

play02:50

capital p y capital o b j capital c

play02:57

okay so that will allow play sound to be

play02:59

a little bit more efficient so i already

play03:01

have a couple of those installed

play03:02

installs just gonna say already

play03:04

satisfied for you it will probably stay

play03:06

successful if you have any errors just

play03:08

go back rewind make sure that you typed

play03:10

everything correctly

play03:12

otherwise let's move on

play03:15

i'm just gonna slide down my window here

play03:16

and i'm going to now import

play03:20

cv2

play03:22

import

play03:24

cv lib as cv

play03:28

and then from

play03:30

cvliv.object

play03:33

detection

play03:35

import

play03:37

draw box so it's going to be drawing a

play03:40

box around our objects for us so make

play03:42

sure you have two b's for box b b o x

play03:47

and then we're gonna say from g t t s

play03:50

import

play03:51

g capital t t s oops i said g t a let me

play03:55

do g t t s then finally from play

play04:00

sound

play04:02

import

play04:03

play

play04:05

sound so there's one two three four five

play04:07

lines of imports but that is everything

play04:11

that we're going to be using for this

play04:13

video so if you need a little bit more

play04:14

time you can go ahead and pause the

play04:16

video and continue that

play04:18

three days later so what we want to do

play04:20

now is now access our camera now

play04:24

originally when i was first building

play04:26

this and testing things out i was just

play04:28

having it bring in a specific image i'm

play04:31

just going to look at objects in the

play04:33

image but i wanted this to be live so it

play04:35

has a live feed and we can detect all

play04:39

the objects in the live feed instead so

play04:42

we're going to access our cameras

play04:45

so i'm going to say video equals

play04:48

cv2 dot video

play04:51

capture

play04:53

and that takes an index now for most of

play04:56

you it might be index zero but my web

play04:59

camera that i want to be using instead

play05:01

which is a lot more higher quality is

play05:03

that index one

play05:05

so you can just mess with those indexes

play05:07

as you please

play05:09

but we're going to start with that and

play05:11

now we're going to say while

play05:15

true

play05:16

i'm now going to use my video capture

play05:19

and i'm going to unpack

play05:21

each frame into a

play05:23

variable called frame so what we're

play05:26

going to do is ret

play05:28

comma

play05:29

frame

play05:31

equals our video

play05:33

dot read

play05:34

so unpack that so now we're going

play05:36

through each frame

play05:38

and now we're going to use that bb box

play05:40

where it's going to be seeing the

play05:42

objects it's going to draw a box around

play05:44

it and we're also going to give it a

play05:46

label next to the box to tell us what

play05:47

the object is

play05:49

so we're going to say bb box

play05:54

comma label

play05:56

and then

play05:58

conf okay and comp is really just

play06:01

identifying what the object is it's just

play06:03

going to be returning some decimal

play06:04

numbers really so i'm going to say cv

play06:07

dot detect

play06:09

common objects

play06:12

and now we have to tell it where to get

play06:14

those objects from

play06:15

so we need to say get it from the frame

play06:18

so that's going to be each frame from my

play06:20

video feed and finally we're going to

play06:22

draw that box so we're going to say

play06:24

output

play06:26

image

play06:28

equals draw

play06:30

box

play06:31

and now we need to give dropbox the

play06:33

frame

play06:35

i want it to get the

play06:37

box that it's going to be drawing around

play06:40

and we're also going to put the label in

play06:42

there and we'll stick conf in there very

play06:45

good so now that we have that let's go

play06:48

ahead and show the user what the image

play06:51

looks like so i'm going to say cv2 dot i

play06:55

am show

play06:57

and we want to show them

play06:59

the name of the window so i'll just call

play07:02

this uh object

play07:04

detection you can call that whatever you

play07:06

want comma and now we've got to tell it

play07:09

output image okay before we hit run

play07:12

we're going to um

play07:14

give this a wait key so i'm going to say

play07:17

if

play07:18

cv2 dot weight key

play07:21

delay of one and

play07:24

we're going to check to see if the user

play07:26

is clicking a certain button

play07:29

you can say whatever button you want but

play07:31

i'm going to say if the user

play07:33

clicks on

play07:35

q some people like the space bar you can

play07:37

just do a space

play07:38

do whatever you want but i'm going to

play07:40

say if the user says hits q i want you

play07:43

to break out of this loop

play07:52

and after i hit q it breaks out of that

play07:55

window so very good so as you could see

play07:58

that was already detecting me as a

play08:00

person even detected this as a tie

play08:03

that's already working so what i want

play08:05

this to do now is i want my program to

play08:08

take each of those labels that it finds

play08:11

in my screen

play08:12

and i want it to append or add to a list

play08:16

so that i have that list of data so what

play08:18

we're going to do now is we're going to

play08:20

make a list called labels so let's come

play08:23

up here and we'll call this labels

play08:26

make sure this is outside of your loop

play08:28

so it doesn't accidentally rename itself

play08:30

inside the loop and just erase all the

play08:32

data

play08:33

um and what we're going to say is

play08:36

we'll do a for loop we're going to say

play08:38

for

play08:38

item in label

play08:44

if item in labels

play08:49

then we're just going to have it pass

play08:52

so that means if if it already found a

play08:55

tie it's going to be checking multiple

play08:58

images it's going to be checking for

play09:00

objects in each frame

play09:02

and so it's going to

play09:04

say maybe like a thousand ties i don't

play09:06

want it to do that i'm just going to say

play09:08

if you find a tie in there then go ahead

play09:10

and put it in the list but if tai is

play09:13

already in the list don't add it to the

play09:15

list so it's only going to say tie one

play09:17

time and you can alter this if you'd

play09:19

like

play09:20

but this is the way i'm going to do it

play09:22

um

play09:23

if it's not already in the list then i

play09:25

want you to

play09:28

labels.append i want you to append

play09:31

that item

play09:33

so that item will be added to this list

play09:35

called labels

play09:37

and just to test that out

play09:39

i'm going to

play09:41

come down here and print

play09:43

labels

play09:45

and let's see if that works

play09:53

okay and as you can see here is my list

play09:56

called labels that i just printed so i

play09:58

found a person and it found a tie so

play10:02

very good uh i know that this is working

play10:04

because if i didn't it would be the same

play10:07

person

play10:08

a thousand times in the tie a thousand

play10:10

times but it's only gonna do it once

play10:13

because of this code here so very good

play10:16

so what i want this to do now is i

play10:19

wanted to take this

play10:21

data called labels so what i'm going to

play10:23

do now is write code

play10:25

using string interpolation to tell me

play10:27

what it found

play10:29

more logically for example i wanted to

play10:32

say something like i found a orange a

play10:36

person a book

play10:38

a tie a cell phone an apple so on and so

play10:41

forth

play10:42

and so

play10:43

how i'm going to do that is i'm going to

play10:46

create a for loop for label

play10:49

in labels

play10:50

i want this to check to see if this is

play10:52

the first time it's reading out loud a

play10:54

label so i'm going to create some kind

play10:56

of iterator so i'm going to say i equals

play10:58

0 and i'm going to say here

play11:01

if i

play11:03

is 0

play11:04

then i want this to actually append to a

play11:07

list because i want this to

play11:10

sound a little bit more natural when it

play11:11

says it out loud so i'm going to say new

play11:14

sentence

play11:15

equals an empty list so i'm going to say

play11:18

if i zero

play11:20

then new

play11:21

sentence dot append

play11:23

that means to add and i want it to add

play11:27

i'll use some string interpolation here

play11:31

i found a

play11:33

i'll put label there so if it's found a

play11:36

person will say i found a person

play11:39

and i'll do a comma and comma

play11:42

that'll give this speech out loud to

play11:45

give a little bit of a pause

play11:47

so we'll see how that goes

play11:49

and

play11:51

then i'm gonna say if it is

play11:54

not equal to zero

play11:56

then new sentence dot append and i'll

play12:00

use string interpolation again

play12:02

and i'm gonna say

play12:03

uh

play12:04

label like so

play12:06

and then once that is done we are going

play12:08

to increment

play12:10

i so i'm going to say

play12:12

i

play12:13

plus equals one so the first thing it

play12:15

finds

play12:17

i is it going to be zero so the first

play12:18

thing it finds is going to say i found a

play12:21

hat

play12:22

and

play12:25

a person

play12:26

a book an apple so on and so forth so

play12:30

very good with that uh and just to make

play12:33

sure that this is all going to be all in

play12:36

one string for our speech

play12:38

to work properly after this let's go

play12:41

ahead and use the join function so i'm

play12:43

just going to say print

play12:46

space dot join

play12:49

new

play12:50

sentence so that will turn this list

play12:53

into a string so let's go ahead and test

play12:56

that out

play13:18

perfect so after hitting run and after

play13:20

it found those things check it out it

play13:22

added each of those things to the list

play13:25

so said i found a person and a tie a

play13:28

orange a chair a donut a apple again

play13:32

this might look kind of weird with the

play13:33

commas but it's going to help with the

play13:35

pauses when the computer says it out

play13:38

loud so very good if we have that

play13:40

working just fine then let's go ahead

play13:42

and add our speech part of this so

play13:45

towards the top of our project

play13:48

i'm going to now add

play13:52

our speech

play13:53

so let's go ahead and

play13:55

define a function so def

play13:58

we'll call this speech

play14:00

and it's going to receive some text and

play14:02

if you've seen my

play14:04

virtual assistant where you build your

play14:05

own siri or alexa this is the same exact

play14:08

function that we're going to be using

play14:10

so we're going to say

play14:12

print

play14:14

that text because we want to be able to

play14:16

see it as well and i also want to set my

play14:18

language to whatever i want i'm going to

play14:21

set mine to

play14:23

i will call yeah we'll say english so e

play14:26

n

play14:27

if you want to do spanish it's e es or

play14:29

japanese it's ja you can always look

play14:32

those up on google if you'd like to but

play14:34

we'll do english for now

play14:36

and then we'll give this some output so

play14:38

output

play14:40

equals now we're going to use gtts so

play14:43

gtts which takes some text

play14:47

which is going to be equal to the text

play14:48

that we're going to send it

play14:50

comma

play14:51

now it's looking for the property of

play14:54

language and so that will be our

play14:56

language

play14:57

and then finally it's going to ask how

play14:59

fast we want to go so i'm going to say

play15:01

slow equals false

play15:03

just like that now what we need to do is

play15:07

save

play15:09

the output

play15:10

into a file so what we need to do is we

play15:13

need to save that audio

play15:16

somewhere in our project so come into

play15:19

your project and let's create a new

play15:21

directory

play15:23

and we're just going to call it

play15:24

sounds so here's sounds i forgot to

play15:28

change the name of the project so don't

play15:30

worry about that but sounds is just

play15:32

underneath that directory so

play15:35

with that in place we can now save so

play15:38

we're going to say output dot save

play15:41

and now we're going to tell where to

play15:43

save

play15:44

so i'm going to say dot slash

play15:47

dot slash sounds

play15:50

and now call your file whatever you want

play15:52

i'm just going to say output.mp3

play15:56

says this will be a mp3 file and then

play15:59

finally we're going to have it play the

play16:01

sound

play16:02

so we're going to use the play sound

play16:04

library that we imported up here and

play16:06

we're going to say

play16:07

play sound which is gonna be that same

play16:09

exact location

play16:12

output dot mp3 and now we gotta send

play16:16

whatever text we want over here

play16:20

so down here we have a print instead of

play16:22

print i'm going to say speech because

play16:24

that's the name of our function

play16:26

so that will send our string to our

play16:28

function and it's going to take our text

play16:31

and make it into actual speech it is

play16:34

then saving

play16:35

and then we're going to play that sound

play16:37

let's see if this works

play16:41

[Music]

play16:51

[Music]

play17:02

i found a person and a tayachara apple a

play17:05

doughnut orange a cell phone

play17:07

so hopefully you could have heard that

play17:09

but it did say i found a person and a

play17:12

tie an apple a orange a cell phone so

play17:15

that is working great congratulations if

play17:18

you just accomplished that that was

play17:20

really cool pretty simple and if you

play17:23

have any questions please let me know

play17:25

down in the comments if you have any

play17:26

requests please let me know don't forget

play17:28

to drop a like and subscribe so that you

play17:32

are notified of my next tutorial thank

play17:34

you so much and happy coding

play17:41

[Music]

play17:46

you know

Rate This

5.0 / 5 (0 votes)

Связанные теги
Object DetectionOpenCVPythonVoice OutputComputer VisionMachine LearningLive FeedTutorialsProgrammingTech Education
Вам нужно краткое изложение на английском?