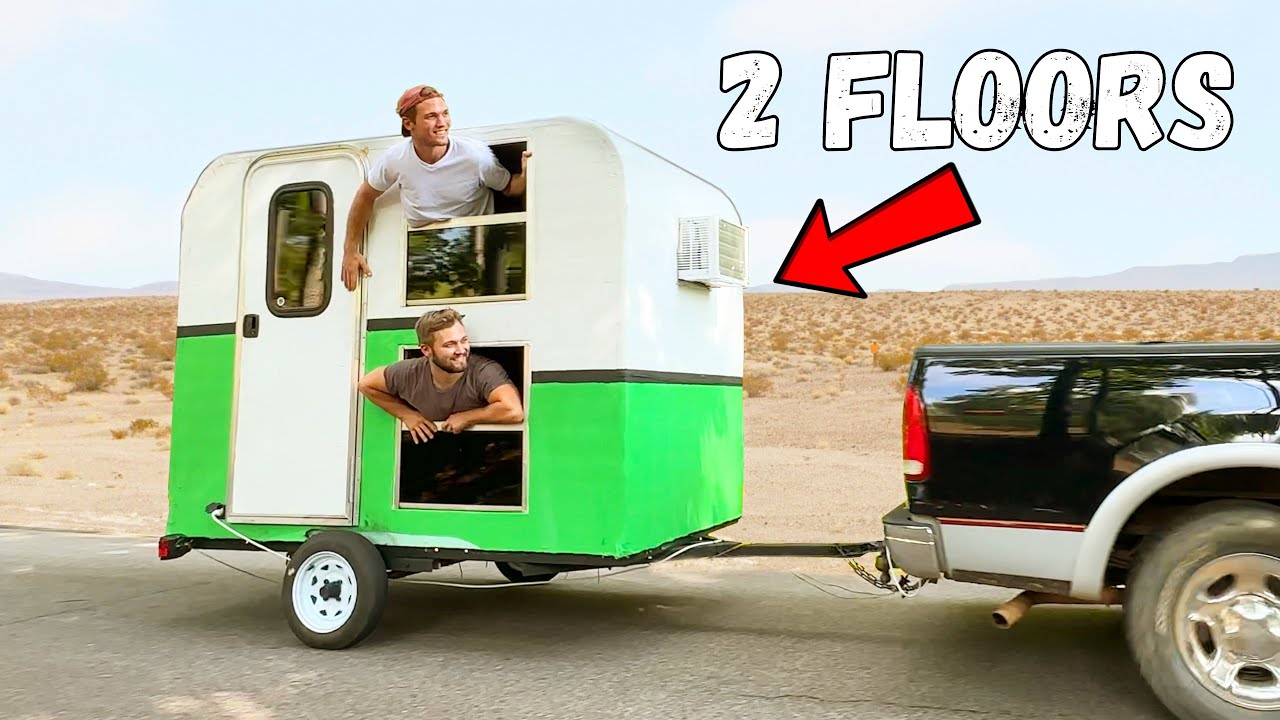
I built a LUXURY micro camper for less than $1,000
Summary
TLDRTwo brothers embark on an ambitious project to build a luxury micro camper from an old trailer for under $1,000. With creativity and resourcefulness, they repurpose materials like bus windows, scrap wood, and pallet boards to construct a cozy and functional living space. Overcoming challenges, they ingeniously waterproof the exterior and insulate the interior, creating a tiny home on wheels complete with beds, a kitchenette, and a living area. Their journey culminates in a successful camping trip, proving that with determination and resourcefulness, even grand dreams can be realized on a shoestring budget.
Takeaways
- 🛒 The goal was to build a luxury micro camper for less than $1,000, using an old trailer purchased for $100 as the base.
- 🛠️ The camper was built using inexpensive materials like 2x4s, OSB, drywall, and repurposed items like bus windows and metal scraps.
- 💰 Innovative techniques like 'poor man's fiberglass' and pallet wood countertops helped keep costs extremely low.
- 👷 The construction process involved steps like insulation, framing, sheathing, waterproofing, electrical work, and interior finishing.
- 🔧 Challenges included fitting all desired amenities (beds, kitchen, living area) into the 48 sq ft space while staying within weight limits.
- ♻️ Repurposing and upcycling materials from previous projects and free online listings were key to cost savings.
- ✨ Despite the low budget, the final camper was fully functional, comfortable, and visually appealing.
- 🌳 The camper allowed them to enjoy camping and the outdoors in a self-contained, affordable way.
- 💡 The project demonstrated creativity, resourcefulness, and the ability to transform basic materials into something remarkable.
- 🔨 With careful planning and execution, it's possible to build high-quality, customized projects on an extremely tight budget.
Q & A
What was the initial idea behind building this luxury micro camper?
-The initial idea came from finding an old trailer on Facebook Marketplace for $100, which they planned to convert into a luxury micro camper on a tight budget of less than $1,000.
What were the main features they wanted to include in the camper?
-They wanted the camper to sleep two people, have a mini kitchen, and a living room area, all within a limited space of around 48 square feet.
How did they insulate and waterproof the camper?
-They used foam for insulation and covered the exterior with quarter-inch OSB or plywood. Then, they applied a DIY waterproofing technique called 'Poor Man's Fiberglass,' which involved layering glue and drop cloths, followed by multiple coats of paint.
Where did they source materials for the camper build?
-They utilized various free or inexpensive materials found on Facebook Marketplace, such as bus windows, scrap wood, and leftover insulation. They also repurposed materials from their previous bus build.
How did they create the countertop for the kitchen area?
-They made the countertop using pallet boards, which was a cost-effective solution that saved them a couple of hundred dollars compared to purchasing regular countertops.
What unique feature did they include in the camper's interior?
-They included working windows in the camper, which is an uncommon feature in many DIY camper builds.
How did they address the electrical needs of the camper?
-For the electrical system, they used an inexpensive extension cord instead of regular house wiring, although they acknowledged that this is not a recommended practice.
How did they create the beds in the camper?
-For the beds, they used foam mattress toppers, layering two of them on each bed and wrapping them in a cover to make them look like mattresses.
What was the total cost of building the luxury micro camper?
-They were able to build the entire camper, including the trailer, for under $900, which was within their budget of less than $1,000.
What was their motivation for building this camper on a tight budget?
-Their motivation was to create a comfortable and functional camper that they could take anywhere, while staying within a strict budget of less than $1,000, as they had previously struggled with the high costs associated with their previous bus build.
Outlines
🛠️ Building an Affordable Luxury Micro Camper
The video script follows the process of building a luxury micro camper from an old $100 trailer. They cover the trailer with a moisture barrier, insulation, and subfloor, then construct the frame, windows, and exterior sheathing. To waterproof the exterior, they use a 'poor man's fiberglass' technique involving glue and drop cloths. The summary outlines the initial steps of acquiring the trailer and preparing the exterior structure.
✨ Finishing Exterior and Starting Interior
This section describes the completion of the camper's exterior by adding a custom door frame, sealing the corners with repurposed bus metal, and installing electrical wiring using an extension cord. The interior work begins with insulation, drywall installation, trimming, and constructing cabinets from scrap wood. The countertop is made from pallet boards, and the floor is tiled with materials from a previous bus build.
🛏️ Interior Finishing Touches and Campsite Testing
The final paragraph covers the interior finishing touches, including constructing twin beds (one doubling as a couch), a mini kitchen with a cooktop, sink, and counter space, along with an AC unit and adjustable lighting. After completing the under $900 camper, they take it to a campsite for testing. The summary highlights the camper's ability to comfortably sleep two people while providing essential amenities for a weekend outdoor experience.
Mindmap
Keywords
💡Micro Camper
💡Budget Build
💡Moisture Barrier
💡Insulation
💡Framing
💡Sheathing
💡Poor Man's Fiberglass
💡Repurposing Materials
💡Countertop
💡Versatility
Highlights
In this video, the goal is to build a luxury micro camper for less than $1,000, starting with an old trailer purchased for $100 from Facebook Marketplace.
The trailer measures 6 feet by 8 feet, with a base of around 48 square feet, posing a challenge to accommodate sleeping for two people, a mini kitchen, and a living room.
The construction process begins with laying down a moisture barrier, insulating with foam, and installing a subfloor.
For the walls, they use basic 2x4s as they are lightweight and inexpensive.
They repurpose bus windows acquired for free from Facebook to save costs.
The exterior is covered with quarter-inch OSB or plywood, costing around $70.
They use the "Poor Man's Fiberglass" technique, involving glue and drop cloths, to waterproof the exterior for under $200, a significant cost-saving compared to traditional fiberglass.
The door is constructed from a wooden frame covered in repurposed metal, providing a waterproof and inexpensive solution.
For the corners, they make waterproof covers from scrap school bus metal, costing nothing.
The electrical wiring is done using inexpensive extension cords, although not recommended for safety reasons.
Insulation is sourced from Facebook Marketplace, saving costs.
Drywall is used for the walls due to its affordability, despite adding weight.
Trim and cabinets are made from scrap wood at no cost.
The countertops are constructed from repurposed pallet boards, saving hundreds of dollars.
The final camper, built for under $900, includes twin beds, a mini kitchen with a cooktop and sink, an AC unit, and working windows, providing a comfortable and affordable camping experience.
Transcripts
in this video me and my brother are
going to build a luxury micro camper and
we're going to do it for less than a
thousand dollars
this idea all started when we came
across this old trailer on Facebook
Marketplace for a hundred bucks
[Music]
it was old and dirty and came with a ton
of trash but it was going to be the
perfect base for our camper
[Music]
[Music]
let's go
[Music]
all right the trailer looks amazing I
cannot believe we got this for a hundred
bucks six feet on the dot eight feet
dude our trailer had a base right around
48 square feet which meant this was
going to be a little tricky you see not
only are we staying under a thousand
dollars but we want this camper to sleep
two people have a mini kitchen and a
living room
nice
the first step was to put down a
moisture barrier to cover up the wood
after that we're going to use foam for
our insulation
[Applause]
and then finally we put on our subfloor
[Music]
then it was time to put up our four
walls we decided to use basic two by
fours because they're not that heavy and
they're super cheap
[Music]
wow
so it doesn't seem like we had too much
weight yet okay so for the windows we're
going to save a ton of money and use
these These are bus windows and we have
a ton of them just laying around but you
can get these things for free on
Facebook people don't want them
[Music]
oh that's gonna look incredible dude
that is awesome wow everything is now
framed out next it's time for sheathing
to cover this camper up Colby and I
decided the cheapest way to do it would
be using quarter inch OSB or plywood
this does add a good bit of weight but
each sheet was like less than 10 bucks
so he spent about 70 dollars on this
[Music]
don't like that wind nope
[Music]
[Music]
hey now that the camper was covered in
Wood the next step is absolutely crucial
so this is what's known as Poor Man's
fiberglass it's how we're going to make
this whole thing waterproof for
basically free what you do is just get
some glue and you put it on like paint
and then you put a cloth over it and
repeat that process over and over and
over again until you have a really solid
fiberglass like layer that's completely
waterproof
foreign
[Music]
[Applause]
if we were to cover up the outside like
a regular camper in real fiberglass this
part right here could have cost anywhere
from two thousand to four thousand
dollars but instead we just bought a ton
of glue and three drop cloths and the
total cost was under two hundred dollars
foreign
[Music]
so now that we got the cloth attached to
the camper the next thing to do is
completely cover everything in glue this
is what ends up making it super hard and
strong
[Music]
the glue is what makes it hard and the
paint is what makes it waterproof so
we're going to start with these three
buckets of like whatever paint we just
found and then we're going to top it off
with our final coat it looks like
expired milk dude it does it might be
expired paint by now the glue had dried
and it felt like a hard plastic but if
it rained or got wet then the glue would
just turn right back into a liquid and
kind of melt off it was the paint's job
to make sure that the glue always stayed
dry and therefore waterproof all right
in a recent video we made this bus into
an epic tiny home and after taking it
camping one time we actually had to sell
it because we couldn't afford to keep it
so when we're done with this camper
we're going to take it to one of our
favorite places that we never got to
take our bus
foreign
we have is our door so we there's a lot
of things to consider it's got to be
waterproof It's gotta be light and it's
gonna be cheap we came up with this
little wooden frame that we're going to
cover in metal that we have laying
around
[Music]
[Applause]
[Music]
oh that looks so good
[Music]
it's white too
all right
dude nice wow
[Music]
[Music]
okay you guys ready
I'm proud of this door look it even has
a lock so you can't get in from the
outside now that the door is on there
was only one thing left to do to the
outside which was seal up the corners
basically our goal is to make a ton of
pieces to cover up all the corners where
we can waterproof them and it's going to
look like that to make all these pieces
we once again used all the school bus
Metals sitting around in our yard so it
didn't cost us a dime and for those of
you who don't have school bus metal you
can get some for very cheap on Facebook
[Music]
[Music]
thank you
[Music]
[Music]
[Applause]
[Music]
[Music]
all right now the outside is waterproof
it's time to get started on the inside
and that begins with the electric
[Music]
regular house wire costs like a hundred
dollars for 100 feet this is an
extension cord and it's 25 for 100 feet
I do not recommend you doing this ever
but let's get this electric done bro
there it is
[Music]
for the installation we're going just
with a basic fiberglass r13 stuff we
actually got all this on Facebook
Marketplace for super cheap
[Music]
foreign
[Music]
because this is a budget build the best
solution we can think for the walls is
just using plain old drywall the only
concern is the weight all this weighs
about 500 pounds a little heavy but it
still should be within the 1000 to 2 000
pound range which is a very light camper
[Music]
it's pretty crazy
after getting the drywall in we could
really start to see everything coming to
life then Kobe started working on the
trim which we made for free by the way
out of leftover wood
[Music]
we then did the same thing with our
cabinets so these cost us nothing
they're literally really made from scrap
wood
it was starting to look just like our
little animation from earlier
[Music]
but we desperately needed one very
expensive item countertops
one secret little building technique you
can use to save some money
pallets
[Music]
[Music]
this is the idea behind our countertop
we're making this whole thing out of
pallet boards and it's going to save us
a couple hundred bucks
one of my favorite things about building
is you can take anything no matter how
bad of shape it's in and make it into
something amazing if you put enough time
and effort into it
[Music]
then I just had to get rid of the nail
holes
[Music]
foreign
[Music]
I started to cut the hole for the sink
[Music]
[Music]
oh my gosh that looks good that's
freaking beautiful wow oh my gosh this
is gonna look amazing
[Music]
all right for the beds we wanted to do
something as cheap as possible so we
bought these um foam mattress toppers
we're gonna do like two layers on each
bed so it should be really comfy then
we're wrapping it in a cover to make it
look like a mattress
once we finish building our mattresses
the next Focus was the floor and I went
and dug up some old tile from our bus
build that was laying around
laying down this tile really made it
seem like we had part of our bus back
[Music]
once we finished a couple of the final
details we were finally able to take it
to the campsite and test it out
[Music]
so we made it to the campsite let me
show you the inside totally waterproof
with the lock on so once you open that
up
here's the inside
[Music]
right as you walk in the first thing
you're going to notice are these twin
beds this one doubles as a couch so you
can watch the TV we have two Cubbies
over here but the main thing is you can
very comfortably sleep two people we
wanted a mini kitchen and some way to
cook food wash our hands and you know do
whatever we need to do just to be
outside for a weekend and be comfortable
so we made enough countertop space where
we could fit a basic cooktop along with
our sink that works
then we have a 5000 BTU AC underneath
this bed we have two adjustable can
lights and then one of my favorite
things we did from the very beginning
was install
working Windows everything you see in
this camper including the trailer we did
for under nine hundred dollars
[Music]
so our camper wasn't quite as big as our
bus but for a thousand dollars to have
something you can take anywhere and be
comfortable
totally worth it
[Music]
all done
5.0 / 5 (0 votes)